Raspbianの初期設定ウィザード( first-boot configuration )を試す

先日Raspberry Pi向けのOSのRaspbian 2018-06-27がリリースされました.

2018-06-27:
  * New first-boot configuration wizard added
  * Recommended Software installer added
  * Bluej, Greenfoot, NodeRED, Claws Mail, VNC Viewer removed from image - can now be installed from Recommended Applications
  * Qpdfview PDF viewer installed instead of Xpdf
  * Version 65.0 of Chromium browser included, with latest Flash player
  * Volume up / down keys now change by 5% increments and affect currently-selected output device rather than internal device only
  * Network plugin now remembers previously-entered WiFi network passwords when prompting for reconnection
  * Serial port and serial console can now be switched separately in Raspberry Pi Configuration
  * Lxkeymap keyboard language setting application removed - replaced with dialog within Raspberry Pi Configuration
  * Wifi country and keyboard language setting dialogs in Raspberry Pi Configuration now callable from other applications
  * New version of Piboto font included to render with correct weight under some rogue applications
  * Reconnection to Bluetooth audio devices on reboot improved
  * Disable click-to-rename behaviour in file manager if single-click selection enabled
  * Appearance Settings dialog makes config changes to some Qt files to match selected theme
  * MIME file type associations improved
  * Multiple desktop management options removed from mouse middle-click menu
  * Menu shortcuts to Raspberry Pi website amended
  * Python 2 IDLE menu link removed
  * Sample Magpi PDF installed in /home/pi/MagPi
  * Various minor tweaks, bug fixes and appearance changes
  * Bluetooth updates
    - Firmware with Bluetooth 4.2 features
    - SCO profile suppot added via bthelper.service
  * Linux kernel 4.14.50+
  * Raspberry Pi firmware 748fb17992426bb29d99224b93cb962fefbdc833

* New first-boot configuration wizard added が気になります.初回起動時にセットアップウィザードが走るようになったようです.気になるので試してみました.

先ずはOSイメージを入手.
以下のページから RASPBIAN STRETCH WITH DESKTOP の方を入手します.

適当な方法でイメージをSD cardに書き込みます.

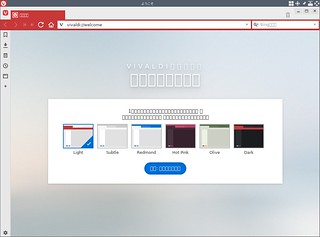
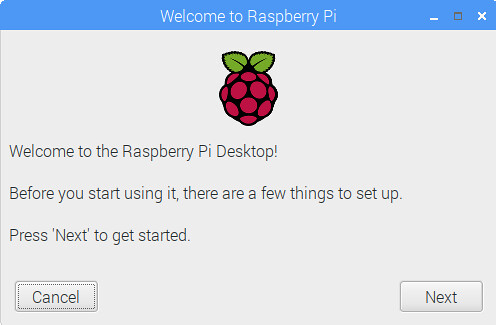
HDMIモニタに接続,若しくはVNC経由(今回は後者)で起動すると「Welcome to Raspberry Pi」というウィンドウが表示されます.

Welcome to Raspberry Pi_001

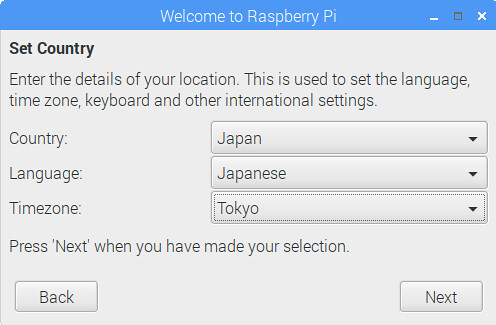
まずは国関連の設定.以下は日本でに言語環境で利用する場合です.

Country: Japan
Language : Japanise
Timezone: Tokyo

Welcome to Raspberry Pi_003

次はpi アカウントのパスワードの設定です.初期状態ではraspberryですが,ここのままだとsshやVNCなどのリモート接続を有効にすると誰でも入れてしまい乗っ取られてしまうのでぜひ変更しましょう.(piアカウントを無効にして別のユーザを作るのもいいですね)

Welcome to Raspberry Pi_005

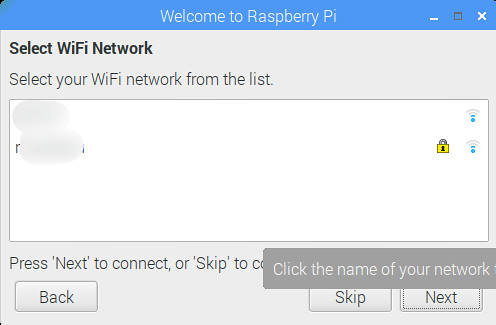
次にWi-Fiの設定です.今回試した Raspberry Pi は Raspberry Pi 2 B でWi-Fiは付いていませんがUSBのWi-Fiドングルを刺していたらこの画面になりました.付けていなくてもRaspberry Pi 3 B / Raspberry Pi 3 B+ / Raspberry Pi Zero W でも設定できると思います.

Welcome to Raspberry Pi_008

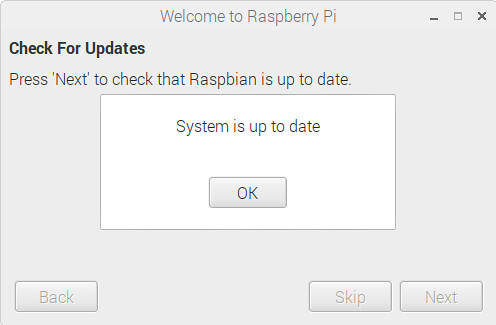
次は Update です.しばらく時間がかかります.

Welcome to Raspberry Pi_009

Updateが終了すると「System is up to date」と表示されます.

Welcome to Raspberry Pi_014

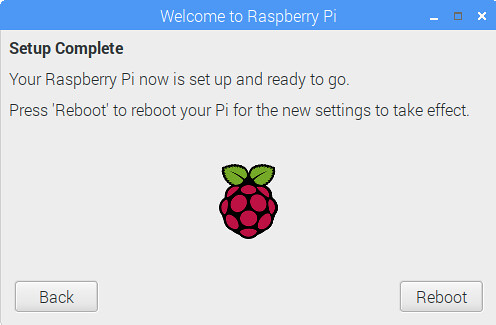
これでおしまい.「Reboot」ボタンで設定が反映されます.

Welcome to Raspberry Pi_015

もしまたこのウィザードを実行したい場合はpiwizコマンドで実行できます.

$ sudo -i piwiz

もし,以前からのRaspbianで実行したい場合はpiwizパッケージを導入することで実行できるようになります.

$ sudo apt update
$ sudo apt install piwiz

raspi-configrc_guiの簡易版みたいな感じですね.
画面は英語ですが,言語ファイルがあるので日本語化もできそうです.しかし,日本語化が反映されるのは設定後?となるとあまり意味はないですかね…….

microSDスロットの固定機構の壊れたRaspberry Pi 2 Bのバネを取り外して普通に使えるようにする

SANY0011

Raspberry Pi 2 Bを使っているのですが,以前からmicroSDソケットの固定機構が壊れてしまっています.セロハンテープで留めて更にケースに入れて動きにくくしているのですがたまにずれるようで起動中にストレージを見失ってしまうことがあります.(そして数回に一回は要fsckに)

ちょっと面倒なので対処したいなと思いながら放置していたのですが,また今日も起こったので調べてみることに.多分microSDを押し返すピンかバネを無くしてしまえたら解決しそうな気がします.でも内部が見えないのでどこにピンやバネがあるのかよくわからないです.

SANY0015

きっと先駆者が居るだろうと検索するといくつかそれらしいページを見つけました.

ソケットを交換するアプローチ

ソケットの中のスプリングを取り出してしまうアプローチ

後者のスプリングを取り出すのが簡単そうだし,最悪失敗しても前者のソケットを交換すればいいかなと試してみました.スプリングの場所が分かったのですが現物を見てもよくわからないです.光を当てながら少し斜めから見るとバネが見えました.バネの横の部分を一旦開けて中を確認する人も居るようです.

SANY0019

ここで安全ピンのピン先でこじるようにと思いましたがちょっと安全ピンが大きいせいかソケットが膨らむのでジャンパワイヤのオスを使いました.

ソケットのスプリングの上側からこじるとプラスチックのラッチが外れました.一旦ラッチを取り出して更にその奥をこじるとスプリングの反応がありました.スプリングを内側に倒してから引っ張り上げるようにして取り外せました.

SANY0020

この状態でmicroSDを差し込むとmicroSDは押し返されなくなりました!これで最近のRaspberry Pi Zero(多分3B/3B+も)と同じような使い勝手になったと思います.

SANY0022

今回はRaspberry Pi 2 Bでしたが,Raspberry Pi B+/Raspbery Pi A+もロック機構が壊れたら同様の機構なので同じように解決できると思います.

今だと最新のRaspberry Pi 3 B+を買う人が多いでしょうが.

Devuan ascii armhf(Raspberry Pi)で時計合わせ

Raspberry PiにはRTCが付いていません.なのでシステム停止すると時間情報が飛んでしまいます.fake-hwclockが設定されていたら前回停止時(に近い)時間がファイルに保存されていてその時間に設定されますが,停止時の時間はカウントされないので時間がずれます.ということでネットワークが有効な場合ntpを参照して時計合わせをしたいです.
最近のDebianやRaspbianはsystemdなのでtimesyncd.confでNTP serverを指定してtimedatectlコマンドで有効にする感じだと思うのですが(既定値でそうなっている),Devuanは脱systemdなディストリビューションなのでこの方法は使えません.

$ sudo vi /etc/systemd/timesyncd.conf
$ sudo timedatectl set-ntp true`

詳細はman timesyncd.conf, man timedatectl

ということでntpdateを入れてみました.

$ sudo apt install ntpdate
$ sudo ntpdate 192.168.1.102
$ grep -A1 -B2 ntp /etc/rc.local
if [ "$_IP" ]; then
  printf "My IP address is %s\n" "$_IP"
  /usr/sbin/ntpdate 192.168.1.102
fi

長時間動かすならcrontabで定期的に設定したほうがいいかも?(若しくは何らかのntpd)

$ sudo -u root crontab -l|tail -2
@reboot /usr/sbin/ntpdate 192.168.1.102
3 3 * * *       /usr/sbin/ntpdate 192.168.1.102

追記)
このシステムはRaspbian stretchをDevuan asciiにdist-upgradeしたシステムなのでntpの設定がないだけかもしれません.Devuan asciiをクリーンインストールすれば必要ない設定かも(未確認)

Raspbian stretch イメージを Devuan ascii にしてみる

DevuanというDebianからのフォークディストリビューションがあります.

これは脱SystemdなLinuxディストリビューションで,Raspberry Pi等のarmhfにも対応しています.そしてDebianからDevuanに移行することが出来ます.(Debian jessie -> Devuan jessie)
DebianベースのRaspbianからも同様に移行できるというmailを見かけたので試してみます.

SD cardでやったほうが手順は少ないのですが,遅いし寿命も縮むだろうしってことでイメージサイズを拡大したRaspbianを元にchroot + QEMU User EmulatorでArm以外のhostででやってみました.

サイズを拡大したRaspbianイメージをマウント

以下の手順で用意したイメージを元にします.

raspbian-stretch-lite_latest.imgが元のイメージで,今回devuan_ascii.imgとしてコピーしたものを使います.

$ cp ./raspbian-stretch-lite_latest.img ./devuan_ascii.img
$ sudo kpartx -av ./devuan_ascii.img
add map loop0p1 (253:4): 0 85045 linear 7:0 8192
add map loop0p2 (253:5): 0 8129 linear 7:0 63
$ sudo mount /dev/mapper/loop0p2 /mnt
$ sudo mount /dev/mapper/loop0p1 /mnt/boot

QEMU User Emulatorが使えるようにqemu-user-staticをcp

これでQEMU User Emulatorが透過的に利用できます.

$ sudo cp -p /usr/bin/qemu-arm-static /mnt/usr/bin/

chroot用に/devと/procをbind mountしてchroot

$ sudo mount --bind /dev /mnt/dev
$ sudo mount --bind /dev/pts /mnt/dev/pts
$ sudo mount --bind /proc /mnt/proc
$ sudo chroot /mnt /bin/bash

Raspbian stretchを最新の状態にする

# apt update
# apt upgrade -y

Devuanリポジトリの鍵をインポート

Devuanリポジトリの鍵をインポートする.そのために必要なdirmngrpkgも導入.

# apt install dirmngr
# apt-key adv --recv-keys 94532124541922FB
Executing: /tmp/apt-key-gpghome.zqL0gcSbes/gpg.1.sh --recv-keys 94532124541922FB
gpg: key 94532124541922FB: public key "Devuan Repository (Primary Devuan signing key) <repository@devuan.org>" imported
gpg: Total number processed: 1
gpg:               imported: 1

source.listをDevuanのものに書き換え

Devuanのstableはjessieですが,元のRaspbianがstretchなのでそれに対応するAsciiを指定しています.
Devuan jessieを使いたい場合は,Raspbian jessieを元にするといいと思います.

Devuan Debian
Jessie(stable) Jessie(oldstable)
Ascii(development) Stretch(stable)
Beowulf(-) Buster(testing)
Ceres(unstable) Sid(unstable)
# vi /etc/apt/sources.list
# cat /etc/apt/sources.list|grep -v ^#
deb http://mirrordirector.raspbian.org/raspbian/ stretch rpi
deb http://auto.mirror.devuan.org/merged ascii main contrib non-free
deb http://auto.mirror.devuan.org/merged ascii-updates  main contrib non-free
deb http://auto.mirror.devuan.org/merged ascii-security main contrib non-free

Devuanのパッケージにupgrade

# apt update && apt upgrade
  :
274 upgraded, 7 newly installed, 0 to remove and 3 not upgraded.
Need to get 115 MB of archives.
After this operation, 25.0 MB disk space will be freed.
Do you want to continue? [Y/n] Y
  :
# apt dist-upgrade
Reading package lists... Done
Building dependency tree       
Reading state information... Done
Calculating upgrade... Done
The following packages were automatically installed and are no longer required:
  bluez bluez-firmware cgmanager libcgmanager0 systemd-shim
Use 'sudo apt autoremove' to remove them.
The following packages will be REMOVED:
  libpam-systemd mountall pi-bluetooth plymouth raspberrypi-sys-mods systemd systemd-sysv
The following NEW packages will be installed:
  eudev libeudev1 sysvinit-core
The following packages will be upgraded:
  init libudev1 udev
3 upgraded, 3 newly installed, 7 to remove and 0 not upgraded.
Need to get 1162 kB of archives.
After this operation, 9431 kB disk space will be freed.
Do you want to continue? [Y/n] Y
  :

chrootから抜けてイメージアンマウント

#念の為kpartx -dの前にfsckしておくといいかも?

# exit
$ sudo umount /mnt/proc
$ sudo umount /mnt/dev/pts
$ sudo umount /mnt/dev
$ sudo umount /mnt/boot
$ sudo umount /mnt
$ sudo kpartx -d /dev/mapper/loop0p1
$ sudo kpartx -d /dev/mapper/loop0p2
$ sync

SD cardにイメージを書き込んでRaspberry Piで起動

普通にddとかEtcherとかでSD cardに書き込みます.

$ time sudo dcfldd if=./devuan_ascii.img of=/dev/sdd;sync;sync
128000 blocks (4000Mb) written.
128000+0 records in
128000+0 records out

real    7m13.207s
user    0m0.823s
sys     0m9.211s

後はRaspberry Piで起動すればOK.今回はRaspberry Pi 2 Bで試しました.

Systemdとか居ません.

RAMの利用状況はこんな感じ

$ free
              total        used        free      shared  buff/cache   available
Mem:         949584       21916      879120         188       48548      879976
Swap:        102396           0      102396

しかしneofetchとかではRaspbianのままですね.該当pkgのreinstallとかで更新できそうな気がしますが未検証.

IMG_20180123_001641

イメージ操作めんどくさいのでdebootstrapの方が楽かもしれない?

いやそれなら公式イメージのほうがいいか

Raspbianイメージを任意の広さに拡大する

Raspbian はSD cardに書き込んでRaspberry Piで起動するとraspi-configから簡単にパーティションサイズを拡大できます.しかし,パッケージのアップデートや導入に時間がかかるのでSD cardに書き込む前にこの辺りの処理は済ませておきたいです. chrootとQEMU User Emulatorを使えば出来るのですが,今度はDisk fullに……. ということでraspbianイメージを広げてみます.
※速度の速いストレージだと必要ない処理かもしれませんが,カスタマイズしたイメージを用意するとかにも使えます.
※ここではRaspbian Lite stretch 2017-11-29のイメージを元にしていますが,最終パーティションを広げるのであれば他の各種イメージでもほぼそのまま,途中のパーティションサイズを変更するのも応用でいけます.

今回は広げると行ってもオリジナルのファイルはそのままに,4GBほどのサイズのイメージを作ってそちらにデータをコピーしてそのイメージのサイズを広げることにします.

今回の環境は Debian sid amd64 環境です.Linux環境であればほぼ同じ手順で行けると思います.

4GBイメージを作成

4GBほどの容量のイメージを作成します.もっと大きい容量がいい人はcountを増やしましょう.
<追記>4GBにしてはちょっと大きかったかも.手持ちにカードの容量より少し小さいサイズにすると良いです.</追記>

$ dd if=/dev/zero of=./4gb.img bs=1M count=4000
$ ls -l ./4gb.img
-rw-r--r-- 1 mk mk 4194304000 Jan 19 21:28 ./4gb.img

losetupでデバイスマッピングをする

/dev/loop0に割り当てられた.

$ sudo losetup -f --show ./4gb.img
/dev/loop0

Raspbianイメージの用意とデバイスマッピング

/dev/loop1に割り当てられた.

$ unzip 2017-11-29-raspbian-stretch-lite.zip
$ sudo losetup -f --show ./2017-11-29-raspbian-stretch-lite.img 
/dev/loop1

Raspbianイメージを4GBのイメージにコピー

loop1(Raspbian)のイメージをloop0(4GB)にコピーしている.

$ sudo dd if=/dev/loop1 of=/dev/loop0 bs=1M
1772+0 records in
1772+0 records out
1858076672 bytes (1.9 GB, 1.7 GiB) copied, 161.929 s, 11.5 MB/s

Raspbianイメージを片付ける

$ sudo losetup -d /dev/loop1
$ rm ./2017-11-29-raspbian-stretch-lite.img

コピーしたイメージをfdiskで確認

Raspbianのパーティション情報が見えます.

$ sudo fdisk -l /dev/loop0 
Disk /dev/loop0: 3.9 GiB, 4194304000 bytes, 8192000 sectors
Units: sectors of 1 * 512 = 512 bytes
Sector size (logical/physical): 512 bytes / 512 bytes
I/O size (minimum/optimal): 512 bytes / 512 bytes
Disklabel type: dos
Disk identifier: 0x37665771

Device       Boot Start     End Sectors  Size Id Type
/dev/loop0p1       8192   93236   85045 41.5M  c W95 FAT32 (LBA)
/dev/loop0p2      94208 3629055 3534848  1.7G 83 Linux

fdiskでパーテションサイズを変更する

ここはわかりづらいですが,以下のような操作をしています.

  • d コマンドで 2つ目のパーテションを削除
  • n コマンドで 2つ目のパーテションを最大容量で作り直し
    • この時 First sector を削除前のものと合わせること
  • p コマンドで確認
  • w コマンドで書き込み
    • w コマンドで書き込むまではファイルシステムは変更されないので間違ってもやり直しできます.
$ sudo fdisk /dev/loop0

Welcome to fdisk (util-linux 2.30.2).
Changes will remain in memory only, until you decide to write them.
Be careful before using the write command.

Command (m for help): d
Partition number (1,2, default 2): 2

Partition 2 has been deleted.

Command (m for help): n
Partition type
   p   primary (1 primary, 0 extended, 3 free)
   e   extended (container for logical partitions)
Select (default p): p
Partition number (2-4, default 2): 2
First sector (2048-8191999, default 2048): 94208
Last sector, +sectors or +size{K,M,G,T,P} (94208-8191999, default 8191999): 8191999

Created a new partition 2 of type 'Linux' and of size 3.9 GiB.  
Partition #2 contains a ext4 signature.

Do you want to remove the signature? [Y]es/[N]o: N

Command (m for help): p

Disk /dev/loop0: 3.9 GiB, 4194304000 bytes, 8192000 sectors
Units: sectors of 1 * 512 = 512 bytes
Sector size (logical/physical): 512 bytes / 512 bytes
I/O size (minimum/optimal): 512 bytes / 512 bytes
Disklabel type: dos
Disk identifier: 0x37665771

Device       Boot Start     End Sectors  Size Id Type
/dev/loop0p1       8192   93236   85045 41.5M  c W95 FAT32 (LBA)
/dev/loop0p2      94208 8191999 8097792  3.9G 83 Linux

Command (m for help): w
The partition table has been altered.
Calling ioctl() to re-read partition table.
Re-reading the partition table failed.: 無効な引数です                                                                         

The kernel still uses the old table. The new table will be used at the next reboot or after you run partprobe(8) or kpartx(8).

fdiskに慣れていない場合はgparted等でGUIで操作したほうが直感的で解りやすいかもしれません(未検証) -> gksudo gparted /dev/loop0
20180121_07:01:45-6347

kpartxでパーティションをマッピングする

上で使ったlosetupでも出来るのですが,オフセットを自分で計算して指定する必要がある

losetupを使う場合はfdiskのpコマンドの対象パーティーションの Start * Sector sizeをlosetupの-oに指定します.今回の例だと2つ目のパーティーションは 94208 * 512 になります.(未検証)

$ losetup -f –show -o `expr 94208 \* 512` /dev/loop0

ので今回はそのあたりを自動で行ってくれるkpartxを利用します.大抵は標準では入っていないので以下のエントリを参考に導入してから実行してください.

1つ目のパーティションが /dev/mapper/loop0p1 2つ目のパーティションが /dev/mapper/loop0p2 として設定されました.

$ sudo kpartx -av /dev/loop0
add map loop0p1 (253:4): 0 85045 linear 7:0 8192
add map loop0p2 (253:5): 0 8129 linear 7:0 63

ファイルシステムの修正

ファイルシステムが壊れているのでfsckで修正します.しかし,cleanと言われてしまうので,

$ sudo fsck -n /dev/mapper/loop0p2
fsck from util-linux 2.30.2
e2fsck 1.43.8 (1-Jan-2018)
rootfs: clean, 39394/110656 files, 256435/441856 blocks

一回resize2fsを叩いて怒られてから

$ sudo resize2fs /dev/mapper/loop0p2
resize2fs 1.43.8 (1-Jan-2018)
Please run 'e2fsck -f /dev/mapper/loop0p2' first.

fsckを実行し直します.

$ sudo e2fsck -f /dev/mapper/loop0p2
e2fsck 1.43.8 (1-Jan-2018)
Pass 1: Checking inodes, blocks, and sizes
Pass 2: Checking directory structure
Pass 3: Checking directory connectivity
Pass 4: Checking reference counts
Pass 5: Checking group summary information
rootfs: 39394/110656 files (0.1% non-contiguous), 256435/441856 blocks

パーティーションリサイズ

fsckが通ったら今度こそリサイズです.これで最大サイズに変更されます.

$ sudo resize2fs /dev/mapper/loop0p2
resize2fs 1.43.8 (1-Jan-2018)
Resizing the filesystem on /dev/mapper/loop0p2 to 1012224 (4k) blocks.

mountしてみる

広くなっているのがわかります :)

$ sudo mount -o ro /dev/mapper/loop0p2 /mnt
$ df /mnt
ファイルシス        1K-ブロック   使用  使用可 使用% マウント位置                                                              
/dev/mapper/loop0p2     3954560 966004 2769736   26% /mnt

後片付け

アンマウントしてloopデバイスも解除します.

$ sudo umount /mnt
$ sudo kpartx -d /dev/mapper/loop0p?
$ sudo losetup -d /dev/loop0 

QEMU User EmulatorでArm以外でapt upgradeする

この辺はまた別のエントリで書くつもりですがこんな感じでupgradeしたりしています.

$ sudo mount /dev/mapper/loop0p2 /mnt
$ sudo mount /dev/mapper/loop0p1 /mnt/boot
$ sudo mount --bind /dev /mnt/dev
$ sudo mount --bind /dev/pts /mnt/dev/pts
$ sudo mount --bind /proc /mnt/proc
$ sudo cp -p /usr/bin/qemu-arm-static /mnt/usr/bin/
$ sudo chroot /mnt /bin/bash
# apt update && apt upgrade -y

このイメージはオリジナルのRaspbianイメージと同じようにSD cardに書き込んで利用できます.

RaspberryPi向けのサービス公開サービスPiTunnelを試そうとした

PiTunnelをちょっと試そうとする.
Raspberry Pi向けのngrok的なもののよう.家庭内のLAN内のRaspberry Piのサービスを外部に公開しようと思うとルーターのポートを開けたりDDNS設定したりとちょっと面倒.これをお手軽に公開できるようになるサービス.

PiTunnelでアカウント登録をすると,Device管理画面に遷移するのでここでAdd Devides ボタンでinstall scriptのコマンドが表示される.

こんな感じだけど XXXXXXXX 部分はtokenのようなので注意.

curl https://pitunnel.com/install/XXXXXXXX | sudo python

とりあえずダウンロードして中見てから実行.

$ wget https://pitunnel.com/install/XXXXXXXXXX
$ lv XXXXXXXXXX
$ sudo python XXXXXXXXXX
   :
Configuring Startup   
Register the device   
OK
Starting PiTunnel


## All done!! ##
Please visit www.pitunnel.com to access your device!

www.pitunnel.comにアクセスしてねって見に行くと,

STATUS: Due to unprecedented high demand, we're currently having connection issues. Please sit tight and we'll have this resolved within the next 24 hours.

とかなっている.今使えなくなっているようです.

とりあえず少し叩いてみます.

$ pitunnel -h
usage: pitunnel [-h] [--port PORT] [--host HOST] [--name NAME] [--token TOKEN]
                [--http] [--register] [--type TYPE] [--private]
                [--http-auth HTTP_AUTH] [--quiet]

optional arguments:
  -h, --help            show this help message and exit
  --port PORT           Port Number
  --host HOST           Hostname or IP Address (default: localhost)
  --name NAME           Display name, for reference and subdomain creation.
  --token TOKEN         Optinal user tunnel token. Not required if installed
                        from website.
  --http                Indicates that a tunnel is for a HTTP service. Will
                        create http links on tunnels list and subdomains for
                        named tunnels.
  --register            Register a new device. Only needs to be called on
                        first use by install script.
  --type TYPE           Used to identify system tunnels like device_monitor.
  --private             Specifies that the tunnel wont except external
                        connections. It can only receive connections from
                        localhost. E.g. for device_monitor.
  --http-auth HTTP_AUTH
                        Add HTTP authorization to external access for this
                        tunnel: 'user:pass'
  --quiet               Quite Mode. Doesn't output messages to standard out.
$ pitunnel --register
OK
$ pitunnel --port 22
Trying to connect to pitunnel.com
^CTraceback (most recent call last):
  File "tunnelling/python/tunnel_client.py", line 139, in <module>
KeyboardInterrupt
[9305] Failed to execute script tunnel_client

て感じでやっぱ動かないようですね.1,2日待ちましょう.

今のところRaspbian最新用だけど,Ubuntu 16.04 TLS aarch64にも入った.
まだPiTunnelは使えてませんが,無料で1ポートだけだとバイナリ一個でokだしngrokの方がいいかなて感じがします.
でも少なくとも機能の多さはこっちが上そう.

Linux ARM版Vivaldiを入れてみた

20171207_01:12:04-24154

Operaの共同創設者でCEOだったJon Stephenson von Tetzchnerによって設立されたVivaldi Technologiesによって開発されているウェブブラウザがあります.
これまでx86/x64プラットホームのWindows/macOS/Linux版が提供されていましたが,2017/12/05にLinux ARM版(armhf)がリリースされました.

Raspberry PiのRaspbianがメインのようですが,他のARM環境でも試したら普通に動きました :)

といってもやはりRAM512MBのようなマシンでは辛いですね.RAM2GBのマシンだと今のところいい感じそうです.Midoriやqutebrowserでうまく表示できないMastodonやgmail/Google+なども問題なく表示できますし,Chromeの拡張機能も使えます.

Linux ARM版Vivaldiの入手と確認

deb pkgダウンロード

$ wget https://downloads.vivaldi.com/stable/vivaldi-stable_1.13.1008.34-1_armhf.deb

hash

hashとか見当たらないけど手元ではこんな感じだった

$ md5sum vivaldi-stable_1.13.1008.34-1_armhf.deb 
7515f51385a9a264ad5bb7612438aeda  vivaldi-stable_1.13.1008.34-1_armhf.deb
$ sha1sum vivaldi-stable_1.13.1008.34-1_armhf.deb 
6b103d205f6aa7a5f3b394ba8d32dc9ca87bf0cd  vivaldi-stable_1.13.1008.34-1_armhf.deb
$ sha256sum vivaldi-stable_1.13.1008.34-1_armhf.deb 
e7af5d021bf0c2968fcf0271e8f741552e34bcf2d032318eb8ea95356067297d  vivaldi-stable_1.13.1008.34-1_armhf.deb
$ sha512sum vivaldi-stable_1.13.1008.34-1_armhf.deb 
f47f2d26e8045af9ba680129feca765cf3f9dc7ea76930071e9688ef50aa78a482b40ba5747fb4470d30520177bda371ec79e5a210a93dcf2e49251425001c6d  vivaldi-stable_1.13.1008.34-1_armhf.deb

パッケージ情報確認

$ dpkg-deb -I ./vivaldi-stable_1.13.1008.34-1_armhf.deb
 新形式 debian パッケージ、バージョン 2.0。
 サイズ 45154158 バイト: コントロールアーカイブ = 9840 バイト。
    1269 バイト、   16 行      control              
   15872 バイト、  442 行   *  postinst             #!/bin/sh
   12544 バイト、  324 行   *  postrm               #!/bin/sh
    1220 バイト、   42 行   *  prerm                #!/bin/sh
 Package: vivaldi-stable
 Version: 1.13.1008.34-1
 Architecture: armhf
 Maintainer: Vivaldi Package Composer <packager@vivaldi.com>
 Installed-Size: 131921
 Pre-Depends: dpkg (>= 1.14.0)
 Depends: gconf-service, libasound2 (>= 1.0.16), libatk1.0-0 (>= 1.12.4), libc6 (>= 2.16), libcairo2 (>= 1.6.0), libcups2 (>= 1.4.0), libdbus-1-3 (>= 1.2.14), libexpat1 (>= 2.0.1), libfontconfig1 (>= 2.8.0), libgcc1 (>= 1:4.4.0), libgconf-2-4 (>= 3.2.5), libgdk-pixbuf2.0-0 (>= 2.22.0), libglib2.0-0 (>= 2.28.0), libgtk-3-0 (>= 3.9.10), libnspr4 (>= 2:4.9-2~), libpango-1.0-0 (>= 1.14.0), libpangocairo-1.0-0 (>= 1.14.0), libx11-6 (>= 2:1.4.99.1), libx11-xcb1, libxcb1 (>= 1.6), libxcomposite1 (>= 1:0.3-1), libxcursor1 (>> 1.1.2), libxdamage1 (>= 1:1.1), libxext6, libxfixes3, libxi6 (>= 2:1.2.99.4), libxrandr2 (>= 2:1.2.99.3), libxrender1, libxss1, libxtst6, ca-certificates, fonts-liberation, libnss3 (>= 3.26), xdg-utils (>= 1.0.2), wget
 Recommends: adobe-flashplugin, chromium-codecs-ffmpeg-extra
 Conflicts: vivaldi-beta, vivaldi-preview
 Replaces: vivaldi-beta, vivaldi-preview
 Provides: www-browser
 Section: web
 Priority: optional
 Homepage: https://vivaldi.com
 Description: A new browser for our friends
  Vivaldi browser is made with power users in mind by people who love the Web.

導入

とりあえずDebian jessie armhf/Ubuntu 16.04 LTS aarch64で動いている.

Debian/Ubuntu等

$ sudo dpkg -i ./vivaldi-stable_1.13.1008.34-1_armhf.deb

以下のように依存パッケージが足りない場合は,

dpkg: 依存関係の問題により vivaldi-stable:armhf の設定ができません:
 vivaldi-stable:armhf は以下に依存 (depends) します: libnss3 (>= 3.26)...しかし:
  パッケージ libnss3:armhf はまだインストールされていません。

dpkg: パッケージ vivaldi-stable:armhf の処理中にエラーが発生しました (--install):
 依存関係の問題 - 設定を見送ります

こんな感じで足りないpkgが入るはず.その後見送られていたvivaldi-stableの設定の続きも実行される.

$ sudo apt install -f

64bit ARM環境

バージョン情報_009

aarch64でも試した.
既にadd archtecture armhfして色々入れていた環境に入れてクリーンな環境で検証していないけど多分こんな感じ.

$ sudo dpkg --add-architecture armhf
$ sudo apt update
$ sudo dpkg -i ./vivaldi-stable_1.13.1008.34-1_armhf.deb
$ sudo apt install -f

—-追記—-
クリーンなDragonBoard 410cにDebian stretch aarch64(lonaro)を入れた環境でも確認したがこの手順でokだった :)
—-追記終わり—-

.debが使えない環境

deb以外の環境ではこんな感じで適当な場所に展開して動かせた.

$ mkdir -p ~/opt/vivaldi
$ ar p vivaldi-stable_1.13.1008.34-1_armhf.deb data.tar.xz | tar xJ -C ~/opt/vivaldi
$ rm vivaldi-stable_1.13.1008.34-1_armhf.deb
$ ~/opt/vivaldi/opt/vivaldi/vivaldi

Slackwareだと以下のsctiptが使えそう(未確認)

問題

sandbox

もし,こんなエラーが出たら

$ ~/opt/vivaldi/opt/vivaldi/vivaldi
[13021:13021:1205/215600.516642:FATAL:setuid_sandbox_host.cc(157)] The SUID sandbox helper binary was found, but is not configured correctly. Rather than run without sandboxing I'm aborting now. You need to make sure that /home/matoken/opt/vivaldi/opt/vivaldi/vivaldi-sandbox is owned by root and has mode 4755.
Aborted[This script will find the latest Vivaldi binary package, download it and repackage it into Slackware format.](https://gist.github.com/ruario/dcbba70da900dac68fcc883542ff7ace "This script will find the latest Vivaldi binary package, download it and repackage it into Slackware format.")

こんな感じでオーナーとパーミッションを設定したらok.

$ chmod 4755 ~/opt/vivaldi/opt/vivaldi/vivaldi-sandbox
$ sudo chown root.root ~/opt/vivaldi/opt/vivaldi/vivaldi-sandbox

若しくは --no-sandbox option

$ ~/opt/vivaldi/opt/vivaldi/vivaldi --no-sandbox

日本語豆腐問題

20171206_06:12:20-506920171206_07:12:16-6600

とりあえず適当な日本語フォント(今回はVLゴシック)を入れて,Vivaldiを再起動で直った.(Dejavuが入っていたので指定してみたけど直らなかった)

$ sudo apt install fonts-vlgothic

関連

Raspbian jessieのntp設定

Raspbianにntpdやchronyやntpdateとか居ないけど何が面倒見てるんだろうてことで確認.
systemdが面倒見ててtimeatectlコマンドで確認設定ができるらしい.

$ dpkg -l|egrep -i "ntp|chrony"
$ systemctl -a | grep -i ntp

今の状態を確認

$ timedatectl status
      Local time: Wed 2017-10-25 02:01:14 JST
  Universal time: Tue 2017-10-24 17:01:14 UTC
        RTC time: n/a
       Time zone: Asia/Tokyo (JST, +0900)
 Network time on: yes
NTP synchronized: yes
 RTC in local TZ: no

NTP同期を無効にしてみる

$ sudo timedatectl set-ntp false

無効になった( Network time on: no )
再起動すると NTP synchronizedno にもなる.

$ timedatectl status
      Local time: Wed 2017-10-25 02:01:39 JST
  Universal time: Tue 2017-10-24 17:01:39 UTC
        RTC time: n/a
       Time zone: Asia/Tokyo (JST, +0900)
 Network time on: no
NTP synchronized: yes
 RTC in local TZ: no

おまけ

タイムゾーンの確認

$ timedatectl list-timezones | grep -i tokyo
Asia/Tokyo

タイムゾーンの設定

$ sudo timedatectl set-timezone

任意のntp serverの指定

dhcpdから渡ってきたもの.

hdcpdに無い場合 /etc/systemd/timesyncd.conf
NTPFallbackNTP

環境

Raspbian stretch lite 2017-09-07(未update)

$ lsb_release -a
No LSB modules are available.
Distributor ID: Raspbian
Description:    Raspbian GNU/Linux 9.1 (stretch)
Release:        9.1
Codename:       stretch
$ uname -a
Linux raspberrypi 4.9.41+ #1023 Tue Aug 8 15:47:12 BST 2017 armv6l GNU/Linux

Raspberry Pi Zero Wのbluetoothを無効にする

てことでRaspberry Pi Zero WのBluetoothも無効にしたいなと.
環境はRaspbian stretch lite 2017-09-07で確認しました.

PCで設定した以下のblacklistの手順でもokなはずですが,config.txtで無効にする方法がありそうだと調べてみました.

まずは定番のeLinux

  • RPiconfig – eLinux.org

    There's lots more documentation of available overlays in /boot/config/README. See source on Github for more.

てことでGithubを見に行きます.

それらしいものがありました :)

Name:   pi3-disable-bt
Info:   Disable Pi3 Bluetooth and restore UART0/ttyAMA0 over GPIOs 14 & 15
        N.B. To disable the systemd service that initialises the modem so it
        doesn't use the UART, use 'sudo systemctl disable hciuart'.
Load:   dtoverlay=pi3-disable-bt
Params: <None>

早速設定してみます.

$ echo 'dtoverlay=pi3-disable-bt' | sudo tee -a /boot/config.txt
dtoverlay=pi3-disable-bt

な感じで /boot/config.txt に追記して再起動しました.
lsmodを設定前と比較するとこんな感じで居なくなっています.

$ diff lsmod lsmod_pi3-disable-bt
2,6d1
< cmac                    3134  1
< bnep                   11949  2
< hci_uart               21190  1
< btbcm                   7885  1 hci_uart
< bluetooth             374820  24 hci_uart,bnep,btbcm
9d3
< snd_bcm2835            23131  0
10a5,6
> snd_bcm2835            23131  0
> rfkill                 21373  4 cfg80211
12d7
< rfkill                 21373  6 bluetooth,cfg80211
16d10
< fixed                   3029  0
18a13
> fixed                   3029  0

moduleのblacklistを設定するよりお手軽ですね :)

恐らくRaspberry Pi 3 Bでも同様の設定は使えると思います.(持ってないので未確認)

Raspbian stretch 2017-09-07

DebianベースのRaspberry Pi向けのOSイメージの最新版Raspbian stretch 2017-09-07が出ている

http://downloads.raspberrypi.org/raspbian/release_notes.txt

2017-09-07:
* Disable predictable network interface names for Ethernet devices
* Bug fix for keyboard settings dialog in Raspberry Pi Configuration
* Bug fix for crash on some videos and animations in Chromium
* Bug fix for taskbar crash when running RealVNC server
* Bug fix for reloading projects with extensions in Scratch 2
* Bug fix for MAC address problem in Bluetooth
* Simple mode and new icons in Thonny
* New Japanese translations in Raspberry Pi Configuration
* Install fonts-droid-fallback for international fonts

先月の 2017-08-16 からDebian stretchベースになっています.今回は主にバグフィクスな感じ?

New Japanese translations in Raspberry Pi Configuration

は恐らくあっきーのrc_guiの翻訳かな?

Disable predictable network interface names for Ethernet devices

はwlan0とかがstretchからの新しい命名規則になる?

Install fonts-droid-fallback for international fonts

は自分は消して日本語フォント入れるかな?

とりあえずダウンロードが終わったら試してみます.