terminalで動作するMastodon clientのnanotodonを試してみた

mikutodonをDebian jessie armhfに入れてみた.Makefileを修正したら動いたけど文字化けする.ちなみにDebian sid amd64では問題なく動作した.

$ cat /etc/debian_version 
8.10
$ uname -m
armv7l

ライブラリ等導入

$ sudo apt install build-essential libcurl4-openssl-dev libjson-c-dev libncurses-dev libncursesw5
$ dpkg-query -W build-essential libcurl4-openssl-dev libjson-c-dev libncurses-dev libncursesw5
build-essential 11.7
libcurl4-openssl-dev:armhf      7.38.0-4+deb8u11
libjson-c-dev:armhf     0.11-4
libncurses-dev  
libncursesw5:armhf      5.9+20140913-1+deb8u2

<追記>
入ってない場合gitも必要ですね $ sudo apt install git
</追記>

source入手

$ git clone https://github.com/taka-tuos/nanotodon

make

コケた

$ cd nanotodon
$ make
make -r nanotodon
make[1]: Entering directory '/home/chip/src/nanotodon'
gcc -c -g -o nanotodon.o nanotodon.c
nanotodon.c: In function 'stream_event_notify':
nanotodon.c:110:12: warning: initialization discards 'const' qualifier from pointer target type
  char *t = json_object_get_string(notify_type);
            ^
nanotodon.c: At top level:
nanotodon.c:138:6: warning: conflicting types for 'stream_event_update'
 void stream_event_update(struct json_object *jobj_from_string)
      ^
nanotodon.c:128:3: note: previous implicit declaration of 'stream_event_update' was here
   stream_event_update(status);
   ^
nanotodon.c: In function 'stream_event_update':
nanotodon.c:180:14: warning: initialization discards 'const' qualifier from pointer target type
  char *src = json_object_get_string(content);
              ^
nanotodon.c:226:3: error: 'for' loop initial declarations are only allowed in C99 or C11 mode
   for (int i = 0; i < json_object_array_length(media_attachments); ++i) {
   ^
nanotodon.c:226:3: note: use option -std=c99, -std=gnu99, -std=c11 or -std=gnu11 to compile your code
nanotodon.c:245:3: error: 'for' loop initial declarations are only allowed in C99 or C11 mode
   for(int i = 0; i < term_w - (l + 4); i++) waddstr(scr, " ");
   ^
nanotodon.c: At top level:
nanotodon.c:589:6: warning: conflicting types for 'do_htl'
 void do_htl()
      ^
nanotodon.c:303:2: note: previous implicit declaration of 'do_htl' was here
  do_htl();
  ^
nanotodon.c: In function 'do_htl':
nanotodon.c:618:3: error: 'for' loop initial declarations are only allowed in C99 or C11 mode
   for (int i = json_object_array_length(jobj_from_string) - 1; i >= 0; i--) {
   ^
nanotodon.c: In function 'main':
nanotodon.c:751:2: error: 'for' loop initial declarations are only allowed in C99 or C11 mode
  for(int i = 0; i < term_w; i++) mvaddch(5, i, '-');
  ^
nanotodon.c:777:4: error: 'for' loop initial declarations are only allowed in C99 or C11 mode
    for(int i = 0; i < term_w; i++) mvaddch(5, i, '-');
    ^
nanotodon.c:802:3: error: 'for' loop initial declarations are only allowed in C99 or C11 mode
   for(int i = 0; i < txt.stringlen; i++) {
   ^
Makefile.in:21: recipe for target 'nanotodon.o' failed
make[1]: *** [nanotodon.o] Error 1
make[1]: Leaving directory '/home/chip/src/nanotodon'
Makefile.in:11: recipe for target 'default' failed
make: *** [default] Error 2

Makefileを修正したら通った

diff --git a/Makefile b/Makefile
index ac1828f..a35ee6a 100644
--- a/Makefile
+++ b/Makefile
@@ -1,7 +1,7 @@
 TARGET         = nanotodon
 OBJS_TARGET    = nanotodon.o
 
-CFLAGS = -g
+CFLAGS = -g -std=gnu99
 LDFLAGS = 
 LIBS = -lc -lm -lcurl -ljson-c -lncursesw -lpthread
 

文字化け><

20180521_20:05:50-30304

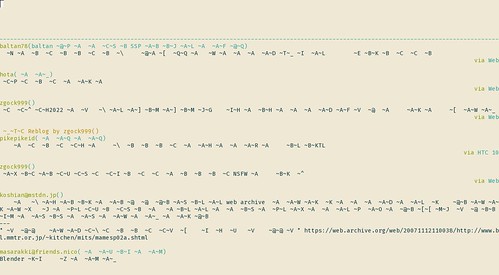
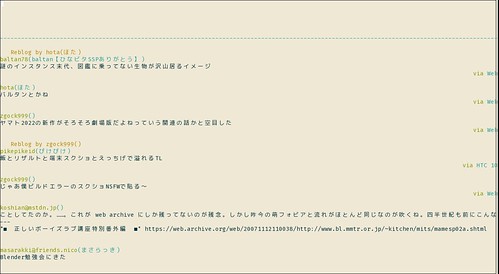
Debian sid amd64ではMakefileの書き換えも必要なく文字化けもしない.

20180521_20:05:01-31796

$ cat /etc/debian_version 
buster/sid
$ uname -m
x86_64
$ dpkg-query -W build-essential libcurl4-openssl-dev libjson-c-dev libncurses-dev libncursesw5
build-essential 12.5
libcurl4-openssl-dev:amd64      7.60.0-1
libjson-c-dev:amd64     0.12.1-1.3
libncurses-dev:amd64    6.1+20180210-3
libncursesw5:amd64      6.1+20180210-3

Linux ARM版Vivaldiを入れてみた

20171207_01:12:04-24154

Operaの共同創設者でCEOだったJon Stephenson von Tetzchnerによって設立されたVivaldi Technologiesによって開発されているウェブブラウザがあります.
これまでx86/x64プラットホームのWindows/macOS/Linux版が提供されていましたが,2017/12/05にLinux ARM版(armhf)がリリースされました.

Raspberry PiのRaspbianがメインのようですが,他のARM環境でも試したら普通に動きました :)

といってもやはりRAM512MBのようなマシンでは辛いですね.RAM2GBのマシンだと今のところいい感じそうです.Midoriやqutebrowserでうまく表示できないMastodonやgmail/Google+なども問題なく表示できますし,Chromeの拡張機能も使えます.

Linux ARM版Vivaldiの入手と確認

deb pkgダウンロード

$ wget https://downloads.vivaldi.com/stable/vivaldi-stable_1.13.1008.34-1_armhf.deb

hash

hashとか見当たらないけど手元ではこんな感じだった

$ md5sum vivaldi-stable_1.13.1008.34-1_armhf.deb 
7515f51385a9a264ad5bb7612438aeda  vivaldi-stable_1.13.1008.34-1_armhf.deb
$ sha1sum vivaldi-stable_1.13.1008.34-1_armhf.deb 
6b103d205f6aa7a5f3b394ba8d32dc9ca87bf0cd  vivaldi-stable_1.13.1008.34-1_armhf.deb
$ sha256sum vivaldi-stable_1.13.1008.34-1_armhf.deb 
e7af5d021bf0c2968fcf0271e8f741552e34bcf2d032318eb8ea95356067297d  vivaldi-stable_1.13.1008.34-1_armhf.deb
$ sha512sum vivaldi-stable_1.13.1008.34-1_armhf.deb 
f47f2d26e8045af9ba680129feca765cf3f9dc7ea76930071e9688ef50aa78a482b40ba5747fb4470d30520177bda371ec79e5a210a93dcf2e49251425001c6d  vivaldi-stable_1.13.1008.34-1_armhf.deb

パッケージ情報確認

$ dpkg-deb -I ./vivaldi-stable_1.13.1008.34-1_armhf.deb
 新形式 debian パッケージ、バージョン 2.0。
 サイズ 45154158 バイト: コントロールアーカイブ = 9840 バイト。
    1269 バイト、   16 行      control              
   15872 バイト、  442 行   *  postinst             #!/bin/sh
   12544 バイト、  324 行   *  postrm               #!/bin/sh
    1220 バイト、   42 行   *  prerm                #!/bin/sh
 Package: vivaldi-stable
 Version: 1.13.1008.34-1
 Architecture: armhf
 Maintainer: Vivaldi Package Composer <packager@vivaldi.com>
 Installed-Size: 131921
 Pre-Depends: dpkg (>= 1.14.0)
 Depends: gconf-service, libasound2 (>= 1.0.16), libatk1.0-0 (>= 1.12.4), libc6 (>= 2.16), libcairo2 (>= 1.6.0), libcups2 (>= 1.4.0), libdbus-1-3 (>= 1.2.14), libexpat1 (>= 2.0.1), libfontconfig1 (>= 2.8.0), libgcc1 (>= 1:4.4.0), libgconf-2-4 (>= 3.2.5), libgdk-pixbuf2.0-0 (>= 2.22.0), libglib2.0-0 (>= 2.28.0), libgtk-3-0 (>= 3.9.10), libnspr4 (>= 2:4.9-2~), libpango-1.0-0 (>= 1.14.0), libpangocairo-1.0-0 (>= 1.14.0), libx11-6 (>= 2:1.4.99.1), libx11-xcb1, libxcb1 (>= 1.6), libxcomposite1 (>= 1:0.3-1), libxcursor1 (>> 1.1.2), libxdamage1 (>= 1:1.1), libxext6, libxfixes3, libxi6 (>= 2:1.2.99.4), libxrandr2 (>= 2:1.2.99.3), libxrender1, libxss1, libxtst6, ca-certificates, fonts-liberation, libnss3 (>= 3.26), xdg-utils (>= 1.0.2), wget
 Recommends: adobe-flashplugin, chromium-codecs-ffmpeg-extra
 Conflicts: vivaldi-beta, vivaldi-preview
 Replaces: vivaldi-beta, vivaldi-preview
 Provides: www-browser
 Section: web
 Priority: optional
 Homepage: https://vivaldi.com
 Description: A new browser for our friends
  Vivaldi browser is made with power users in mind by people who love the Web.

導入

とりあえずDebian jessie armhf/Ubuntu 16.04 LTS aarch64で動いている.

Debian/Ubuntu等

$ sudo dpkg -i ./vivaldi-stable_1.13.1008.34-1_armhf.deb

以下のように依存パッケージが足りない場合は,

dpkg: 依存関係の問題により vivaldi-stable:armhf の設定ができません:
 vivaldi-stable:armhf は以下に依存 (depends) します: libnss3 (>= 3.26)...しかし:
  パッケージ libnss3:armhf はまだインストールされていません。

dpkg: パッケージ vivaldi-stable:armhf の処理中にエラーが発生しました (--install):
 依存関係の問題 - 設定を見送ります

こんな感じで足りないpkgが入るはず.その後見送られていたvivaldi-stableの設定の続きも実行される.

$ sudo apt install -f

64bit ARM環境

バージョン情報_009

aarch64でも試した.
既にadd archtecture armhfして色々入れていた環境に入れてクリーンな環境で検証していないけど多分こんな感じ.

$ sudo dpkg --add-architecture armhf
$ sudo apt update
$ sudo dpkg -i ./vivaldi-stable_1.13.1008.34-1_armhf.deb
$ sudo apt install -f

—-追記—-
クリーンなDragonBoard 410cにDebian stretch aarch64(lonaro)を入れた環境でも確認したがこの手順でokだった :)
—-追記終わり—-

.debが使えない環境

deb以外の環境ではこんな感じで適当な場所に展開して動かせた.

$ mkdir -p ~/opt/vivaldi
$ ar p vivaldi-stable_1.13.1008.34-1_armhf.deb data.tar.xz | tar xJ -C ~/opt/vivaldi
$ rm vivaldi-stable_1.13.1008.34-1_armhf.deb
$ ~/opt/vivaldi/opt/vivaldi/vivaldi

Slackwareだと以下のsctiptが使えそう(未確認)

問題

sandbox

もし,こんなエラーが出たら

$ ~/opt/vivaldi/opt/vivaldi/vivaldi
[13021:13021:1205/215600.516642:FATAL:setuid_sandbox_host.cc(157)] The SUID sandbox helper binary was found, but is not configured correctly. Rather than run without sandboxing I'm aborting now. You need to make sure that /home/matoken/opt/vivaldi/opt/vivaldi/vivaldi-sandbox is owned by root and has mode 4755.
Aborted[This script will find the latest Vivaldi binary package, download it and repackage it into Slackware format.](https://gist.github.com/ruario/dcbba70da900dac68fcc883542ff7ace "This script will find the latest Vivaldi binary package, download it and repackage it into Slackware format.")

こんな感じでオーナーとパーミッションを設定したらok.

$ chmod 4755 ~/opt/vivaldi/opt/vivaldi/vivaldi-sandbox
$ sudo chown root.root ~/opt/vivaldi/opt/vivaldi/vivaldi-sandbox

若しくは --no-sandbox option

$ ~/opt/vivaldi/opt/vivaldi/vivaldi --no-sandbox

日本語豆腐問題

20171206_06:12:20-506920171206_07:12:16-6600

とりあえず適当な日本語フォント(今回はVLゴシック)を入れて,Vivaldiを再起動で直った.(Dejavuが入っていたので指定してみたけど直らなかった)

$ sudo apt install fonts-vlgothic

関連

speedtest.netがcliで利用できるspeedtest-cliを試す

九里 真夏 @orumin そういえば speedtest.net って Linux の CLI client もありますね。

ってことでLinuxのcliで動くPython製のspeedtest-cliをちょっと試してみた.

speedtest.netでの回線速度計測をcliで行えます.python製でpipとかで各種環境に導入可能.

Debianだとjessie以降all, Ubuntuだと16.04LTS以降allにpkgもあるのでapt一発で入るし,Raspberry PiなどのARMアーキテクチャなんかでも問題なく動きました.

規定値の動作はipからロケーション拾ってそこから近いサーバーで計測した結果を返すようです.
自宅のipアドレスでの自動判定では静岡になってたので手動で計測サーバを変更して鹿児島と東京を試しました.

help

$ speedtest-cli -h
usage: speedtest-cli [-h] [--bytes] [--share] [--simple] [--list]
[--server SERVER] [--mini MINI] [--source SOURCE]
[--timeout TIMEOUT] [--secure] [--version]

Command line interface for testing internet bandwidth using speedtest.net.
--------------------------------------------------------------------------
https://github.com/sivel/speedtest-cli

optional arguments:
-h, --help show this help message and exit
--bytes Display values in bytes instead of bits. Does not affect
the image generated by --share
--share Generate and provide a URL to the speedtest.net share
results image
--simple Suppress verbose output, only show basic information
--list Display a list of speedtest.net servers sorted by
distance
--server SERVER Specify a server ID to test against
--mini MINI URL of the Speedtest Mini server
--source SOURCE Source IP address to bind to
--timeout TIMEOUT HTTP timeout in seconds. Default 10
--secure Use HTTPS instead of HTTP when communicating with
speedtest.net operated servers
--version Show the version number and exit

規定値では自宅は静岡になっていて静岡サーバで計測する(実際は鹿児島)

$ speedtest-cli
Retrieving speedtest.net configuration...
Retrieving speedtest.net server list...
Testing from FreeBit (180.131.110.140)...
Selecting best server based on latency...
Hosted by ClickL Network (Shizuoka) [0.02 km]: 110.464 ms
Testing download speed........................................
Download: 2.07 Mbit/s
Testing upload speed..................................................
Upload: 0.92 Mbit/s

日本のサーバを確認する

$ speedtest-cli --list|grep -i japan
14180) ClickL Network (Shizuoka, Japan) [0.02 km]
8407) Allied Telesis Capital Corporation (Sagamihara, Japan) [111.58 km]
6087) Allied Telesis Capital Corporation (Fussa-shi, Japan) [120.41 km]
6508) at2wn (Yokohama, Japan) [125.30 km]
7510) ASEINet (Tokyo, Japan) [141.71 km]
12546) TB (Tokyo, Japan) [141.71 km]
12511) h3zjp (Nerima, Japan) [142.66 km]
8348) Foxcore-LS (Sodegaura, Japan) [167.71 km]
7139) SoftEther Corporation (Tsukuba, Japan) [192.41 km]
6368) gatolabo (Maibara, Japan) [194.62 km]
6766) JAIST(ino-lab) (Nomi, Japan) [232.28 km]
13641) NextechNetworkSolutions (Nara, Japan) [237.53 km]
6476) rxy (individual) (Osaka, Japan) [264.80 km]
8832) prize3046 (Ikeda, Japan) [269.86 km]
8193) kamiari (Sendai, Japan) [427.67 km]
7976) denpa893 (Hikari, Japan) [601.03 km]
6405) Allied Telesis Capital Corporation (Misawa, Japan) [686.38 km]
13568) KSL (Kagoshima, Japan) [820.38 km]
811) GLBB Japan KK (Chatan, Japan) [1397.84 km]
6581) haza (Haebaru, Japan) [1410.56 km]

鹿児島サーバで計測してみる

$ speedtest-cli --server 13568
Retrieving speedtest.net configuration...
Retrieving speedtest.net server list...
Testing from FreeBit (180.131.110.140)...
Hosted by KSL (Kagoshima) [820.38 km]: 103.499 ms
Testing download speed........................................
Download: 2.20 Mbit/s
Testing upload speed..................................................
Upload: 0.92 Mbit/s

東京を–simple optionで計測してみる

$ speedtest-cli --simple --server 7510
Ping: 150.627 ms
Download: 1.88 Mbit/s
Upload: 0.84 Mbit/s

サーバの数を確認してみる

$ speedtest-cli --list | wc -l
6509

speedtestはJavaScriptやAdobe Flashが必要なことが多くてヘッドレス環境などでは面倒でした.
iperfやnetcatなんかはお手軽ですが,速度テスト先のサーバの用意が必要です.

今回のspeedtest-cliはお手軽に導入できて世界各地のサーバ相手にcliでspeed testも出来ていい感じです.

OpenJDK環境でAsciidocFXを動かす

AsciidocFXのLinux版はJRE同梱版(amd64のみ)とJREなし版が配布されています.
OpenJDKで動かないなと思っていたのですが,調べてみると以下のようなissueが.

てことでOpenJFXの導入を試してみたらamd64でもarm64環境でも起動しました :)
しかし手元のarm64環境ではキー入力してから表示されるまでのラグが結構気になるので実用にはちょっと辛そうでした.

$ sudo apt install openjfx
$ java -version
openjdk version "1.8.0_131"
OpenJDK Runtime Environment (build 1.8.0_131-8u131-b11-0ubuntu1.16.04.2-b11)
OpenJDK 64-Bit Server VM (build 25.131-b11, mixed mode)

Joypadで簡易操作を試みる

LinuxBoxで文章を読むのにJoypadで操作できないかなと思ってちょっと試してみました.

はじめはxevコマンドでJoypadのKeyCodeを調べてxmodmadコマンドで書き換えればいいだろうと思っていたのですが,xevコマンドでJoypadは反応しないようでした.他に方法はないかと検索するとjoy2keyというものを見つけたのでこれを試してみました.

$ apt show joy2key
Package: joy2key
Version: 1.6.3-2
Priority: optional
Section: x11
Maintainer: Debian QA Group <packages@qa.debian.org>
Installed-Size: 52.2 kB
Depends: libc6 (>= 2.15), libx11-6
Homepage: http://joy2key.sourceforge.net
Tag: hardware::input:joystick, hardware::input:keyboard, implemented-in::c,
 role::program, use::configuring
Download-Size: 21.8 kB
APT-Sources: http://dennou-q.gfd-dennou.org/debian sid/main amd64 Packages
Description: ジョイスティックの動きを同等のキーストロークに変換
 joy2key により、ジョイスティックの軸とボタンの動きに対してキーボードイベント
 を選択できますので、ネーティブでジョイスティックをサポートしていないアプリケーション
 でジョイスティックやゲームパッドを利用できます。

DebianだとWheezy以降,Ubuntuだとprecise(12.04LTS)以降にパッケージがあるようです.

今回はDebian sidやjessieなので導入はパッケージを入れるだけでした.

$ sudo apt install joy2key

設定はよく解らなかったけどこの辺を参考に

こんな感じで動きました.キーマップは未だ詰めるつもりだけどとりあえず.

$ DISPLAY=:0 joy2key -X -buttons A B X Y L Tab Escape Return KP_9 -axis Left Right Up Down -thresh -16383 16383 -16383 16383

キーコードについてはxevや/usr/include/X11/keysymdef.hで確認できます.とりあえずここにも貼っておきます.

しかしShift + Tabも使いたいのだけどShift/Tabそれぞれ単体は入力できるけど同時入力が効かないようです.通常のKBDでは動作するのでjoy2keyの問題だと思います.

試した環境はDebian sidのjoy2key 1.6.3-2とDebian lennyのjoy2key 1.6.3-2でJoypadはハードオフで\200くらいだったBUFFALOのスーパーファミコンみたいな見た目のBSGP801シリーズと書かれているもの.

[ 5239.625574] usb 2-1.2: authorized to connect
[ 5263.982357] usb 1-1.2: new low-speed USB device number 6 using ehci-pci
[ 5264.095408] usb 1-1.2: New USB device found, idVendor=0583, idProduct=2060
[ 5264.095410] usb 1-1.2: New USB device strings: Mfr=0, Product=2, SerialNumber=0
[ 5264.095411] usb 1-1.2: Product: USB,2-axis 8-button gamepad  
[ 5264.095545] usb 1-1.2: Device is not authorized for usage
[ 5266.168066] usb 1-1.2: authorized to connect
[ 5266.176105] hidraw: raw HID events driver (C) Jiri Kosina
[ 5266.184205] usbcore: registered new interface driver usbhid
[ 5266.184207] usbhid: USB HID core driver
[ 5266.188173] input: USB,2-axis 8-button gamepad   as /devices/pci0000:00/0000:00:1a.0/usb1/1-1/1-1.2/1-1.2:1.0/0003:0583:2060.0001/input/input19
[ 5266.188377] hid-generic 0003:0583:2060.0001: input,hidraw0: USB HID v1.10 Joystick [USB,2-axis 8-button gamepad  ] on usb-0000:00:1a.0-1.2/input0

Mumble server設定メモ

鹿児島Linux勉強会 2017.01の遠隔で利用した設定メモです.

  • サーバのOSはDebian jessie amd64
  • 自動起動せず利用時に手動で起動する
  • fwも都度手動
  • サブチャンネルはなし
  • ssl証明書は既存のstartsslを利用

pkgの導入

$ sudo apt install mumble-server

自動起動を無効にする

$ sudo dpkg-reconfigure mumble-server

で設定画面に入り,

Mumble-server (murmurd) can start automatically when the server is booted.

Autostart mumble-server on server boot?

を選択する.
(/etc/default/mumble-serverMURMUR_DAEMON_START=0でも)

設定ファイルを編集

diff --git a/mumble-server.ini b/mumble-server.ini
index b445d4e..46f1dfd 100644
--- a/mumble-server.ini
+++ b/mumble-server.ini
@@ -12,7 +12,7 @@
 #        NOT regex = \w* BUT regex = \\w*

 # Path to database. If blank, will search for
-# murmur.sqlite in default locations or create it if not found.
+A
 database=/var/lib/mumble-server/mumble-server.sqlite

 # If you wish to use something other than SQLite, you'll need to set the name
@@ -86,7 +86,7 @@ pidfile=/var/run/mumble-server/mumble-server.pid
 # configure it here ehan ehrough D-Bus or Ice.
 #
 # Welcome message sent to clients when they connect.
-welcometext="<br />Welcome to this server running <b>Murmur</b>.<br />Enjoy your stay!<br />"
+welcometext="<br />Welcome to KagoLUG server running <b>Murmur</b>.<br />Enjoy your stay!<br />"

 # Port to bind TCP and UDP sockets to.
 port=64738
@@ -144,26 +144,28 @@ users=100
 # addresses.
 # Only uncomment the 'registerName' parameter if you wish to give your "Root" channel a custom name.
 #
-#registerName=Mumble Server
+registerName=KagoLUG Mumble Server
 #registerPassword=secret
 #registerUrl=http://mumble.sourceforge.net/
-#registerHostname=
+registerHostname=kagolug.org

 # If this option is enabled, the server will announce its presence via the 
 # bonjour service discovery protocol. To change the name announced by bonjour
 # adjust the registerName variable.
 # See http://developer.apple.com/networking/bonjour/index.html for more information
 # about bonjour.
-#bonjour=True
+bonjour=False

 # If you have a proper SSL certificate, you can provide the filenames here.
 # Otherwise, Murmur will create it's own certificate automatically.
-#sslCert=
-#sslKey=
+#sslCert=/etc/letsencrypt/live/kagolug.org/cert.pem
+sslCert=/etc/letsencrypt/live/kagolug.org/fullchain.pem
+sslKey=/etc/letsencrypt/live/kagolug.org/privkey.pem
+#sslCA=/etc/letsencrypt/live/kagolug.org/fullchain.pem

 # If Murmur is started as root, which user should it switch to?
 # This option is ignored if Murmur isn't started with root privileges.
-uname=mumble-server
+uname=root

 # If this options is enabled, only clients which have a certificate are allowed
 # to connect.

ssl証明書をクリア

$ sudo murmurd -wipessl
$ sudo killall murmurd

利用時

デーモンの起動とポート開放を行う

$ sudo service mumble-server start
$ sudo iptables -A INPUT -p udp -m udp --dport 64738 -j ACCEPT
$ sudo iptables -A INPUT -p tcp -m tcp --dport 64738 -j ACCEPT

利用者にはサーバとポートを伝える
– server : kagolug.org
– port : 64738

mumble://kagolug.org?title=KagoLUG%20Mumble%20Server&version=1.2.0

利用環境

  • PC : ThinkPad X200(Ubuntu 16.10 amd64)
  • マイク : elecom製の数百円のもの
  • スピーカー : Elecom LBT-SPTR01ECBK

はじめLBT-SPTR01ECBKでマイクとスピーカー両方の役割をと思っていたが,うまく音を拾えない&HSP/HFPでは音が悪く聞き取りづらかったので役割を分けた.
マイクはPC直付だったので音を拾いづらい&キー入力の音などを拾っていたはず.

利用完了時

デーモンの終了

$ sudo service mumble-server start

iptablesのmumbleルールを閉じる

$ sudo iptables -L --line-numbers | grep 64738
23   ACCEPT     udp  --  anywhere             anywhere             udp dpt:64738
24   ACCEPT     tcp  --  anywhere             anywhere             tcp dpt:64738
$ sudo iptables -D INPUT 23
$ sudo iptables -D INPUT 24
$ sudo iptables -L --line-numbers | grep 64738

課題

ssl証明書ファイルを読み込むためにdaemonをrootで動かしているのをmumble-serverユーザに戻したい.

-uname=mumble-server
+uname=root
$ sudo ls -l /etc/letsencrypt/live/kagolug.org/fullchain.pem /etc/letsencrypt/live/kagolug.org/privkey.pem
lrwxrwxrwx 1 root ssl-cert 40 Dec 26 10:30 /etc/letsencrypt/live/kagolug.org/fullchain.pem -> ../../archive/kagolug.org/fullchain9.pem
lrwxrwxrwx 1 root ssl-cert 38 Dec 26 10:30 /etc/letsencrypt/live/kagolug.org/privkey.pem -> ../../archive/kagolug.org/privkey9.pem

ssl-certグループにmumble-serverを登録で行けそう?

マイク

会議向けの全方位のマイクが欲しい

Dragonboard 410c eMMC領域のOS入れ替え方法2種類

以下のガイドのとおりなんですが一応メモを.

microSD Card経由と,Fastboot経由の2種類があります.
microSD Card経由の場合はDIP switchの変更が必要でディスプレイとマウスが必要です.
Fastboot経由の場合はHostPCとmicroUSB Cableが必要です.USB-LANアダプタを使えばヘッドレスで全て設定できます.

#こういうのを使ったほうがいいけど.

microSD Card経由での書き込み

USBキーボード,マウス,HDMIモニタと4GB以上のmicroSDが必要です.

イメージの入手とmicroSD Cardへの書き込み

このファイル名は現在の最新です.以下のページを見て最新を入手してください.

$ wget http://builds.96boards.org/releases/dragonboard410c/linaro/debian/latest/dragonboard410c_sdcard_install_debian-66.zip http://builds.96boards.org/releases/dragonboard410c/linaro/debian/latest/MD5SUMS.txt
$ md5sum -c MD5SUMS.txt 2>&1 | egrep -v 'FAILED|ありません'
dragonboard410c_sdcard_install_debian-66.zip: 完了
md5sum: 警告: 一覧にある 15 個のファイルが読み込めませんでした
$ unzip -l dragonboard410c_sdcard_install_debian-66.zip
Archive:  dragonboard410c_sdcard_install_debian-66.zip
  Length      Date    Time    Name
---------  ---------- -----   ----
    14022  2016-02-27 14:36   license.txt
2621440000  2016-02-27 14:36   db410c_sd_install_debian.img
---------                     -------
2621454022                     2 files
$ unzip dragonboard410c_sdcard_install_debian-66.zip
$ cat ./db410c_sd_install_debian.img | pv | sudo dd of=/dev/sdz bs=4M

microSDからの起動とセットアップ

microSD CardをDragonboard 410cに差し込んで,基盤の裏面のDIP switch(s6)を操作してSD boot(2)だけをOnにします.シルクがあるので解りやすいです.
Dragonboard 410cにUSBキーボード,マウス,HDMIモニタを接続して起動するとシンプルなインストーラが起動するのでポチポチと押していくと完了です.

IMGP2730IMGP2731IMGP2732IMGP2733

一旦電源を切ってDIP swatchを元に戻し,microSD Cardを取り外して起動するとLXDEが起動してきます.

ちなみにDIP switchにUSB bootもあるので試してみましたが未実装化手順が違うのかうまく行きませんでした.

Fastboot経由での書き込み

microSD経由より手順が多いですが必要なものが少ない&DIP swatchの操作が必要ないのでケースに入れている場合などもいいかもしれません.
microUSB Cableは必要なので用意してください.

fastbootの導入

HostPCにfastbootを導入します.Android開発環境が既にある人は入っていそうですね.

$ sudo apt install android-tools-fastboot

bootloaderイメージの入手

次のsiteからbootloaderイメージを入手します.最新版を入手してください.
96Boards Builds for: latest

ディレクトリを掘って展開しておきます.

$ unzip -l dragonboard410c_bootloader_emmc_linux-46.zip 
Archive:  dragonboard410c_bootloader_emmc_linux-46.zip
  Length      Date    Time    Name
---------  ---------- -----   ----
57344  2016-02-10 10:00   hyp.mbn
   744042  2016-02-10 10:00   emmc_appsboot.mbn
14022  2016-02-10 10:00   license.txt
   154980  2016-02-10 10:00   rpm.mbn
   483468  2016-02-10 10:00   tz.mbn
 23102976  2016-02-10 10:00   NON-HLOS.bin
   80  2016-02-10 10:00   sec.dat
   252868  2016-02-10 10:00   sbl1.mbn
34304  2016-02-10 10:00   gpt_both0.bin
  324  2016-02-10 10:00   flashall
---------                     -------
 24844408                     10 files
$ mkdir dragonboard410c_bootloader_emmc_linux-46
$ unzip dragonboard410c_bootloader_emmc_linux-46.zip

fastboot modeに入るために基板上の(-)ボタン(s4)を押しながら電源を投入します.すぐにfastboot modeになるのでfastboot devicesコマンドで確認します.何も出てない場合は失敗しているので電源投入をやり直します.

$ sudo fastboot devices
b5d12d18        fastboot

デバイスが認識できているのが確認できたらflashall scriptで書き込みを開始します.書き込みを開始した後は(-)ボタン(s4)を離しても大丈夫そうです.

$ sudo ./flashall
target reported max download size of 268435456 bytes
sending 'partition' (33 KB)...
OKAY [  0.005s]
writing 'partition'...
OKAY [  1.451s]
finished. total time: 1.457s
target reported max download size of 268435456 bytes
sending 'hyp' (56 KB)...
OKAY [  0.005s]
writing 'hyp'...
OKAY [  0.011s]
finished. total time: 0.016s
target reported max download size of 268435456 bytes
sending 'modem' (22561 KB)...
OKAY [  0.732s]
writing 'modem'...
OKAY [  0.756s]
finished. total time: 1.488s
target reported max download size of 268435456 bytes
sending 'rpm' (151 KB)...
OKAY [  0.008s]
writing 'rpm'...
OKAY [  0.010s]
finished. total time: 0.018s
target reported max download size of 268435456 bytes
sending 'sbl1' (246 KB)...
OKAY [  0.011s]
writing 'sbl1'...
OKAY [  0.010s]
finished. total time: 0.021s
target reported max download size of 268435456 bytes
sending 'sec' (0 KB)...
OKAY [  0.004s]
writing 'sec'...
OKAY [  0.006s]
finished. total time: 0.010s
target reported max download size of 268435456 bytes
sending 'tz' (472 KB)...
OKAY [  0.017s]
writing 'tz'...
OKAY [  0.015s]
finished. total time: 0.033s
target reported max download size of 268435456 bytes
sending 'aboot' (726 KB)...
OKAY [  0.026s]
writing 'aboot'...
OKAY [  0.025s]
finished. total time: 0.052s
erasing 'boot'...
OKAY [  0.036s]
finished. total time: 0.037s
erasing 'rootfs'...
OKAY [  0.267s]
finished. total time: 0.267s
erasing 'devinfo'...
OKAY [  0.034s]
finished. total time: 0.034s

boot/root領域の書き込み

OSイメージのboot/root領域のデータを入手して書き込みます.
書き込みはfastboot modeにしてから行ってください.

$ wget http://builds.96boards.org/releases/dragonboard410c/linaro/debian/latest/linaro-jessie-alip-qcom-snapdragon-arm64-20160227-66.img.gz http://builds.96boards.org/releases/dragonboard410c/linaro/debian/latest/boot-linaro-jessie-qcom-snapdragon-arm64-20160227-66.img.gz http://builds.96boards.org/releases/dragonboard410c/linaro/debian/latest/MD5SUMS.txt
$ md5sum -c MD5SUMS.txt 2&>1 |grep 完了
boot-linaro-jessie-qcom-snapdragon-arm64-20160227-66.img.gz: 完了
linaro-jessie-alip-qcom-snapdragon-arm64-20160227-66.img.gz: 完了
$ sudo fastboot flash boot ./boot-linaro-jessie-qcom-snapdragon-arm64-20160227-66.img 
target reported max download size of 268435456 bytes
sending 'boot' (17480 KB)...
OKAY [  0.562s]
writing 'boot'...
OKAY [  0.329s]
finished. total time: 0.891s
$ sudo fastboot flash rootfs ./linaro-jessie-alip-qcom-snapdragon-arm64-20160227-66.img 
target reported max download size of 268435456 bytes
sending sparse 'rootfs' (262140 KB)...
OKAY [  9.309s]
writing 'rootfs'...
OKAY [ 18.304s]
sending sparse 'rootfs' (262140 KB)...
OKAY [  9.236s]
writing 'rootfs'...
OKAY [ 19.888s]
sending sparse 'rootfs' (262140 KB)...
OKAY [  9.255s]
writing 'rootfs'...
OKAY [ 19.759s]
sending sparse 'rootfs' (262140 KB)...
OKAY [  9.295s]
writing 'rootfs'...
OKAY [ 19.834s]
sending sparse 'rootfs' (262140 KB)...
OKAY [  9.317s]
writing 'rootfs'...
OKAY [ 19.828s]
sending sparse 'rootfs' (262140 KB)...
OKAY [  9.290s]
writing 'rootfs'...
OKAY [ 19.765s]
sending sparse 'rootfs' (59016 KB)...
OKAY [  2.118s]
writing 'rootfs'...
OKAY [  4.450s]
finished. total time: 179.649s

起動するとlxdeが起動してきます.sshdも起動してくるのでdhcpdの動いている環境でUSB-LANアダプタを接続すればヘッドレス環境で設定が可能です.avahiは動いてないのでipはポートスキャンなりarpなりで探してください.

$ sudo nmap -sP 192.168.2.200-255 --spoof-mac 00:90:cc:e8:0b:db

Starting Nmap 7.01 ( https://nmap.org ) at 2016-03-11 01:39 JST
Spoofing MAC address 00:90:CC:E8:0B:DB (Planex Communications)
Nmap scan report for 192.168.2.203
Host is up.
Nmap done: 56 IP addresses (1 host up) scanned in 19.15 seconds
$ sudo arp|grep 00:90:cc
192.168.2.214            ether   00:90:cc:e8:0b:db   C                     wlp3s0

ユーザ名はlinaroパスワードも同じです.

$ ssh linaro@192.168.2.202
$ uname -a
Linux linaro-alip 4.4.0-linaro-lt-qcom #1 SMP PREEMPT Sat Feb 27 04:55:16 UTC 2016 aarch64 GNU/Linux
$ lsb_release -a
No LSB modules are available.
Distributor ID: Debian
Description:    Debian GNU/Linux 8.3 (jessie)
Release:        8.3
Codename:       jessie

ちなみに,セットアップ終了後のeMMCの容量はこのくらいです.

$ df /
Filesystem      1K-blocks    Used Available Use% Mounted on
/dev/mmcblk0p10   7260748 1814312   5120404  27% /

後は普通のDebianなのでsource listを日本に向けてUpdateしてほげりましょう.

/etc/apt/sources.list.d/の下はこんな感じ.後ろ2つは/etc/apt/sources.listと重複しているような?

$ find /etc/apt/sources.list.d/ -type f | xargs -n1 -I{} sh -c "echo \#-- {} ; cat {}"
#-- /etc/apt/sources.list.d/hwpack.qcom.list
deb http://repo.linaro.org/ubuntu/qcom-overlay jessie main
#-- /etc/apt/sources.list.d/linaro-overlay-repo.list
deb http://repo.linaro.org/ubuntu/linaro-overlay jessie main
deb-src http://repo.linaro.org/ubuntu/linaro-overlay jessie main
#-- /etc/apt/sources.list.d/hwpack.debian.list
deb http://ftp.debian.org/debian/ jessie main contrib non-free
#-- /etc/apt/sources.list.d/hwpack.backports.list
deb http://ftp.debian.org/debian/ jessie-backports main

コマンドで添付ファイル付きメールを送る2つの方法

Google+でmailコマンドで添付ファイル付きメールを送ろうとしている方の投稿のコメントにbase64でデコードして送るscriptを使ってますとか書いたのですが,これperl4でcgi全盛な大昔からやってる手法なので楽なものがあるのではと思い探してみました.

Debian stretch testingのs-nailを使う

Debian stretch testing/sid ではmailコマンドがbsd-mailxからs-nailに変わって添付ファイルオプションがあるようです.

 -a file     Attach the given file to the message.  The same filename conventions as described in the section COMMANDS apply: shell word expansion is
             restricted to the tilde ‘~’ and variables.  Shall file not be accessible but contain a ‘=’ character, then anything after the ‘=’ is assumed to
             specify the input character set and anything before ‘=’ the filename: this is the only option to specify the input character set (and don't per‐
             form any character set conversion) for text attachments from the command line, not using the ~@ tilde escape command.

こんな感じで使えました.

$ echo 'attach test(binary)' | mail -s "attach test mail" -a ./text.xz matoken@gmail.com

#はじめ.zipを送ろうとしてgmailサーバに弾かれました.そういえばそうだった……
##sendmail: 552 5.7.0 content and attachment content guidelines. xu1sm1469539pab.31 - gsmtp

普通にメール送るのに加えて-aオプションでファイルを指定する感じです.
オプションでSMTPサーバの指定も出来るようなのでMTAの設定をしていないような場合でも単体で使えそうです.

Debian jessieでbiabamを使う

s-nailはstretch testingからでjessieには入っていないようです.代わりに入っているのはbsd-mailxです.manをちょっと見た感じでは添付ファイルの扱いは載っていなさそう.でもきっと便利な何かがあるのでは?とapt-cache search mail attachとかして探してみるとbiabamというbash script製のものを発見.小さいし良さそうと試してみました.

biabam – bash attachment mailer

こんな感じで使えました.

$ sudo apt install biabam
$ echo 'attach test' | biabam ./test.xz -s "attach test from jessie" matoken@gmail.com

ちなみにmailコマンドで添付ファイルの方法を検索すると大抵mutt使う例が出てきますが,muttを既に設定済みの人でないと敷居が高いと思います.そういう場合に今回の方法はいいのではないかと思います.

しかし恐らく多国言語対応はして居なさそうなので日本語をSubjectやBODYに使う場合は素直にScriptを書いたほうがいいかもしれません…….
定形なら適当なMUAでメールのテンプレートファイルを作っておいて流し込んでmailコマンドに投げるようにしてもいいですね.


aptコマンドのedit-sourcesオプションが便利

Rasbianのパッケージサーバにjaistを指定していたのだけど最近遅いのでmirror listを見て

$ w3m -dump https://www.raspbian.org/RaspbianMirrors|grep -i japan -A1
Asia^*    Japan       JAIST                    (http|rsync)://ftp.jaist.ac.jp/pub/
                                               Linux/raspbian-archive/raspbian
--
Asia^*    Japan       WIDE Project Tsukuba NOC raspbian/raspbian/
                                               rsync://ftp.tsukuba.wide.ad.jp/
--
Asia^*    Japan       Yamagata University      http://ftp.yz.yamagata-u.ac.jp/pub/
                                               linux/raspbian/raspbian/

/etc/apt/sources.listをWIDEに変更した.

-deb http://ftp.jaist.ac.jp/pub/Linux/raspbian-archive/raspbian/ jessie main contrib non-free rpi
-deb-src http://ftp.jaist.ac.jp/pub/Linux/raspbian-archive/raspbian/ jessie main contrib non-free rpi
+deb http://ftp.tsukuba.wide.ad.jp/Linux/raspbian/raspbian/  jessie main contrib non-free rpi
+deb-src http://ftp.tsukuba.wide.ad.jp/Linux/raspbian/raspbian/  jessie main contrib non-free rpi

ところでaptコマンドのedit-sourcesオプションが便利なのでぜひ使うべき.visudoとかみたいに間違えると教えてくれる.

$ sudo apt edit-sources
E: Type 'eb' is not known on line 3 in source list /etc/apt/sources.list
Failed to parse /etc/apt/sources.list. Edit again?  [Y/n]

引数を付けて/etc/apt/sources.list.d/以下の編集も出来る

$ ls /etc/apt/sources.list.d/
google-chrome.list  gyazo_gyazo-for-linux.list  owncloud-client.list
$ sudo apt edit-sources owncloud-client

Debian jessie以降,Rasbian jessie以降,Ubuntu vivid(15.04)以降でそれぞれ利用可能だと思う.

apt (0.9.13.1) unstable; urgency=low
 
  [ Colin Watson ]
  * fix "apt-get  --purge build-dep" (closes: #720597)
  * fix regression that APT::Keep-Fds is not honored (closes: #730490)
 
  [ Michael Vogt ]
  * add "-f" option to "build-dep" as sbuild is using it to fix
    regression with cross-building (LP: #1255806)
  * add autopkgtest support for the integration testsuite
  * merge mvo/feature/short-list
  * merge mvo/feature/edit-sources
  * fix segfault in pkgDepCache::SetCandidateRelease() (closes: #709560)
  * reset terminal on error (closes: #730795)
  * fix apport report writing (LP: #1254499)
 
 -- Michael Vogt <mvo@debian.org>  Fri, 29 Nov 2013 20:50:17 +0100


デジモノステーション2016年2月号付録の0SIMをRaspberry Piで試す

デジモノステーション 2016年2月号に0SIM by So-net というものが付録で付いてきて一部で流行っています.
雑誌「デジモノステーション」最新号 – DIGIMONO!(デジモノ!)

IMG_20151229_022627IMG_20151229_022636

これはこの雑誌を買って付いてきた付録のSIMを使うと雑誌代(620円)だけで開通手続き手数料無料で月あたり500MB迄無料で利用できるというもの.勿論他にSIMを刺す端末は必要です.

【0SIM by So-net】 詳細
形状:nanoSIM 規格:0SIM by So-net 種類:データ通信専用
データ量と料金(2段階定額)
0MB~499MB:0円
500MB ~ 2047MB:100円~1500円
2048MB ~:1600円
速度制限:なし(ただし5GBまで)/ NTTドコモ 4G LTE(下り最大225Mbps)
開通期限:2016年2月24日

上限もあるのでうっかり使いすぎても安心感があります.ちなみに上限をよく超えるようだと別のプランにしたほうがお得です.
一人で複数契約は出来ないのでたくさん買って500MBごとに差し替えて使うと言ったことは出来ない,3ヶ月利用しないと自動解約されるようなので寝かせておくことも出来ないよう.
普通に使うとあっという間に500MB超えちゃうでしょうけど使いようによっては便利に使えそう(気象センサのデータを送るとかなら余裕).ということで試してみたかったのですがここは鹿児島.都内から最低でも2日遅れなので試せないでいました.昨日やっとコンビニで入手出来たので試してみました.

ちなみにAmazonでは売り切れでマーケットプレイス扱いの物しか無いようです.その中で安いものはSIMなしと書かれているので注意しましょう.

今回はUSBモデムとして以前500円ほどで買った Docomo L-02C を Rasbian jessie を導入した Raspberry Pi 2B に接続して wvdial で接続しました.このモデムは結構電気を食うらしく電源がある程度大容量でないととても不安定になります.今回は秘密結社オープンフォース河野総統謹製の RaspberryPot という GPIO 経由での電源を利用しました.RaspberryPot は現在恐らく入手出来ません.Raspberry Hubu の電源部分を切り出したものなので Raspberry Hubu でも同じことが出来ます.
#ちなみに Pi で動かす前に Debian testing stretch amd64 な NotePC でも同様の設定で動くのを確認しています.Debian oldstable 以降なら全部同じ手順で行けると思います.


RaspberryHabu – FABLIB Wiki – FABLIB – OSDN
秘密結社オープンフォース

IMG_20151229_071104

開通手続き

次のページから開通手続きを行います.開通手続きの期限は2016年02月24日.
http://lte.so-net.ne.jp/r/0sim/a/

ログイン情報はSIMの台紙に書かれています.
IMG_20151229_022855

必要なソフトウェアの導入

$ sudo apt update && sudo apt upgrade
$ sudo apt install cu wvdial usb-modeswitch

<追記>
※必要なソフトウェアの導入にusb-modeswitchパッケージを追加
</追記>

利用ユーザ pidialout グループへの登録

この手続きをしないと,ダイヤル時など毎回 sudo しないといけません.

$ sudo addgroup pi dialout

※反映には要ログインしなおし

Docomo L-02C への APN登録

モデムへの接続と動作確認

/dev/ttyUSB2 部分は dmesg|tailなどとして確認して下さい.モデムの他に何も接続していなければ ttyUSB0~ttyUSB3 の4つのデバイスが確認できるはずです.

% cu -l /dev/ttyUSB2 -s 115200
Connected.
atz
OK

現在のAPN確認

AT+CGDCONT?
+CGDCONT: 1,"IP","mopera.net",,0,0,0
+CGDCONT: 11,"IP","mopera.net",,0,0,0

OK

APN(so-net.jp)を設定

AT+CGDCONT=1,"IP","so-net.jp"
OK

※次のようにして複数のAPNを設定することも可能

AT+CGDCONT=2,"IP","lte.nttplala.com"
OK
AT+CGDCONT=3,"IP","mineo-d.jp"
OK

APNが登録できたか確認

AT+CGDCONT?
+CGDCONT: 1,"IP","so-net.jp",,0,0,0
+CGDCONT: 11,"IP","mopera.net",,0,0,0
OK

設定の書き込み

ATZ0
OK

モデムから切断

~.

Disconnected.

ダイヤルアップのために wvdial の設定

/etc/wvdial.conf に以下を追記.

[Dialer 0sim]
Modem Type = Analog Modem
Phone = *99***1#
Carrier Check = no
Auto Reconnect = yes
Stupid Mode = yes

ISDN = 0
Init1 = ATZ
Init2 = ATH
Init3 = AT+CGDCONT?
Init4 = ATQ0 V1 E1 S0=0 &C1 &D2 +FCLASS=0
Dial Command = ATD
Modem = /dev/ttyUSB2
Baud = 115200

Username = nuro
Password = nuro

接続

$ wvdial 0sim

接続確認

$ w3m -dump http://ifconfig.me/all
ip_addr: 118.241.XXX.XXX
remote_host: XXXXXXXXXX.ap.nuro.jp
user_agent: w3m/0.5.3+debian-19
port: 44286
lang: ja;q=1.0, en;q=0.5
connection: 
keep_alive: 
encoding: gzip, compress, bzip, bzip2, deflate
mime: text/html, text/*;q=0.5, image/*, application/*, audio/*, video/*, x-scheme-handler/*, x-content/*, inode/*
charset: 
via: 
forwarded: 

利用状況確認

対のページからログインして利用状況が確認できます.また,400MB を超えるとメールでお知らせも来るらしいです.
ユーザWebメインメニュー

20151229_07:12:50-10076

ということで暫く試してみたいと思います.

※Amazonで雑誌を買う場合はSIMなしのものもあるのでよく確認して購入しましょう.

関連URL

<追記>

Twitterで/dev/ttyUSBnが見つからないという書き込みを見て導入パッケージが足りなかったのに気づきました.これが足りないとUSBモデム接続時のdmesgで以下のようにCD-ROMのsr0デバイスが出て来てttyUSBnは出てきません.

$ dmesg | tail
[417400.989925] usb 2-1.1: Product: docomo L02C
[417400.989927] usb 2-1.1: Manufacturer: NTT DOCOMO, INC.
[417400.989928] usb 2-1.1: SerialNumber: 353168046719530
[417400.990982] usb-storage 2-1.1:1.0: USB Mass Storage device detected
[417400.991062] scsi host11: usb-storage 2-1.1:1.0
[417401.988387] scsi 11:0:0:0: CD-ROM            LG       Autorun          2.00 PQ: 0 ANSI: 0
[417401.988771] scsi 11:0:0:0: Attached scsi generic sg2 type 5
[417401.999991] sr 11:0:0:0: [sr0] scsi-1 drive
[417402.000001] cdrom: Uniform CD-ROM driver Revision: 3.20
[417402.000257] sr 11:0:0:0: Attached scsi CD-ROM sr0

この時のベンダーID:プロダクトIDは1004:61ddです.

$ lsusb|grep LG
Bus 002 Device 027: ID 1004:61dd LG Electronics, Inc. 

この場合usb-modeswitchパッケージを導入して,

$ sudo apt install usb-modeswitch

USBモデムを接続し直すと出てきます.

$ dmesg | tail
[417994.525827] usb 2-1.1: Product: docomo L02C
[417994.525830] usb 2-1.1: Manufacturer: NTT DOCOMO, INC.
[417994.527296] option 2-1.1:1.0: GSM modem (1-port) converter detected
[417994.527511] usb 2-1.1: GSM modem (1-port) converter now attached to ttyUSB0
[417994.527807] option 2-1.1:1.1: GSM modem (1-port) converter detected
[417994.527997] usb 2-1.1: GSM modem (1-port) converter now attached to ttyUSB1
[417994.528217] option 2-1.1:1.2: GSM modem (1-port) converter detected
[417994.528346] usb 2-1.1: GSM modem (1-port) converter now attached to ttyUSB2
[417994.528597] option 2-1.1:1.3: GSM modem (1-port) converter detected
[417994.528741] usb 2-1.1: GSM modem (1-port) converter now attached to ttyUSB3

プロダクトIDも61ddから618fに変わりました.

$ lsusb|grep LG
Bus 002 Device 029: ID 1004:618f LG Electronics, Inc. Ally/Optimus One

何故CD-ROMデバイスが出てくるかというとWindows環境などでのツールやドライバ導入のためです.このCD-ROMデバイス中にツールやドライバが入っていて簡単に導入が出来るというものなのですが,Linux版のツールやドライバは入っていないです.usb-modeswitchパッケージはCD-ROMからUSBモデムへのデバイスの切り替えをしてくれます.

</追記>