Debian で non-free-firmware というコンポーネントが増えることになり,実際に移動し始めたとのことで利用できるように設定しました.
タグ: Debian
rmadison でパッケージのバージョンを確認
Twitterで rmadison というコマンドを教えてもらいました.
$ rmadison
openssh とかもバージョン調べるのによいかも— henrich (@henrich) 2022年2月25日
Debian 10 Buster testing をリリース後に apt update するとエラーになる
2019-07-06 に Debian Buster 10 がリリースされました.
Debian 10 Buster testing 環境でリリース後に apt update をするとエラーになってしまいます.
$ sudo apt update
Get:1 http://security.debian.org/debian-security buster/updates InRelease [39.1 kB]
Get:2 http://deb.debian.org/debian buster InRelease [118 kB]
N: Repository 'http://security.debian.org/debian-security buster/updates InRelease' changed its 'Version' value from '' to '10'
E: Repository 'http://security.debian.org/debian-security buster/updates InRelease' changed its 'Suite' value from 'testing' to 'stable'
N: This must be accepted explicitly before updates for this repository can be applied. See apt-secure(8) manpage for details.
Do you want to accept these changes and continue updating from this repository? [y/N]
N: Repository 'http://deb.debian.org/debian buster InRelease' changed its 'Version' value from '' to '10.0'
E: Repository 'http://deb.debian.org/debian buster InRelease' changed its 'Suite' value from 'testing' to 'stable'
N: This must be accepted explicitly before updates for this repository can be applied. See apt-secure(8) manpage for details.
Do you want to accept these changes and continue updating from this repository? [y/N]
Reading package lists... Done
E: Failed to fetch http://deb.debian.org/debian/dists/buster/InRelease
E: Failed to fetch http://security.debian.org/debian-security/dists/buster/updates/InRelease
E: Some index files failed to download. They have been ignored, or old ones used instead.
--allow-releaseinfo-change を指定してAPT にリリースを情報を確認したことを教えます.
$ sudo apt --allow-releaseinfo-change update
次からはオプション無しで実行してもエラーが出なくなります.
$ sudo apt update
Hit:1 http://deb.debian.org/debian buster InRelease
Hit:2 http://security.debian.org/debian-security buster/updates InRelease
Reading package lists... Done
Building dependency tree
Reading state information... Done
3 packages can be upgraded. Run 'apt list --upgradable' to see them.
ちなみに stable でなく testing 環境を使い続けたい場合は /etc/apt/sources.list を現在の Debian testing の bullseye に修正すればいいはず.
環境
$ dpkg-query -W apt
apt     1.8.2
$ hostnamectl | egrep 'Operating System|Architecture'
  Operating System: Debian GNU/Linux 10 (buster)
      Architecture: x86-64
特定グループでのみ dmesg command を有効にする
Debian の linux 4.8.0 以降で一般ユーザによる dmesg が無効化されたので,kernelパラメータの kernel.dmesg_restrict を修正して dmesg command を一般ユーザでも実行できるようにしましたがこれだと全ユーザで実行できてしまいます.sudo を設定してログの読める adm ユーザだけが dmesg command を実行できるようにしてみました.
dmesgを実行したいユーザをadm group に登録する(loginし直して反映しておく)
$ sudo addgroup matoken adm
$ exit
visudo command で /etc/sudoers を編集して adm group は NOPASSWD で dmesg command を実行できるようにする(念の為編集前にもう1枚端末を開いて sudo -s しておいたり,at等で5分後に /etc/sudoers を巻き戻すようにしておくとミスっても安心)
$ sudo visudo
$ sudo git diff /etc/sudoers
diff --git a/sudoers b/sudoers
index d4cc632..ac3bd77 100644
--- a/sudoers
+++ b/sudoers
@@ -21,6 +21,7 @@ root  ALL=(ALL:ALL) ALL

 # Allow members of group sudo to execute any command
 %sudo  ALL=(ALL:ALL) ALL
+%adm   ALL=NOPASSWD: /usr/bin/dmesg

 # See sudoers(5) for more information on "#include" directives:
adm group のユーザでdmesg コマンドが追加されているのを確認
$ sudo -l | grep dmesg
    (root) NOPASSWD: /usr/bin/dmesg
adm group のユーザが認証無しで sudo dmesg が実行できるのを確認
$ id | grep -o adm
adm
$ sudo dmesg -H | tail -1
[  +0.015080] smsc95xx 1-1.1:1.0 eth0: link up, 100Mbps, full-duplex, lpa 0xCDE1
このとき kernel.dmesg_restrict = 1 で sudo を通さないと dmesg は実行できない
$ cat /proc/sys/kernel/dmesg_restrict
1
$ dmesg
dmesg: read kernel buffer failed: Operation not permitted
$ LC_MESSAGES=ja_JP.UTF-8 dmesg
dmesg: read kernel buffer failed: 許可されていない操作です
~/.profile にalias を設定
$ echo 'alias dmesg="sudo dmesg"' | tee -a ~/.profile
alias dmesg="sudo dmesg"
$ source ~/.profile
$ dmesg -H | tail -1
[  +0.015080] smsc95xx 1-1.1:1.0 eth0: link up, 100Mbps, full-duplex, lpa 0xCDE1
環境
$ dpkg-query -W sudo util-linux linux-image-*
linux-image-4.19.0-2-arm64      4.19.16-1
linux-image-4.19.0-2-arm64-unsigned
linux-image-arm64       4.19+102
sudo    1.8.27-1
util-linux      2.33.1-0.1
$ lsb_release -dr
Description:    Debian GNU/Linux buster/sid
Release:        testing
$ uname -a
Linux rpi3 4.19.0-2-arm64 #1 SMP Debian 4.19.16-1 (2019-01-17) aarch64 GNU/Linux
$ cat /proc/device-tree/model ;echo
Raspberry Pi 3 Model B Rev 1.2
Debian buster/sid でdmesgを一般ユーザで実行
※この方法だと全ユーザで dmesg が実行できてしまうので sudo を使ってグループを制限する次の方法のほうがいいかもしれない.
Debian buster arm64 環境を作りました( Raspberry Pi 3 Model B の USB起動で Debian buster arm64 を動かす – matoken’s meme )が,dmesg でエラーとなります.sudo dmesg は動く.
$ dmesg
dmesg: read kernel buffer failed: Operation not permitted
$ LC_MESSAGES=ja_JP.UTF-8 dmesg
dmesg: read kernel buffer failed: 許可されていない操作です
そういえば以前 Debian sid amd64 でも起こった現象です.
Debian では Linux 4.8.0 から仕様が変わってroot 以外ではdmesg が読めないようになっています.log file の読める adm group のユーザも駄目.
これは kernelパラメータの kernel.dmesg_restrict で設定されていて以下のようなコマンドで確認できます.
$ sudo sysctl -a|grep dmesg
kernel.dmesg_restrict = 1
$ cat /proc/sys/kernel/dmesg_restrict
1
これを 1 から 0 に変更することで以前と同じ動作となります.sysctl コマンドや,
$ sudo sysctl -w kernel.dmesg_restrict=0
/proc/sys/kernel/dmesg_restrict を直接書き換えることで一時的に変更できます.
echo 0 | sudo tee /proc/sys/kernel/dmesg_restrict
動きました.
$ id | grep -o adm
$ echo hello | sudo tee /dev/kmsg
hello
[  562.152729] hello
$ dmesg -H | tail
[  +0.019933] brcmfmac mmc1:0001:1: firmware: failed to load brcm/brcmfmac43430-sdio.clm_blob (-2)
[  +0.020182] firmware_class: See https://wiki.debian.org/Firmware for information about missing firmware
[  +0.020886] brcmfmac mmc1:0001:1: Direct firmware load for brcm/brcmfmac43430-sdio.clm_blob failed with error -2
[  +0.021916] brcmfmac: brcmf_c_process_clm_blob: no clm_blob available (err=-2), device may have limited channels available
[  +0.026818] brcmfmac: brcmf_c_preinit_dcmds: Firmware: BCM43430/1 wl0: Oct 23 2017 03:55:53 version 7.45.98.38 (r674442 CY) FWID 01-e58d219f
[  +0.077925] systemd-udevd[376]: link_config: autonegotiation is unset or enabled, the speed and duplex are not writable.
[  +0.537137] EXT4-fs (sda2): re-mounted. Opts: (null)
[  +2.001639] smsc95xx 1-1.1:1.0 eth0: hardware isn't capable of remote wakeup
[  +1.563625] smsc95xx 1-1.1:1.0 eth0: link up, 100Mbps, full-duplex, lpa 0xCDE1
[Mar 2 05:58] hello
再起動すると元に戻ってしまうので,/etc/sysctl.d/local.conf などに設定を書いてくと次回起動時以降も反映されます.
$ sudo install -m 644 -o root -g root /dev/null /etc/sysctl.d/local.conf
$ echo 'kernel.dmesg_restrict = 0' | sudo tee -a /etc/sysctl.d/local.conf
kernel.dmesg_restrict = 0
試した環境
$ dmesg --version
dmesg from util-linux 2.33.1
$ dpkg-query -W util-linux linux-image-*
linux-image-4.19.0-2-arm64      4.19.16-1
linux-image-4.19.0-2-arm64-unsigned
linux-image-arm64       4.19+102
util-linux      2.33.1-0.1
$ lsb_release -dr
Description:    Debian GNU/Linux buster/sid
Release:        testing
$ uname -a
Linux rpi3 4.19.0-2-arm64 #1 SMP Debian 4.19.16-1 (2019-01-17) aarch64 GNU/Linux
$ cat /proc/device-tree/model ;echo
Raspberry Pi 3 Model B Rev 1.2
Raspberry Pi 3 Model B の USB起動で Debian buster arm64 を動かす
最近入手した(遅) RaspberryPi 3 model B で USB メモリ起動の Debian buster aarch64 を設定してみたときのメモです.
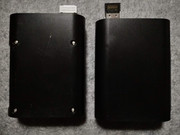
ジモティー経由で Raspberry Pi 3 model B を入手しました.Raspberry Pi 3 model B + USB Wi-Fi + USB Bluetooth + ケースのセットが2,500円 + 送料手数料 500円と安いです.普通に新品で買うと 8,000円近くすると思います.今この記事を書いている時点で未だ在庫はあるようなので興味のある人は買うといいかもしれません.(6個同梱可能なのでそれだと1個あたりが少し安くなるので近所の友達と買うといいかも)
64bitになった Raspberry Pi は欲しいと思っていたので安く手に入って助かりました :)
(後継の Raspberry Pi 3 Model B+/A+ や,SoCが 3B と同じで無線機能のない 2B v1.2 とかも欲しいですね.)
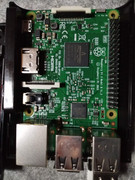
Raspberry Pi 3 model B は 32bitだけでなく64bit も利用できるハードウェアです.せっかくなので 64bitで動かしたいけど今の時点では Raspbian は 32bitのみです.そこで Debian の arm64 を試すことにしました.
Raspberry Pi 3 用 Debian buster arm64 イメージの入手とUSBメモリへの書き込み
イメージは岩松さんの東京エリアDebian勉強会の資料を真似して作ろうと思っていたのですが,
DebianWiki の RaspberryPi3 の項目を見たら非公式だけどイメージがあったので今回はそれを利用しました.現在 testing の Buster のイメージが入手できます.
ストレージは通常 microSD を利用しますが,手持ちがないのと Raspberry Pi 3 B はUSB起動が可能なはずなのでUSBメモリを利用することにしました.USB 2.0接続の容量2GBのものを用意しました.
このような感じでイメージを入手してハッシュのチェックをした後USBメモリへ書き込みました.ここでは Linuxのddコマンドで書き込んでいますが,Etcherなどを利用すると色々な環境でGUIでの書き込みが可能です.
※イメージは最新のものを利用するようにしましょう.
$ wget -c https://people.debian.org/~gwolf/raspberrypi3/20190206/20190206-raspberry-pi-3-buster-PREVIEW.img.xz https://people.debian.org/~gwolf/raspberrypi3/20190206/20190206-raspberry-pi-3-buster-PREVIEW.img.xz.sha256
$ sha256sum -c ./20190206-raspberry-pi-3-buster-PREVIEW.img.xz.sha256
20190206-raspberry-pi-3-buster-PREVIEW.img.xz: 完了
$ xzcat 20190206-raspberry-pi-3-buster-PREVIEW.img.xz | pv | sudo dd of=/dev/sdb bs=1M oflag=dsync
- balenaEtcher – Home
- ブータブルUSBメモリを作るEtcherを試す – matoken’s meme
- マルチUSB書き込みツールのPopsicle – matoken’s meme
- ブートUSBメモリなどを作るmkusbを試してみる – matoken’s meme
- Linux 環境での Raspberry Pi 向け OS 書き込みTips – matoken’s meme
USBから起動できるようOTPを設定する
注意:OTPの設定は1度しか出来ないし,元に戻すことも出来ないと思われます.起動時間が長くなるなどデメリットもあるので気をつけて設定してください.
このUSBメモリを Raspberry Pi に接続して電源を入れてみましたが起動しません.恐らく OTP(One Time Programmable)メモリの設定が USB起動に対応していないので以下のページを参考に設定します.(Raspberry Pi 3+ シリーズは標準でUSB起動可能なのでこの設定は不要なはずです.)
先ず Raspbian 2017-04-10 以降のイメージを書き込んだ microSD を用意して起動します.
( uart経由で繋ぎたい場合起動前に /boot/config.txt に enable_uart=1 を書いておきます. $ echo enable_uart=1 | tee -a /media/matoken/boot/config.txt )
OTP を確認するとやはり有効になっていませんでした.
pi@raspberrypi:~$ vcgencmd otp_dump | grep ^17:
17:1020000a
以下のように /boot/config.txt に program_usb_boot_mode=1 を追記して再起動すると反映されます.
$ echo program_usb_boot_mode=1 | sudo tee -a /boot/config.txt
program_usb_boot_mode=1
pi@raspberrypi:~$ sudo reboot
17 が 3020000a に変わればOK
pi@raspberrypi:~$ vcgencmd otp_dump | grep ^17:
17:3020000a
詳細は以下を参照してください
17 – bootmode register

Bit 1: sets the oscillator frequency to 19.2MHz
Bit 3: enables pull ups on the SDIO pins
Bit 19: enables GPIO bootmode
Bit 20: sets the bank to check for GPIO bootmode
Bit 21: enables booting from SD card
Bit 22: sets the bank to boot from
Bit 28: enables USB device booting
Bit 29: enables USB host booting (ethernet and mass storage)
設定前が,1020000a -> 0b010000001000000000000000001010 で設定後が,0x3020000a -> 0b110000001000000000000000001010 てことで,Bit 29 が 0 から 1 になってネットワーク起動とUSB起動を試すようにります.この状態で microSD 起動を試すとこれも大丈夫でした.(優先度は microSD > USB,Networkは未確認)
USBメモリからの起動
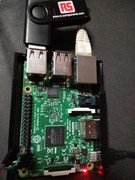
この状態で shutdown し,microSD を取り出して Debian の導入した USB メモリを接続して起動で起動しました.(USB起動の場合なかなか起動が始まらず焦ったけど30秒ほど待つとUARTにログが出はじめる.HDMIの出力は未確認)
login は root:raspberry
ちゃんと 64bit です :)
root@rpi3:~# uname -a
Linux rpi3 4.19.0-2-arm64 #1 SMP Debian 4.19.16-1 (2019-01-17) aarch64 GNU/Linux
細々とした設定(ほぼ余録)
パッケージの更新
root@rpi3:~# apt update && apt upgrade
一般ユーザの追加
root@rpi3:~# useradd -m matoken
root@rpi3:~# passwd matoken
Enter new UNIX password:
Retype new UNIX password:
passwd: password updated successfully
root@rpi3:~# chsh matoken -s /bin/bash
OpenSSH の設定変更
root@rpi3:~# diff -u /etc/ssh/sshd_config.old /etc/ssh/sshd_config
--- /etc/ssh/sshd_config.old    2019-02-06 15:15:46.940904823 +0000
+++ /etc/ssh/sshd_config        2019-02-16 13:17:17.076873278 +0000
@@ -29,7 +29,7 @@
 # Authentication:

 #LoginGraceTime 2m
-PermitRootLogin yes
+PermitRootLogin prohibit-password
 #StrictModes yes
 #MaxAuthTries 6
 #MaxSessions 10
@@ -53,7 +53,7 @@
 #IgnoreRhosts yes

 # To disable tunneled clear text passwords, change to no here!
-#PasswordAuthentication yes
+PasswordAuthentication no
 #PermitEmptyPasswords no

 # Change to yes to enable challenge-response passwords (beware issues with
@@ -119,3 +119,5 @@
 #      AllowTcpForwarding no
 #      PermitTTY no
 #      ForceCommand cvs server
+
+AllowGroups sshusers
sshusers グループを作成して ssh login 出来るユーザを登録
root@rpi3:~# sudo groupadd sshusers
root@rpi3:~# sudo usermod -a -G sshusers matoken
短いmodulus を削除する
root@rpi3:~# awk '$5>=3071' /etc/ssh/moduli | tee /etc/ssh/moduli.tmp
root@rpi3:~# wc -l /etc/ssh/moduli /etc/ssh/moduli.tmp
    427 /etc/ssh/moduli
    368 /etc/ssh/moduli.tmp
    795 total
root@rpi3:~# sudo mv /etc/ssh/moduli.tmp /etc/ssh/moduli
hostpcからssh公開鍵をcpしておく
$ ssh-copy-id -i ~/.ssh/id_ed25519_pi.pub matoken@rpi3
ssh鍵ペアを作っておく
root@rpi3:~# sudo -u matoken ssh-keygen -t ed25519
sshd の再起動
root@rpi3:~# systemctl restart ssh
ssh login時に通知を飛ばすようにしておく
root@rpi3:~# vi /etc/ssh/sshrc
root@rpi3:~# chmod +x /etc/ssh/sshrc
root@rpi3:~# cat /etc/ssh/sshrc
#!/bin/sh

/home/matoken/bin/telegram.sh sshrc:${USER}@`hostname`:${SSH_CONNECTION}
/home/matoken/bin/sms.sh sshrc:${USER}@`hostname`:${SSH_CONNECTION}
ssh でパスワードログインできず,鍵認証でログインが出来る&通知が飛ぶのを確認
root@rpi3:~# ssh root@localhost -o PasswordAuthentication=yes
root@rpi3:~# ssh matoken@localhost -o PasswordAuthentication=yes
root@rpi3:~# ssh matoken@localhost -i ~/.ssh/id_ed25519
自分のネットワークに合わせて /etc/iptables/rules.v4, /etc/iptables/rules.v6 を変更.
root@rpi3:~# grep -v ^# /etc/iptables/rules.v4
*filter
:INPUT ACCEPT [0:0]
:FORWARD ACCEPT [0:0]
:OUTPUT ACCEPT [0:0]
-A INPUT -s 127.0.0.0/8 -m comment --comment "RFC3330 loopback" -j ACCEPT
-A INPUT -s 192.168.1.0/24 -m comment --comment "RFC1918 reserved" -j ACCEPT
-A INPUT -p tcp -m tcp --dport 22 -m comment --comment SSH -j REJECT --reject-with icmp-port-unreachable
COMMIT
root@rpi3:~# grep -v ^# /etc/iptables/rules.v6
*filter
:INPUT ACCEPT [0:0]
:FORWARD ACCEPT [0:0]
:OUTPUT ACCEPT [0:0]
-A INPUT -s ::1/128 -m comment --comment "RFC3513 loopback" -j ACCEPT
-A INPUT -p tcp -m tcp --dport 22 -m comment --comment SSH -j REJECT --reject-with icmp6-port-unreachable
COMMIT
sudo を導入して設定
root@rpi3:~# apt install sudo
sudo groupにユーザを登録
root@rpi3:~# usermod -a -G sudo matoken
sudo が利用できるのを確認
matoken@rpi3:~$ sudo grep ^root: /etc/shadow
sudo: unable to resolve host rpi3: Name or service not known
root:!..VyaTFxP8kT6:17933:0:99999:7:::
rootユーザをロック
$ sudo passwd -l root
sudo: unable to resolve host rpi3: Name or service not known
passwd: password expiry information changed.
matoken@rpi3:~$ sudo passwd -S root
sudo: unable to resolve host rpi3: Name or service not known
root L 02/06/2019 0 99999 7 -1
sudo時などに「sudo: unable to resolve host rpi3: Name or service not known」と言われるので hosts の localhost に rpi3 を追加
matoken@rpi3:~$ sudo vi /etc/hosts
127.0.0.1 localhost rpi3
ここで再起動すると rootfs が見つからないと言われ起動しない.
(initramfs) Gave up waiting for root file system device. Common problems:
- Boot args (cat /proc/cmdline)
- Check rootdelay= (did the system wait long enough?)
- Missing modules (cat /proc/modules; ls /dev)
ALERT! /dev/mmcblk0p2 does not exist. Dropping to a shell!


BusyBox v1.27.2 (Debian 1:1.27.2-3) built-in shell (ash)
Enter 'help' for a list of built-in commands.
cmdline では /dev/mmcblkp2 から起動しようとしているが, /dev/sda2 から起動したい
(initramfs) ls /dev
block tty12 tty47
bsg tty13 tty48
bus tty14 tty49
char tty15 tty5
console tty16 tty50
core tty17 tty51
cpu_dma_latency tty18 tty52
disk tty19 tty53
fb0 tty2 tty54
fd tty20 tty55
full tty21 tty56
gpiochip0 tty22 tty57
gpiochip1 tty23 tty58
input tty24 tty59
kmsg tty25 tty6
kvm tty26 tty60
mem tty27 tty61
memory_bandwidth tty28 tty62
network_latency tty29 tty63
network_throughput tty3 tty7
null tty30 tty8
port tty31 tty9
psaux tty32 ttyAMA0
ptmx tty33 ttyS0
pts tty34 ttyS1
random tty35 ttyS2
sda tty36 ttyS3
sda1 tty37 urandom
sda2 tty38 vcs
snapshot tty39 vcs1
stderr tty4 vcsa
stdin tty40 vcsa1
stdout tty41 vcsu
tty tty42 vcsu1
tty0 tty43 vga_arbiter
tty1 tty44 zero
tty10 tty45
tty11 tty46
(initramfs) cat /proc/cmdline
bcm2708_fb.fbwidth=656 bcm2708_fb.fbheight=416 bcm2708_fb.fbswap=1 dma.dmachans=0x7f35 bcm2709.boardrev=0xa02082 bcm2709.serial=0xfaf144 bcm2709.uart_clock=48000000 smsc95xx.macaddr=B8:27:EB:FA:F1:44 vc_mem.mem_base=0x3ec00000 vc_mem.mem_size=0x40000000 console=tty0 console=ttyS1,115200 root=/dev/mmcblk0p2 rw elevator=deadline fsck.repair=yes net.ifnames=0 cma=64M rootwait
/boot を mount して書き換えようと思ったけどうまく mount 出来ない?
(initramfs) mkdir /tmp/boot
(initramfs) mount /dev/sda1 /tmp/boot
mount: mounting /dev/sda1 on /tmp/boot failed: Invalid argument
(initramfs) ls -la /dev/sda1 /tmp/boot
brw-------    1 0        0           8,   1 Jan  1 00:00 /dev/sda1

/tmp/boot:
total 0
drwxr-xr-x    2 0        0                0 Jan  1 00:10 .
drwxr-xr-x    3 0        0                0 Jan  1 00:10 ..
(initramfs) mount -t vfat /dev/sda1 /tmp/boot
mount: mounting /dev/sda1 on /tmp/boot failed: No such device
(initramfs) mkdir /tmp/root
(initramfs) modprobe ext4
(initramfs) mount /dev/sda2 /tmp/root
[ 2144.515323] EXT4-fs (sda2): mounted filesystem with ordered data mode. Opts: (null)
(initramfs) find /tmp/root -name "vfat.ko"
/tmp/root/usr/lib/modules/4.19.0-2-arm64/kernel/fs/fat/vfat.ko
(initramfs) modprobe -v /tmp/root/usr/lib/modules/4.19.0-2-arm64/kernel/fs/fat/vfat.ko
(initramfs) lsmod|grep fat
(initramfs) mount -t vfat /dev/sda1 /tmp/boot
mount: mounting /dev/sda1 on /tmp/boot failed: No such device
(initramfs) lsmod|grep fat
一旦電源を切って /boot/cmdline.txt の root=/dev/mmcblk0p2 を root=/dev/sda2 に書き換えて起動するようになった.(LABEL指定に変えたほうがいいかな)
$ cat /boot/firmware/cmdline.txt
console=tty0 console=ttyS1,115200 root=/dev/sda2 rw elevator=deadline fsck.repair=yes net.ifnames=0 cma=64M rootwait
※raspi3-firmware あたりのアップデートが掛かると上書きされるよう.
- Revert “Fix the cmdline.txt options to boot by label, not by partition” by chschlue · Pull Request #33 · Debian/raspi3-image-spec
- #903543 – raspi3-firmware: add configuration options for cmdline.txt – Debian Bug report logs
systemd から sysvinit に変更(RAMが開くかと思ったけど数MB程度だった)
$ sudo apt install sysvinit-core sysvinit-utils
LANGを設定
en_US.UTF-8 UTF-8, ja_JP.UTF-8 UTF-8 を有効にして,デフォルトロケールを ja_JP.UTF-8 にしたりした.
$ sudo dpkg-reconfigure locales
$ echo 'export LANG="ja_JP.UTF-8"
export LC_TIME="en_US.UTF-8"' | tee -a ~/.profile
$ source ~/.profile
$ locale
LANG=ja_JP.UTF-8
LANGUAGE=
LC_CTYPE="ja_JP.UTF-8"
LC_NUMERIC="ja_JP.UTF-8"
LC_TIME=en_US.UTF-8
LC_COLLATE="ja_JP.UTF-8"
LC_MONETARY="ja_JP.UTF-8"
LC_MESSAGES="ja_JP.UTF-8"
LC_PAPER="ja_JP.UTF-8"
LC_NAME="ja_JP.UTF-8"
LC_ADDRESS="ja_JP.UTF-8"
LC_TELEPHONE="ja_JP.UTF-8"
LC_MEASUREMENT="ja_JP.UTF-8"
LC_IDENTIFICATION="ja_JP.UTF-8"
LC_ALL=
Raspberry Pi には rtc がなくて再起動などで時計が初期化されてしまうので fake-hwclock を導入(電源断時などの時間はカウントされないので時間がずれるが時計が巻き戻らない)
$ sudo apt install fake-hwclock
ntpdate を導入して起動時の時計合わせをするようにする(systemdのままだとntpの面倒を見てくれるので必要ない)
$ sudo apt install ntpdate
$ sudo vi /etc/boot.d/ntpdate
$ cat /etc/boot.d/ntpdate
#!/bin/sh

ntpdate 1.jp.pool.ntp.org
$ sudo chmod +x /etc/boot.d/ntpdate
ntpdate iptables に合わせてこっちのほうがいいかも?(有線接続後に時計合わせする)
$ cat /etc/network/interfaces.d/eth0
auto eth0

# TODO: switch back to iptables-persistent once it re-enters testing
iface eth0 inet dhcp
        pre-up iptables-restore < /etc/iptables/rules.v4
        pre-up ip6tables-restore < /etc/iptables/rules.v6
        up ntpdate 1.jp.pool.ntp.org
uartでsetial接続するために /etc/inittab に以下を設定(systemdだと設定済みなので不要)
T1:23:respawn:/sbin/getty -L ttyS1 115200 vt100
msmtpを導入してメールを飛ばせるように
$ sudo apt install msmtp
$ sudo vi /etc/msmtprc
$ grep -v ^# /etc/msmtprc|uniq
defaults
syslog on
aliases /etc/aliases

tls on
tls_trust_file /etc/ssl/certs/ca-certificates.crt
auth on
syslog LOG_MAIL

account gmail
host smtp.gmail.com
port 587
from matohara@gmail.com
user matohara
password throjfeekdewxeib

account default : gmail
$ sudo vi /etc/aliases
$ grep -v ^# /etc/aliases
mailer-daemon:hoge@example.com
postmaster:hoge@example.com
nobody:hoge@example.com
hostmaster:hoge@example.com
usenet:hoge@example.com
news:hoge@example.com
webmaster:hoge@example.com
www:hoge@example.com
ftp:hoge@example.com
abuse:hoge@example.com
noc:hoge@example.com
security:hoge@example.com
root: hoge@example.com
default: hoge@example.com
$ echo 'hello' | msmtp matoken@ya.ru
$ sudo apt install msmtp-mta
$ echo 'hello' | /usr/sbin/sendmail matoken@ya.ru
無線を無効にするために /boot/firmware/config.txt に以下を追記……再起動しても反映されない?要確認
dtoverlay=pi3-disable-wifi
dtoverlay=pi3-disable-bt
apticron を導入して更新をメールで通知する
$ sudo apt install apticron
$ sudo cp -p /usr/lib/apticron/apticron.conf /etc/apticron/
$ grep ^EMAIL= /etc/apticron/apticron.conf #必要なら宛先を書き換えたり
EMAIL="root"
deborphan でみなしごパッケージを通知するようにする
$ sudo apt install deborphan
$ sudo crontab -e
$ sudo crontab -l | grep deborphan | grep -v ^#
7 4 * * *       deborphan && printf "\nsudo apt --autoremove purge $( deborpha)'
てことでとりあえず動くようになったけど昔もらったノベルティのUSBメモリなのでこのまま運用すると多分すぐ壊れてしまうと思います.
最近秋葉原でセールになっている様な安い SSD とか欲しいですね.
こちらは起動終了のUARTのメッセージ

Debian, Ubuntu で 上流のパッケージを借りてくる
以前以下のような記事を書きました.
今でもこのblogの中ではアクセスが多く,最近もトラックバックをもらいました.
この当時は arm64 の mozcパッケージがなくて自分でbuild したという話なのですが,現在はDebian では buster(testing), Ubuntu ではartful(17.10) 以降でパッケージが存在します.
なのでこの野良パッケージを使うよりも公式の上流パッケージを借りるほうが大抵の場合いいと思います.
ということで手順を書いておきます.
パッケージファイルだけが必要な場合はパッケージのページからダウンロード可能です.
野良パッケージは近日中に削除します.
Debian stretch arm64 に Debian buster arm64 の mozc を借りてくる
Debian stretch arm64 では mozc-data しかない
$ apt-cache search mozc
mozc-data - Mozc input method - data files
buster(testing) のmozc を借りてくることにする.
/etc/apt/preferences で buster の優先度を下げる
/etc/apt/preferences
Package: *
Pin: release n=buster
Pin-Priority: 100
/etc/apt/sources.list に
buster(testing) を 追加 設定deb http://deb.debian.org/debian buster main
※sources.list の編集には apt edit-sources を使うと文法チェックをしてくれるのでおすすめ
パッケージ情報の更新
$ sudo apt update
mozcパッケージの確認
$ apt-cache search mozc
mozc-data - Mozc input method - data files
fcitx-dbus-status - Addon for Fcitx to set/get/monitor IM statuses via D-Bus
emacs-mozc - Mozc for Emacs
emacs-mozc-bin - Helper module for emacs-mozc
fcitx-mozc - Mozc engine for fcitx - Client of the Mozc input method
ibus-mozc - Mozc engine for IBus - Client of the Mozc input method
mozc-server - Server of the Mozc input method
mozc-utils-gui - GUI utilities of the Mozc input method
uim-mozc - Mozc engine for uim - Client of the Mozc input method
パッケージの導入
$ apt install fcitx-mozc -t buster
後は通常の apt update && apt upgrade で stretch で導入したパッケージは stretch で,buster で導入したパッケージはbuster で更新されるはず.
Ubuntu 16.04 LTS xenial arm64 に Ubuntu 18.04 LTS bionic arm64 の mozc を借りてくる
Debianの手順と同じでもokだと思うけど念の為以下の手順を真似してみる.
mozc は Ubuntu 17.10 artful から対応しているが,もうサポートされないのでUbuntu 18.04 bionic を使う.
標準のリリースを xenial に設定
/etc/apt/apt.conf.d/01ubuntu
APT::Default-Release "xenial";
mozc をpinningする
/etc/apt/preferences
Package: *mozc*
Pin: release n=xenial
Pin-Priority: -10

Package: *mozc*
Pin: release n=bionic
Pin-Priority: 900
/etc/apt/sources.list に buster(testing) を 追加 設定
/etc/apt/sources.list
deb http://ports.ubuntu.com/ bionic main universe
※sources.list の編集には apt edit-sources を使うと文法チェックをしてくれるのでおすすめ
※mirrorにより arm64 が置かれていないので注意
パッケージ情報の更新
$ sudo apt update
検索結果にmozcが出てくる
$ apt-cache search mozc
mozc-data - Mozc input method - data files
ibus-mozc - Mozc engine for IBus - Client of the Mozc input method
mozc-server - Server of the Mozc input method
mozc-utils-gui - GUI utilities of the Mozc input method
emacs-mozc - Mozc for Emacs
emacs-mozc-bin - Helper module for emacs-mozc
fcitx-mozc - Mozc engine for fcitx - Client of the Mozc input method
uim-mozc - Mozc engine for uim - Client of the Mozc input method
パッケージの導入
$ sudo apt install fcitx-mozc -t bionic
Debianでもarm64でmozc build
EDIT: 現在は次の記事の手順のほうが良いと思います -> Debian, Ubuntu で 上流のパッケージを借りてくる – matoken’s meme
先日Ubuntu 16.04 arm64環境でmozc pkgを作りました.
今回はDebian stretch arm64でも作ってみました.
環境はQualcomの96BoardのDragonBoard 410cにDebian stretch aarch64のイメージ(dragonboard410c_sdcard_install_debian-233.zip)を使いました.
OSイメージの入手や導入方法などは以下のあたりにあります.
- DragonBoard™ 410 Getting Started Guide (README.md)
- DragonBoard™ 410 Getting Started Guide (Debian.md)
- DragonBoard™ 410 Getting Started Guide (LinuxSD.md)
手元では以下のような感じでsd cardに書き込んだ後dipスイッチでsd起動にして起動してeMMCに導入しました.
$ md5sum dragonboard410c_sdcard_install_debian-233.zip
ef17a1602cf0ef300e123a3224e0699d  dragonboard410c_sdcard_install_debian-233.zip
$ unzip -l dragonboard410c_sdcard_install_debian-233.zip
Archive:  dragonboard410c_sdcard_install_debian-233.zip
  Length      Date    Time    Name
---------  ---------- -----   ----
4055891968  2017-05-11 05:25   db410c_sd_install_debian.img
    13953  2017-05-04 21:45   LICENSE
---------                     -------
4055905921                     2 files
$ unzip -p dragonboard410c_sdcard_install_debian-233.zip LICENSE | lv
$ unzip -p dragonboard410c_sdcard_install_debian-233.zip db410c_sd_install_debian.img | pv | sudo dd of=/dev/mmcblk0 bs=4M
$ sync
$ sync
$ sync
後の手順はほぼ前回のUbuntuと同じですが,
dpkg-buildpackage: error: fakeroot not found, either install the fakeroot
package, specify a command with the -r option, or run this as root
とfakerootが無いと起こられたので導入パッケージにfakerootを追加したのと,
virtual memory exhausted: Cannot allocate memory
という感じでコケたので以下のような感じでスワップファイルを追加して回避しました.前回のUbuntuを入れてる方の機械はRAM2GBなのでRAM1GB+SWAP1GBでも行けると思いますが念の為2GB追加しました.
$ dd if=/dev/zero of=/var/tmp/swap bs=1M count=2048
$ sudo chmod 600 /var/tmp/swap
$ sudo chown 0.0 /var/tmp/swap
$ sudo mkswap /var/tmp/swap
$ sudo swapon /var/tmp/swap
$ free
              total        used        free      shared  buff/cache   available
Mem:         945868      225736      444948       40784      275184      608980
Swap:       2097148           0     2097148
で,パッケージングと導入の手順はこんな感じでした.
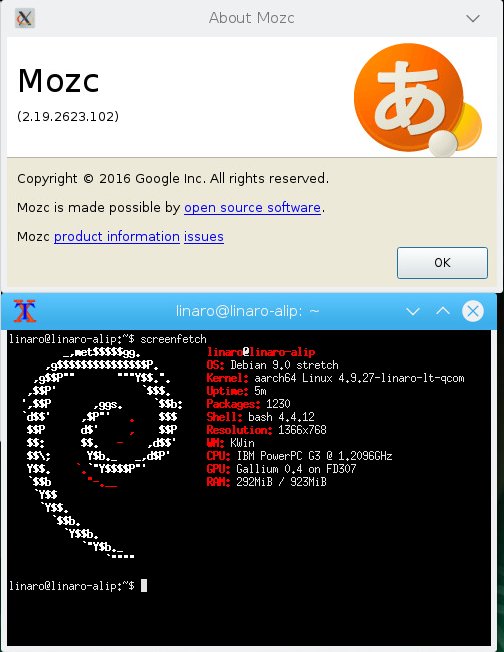
$ sudo apt update
$ sudo apt upgrade
$ sudo apt install build-essential devscripts fakeroot
$ sudo apt build-dep mozc
$ apt source mozc
$ wget https://gist.githubusercontent.com/matoken/afce66ce67392c11d3ed20d7bbab5833/raw/2bb0163f30291caa6ba7b41b3d4352c7e6c0b6a7/patch
$ patch -p0 < patch
$ cd mozc-2.19.2623.102+dfsg
$ time dpkg-buildpackage -us -uc -j4
   :
real    111m31.882s
user    88m2.352s
sys     10m59.828s
$ dch -i
$ head debian/changelog
mozc (2.19.2623.102+dfsg-1.1) unstable; urgency=medium

  * Non-maintainer upload.
  * Update debian/control.
    - Add arm64 to Architecture list.

 -- K.I.Matohara <matoken@gmail.com>  Sat, 03 Jun 2017 22:15:19 +0000

mozc (2.19.2623.102+dfsg-1) unstable; urgency=medium

$ dpkg-buildpackage -j4
$ ls -la ../*dfsg-1.1_*
-rw-r--r-- 1 linaro linaro  2130510 Jun  4 01:10 ../emacs-mozc-bin-dbgsym_2.19.2623.102+dfsg-1.1_arm64.deb
-rw-r--r-- 1 linaro linaro   157710 Jun  4 01:10 ../emacs-mozc-bin_2.19.2623.102+dfsg-1.1_arm64.deb
-rw-r--r-- 1 linaro linaro    28118 Jun  4 01:10 ../emacs-mozc_2.19.2623.102+dfsg-1.1_arm64.deb
-rw-r--r-- 1 linaro linaro  2765446 Jun  4 01:10 ../fcitx-mozc-dbgsym_2.19.2623.102+dfsg-1.1_arm64.deb
-rw-r--r-- 1 linaro linaro   224574 Jun  4 01:10 ../fcitx-mozc_2.19.2623.102+dfsg-1.1_arm64.deb
-rw-r--r-- 1 linaro linaro  3088148 Jun  4 01:10 ../ibus-mozc-dbgsym_2.19.2623.102+dfsg-1.1_arm64.deb
-rw-r--r-- 1 linaro linaro   189886 Jun  4 01:10 ../ibus-mozc_2.19.2623.102+dfsg-1.1_arm64.deb
-rw-r--r-- 1 linaro linaro    14134 Jun  4 01:10 ../mozc-data_2.19.2623.102+dfsg-1.1_all.deb
-rw-r--r-- 1 linaro linaro 24825020 Jun  4 01:11 ../mozc-server-dbgsym_2.19.2623.102+dfsg-1.1_arm64.deb
-rw-r--r-- 1 linaro linaro 12310852 Jun  4 01:11 ../mozc-server_2.19.2623.102+dfsg-1.1_arm64.deb
-rw-r--r-- 1 linaro linaro  9823936 Jun  4 01:11 ../mozc-utils-gui-dbgsym_2.19.2623.102+dfsg-1.1_arm64.deb
-rw-r--r-- 1 linaro linaro   755758 Jun  4 01:11 ../mozc-utils-gui_2.19.2623.102+dfsg-1.1_arm64.deb
-rw-r--r-- 1 linaro linaro    18228 Jun  4 04:00 ../mozc_2.19.2623.102+dfsg-1.1_arm64.buildinfo
-rw-r--r-- 1 linaro linaro     6898 Jun  4 04:00 ../mozc_2.19.2623.102+dfsg-1.1_arm64.changes
-rw-r--r-- 1 linaro linaro  1921396 Jun  4 01:10 ../uim-mozc-dbgsym_2.19.2623.102+dfsg-1.1_arm64.deb
-rw-r--r-- 1 linaro linaro   192712 Jun  4 01:10 ../uim-mozc_2.19.2623.102+dfsg-1.1_arm64.deb
$ sudo apt install ../mozc-server_2.19.2623.102+dfsg-1.1_arm64.deb ../fcitx-mozc_2.19.2623.102+dfsg-1.1_arm64.deb ../mozc-data_2.19.2623.102+dfsg-1.1_all.deb ../mozc-utils-gui_2.19.2623.102+dfsg-1.1_arm64.deb
$ sudo apt install fcitx-ui-classic
これも一応この辺に置いておきました.多分そのうち消します.(Versionが上がった頃?)
これでとりあえず手元のUbuntu/Debianで利用できるようになりましたが,mozcのバージョンアップ毎にbuildが必要です.なのでBTS予定.あとクロスで試すのとMultiarchも試してみたいです.
参考URL
Raspberry PiのFreedomBoxで/var/lib/dpkg/statusが壊れたのを復旧
Raspberry PiでFreedomBoxを試しているのですが,ストレージがmicroSDのせいか修正していたパッケージの依存関係か何かがおかしくなったせいか/var/lib/dpkg/statusが壊れてしまいました.
$ sudo apt update
Hit:1 http://cdn-fastly.deb.debian.org/debian testing InRelease
Reading package lists... Error!
E: Unable to parse package file /var/lib/dpkg/status (1)
W: You may want to run apt-get update to correct these problems
E: The package cache file is corrupted
E: パッケージファイル /var/lib/dpkg/status を解釈することができません (1)
W: これらの問題を解決するためには apt-get update を実行する必要があるかもしれません
E: パッケージキャッシュファイルが壊れています
apt-get updateで治るのかなと思って叩いてみましたが駄目でした.
Debian リファレンスの第2章 Debian パッケージ管理によると,
2.6.5. パッケージセレクションの復元
もし何らかの理由で “/var/lib/dpkg/status” の内容が腐った場合には、Debian システムはパッケージ選択データーが失われ大きな打撃を被ります。古い “/var/lib/dpkg/status” ファイルは、”/var/lib/dpkg/status-old” や “/var/backups/dpkg.status.*” としてあるので探します。
“/var/backups/” は多くの重要な情報を保持しているので、これを別のパーティション上に置くのも良い考えです。
とのことなので,/var/lib/dpkg/status-oldから復旧をと思いましたがこれも既に壊れているバージョン./var/backups/dpkg.status.0はまだ壊れていなかったのでこれで上書きして復旧したようです.
$ sudo cp /var/backups/dpkg.status.0 /var/lib/dpkg/status
ディスクイメージのデバイスマップが簡単に作れるkpartxを試す
以下のページでkpartxというディスクのデバイスマップを作るコマンドがあるのを知りました
そこでまず、kpartxを使って各パーティションのデバイスマップを作ります。
$ sudo /sbin/kpartx -av /opt/atde3-20100309.img
add map loop2p1 : 0 497952 linear /dev/loop2 63
add map loop2p2 : 0 33045705 linear /dev/loop2 498015
$ ls /dev/mapper/
control loop2p1 loop2p2
これでディスクイメージの各物理パーティションに対応したデバイスマップができました。fdiskで見えていたパーティションはそれぞれ、/dev/mapper/loop2p1 /dev/mapper/loop2p2 として参照できるようになっています。
これまでは以下のページのようにfdiskコマンドでパーティション情報を確認してmount時にoffsetを指定していました.
kpartxを使うとこの作業が簡単になりそうなので試してみました.
Debian sid amd64ではそのままkpartxパッケージだったのでこれを導入します.(Ubuntu 17.04 amd64でも同様でした.)
$ sudo apt install kpartx
丁度Raspbian jessie 2017-04-10が出たのでこれで試してみます.
$ unzip -l 2017-04-10-raspbian-jessie-lite.zip
Archive:  2017-04-10-raspbian-jessie-lite.zip
  Length      Date    Time    Name
---------  ---------- -----   ----
1297862656  2017-04-10 18:58   2017-04-10-raspbian-jessie-lite.img
---------                     -------
1297862656                     1 file
$ time unzip 2017-04-10-raspbian-jessie-lite.zip
Archive:  2017-04-10-raspbian-jessie-lite.zip
  inflating: 2017-04-10-raspbian-jessie-lite.img

real    2m58.438s
user    0m27.512s
sys     0m2.132s
 sudo /sbin/kpartx -av 2017-04-10-raspbian-jessie-lite.img
add map loop0p1 (254:3): 0 83968 linear 7:0 8192
add map loop0p2 (254:4): 0 2442728 linear 7:0 92160
$ ls -lA /dev/mapper/
合計 0
crw------- 1 root root 10, 236  4月 11 23:37 control
lrwxrwxrwx 1 root root       7  4月 12 06:07 loop0p1 -> ../dm-3
lrwxrwxrwx 1 root root       7  4月 12 06:07 loop0p2 -> ../dm-4
lrwxrwxrwx 1 root root       7  4月 11 23:37 sda3_crypt -> ../dm-0
lrwxrwxrwx 1 root root       7  4月 11 23:37 x220--vg-root -> ../dm-1
lrwxrwxrwx 1 root root       7  4月 11 23:37 x220--vg-swap_1 -> ../dm-2
デバイスマッピングされています.これで簡単にmount出来ました.
$ sudo mount -o ro /dev/mapper/loop0p1 /media/mk/pi-boot
$ sudo mount -o ro /dev/mapper/loop0p2 /media/mk/pi-root/
$ mount | grep /dev/mapper/loop0p
/dev/mapper/loop0p1 on /media/mk/pi-boot type vfat (ro,relatime,fmask=0022,dmask=0022,codepage=437,iocharset=ascii,shortname=mixed,utf8,errors=remount-ro)
/dev/mapper/loop0p2 on /media/mk/pi-root type ext4 (ro,relatime,data=ordered)
$ ls /media/mk/pi-boot
COPYING.linux     bcm2708-rpi-0-w.dtb     bcm2708-rpi-cm.dtb   bcm2710-rpi-cm3.dtb  config.txt    fixup_db.dat  kernel.img   start.elf     start_x.elf
LICENCE.broadcom  bcm2708-rpi-b-plus.dtb  bcm2709-rpi-2-b.dtb  bootcode.bin         fixup.dat     fixup_x.dat   kernel7.img  start_cd.elf
LICENSE.oracle    bcm2708-rpi-b.dtb       bcm2710-rpi-3-b.dtb  cmdline.txt          fixup_cd.dat  issue.txt     overlays     start_db.elf
$ ls /media/mk/pi-root
bin  boot  dev  etc  home  lib  lost+found  media  mnt  opt  proc  root  run  sbin  srv  sys  tmp  usr  var
そしてchrootしてみたり
$ sudo mount -o remount,rw /media/mk/pi-root
$ sudo cp -p /usr/bin/qemu-arm-static /media/mk/pi-root/usr/bin
$ sudo chroot /media/mk/pi-root/ /bin/bash
# dpkg --get-selections "*" | wc -l
427
アンマウントして元に戻します.
# exit
$ sudo umount /media/mk/pi-*
$ sudo kpartx -d /dev/mapper/loop0p1
$ sudo kpartx -d /dev/mapper/loop0p2
$ rm ./2017-04-10-raspbian-jessie-lite.img
便利ですね :)
後は圧縮ファイルをそのまま使えると便利なんですがムリカナ?