DebianのisoイメージをUSBメモリに書き込み

gistに貼ってたものだけどせっかくなのでこちらにも.

ファイルダウンロード

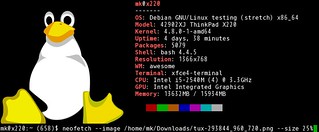
今回はDebian stretch Debian Installer rc2のi386版のnetinst.

  • debian-stretch-DI-rc2-i386-netinst.iso : イメージ本体
  • SHA512SUMS : isoファイルのチェックサムファイル
  • SHA512SUMS.sign : SHA512SUMSの署名ファイル
$ wget http://cdimage.debian.org/cdimage/stretch_di_rc2/i386/iso-cd/debian-stretch-DI-rc2-i386-netinst.iso http://cdimage.debian.org/cdimage/stretch_di_rc2/i386/iso-cd/SHA512SUMS.sign http://cdimage.debian.org/cdimage/stretch_di_rc2/i386/iso-cd/SHA512SUMS

※i386/amd64をよく使う場合はmulti-archを使うと1つのUSBメモリでi386/amd64が利用できて便利

チェックサムファイルの署名確認

チェックサムファイルのSHA512SUMSが正常なものか確認

$ gpg --verify SHA512SUMS.sign
gpg: 署名されたデータが'SHA512SUMS'にあると想定します
gpg: 2017年02月02日 07時45分30秒 JSTに施された署名
gpg:                RSA鍵DA87E80D6294BE9Bを使用
gpg: "Debian CD signing key <debian-cd@lists.debian.org>"からの正しい署名 [不明の]
gpg: *警告*: この鍵は信用できる署名で証明されていません!
gpg:       この署名が所有者のものかどうかの検証手段がありません。
 主鍵フィンガープリント: DF9B 9C49 EAA9 2984 3258  9D76 DA87 E80D 6294 BE9B

公開鍵が見つかりません(public key not found)というエラーの場合はgpg --keyserver keyring.debian.org --recv-keys DA87E80D6294BE9Bで鍵をインポートして再度確認.鍵のIDやフィンガープリントは以下のページでも確認できる

ハッシュ確認

isoファイルが正しくダウンロードされているか確認
以下の例はdebian-stretch-DI-rc2-i386-netinst.isoしかダウンロードしていないのでそれ以外のエラーや警告は無視する

$ sha512sum -c SHA512SUMS
sha512sum: debian-mac-stretch-DI-rc2-i386-netinst.iso: そのようなファイルやディレクトリはありません
debian-mac-stretch-DI-rc2-i386-netinst.iso: FAILED open or read
debian-stretch-DI-rc2-i386-netinst.iso: 完了
sha512sum: debian-stretch-DI-rc2-i386-xfce-CD-1.iso: そのようなファイルやディレクトリはありません
debian-stretch-DI-rc2-i386-xfce-CD-1.iso: FAILED open or read
sha512sum: 警告: 一覧にある 2 個のファイルが読み込めませんでした

usbメモリへの書き込み

USBメモリの確認

書き込み先のデバイスが正しいか確認する
USBメモリ接続直後にdmesgを確認したりfdiskコマンドやマウントして中を確認したり……

$ dmesg
  :
[414356.444121] usb 1-1.2: New USB device found, idVendor=13fe, idProduct=1a00
[414356.444128] usb 1-1.2: New USB device strings: Mfr=0, Product=11, SerialNumber=0
[414356.444131] usb 1-1.2: Product: USB 2.0 HUB
[414362.925178] usb-storage 1-1.2.1:1.0: USB Mass Storage device detected
[414362.925967] scsi host6: usb-storage 1-1.2.1:1.0
[414364.184209] sd 6:0:0:1: [sdb] 980480 512-byte logical blocks: (502 MB/479 MiB)
[414364.187102] sd 6:0:0:1: [sdb] Write Protect is off
[414364.187106] sd 6:0:0:1: [sdb] Mode Sense: 23 00 00 00
[414364.190339] sd 6:0:0:1: [sdb] No Caching mode page found
[414364.190345] sd 6:0:0:1: [sdb] Assuming drive cache: write through
[414364.201730]  sdb: sdb1
[414364.201734] sdb: p1 size 982496 extends beyond EOD, enabling native capacity
[414364.214471]  sdb: sdb1
[414364.214475] sdb: p1 size 982496 extends beyond EOD, truncated
[414364.228961] sd 6:0:0:1: [sdb] Attached SCSI removable disk
$ sudo fdisk -l /dev/sdb
Disk /dev/sdb: 478.8 MiB, 502005760 bytes, 980480 sectors
Units: sectors of 1 * 512 = 512 bytes
Sector size (logical/physical): 512 bytes / 512 bytes
I/O size (minimum/optimal): 512 bytes / 512 bytes
Disklabel type: dos
Disk identifier: 0x00000000

Device     Boot Start    End Sectors   Size Id Type
/dev/sdb1  *       32 982527  982496 479.8M  6 FAT16

USBメモリのアンマウント

USBメモリをマウントしている場合はアンマウントしておく

$ sudo umount /dev/sdb1
$ mount | grep /dev/sdb

パーテイション情報の削除

念の為パーテイション情報を削除しておく

$ sudo wipefs /dev/sdb
offset               type
----------------------------------------------------------------
0x1fe                dos   [partition table]

$ sudo wipefs -a /dev/sdb ; sync
/dev/sdb: 2 bytes were erased at offset 0x000001fe (dos): 55 aa
/dev/sdb: calling ioctl to re-read partition table: 成功です

書き込み

進捗状態を確認したい場合はpvコマンドを間に挟んだり,ddrescue / ddrescueなどが利用できる

$ sudo dd if=./debian-stretch-DI-rc2-i386-netinst.iso of=/dev/sdb bs=4M ; sync
95+1 レコード入力
95+1 レコード出力
401604608 bytes (402 MB, 383 MiB) copied, 176.874 s, 2.3 MB/s

書き込みが終わったらUSBメモリを取り外してターゲットマシンで利用する
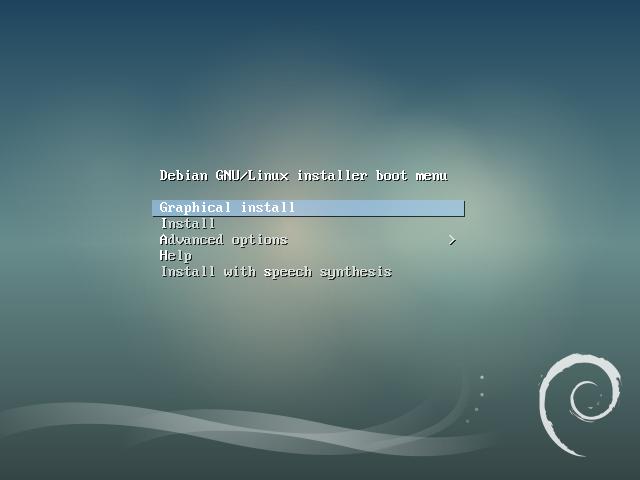
VirtualBoxで起動確認(余録)

手軽に試せるマシンがなかったのでVirtualBoxからUSBメモリを起動して確認した

USBメモリのディスクイメージ作成

直にUSBメモリを指定できないのでUSBメモリへアクセスするためのvmdkイメージを作成

$ sudo VBoxManage internalcommands createrawvmdk -rawdisk /dev/sdb -filename sdb.vmdk 
RAW host disk access VMDK file sdb.vmdk created successfully.
$ sudo cat sdb.vmdk
# Disk DescriptorFile
version=1
CID=1722e641
parentCID=ffffffff
createType="fullDevice"

# Extent description
RW 980480 FLAT "/dev/sdb" 0

# The disk Data Base 
#DDB

ddb.virtualHWVersion = "4"
ddb.adapterType="ide"
ddb.geometry.cylinders="972"
ddb.geometry.heads="16"
ddb.geometry.sectors="63"
ddb.uuid.image="c2c9d560-049f-4c44-bf8a-0b85e820ba12"
ddb.uuid.parent="00000000-0000-0000-0000-000000000000"
ddb.uuid.modification="00000000-0000-0000-0000-000000000000"
ddb.uuid.parentmodification="00000000-0000-0000-0000-000000000000"

USBメモリにアクセス権のあるユーザでVirtualBoxを起動してUSBメモリのイメージを指定して起動

(ここいまいち……)

$ gksudo virtualbox

Screenfetch的な情報表示コマンドのNeofetch

Screenfetch的な情報表示コマンドのNeofetch

よくデスクトップのキャプチャを取得するときに表示されているScreenfetchコマンドというものがあります.システムの情報とアスキーアートを素敵に表示してくれます. これににたものでNetfetchというものを見かけたので試してみました.こちらは画像も扱えるようです.

導入

以下のページに各種環境への導入方法が書かれています.

Debian sid/stretchにはパッケージがあるようなことが書かれていますが,

Neofetch is in Debian Unstable/Stretch's official repositories.

今はsidのみのようです.

ということでひとまずstretchではこんな感じで導入しました.

$ #-- /etc/apt/sources.list.d/neofetch を作る
$ sudo apt edit-sources neofetch
$ cat /etc/apt/sources.list.d/neofetch.list
deb http://dl.bintray.com/dawidd6/neofetch jessie main
$ #-- 鍵のインポート
$ wget "https://bintray.com/user/downloadSubjectPublicKey?username=bintray" -O Release-neofetch.key
$ gpg Release-neofetch.key
pub   rsa4096 2015-02-17 [SC]
      8756C4F765C9AC3CB6B85D62379CE192D401AB61
uid           Bintray (by JFrog) <bintray@bintray.com>
sub   rsa4096 2015-02-17 [E]
$ sudo apt-key add Release-neofetch.key
$ rm Release-neofetch.key
$ #-- pkg情報更新&pkg導入
$ sudo apt update
$ sudo apt install neofetch

早速実行

$ neofetch --help

    NEOFETCH

    USAGE: neofetch --option "value" --option "value"

    NOTE: There's also a config option for each flag below.

    Info:
    --disable infoname          Allows you to disable an info line from appearing
                                in the output.
                                NOTE: You can supply multiple args. eg.
                                'neofetch --disable cpu gpu disk shell'
                                NOTE: The arguments must all be lowercase.
    --os_arch on/off            Hide/Show OS architecture.
    --speed_type type           Change the type of cpu speed to display.
                                Possible values: current, min, max, bios,
                                scaling_current, scaling_min, scaling_max
                                NOTE: This only support Linux with cpufreq.
    --cpu_shorthand type        Shorten the output of CPU
                                Possible values: name, speed, tiny, on, off
    --cpu_cores type            Whether or not to display the number of CPU cores
                                Takes: logical, physical, off
                                NOTE: 'physical' doesn't work on BSD.
    --cpu_speed on/off          Hide/Show cpu speed.
    --cpu_temp on/off           Hide/Show cpu temperature.
                                NOTE: This only works on Linux and BSD.
                                NOTE: For FreeBSD-based systems, you need to enable coretemp
                                      kernel module.
    --distro_shorthand on/off   Shorten the output of distro (tiny, on, off)
                                NOTE: This option won't work in Windows (Cygwin)
    --kernel_shorthand on/off   Shorten the output of kernel
                                NOTE: This option won't work in BSDs (except PacBSD and PC-BSD)
    --uptime_shorthand on/off   Shorten the output of uptime (tiny, on, off)
    --refresh_rate on/off       Whether to display the refresh rate of each monitor
                                Unsupported on Windows
    --gpu_brand on/off          Enable/Disable GPU brand in output. (AMD/NVIDIA/Intel)
    --gtk_shorthand on/off      Shorten output of gtk theme/icons
    --gtk2 on/off               Enable/Disable gtk2 theme/icons output
    --gtk3 on/off               Enable/Disable gtk3 theme/icons output
    --shell_path on/off         Enable/Disable showing $SHELL path
    --shell_version on/off      Enable/Disable showing $SHELL version
    --ip_host url               Url to query for public IP
    --song_shorthand on/off     Print the Artist/Title on seperate lines
    --birthday_shorthand on/off Shorten the output of birthday
    --birthday_time on/off      Enable/Disable showing the time in birthday output
    --birthday_format format    Format the birthday output. (Uses 'date' cmd format)

    Text Formatting:
    --colors x x x x x x        Changes the text colors in this order:
                                title, @, underline, subtitle, colon, info
    --underline on/off          Enable/Disable the underline.
    --underline_char char       Character to use when underlining title
    --bold on/off               Enable/Disable bold text

    Color Blocks:
    --color_blocks on/off       Enable/Disable the color blocks
    --block_width num           Width of color blocks in spaces
    --block_height num          Height of color blocks in lines
    --block_range start end     Range of colors to print as blocks

    Bars:
    --bar_char 'elapsed char' 'total char'
                                Characters to use when drawing bars.
    --bar_border on/off         Whether or not to surround the bar with '[]'
    --bar_length num            Length in spaces to make the bars.
    --bar_colors num num        Colors to make the bar.
                                Set in this order: elapsed, total
    --cpu_display mode          Bar mode.
                                Takes: bar, infobar, barinfo, off
    --memory_display mode       Bar mode.
                                Takes: bar, infobar, barinfo, off
    --battery_display mode      Bar mode.
                                Takes: bar, infobar, barinfo, off
    --disk_display mode         Bar mode.
                                Takes: bar, infobar, barinfo, off

    Image:
    --image type                Image source. Where and what image we display.
                                Possible values: wall, ascii,
                                /path/to/img, /path/to/dir/, off
    --size 00px | --size 00%    How to size the image.
                                Possible values: auto, 00px, 00%, none
    --crop_mode mode            Which crop mode to use
                                Takes the values: normal, fit, fill
    --crop_offset value         Change the crop offset for normal mode.
                                Possible values: northwest, north, northeast,
                                west, center, east, southwest, south, southeast

    --xoffset px                How close the image will be to the left edge of the
                                window. This only works with w3m.
    --yoffset px                How close the image will be to the top edge of the
                                window. This only works with w3m.
    --bg_color color            Background color to display behind transparent image.
                                This only works with w3m.
    --gap num                   Gap between image and text.
                                NOTE: --gap can take a negative value which will
                                move the text closer to the left side.
    --clean                     Delete cached files and thumbnails.

    Ascii:
    --ascii value               Where to get the ascii from, Possible values:
                                distro, /path/to/ascii
    --ascii_colors x x x x x x  Colors to print the ascii art
    --ascii_distro distro       Which Distro's ascii art to print
                                NOTE: Arch and Ubuntu have 'old' logo varients.
                                NOTE: Use 'arch_old' or 'ubuntu_old' to use the old logos.
                                NOTE: Ubuntu has flavor varients.
                                NOTE: Change this to 'Lubuntu', 'Xubuntu', 'Ubuntu-GNOME'
                                or 'Ubuntu-Budgie' to use the flavors.
    --ascii_logo_size           Size of ascii logo.
                                Supported distros: Arch, Gentoo, Crux, OpenBSD.
    --ascii_bold on/off         Whether or not to bold the ascii logo.
    --logo | -L                 Hide the info text and only show the ascii logo.

    Screenshot:
    --scrot | -s /path/to/img   Take a screenshot, if path is left empty the screen-
                                shot function will use $scrot_dir and $scrot_name.
    --upload | -su /pth/t/img   Same as --scrot but uploads the scrot to a website.
    --image_host                Website to upload scrots to. Takes: imgur, teknik
    --scrot_cmd cmd             Screenshot program to launch

    Other:
    --config /path/to/config    Specify a path to a custom config file
    --config none               Launch the script without a config file
    --help                      Print this text and exit
    --version                   Show neofetch version
    -v                          Display error messages.
    -vv                         Display a verbose log for error reporting.

オプション結構多いです. とりあえず素で実行.

20161207_05:12:12-5188

情報もScreenfetchより増えています.

20161207_05:12:20-9093

次は画像を指定してみます.画像サイズが大きかったので25%に縮小もしています. 楽しい :)

20161207_05:12:35-3963

20161207_06:12:30-16979

画像の表示については環境によってうまく行く行かないがあるようです.うまく表示されない場合は以下のWikiを参照すると良さそうです.

Mumbleでリモート会議

先週ですが,FSIJ 月例会に参加していました. といっても東京に出て行ったわけではなくネットワーク開催だったので家からの参加です.

ということでMumbleというソフトウェアで音声チャット + Etherpad(ウェブブラウザベース)でテキスト交換という環境でした. Mumbleを前もって試していればよかったのだけど直前に入れてなかなか参加できず途中からの参加になりましたorz~

MumbleはDebian stretch amd64環境ではパッケージが存在する( mumble )のでこれを導入するだけでした.マルチプラットホームで各種環境向けにも存在して,Androidなどでも利用できるようです. – Mumble, the open source VoIP solutionPlumble – Mumble VOIP (Free) – Google Play の Android アプリPlumble – Mumble VOIP – Google Play の Android アプリ

今回使用機器は以下のような感じ.でしたが,スピーカーは試行錯誤している時に繋いだもので後で試すと本体のスピーカーで大丈夫でした.

  • PC : Thinkpad X220(Debian stretch amd64)
  • マイク : 3.5mmジャックに直接挿せるもの(型番不明)
  • スピーカー : ELECOM LBT-SPTR01AV(Bluetooth)

このときMumble利用時に嵌ったところをメモしておきます. – ヘッドホンとマイクが1つの端子の端末でマイクを繋ぐとヘッドホンもそちらを向いてしまって音が出なかった – Bluetothヘッドセットを繋ぐとそちらから音が出るようになったがマイクがうまく働かない – PulseAudio Volume Control (pavucontrol)で見るとマイクがミュートになっていたので解除してMumbleに割り当て – 伝送方式を"push to talk"にしたがpushがわからなかった -> ショートカットで適当なキーに割り当て(Mumble非アクティブ時も有効)

  • その他
    • Awesome WM環境ではMumbleが最小化してしまうと窓を復帰させる方法が今のところわからない.タスクトレイのアイコンをクリックしても出てこない.(Xfce4はアイコンクリックで出てくるよう)
    • 一回設定できればフォーカスがなくてもショートカットが効いて話せるのでとりあえず使えるけどチャットと誰が話しているかのアイコンの確認(唇アイコンが赤くなる)が出来ない(オーバーレイの設定でどうにかなりそう?)
    • アイコンを右クリックしてそのまま離すと丁度終了になってしまう…….
    • Mumbleの音声品質は16kbps/40kbps/72kbpsから選択可能(規定値は40k)
    • push to talkを使うとその時しか音声が飛ばないので周りの環境に左右されにくくて良い(キー入力の音や環境音が入りにくい)

最近はUstream.tv/Youtube Liveなどの動画配信やBBB(BigBlueButton)などの動画を使ったオンライン会議システムなどで中継ということが多いですが,手弁当の勉強会なんかだと回線などの問題でうまく行かなかったりすることが多いですが割り切って音声のみの中継にしてしまうのもありだなと感じました.

最近リモート参加した勉強会

Android端末をLinuxのタッチパッド替わりにしたい(Bluetooth利用のBlink)

最近またポインティングデバイスにApple Wireless Trackpadを利用するようになりましたが持ち運びには少し嵩張ります.マウスを持ち運ぶのもかさばります.
Ubuntu TouchでHDMI接続時にタッチデバイスになるというのを見てAndroid端末をタッチデバイスにすることが出来るのでは?それなら荷物増え無いしいいかもと思って少し調べてみました.

BlinkはBluetooth接続かつPC側でデーモンを動かす必要があります.
先ずBluetoothペアリングをしておき,PC側でデーモンを導入します.

  • 必要パッケージの導入

$ sudo apt install bluez python-bluez xdotoolsudo apt-get install bluez python-bluez xdotool
  • デーモンの導入

$ git clone https://github.com/drpain/blink-server.git ~/.blink

以下のようにしてデーモンを起動するのですが,この記事を書いている時点でのDebian stretch testing amd64では以下のようなエラーとなります.

$ sudo ~/.blink/bluetooth_server.py
Traceback (most recent call last):
  File "/home/mk/.blink/bluetooth_server.py", line 25, in <module>
    profiles         = [ SERIAL_PORT_PROFILE ]
  File "/usr/lib/python2.7/dist-packages/bluetooth/bluez.py", line 176, in advertise_service
    raise BluetoothError (str (e))
bluetooth.btcommon.BluetoothError: (2, 'No such file or directory')

GuihubのHELPを参考に*/etc/bluetooth/main.conf*を以下のように修正します.

diff --git a/bluetooth/main.conf b/bluetooth/main.conf
index 372fd8c..2f7cc4a 100644
--- a/bluetooth/main.conf
+++ b/bluetooth/main.conf
@@ -64,6 +64,9 @@
 # 'false'.
 #FastConnectable = false

+# "drpain/blink-server: This is the server you would need to be able to run the Blink Android Application." https://github.com/drpain/blink-server
+DisablePlugins = pnat
+
 #[Policy]
 #
 # The ReconnectUUIDs defines the set of remote services that should try

設定を反映するためにbluetoothdを再起動してサーバを再起動します.

$ sudo service bluetooth restart

サーバは要rootのようです.
この状態でAndroid側からクライアントPCを選択して接続すればok.

$ sudo ~/.blink/bluetooth_server.py
READY FOR CONNECTIONS, RFCOMM channel 1
('INBOUND CONNECTION ', ('68:76:4F:3B:D1:E0', 1))
COMMAND RECEIVED [{"action":"mouse-move","x":null,"y":null}]
['xdotool', 'mousemove_relative', '--', 'None', 'None']
COMMAND RECEIVED [{"action":"mouse-move","x":-1,"y":0}]
['xdotool', 'mousemove_relative', '--', '-1', '0']
COMMAND RECEIVED [{"action":"mouse-move","x":0,"y":0}]
['xdotool', 'mousemove_relative', '0', '0']
COMMAND RECEIVED [{"action":"mouse-move","x":-1,"y":0}]
['xdotool', 'mousemove_relative', '--', '-1', '0']

上の方のモード切替スイッチをタップして規定の「Swipe Area」から「Mouse」にします.「Mouse Area」で操作するとxdotoolのログが大量に出つつ操作できます.

27629912281 e0ba729509 n
27094267013 3fb8577a76 n

操作は少し解りづらくてこんな感じです.

  • タップ→左クリック

  • タップ, ホールド, リリース → 右クリック

中クリックやドラッグは多分未実装で使えません.
カーソル移動はちらつきますがとりあえず使える感じです.

でも導入に要設定変更&要rootなのが面倒ですね.

awesomeとかでApple Wireless Trackpadを設定する

Bluetooth接続のApple Wireless Trackpadですが,GnomeとかだとBluetoothでペアリングした後こんな感じでGUIで設定できるのですが,

27082898093 594ed9ea4e n
27082898303 067a324e77 n
27414891970 2128414b0d n

awesomeだと効かないようです.ペアリングした後カーソル移動,2本指スクロール,右クリックはなどは動作するのですが,一番利用する左クリックが動作しません.

こいつはDynaptics driver用のコマンドのsynclientを使って設定内容の確認とアドホックな動作確認をします.
コマンドが存在しない場合 xserver-xorg-input-synaptics pkgを導入してください.
-l optionで設定項目の確認が出来ます.

$ synclient -l
Parameter settings:
    LeftEdge                = -2393
    RightEdge               = 2651
    TopEdge                 = -2030
    BottomEdge              = 2139
    FingerLow               = 70
    FingerHigh              = 75
    MaxTapTime              = 180
    MaxTapMove              = 346
    MaxDoubleTapTime        = 100
    SingleTapTimeout        = 180
    ClickTime               = 100
    EmulateMidButtonTime    = 0
    EmulateTwoFingerMinZ    = 100
    EmulateTwoFingerMinW    = 50
    VertScrollDelta         = 157
    HorizScrollDelta        = 157
    VertEdgeScroll          = 0
    HorizEdgeScroll         = 0
    CornerCoasting          = 0
    VertTwoFingerScroll     = 1
    HorizTwoFingerScroll    = 1
    MinSpeed                = 1
    MaxSpeed                = 1.75
    AccelFactor             = 0.0253743
    TouchpadOff             = 0
    LockedDrags             = 0
    LockedDragTimeout       = 5000
    RTCornerButton          = 0
    RBCornerButton          = 0
    LTCornerButton          = 0
    LBCornerButton          = 0
    TapButton1              = 0
    TapButton2              = 2
    TapButton3              = 3
    ClickFinger1            = 1
    ClickFinger2            = 3
    ClickFinger3            = 2
    CircularScrolling       = 1
    CircScrollDelta         = 0.1
    CircScrollTrigger       = 0
    CircularPad             = 0
    PalmDetect              = 1
    PalmMinWidth            = 10
    PalmMinZ                = 200
    CoastingSpeed           = 50
    CoastingFriction        = 50
    PressureMotionMinZ      = 30
    PressureMotionMaxZ      = 160
    PressureMotionMinFactor = 1
    PressureMotionMaxFactor = 1
    GrabEventDevice         = 0
    TapAndDragGesture       = 1
    AreaLeftEdge            = 0
    AreaRightEdge           = 0
    AreaTopEdge             = 0
    AreaBottomEdge          = 0
    HorizHysteresis         = 4
    VertHysteresis          = 4
    ClickPad                = 0
    RightButtonAreaLeft     = 0
    RightButtonAreaRight    = 0
    RightButtonAreaTop      = 0
    RightButtonAreaBottom   = 0
    MiddleButtonAreaLeft    = 0
    MiddleButtonAreaRight   = 0
    MiddleButtonAreaTop     = 0
    MiddleButtonAreaBottom  = 0

とりあえずタップの設定をしてみます.これでタップが出来るようになったら設定項目は当たりです.

$ synclient TapButton1=1
$ synclient -l|grep TapButton1
    TapButton1              = 1

設定項目が判ったら設定ファイルに書いておきます.
今回は /etc/X11/xorg.conf.d/21-apple-touchpad.conf にしました.
とりあえずタップの設定だけ以下のように設定しました.
ファイルの用意ができたらXの再起動を行います.awesomeの場合 Mod4 + Shift + q とかで一旦Xを終了してログインし直します.

Section "InputClass"
    Identifier "touchpad"
    Driver "synaptics"
    MatchIsTouchpad "on"
        Option "TapButton1" "1" # 1本指タップを左クリックに
EndSection

他の設定項目も同様に設定していきます.
現在こんな感じにしています.

Section "InputClass"
    Identifier "touchpad"
    Driver "synaptics"
    MatchIsTouchpad "on"
        Option "TapButton1" "1" # 1本指タップを左クリックに
        Option "TapButton2" "3" # 2本指タップを右クリックに
        Option "TapButton3" "2" # 3本指タップを中クリックに
        Option "VertTwoFingerScroll" "on"       # 縦スクロールを有効
        Option "HorizTwoFingerScroll" "on"      # 横スクロールを有効
        Option "PalmDetect" "1" # 手のひら検出
EndSection

今回Debian stretch testing amd64ですが他の環境でも同様に行けると思います.

$ screenfetch
         _,met$$$$$gg.           mk@x220
      ,g$$$$$$$$$$$$$$$P.        OS: Debian testing stretch
    ,g$$P""       """Y$$.".      Kernel: x86_64 Linux 4.5.0-2-amd64
   ,$$P'              `$$$.      Uptime: 1d 12h 8m
  ',$$P       ,ggs.     `$$b:    Packages: 4379
  `d$$'     ,$P"'   .    $$$     Shell: bash 4.3.42
   $$P      d$'     ,    $$P     Resolution: 1366x768
   $$:      $$.   -    ,d$$'     WM: Awesome
   $$\;      Y$b._   _,d$P'      WM Theme: awesome
   Y$$.    `.`"Y$$$$P"'          CPU: Intel Core i5-2540M CPU @ 3.3GHz
   `$$b      "-.__               GPU: Mesa DRI Intel(R) Sandybridge Mobile
    `Y$$                         RAM: 4288MiB / 15934MiB
     `Y$$.
       `$$b.
         `Y$$b.
            `"Y$b._
                `""""

画像や動画をtextに変換するhiptextを試す

類似のものでlibcacaとかがありますが,

Turn images into text better than caca/aalib

とのことでもっといいものらしいです.
Texttop[1]で使われているので興味を持ったのですが,そのままではBuild出来なかったのでメモです.

build

READMEではこの辺が必要とのことです.

sudo apt-get install build-essential libpng12-dev libjpeg-dev \
    libfreetype6-dev libgif-dev ragel libavformat-dev libavcodec-dev \
    libswscale-dev libgflags-dev libgoogle-glog-dev

Debian stretch testingではこんな感じ?

$ sudo apt-get install build-essential libpng-dev libjpeg-dev \
      libfreetype6-dev libgif-dev ragel libavformat-dev libavcodec-dev \
      libswscale-dev libgflags-dev libgoogle-glog-dev

後はmakeするだけなんですが,こんなエラーが.新しいlibavに追従できてない感じ?

g++ -g -O3 -std=c++11 -Wall -Wextra -fno-exceptions -fno-rtti -MD  -march=native -c -o movie.o movie.cc
movie.cc: In member function ‘void Movie::PrepareRGB(int, int)’:
movie.cc:56:42: error: ‘PIX_FMT_RGB24’ was not declared in this scope
                       width_, height_, PIX_FMT_RGB24, SWS_FAST_BILINEAR,
                                          ^
In file included from graphic.h:10:0,
                 from movie.h:9,
                 from movie.cc:4:
movie.cc:64:38: error: ‘avcodec_alloc_frame’ was not declared in this scope
 CHECK(frame_ = avcodec_alloc_frame());
                                      ^
movie.cc:66:19: warning: ‘int avpicture_get_size(AVPixelFormat, int, int)’ is deprecated [-Wdeprecated-declarations]
   int rgb_bytes = avpicture_get_size(PIX_FMT_RGB24, width_, height_);
                   ^
In file included from /usr/include/x86_64-linux-gnu/libavformat/avformat.h:318:0,
                 from movie.cc:10:
/usr/include/x86_64-linux-gnu/libavcodec/avcodec.h:4898:5: note: declared here
 int avpicture_get_size(enum AVPixelFormat pix_fmt, int width, int height);
     ^
movie.cc:69:14: warning: ‘int avpicture_fill(AVPicture*, const uint8_t*, AVPixelFormat, int, int)’ is deprecated [-Wdeprecated-declarations]
   int prep = avpicture_fill(reinterpret_cast<AVPicture*>(frame_rgb_),
              ^
In file included from /usr/include/x86_64-linux-gnu/libavformat/avformat.h:318:0,
                 from movie.cc:10:
/usr/include/x86_64-linux-gnu/libavcodec/avcodec.h:4883:5: note: declared here
 int avpicture_fill(AVPicture *picture, const uint8_t *ptr,
     ^
movie.cc: In member function ‘Graphic Movie::Next()’:
movie.cc:94:5: warning: ‘void av_free_packet(AVPacket*)’ is deprecated [-Wdeprecated-declarations]
     av_free_packet(&packet);
     ^
In file included from /usr/include/x86_64-linux-gnu/libavformat/avformat.h:318:0,
                 from movie.cc:10:
/usr/include/x86_64-linux-gnu/libavcodec/avcodec.h:4040:6: note: declared here
 void av_free_packet(AVPacket *pkt);
      ^
movie.cc:94:27: warning: ‘void av_free_packet(AVPacket*)’ is deprecated [-Wdeprecated-declarations]
     av_free_packet(&packet);
                           ^
In file included from /usr/include/x86_64-linux-gnu/libavformat/avformat.h:318:0,
                 from movie.cc:10:
/usr/include/x86_64-linux-gnu/libavcodec/avcodec.h:4040:6: note: declared here
 void av_free_packet(AVPacket *pkt);
      ^
<ビルトイン>: ターゲット 'movie.o' のレシピで失敗しました
make: *** [movie.o] エラー 1

でも以下のPRを反映したら通りました :)

試してみる

サンプルとして,balls.jpg, obama.jpg があるのでこれを試してみます.
うまく動いていそうです.

47418

でも.pngはうまく動かない?

$ ./hiptext ~/Downloads/Tux.png
F0601 11:01:16.713266 30721 png.cc:35] Check failed: type == PNG_COLOR_TYPE_RGB || type == PNG_COLOR_TYPE_RGBA png bad type: /home/mk/Downloads/Tux.png
*** Check failure stack trace: ***
    @     0x7fa48d3c013d  google::LogMessage::Fail()
    @     0x7fa48d3c1fa3  google::LogMessage::SendToLog()
    @     0x7fa48d3bfccb  google::LogMessage::Flush()
    @     0x7fa48d3c298e  google::LogMessageFatal::~LogMessageFatal()
    @           0x41859f  LoadPNG()
    @           0x403fa8  main
    @     0x7fa489e59610  __libc_start_main
    @           0x40a229  _start
    @              (nil)  (unknown)
中止
$ convert ~/Downloads/Tux.png ./Tux.jpg
$ ./hiptext Tux.jpg

`.jpg`に変換したらいけてる感じですがなんか欠けてます.

26780171563 8d301b27a4

動画再生もいけます.再生のみで一時定位などの操作は出来ない感じ?

今のところlibcacaや動画ではvlcやmplayerなんかのほうがパッケージで導入できるのでお手軽そう.

とりあえず動くようになったので次はTexttopを試してみようと思います.

書き込み専用ぽいsamba共有を作る

書き込み専用の共有

sambaでデータの提出専用みたいな共有が作れないかと試してみました.

sambaサーバ の /etc/samba/smb.conf を編集して write-only という共有を作成.

[write-only]
  # 共有ファイルの保存先
  path = /export/data/write-only
  # 共有が見えるように
  browseable = yes
  # ゲストアクセス許可
  guest ok = yes
  guest only = yes
  # 書き込み可能
  writable = Yes
  # ゲストで書き込むと nobody アカウントで保存される
  guest account = nobody
  # umaskを 0333 に
  create mask = 0333
  directory mask = 0333
  # 読み込み権のないファイルを見えなくする
  hide unreadable = Yes

samba の設定を反映する

$ sudo service samba reload

クライアントPCから共有に接続して動作確認する

gvfs-mount で mount して,マウントポイントを確認.

$ gvfs-mount smb://192.168.1.102/write-only
$ mount|grep gvfs
gvfsd-fuse on /run/user/1000/gvfs type fuse.gvfsd-fuse (rw,nosuid,nodev,relatime,user_id=1000,group_id=1000)
client$ $ ls -la /run/user/1000/gvfs/smb-share\:server\=192.168.1.102\,share\=write-only/
合計 0
drwx------ 1 mk mk 0  5月 25 19:13 .
dr-x------ 3 mk mk 0  5月 21 05:54 ..

書き込んでみる

$ echo hoge > /run/user/1000/gvfs/smb-share\:server\=192.168.1.102\,share\=write-only/hoge

書き込んだファイルは見えない

$ ls -la /run/user/1000/gvfs/smb-share\:server\=192.168.1.102\,share\=write-only/
合計 0
drwx------ 1 mk mk 0  5月 25 19:24 .
dr-x------ 3 mk mk 0  5月 21 05:54 ..
$ cat /run/user/1000/gvfs/smb-share\:server\=192.168.1.102\,share\=write-only/hoge
$ cat: '/run/user/1000/gvfs/smb-share:server=192.168.1.102,share=write-only/hoge': 許可がありません

serverではこんな感じで見える

$ ls -lA /export/data/write-only
合計 4
--wx-w---- 1 nobody nogroup 5  5月 25 19:24 hoge
$ sudo cat /export/data/write-only/hoge
hoge

クライアントから同名のファイル名で上書きするとエラーもなく書き込める

$ echo fuga > /run/user/1000/gvfs/smb-share\:server\=192.168.1.102\,share\=write-only/hoge

サーバで書き換わっているのを確認

$ sudo cat /export/data/write-only/hoge
fuga


コンポジットマネージャーのXcompmgrでウィンドウ透過設定

久々にMATE環境を使ってみています.
awesomeだとショートカットキーでウィンドウの配置を設定できるので簡単にウィンドウを並べ変えて動画を見ながら別のことをするといったことが簡単に出来ました.しかしMATEで同じことをしようとすると面倒.以前はGnome端末で背景を透過させていましたがこの機能はなくなっていました.

Gnome端末から無くなった後もMATE端末には透過機能が残っていましたがこちらからもいつの間にかなくなっていました.もう復活することは無さそうなので他の端末アプリを幾つか試してみましたが擬似透過しか見当たりません.

ということで今回はXcompmgrを試してみました.

前提

xorgでComposite, RENDER が有効になっている必要がああります.以下OKの例.

$ xdpyinfo | grep -i "render\|composite"
    Composite
    RENDER

必要パッケージの導入

コンポジットマネージャーのxcompmgrと,透過の設定をするtranssetの含まれたx11-appsを導入します.

$ sudo apt install xcompmgr x11-apps

コンポジットマネージャの起動

$ xcompmgr -c &

とか

$ xcompmgr -cf &

とか

$ xcompmgr -c -C -t-5 -l-5 -r4.2 -o.55 &

とかお好みで.

transsetでの透過

xcompmgrが起動した状態でtranssetを使うとウィドウを透過させることが出来ます.
引数には0~1の値を設定します.0が完全に透明.1が不透明です.

$ transset 0.6

として実行するとマウスカーソルが+マークになり,クリックしたウィンドウが透過されます.
以下はブラウザフルスクリーンでニコ生を再生した上に透過設定したMATE端末を表示しています.

Screenshot at 2016-03-19 07:06:39

自動起動設定

毎回手動で起動&設定するのは面倒なのでこんな感じで自動起動設定をします.
コンポジットマネージャーは「システム」->「設定」>「ユーザ向け」->「自動起動するアプリ」から.

Screenshot at 2016-03-20 06:27:22

MATE端末の透過設定は~/.bashrcに以下のように書いてbash起動時にMATE端末だったらtranssetを起動するようにしてみました.sleepを付けないとうまく動きませんでした.sleepの値は環境によって変わると思います.

$ tail -4 ~/.bashrc
case "$COLORTERM" in
    mate-terminal) sleep 0.3 && transset -a 0.6 > /dev/null;;
esac
 

ショートカット設定

MATE端末だけを透過設定する場合はここまでの設定で大丈夫ですが,他のウィンドウや透過度を変更するのにショートカット設定をしておくと便利そうです.

「システム」->「設定」->「ハードウェア」->「キーボードショートカット」でtranssetを登録してショートカットを設定します.

ここで設定したtranssetのオプションは-aはアクティブウィンドウの指定,--inc/--decはインクリメント,デクリメントのオプションです.

Screenshot at 2016-03-20 07:48:08Screenshot at 2016-03-20 07:48:03

Screenshot at 2016-03-20 06:25:27

これで未設定のアプリで透過させたり,ちょっと透過度を調整したいと行った時にショートカットですぐ設定できるようになりました :)

Screenshot at 2016-03-20 06:30:06


Radikoを自動的に録音してPodcast化してくれるradicastを試す

Radikoを自動的に録音してPodcast化してくれるradicastというものを見つけました.

昔はこんな感じで録音したりしていましたが仕様が変わって録音できなくなって対応というのが面倒で最近は録音していませんでした.たまに聞くときはAndroidのRazikoを使っています.でもradicastならお手軽に動かせてPodcastとして扱えるので便利そうということで試してみました.

試した環境はUbuntu 14.04 amd64/Debian stretch testing amd64/Rasbian jessieですが,Ubuntu環境では録音開始時に以下のようにコアダンプしてしまうようでうまく行っていません :-(

2016/03/09 05:20:00 [radiko] start record
2016/03/09 05:20:00 [radiko] GET http://radiko.jp/player/swf/player_3.0.0.01.swf
2016/03/09 05:20:04 [radiko] POST https://radiko.jp/v2/api/auth1_fms
Segmentation fault (コアダンプ)

dockerでも動きますが,今回は実機で動かしています.

必要なpkgの導入

$ sudo apt install libav-tools swftools rtmpdump golang-go

※Debian stretchの場合はlibav-toolsの代わりにffmpegを導入.

go getで導入

$ GOPATH=~/usr/local/go go get github.com/soh335/radicast

オプションはこんな感じでした.

$ ~/usr/local/go/bin/radicast -h
Usage of /home/mk/usr/local/go/bin/radicast:
  -bitrate string
        bitrate (default "64k")
  -buffer int
        buffer for recording (default 60)
  -config string
        path of config.json (default "config.json")
  -converter string
        ffmpeg or avconv. If not set this option, radicast search its automatically.
  -host string
        host (default "0.0.0.0")
  -output string
        output (default "output")
  -port string
        port (default "3355")
  -setup
        initialize json configuration
  -title string
        title (default "radicast")

設定ファイル作成

--setupオプションでスケルトンを作成して,

$ ~/usr/local/go/bin/radicast --setup > ~/usr/local/go/etc/radicast.json
$ cat ~/usr/local/go/etc/radicast.json
{
  "HOUSOU-DAIGAKU": [],
  "MBC": [],
  "RN1": [],
  "RN2": []
}

次のページを参考にcron形式で設定します.crontabと違い秒単位まで指定できるようです.

例えば"0 0 7 * * MON-FRI" だと月曜から金曜の07:00:00の番組を録音となります.
録音停止は自動的にされるようです.

$ cat ~/usr/local/go/etc/radicast.json
{
  "HOUSOU-DAIGAKU": [],
  "MBC": [
    "0 0 5 * * MON-FRI",
    "0 10 5 * * MON-FRI",
    "0 0 7 * * MON-FRI"
  ],
  "RN1": [],
  "RN2": []
}

実行

設定ファイルを指定して実行します.

$ ~/usr/local/go/bin/radicast -config=$HOME/usr/local/go/etc/radicast.json
2016/03/09 05:00:12 [radicast] station:MBC spec:0 0 5 * * MON-FRI
2016/03/09 05:00:12 [radicast] station:MBC spec:0 10 5 * * MON-FRI
2016/03/09 05:00:12 [radicast] station:MBC spec:0 0 7 * * MON-FRI
2016/03/09 05:00:12 [radicast] start new cron
2016/03/09 05:00:12 [server] start 0.0.0.0:3355

指定時刻になると,番組情報を取得して録音が始まり,番組終了時に録音が終了して次のジョブまで待機します.

2016/03/09 06:30:00 [radiko] start record
2016/03/09 06:30:00 [radiko] GET http://radiko.jp/player/swf/player_3.0.0.01.swf
2016/03/09 06:30:04 [radiko] POST https://radiko.jp/v2/api/auth1_fms
2016/03/09 06:30:05 [radiko] POST https://radiko.jp/v2/api/auth2_fms
2016/03/09 06:30:06 [radiko] GET http://radiko.jp/v2/api/program/today?area_id=JP46
2016/03/09 06:30:07 [radiko] start recording モーニング・スマイル
2016/03/09 06:30:07 [radiko] rtmpdump command: /usr/bin/rtmpdump --live --quiet -r rtmpe://f-radiko.smartstream.ne.jp --playpath simul-stream.stream --app MBC/_definst_ -W http://radiko.jp/player/swf/player_3.0.0.01.swf -C S:"" -C S:"" -C S:"" -C S:J_Rb9kLWN2Cb5XlcGqQjfw --stop 1853 -o -
2016/03/09 06:30:07 [radiko] converter command: /usr/bin/ffmpeg -y -i - -vn -acodec libmp3lame -ar 44100 -ab 64k -ac 2 /tmp/radiko240330221/radiko_0.mp3

データは以下のようにoutput以下に保存されています.

$ find output -ls
  6724248      0 drwxr-xr-x   1 mk       mk             36  3月  9 05:55 output
  6724778      0 drwxr-xr-x   1 mk       mk             44  3月  9 05:55 output/20160309053000_MBC
  6724327  10168 -rw-r--r--   1 mk       mk       10409132  3月  9 05:55 output/20160309053000_MBC/podcast.mp3
  6724779      4 -rw-r--r--   1 mk       mk            650  3月  9 05:55 output/20160309053000_MBC/podcast.xml

録音中のテンポラリファイルは/tmp以下に作られます.

$ ls -lA /tmp/radiko077215706/
合計 5184
-rw-r--r-- 1 mk mk 5223512  3月  9 07:10 radiko_0.mp3

録音したデータはPodcastとして配信されます.このURLは規定値ではlocalhostからしかアクセスできません.このURLをPodcast Aggregatorに指定してあげると普通にPodcastとして扱えます :)

$ xmllint http://localhost:3355/rss
<?xml version="1.0" encoding="UTF-8"?>
<rss xmlns:itunes="http://www.itunes.com/dtds/podcast-1.0.dtd" version="2.0">
    <channel>
        <title>radicast</title>
        <itunes:owner/>
        <itunes:image/>
        <itunes:category/>
        <item>
            <title>生島ヒロシのおはよう一直線 (2016-03-09 05:30:00 +0900 JST)</title>
            <itunes:author>生島ヒロシ</itunes:author>
            <itunes:summary> &lt;br /&gt;&lt;A href="http://www.mbc.co.jp/radio/" target="_blank"&gt;&lt;img src="http://www.mbc.co.jp/radio/radiko/bn/mbcradio_pr1410.png" alt="MBCradio" /&gt;&lt;/A&gt;&lt;br /&gt;&lt;br /&gt;twitterハッシュタグは「&lt;a href="http://twitter.com/#!/search/%23mbc1107"&gt;#mbc1107&lt;/a&gt;」</itunes:summary>
            <itunes:image/>
            <enclosure url="http://localhost:3355/podcast/20160309053000_MBC.mp3" length="10409132" type="audio/mpeg"/>
            <pubDate>Wed, 9 Mar 2016 05:55:45 +0900</pubDate>
        </item>
    </channel>
</rss>

Podcast Aggregatorとこのサーバが別の場合以下のように-hostオプションを指定してインターフェイスに割り当てたipを指定するとそのネットワークからアクセスできるようになります.

$ ~/usr/local/go/bin/radicast -config=$HOME/usr/local/go/etc/radicast.json -host 192.168.2.203
  :
2016/03/09 07:42:34 [server] start 192.168.2.203:3355

proxy

は使えない感じかな?

$ w3m -dump http://radiko.jp/area
document.write('<span class="JP46">KAGOSHIMA JAPAN</span>');
$ tsocks w3m -dump http://radiko.jp/area
document.write('<span class="JP13">TOKYO JAPAN</span>');
$ ALL_PROXY=socks5h://localhost:8080 ~/usr/local/go/bin/radicast -setup
2016/03/09 07:56:00 [radiko] GET http://radiko.jp/player/swf/player_3.0.0.01.swf
2016/03/09 07:56:01 [radiko] POST https://radiko.jp/v2/api/auth1_fms
2016/03/09 07:56:02 [radiko] POST https://radiko.jp/v2/api/auth2_fms
2016/03/09 07:56:02 [radiko] GET http://radiko.jp/v2/api/program/today?area_id=JP46
{
  "HOUSOU-DAIGAKU": [],
  "MBC": [],
  "RN1": [],
  "RN2": []
}
$ tsocks ~/usr/local/go/bin/radicast -setup
   :
  "MBC": [],
   :
$ tsocks ~/usr/local/go/bin/radicast -setup
   :
  "MBC": [],
   :
$ ALL_PROXY=http://localhost:8080 ~/usr/local/go/bin/radicast -setup
   :
  "MBC": [],
   :

ownCloudの同期が動かなくなって困る

ownCloudを便利に使っているのですが,ふと気づくと同期されていない.ステータスを見ると最後の同期が8時間前.タスクマネージャーのアイコンは!マークが付いて「不明な状態」となっています.

20160226_19:02:52-398

ログを見てもよくわからない.

WebやAndroidそして別のLinuxマシンは問題ないようです.ということは多分この端末の問題.
問題の環境はDebian stretch testing amd64のowncloud 7.0.12~dfsg-2です.

一旦ownCloudを終了して設定ファイルだけ退避(対象ファイルはそのまま)して設定を作りなおしてみました.

$ mv ./.local/share/data/ownCloud ./.local/share/data/ownCloud-backup
$ owncloud --logwindow

とりあえず同期出来たようです.