jessie がリリースされて2月近く 🏛️.1度目のポイントリリース 🏛️ もされて普通に使えています.しかし,悟りを開くためにtesting のstretch にアップグレードしてみます.
以下に記すことにより悟りを開けば、アップグレード地獄という果てしない因果応報の葛藤から人は解脱し、Debian の涅槃の境地に到達できます。
Debian リファレンス 🏛️ 2.1.3. 永遠のアップグレード人生 🏛️ より
参考URL
以下の公式文章と,前回Wheezy から Jessie にアップグレードした時のメモを参考にしました.
- 第4章 Debian 7 (wheezy) からのアップグレード 🏛️
- 第2章 Debian パッケージ管理 🏛️
- Debian Wheezy から Jessie にディストリビューションアップグレードしてみる | matoken’s meme 🏛️
パッケージを最新にする
% sudo apt update
% sudo apt upgrade
backup
pkg 情報
デイリーでファイルに落として( /usr/bin/dpkg --get-selections "*" > dpkg_--get-selections )バックアップしているのでバックアップログを見てバックアップがちゃんと取れているのを確認
/etc, /var, /home など
デイリーでバックアップしているのでバックアップログを見てバックアップがちゃんと取れているのを確認
最近の $HOME はこんな感じでバックアップしている
ionice -c2 -n7 nice -n19 rsync --stats -avze ssh --delete --bwlimit=2048 --rsync-path="/usr/bin/ionice -c2 -n7 /usr/bin/nice -n19 /usr/bin/rsync" --exclude-from "$HOME/.rsync-backup_exclude-list" --link-dest=/mnt/backup/x201s/rsync/home/`/bin/date -d '1 day ago' +\%Y\%m\%d`/ $HOME micro-backup:/mnt/backup/x201s/rsync/home/`date +%Y%m%d`/
Pin の解除
% find /etc/apt/ -type f|grep preferences
/etc/apt/preferences
% rm /etc/apt/preferences
パッケージ状態の確認
% sudo dpkg --audit
% find /etc/apt/ -type f|grep preferences
% aptitude search "~ahold"
vim パッケージを削除をされないようにする
% sudo aptitude unmarkauto vim
以下はaptitude のman より
       markauto, unmarkauto
           それぞれ、自動的にインストールされた、および手動でインストールされたという印をパッケージに添付します。パッケージの指定は「install」コマンドと
           まったく同じ方法で行います。例えば「aptitude markauto '~slibs'」を実行すると、「libs」セクションのパッケージすべてに、自動的にインストールされ
           たという印が添付されます。

           自動的にインストールしたパッケージについてのさらに詳しい情報は、aptitude リファレンスマニュアルの「自動的にインストールしたパッケージの管理」セ
           クションを参照してください。
aptitude リファレンスマニュアルの「自動的にインストールしたパッケージの管理」セクション は以下から.
ソースリストの修正
非公式なソースを削除して公式だけにする.
% sudo rm -rf /etc/apt/sources.list.d
% sudo vi /etc/apt/sources.list
% grep -v ^# /etc/apt/sources.list|uniq

deb http://ftp.jp.debian.org/debian/ jessie main non-free contrib
deb-src http://ftp.jp.debian.org/debian/ jessie main non-free contrib

deb http://security.debian.org/ jessie/updates main contrib non-free
deb-src http://security.debian.org/ jessie/updates main contrib non-free
jessie をstretch にする.
% grep -v ^# /etc/apt/sources.list|uniq

deb http://ftp.jp.debian.org/debian/ stretch main non-free contrib
deb-src http://ftp.jp.debian.org/debian/ stretch main non-free contrib

deb http://security.debian.org/ stretch/updates main contrib non-free
deb-src http://security.debian.org/ stretch/updates main contrib non-free
コンソール端末に移動する
X の端末だとX が不安定になることがあるのでコンソールの端末に移動.Ctrl + Alt + 1~6 とかで移動してログインする.
fbtermなどを使わないと日本語表示が出来ないので LANG=C にしておく.
% echo $LANG
ja_JP.UTF-8
% LANG=C
root 権限になる
% sudo -s
# echo $LANG
C
ログの取得開始
# script ~mk/jessie2stretch.log
Script started, file is /home/mk/jessie2stretch.log
パッケージ情報を更新
# apt-get update
アップグレードに必要な容量を確認する
# apt-get -o APT::Get::Trivial-Only=true dist-upgrade
 :
 :
 :
1551 upgraded, 72 newly installed, 8 to remove and 0 not upgraded.
Need to get 79.4 MB/1645 MB of archives.
After this operation, 469 MB of additional disk space will be used.
E: Trivial Only specified but this is not a trivial operation.
最小アップグレード
# apt-get upgrade
 :
1212 upgraded, 0 newly installed, 0 to remove and 340 not upgraded.
Need to get 0 B/1180 MB of archives.
After this operation, 137 MB of additional disk space will be used.
Do you want to continue? [Y/n] Y
 :
dist-upgrade の影響を確認する
# apt-get -s dist-upgrade
  :
dist-upgrade する
# apt-get dist-upgrade
  :
The following packages will be REMOVED:
  iceweasel-l10n-csb iceweasel-l10n-ku iceweasel-l10n-zu librpmsign1 libsane:i386 tracker-utils xserver-xorg-video-modesetting
  xserver-xorg-video-siliconmotion
  :
339 upgraded, 72 newly installed, 8 to remove and 0 not upgraded.
Need to get 79.4 MB/465 MB of archives.
After this operation, 332 MB of additional disk space will be used.
Do you want to continue? [Y/n] Y
  :
不要になったパッケージを削除する
# apt-get autoremove
  :
0 upgraded, 0 newly installed, 32 to remove and 0 not upgraded.
After this operation, 28.6 MB disk space will be freed.
Do you want to continue? [Y/n]Y
  :
0 upgraded, 0 newly installed, 0 to remove and 0 not upgraded.
sudo 設定確認
# lv /etc/sudoers
以前 sudoers が書き換わっていた事があるので確認
念の為別端末( Alt + 1~6 )で確認も
% sudo -s
[sudo] password for mk:
# whoami
root
ログ終了
# exit
Script done, file is /home/mk/jessie2stretch.log
再起動
% sudo shutdown -r now jessie2stretch dist-upgrade!
Version 確認
% cat /etc/debian_version
stretch/sid
% uname -a
Linux x220 3.16.0-4-amd64 #1 SMP Debian 3.16.7-ckt11-1 (2015-05-24) x86_64 GNU/Linux
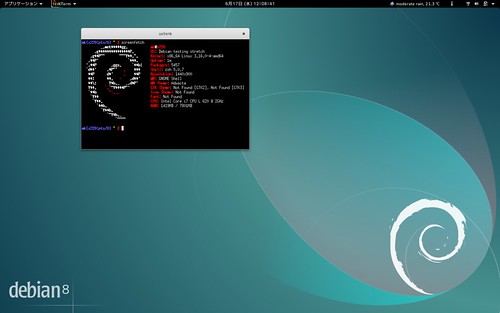
% screenfetch
_,met$$$$$gg. mk@x220
,g$$$$$$$$$$$$$$$P. OS: Debian testing stretch
,g$$P"" """Y$$.". Kernel: x86_64 Linux 3.16.0-4-amd64
,$$P' `$$$. Uptime: 2m
',$$P ,ggs. `$$b: Packages: 5457
`d$$' ,$P"' . $$$ Shell: zsh 5.0.7
$$P d$' , $$P Resolution: 1440x900
$$: $$. - ,d$$' WM: GNOME Shell
$$\; Y$b._ _,d$P' WM Theme: Adwaita
Y$$. `.`"Y$$$$P"' GTK Theme: Not Found [GTK2], Not Found [GTK3]
`$$b "-.__ Icon Theme: Not Found
`Y$$ Font: Not Found
`Y$$. CPU: Intel Core i7 CPU L 620 @ 2GHz
`$$b. RAM: 1413MB / 7801MB
`Y$$b.
`"Y$b._
`""""
サードパーティのsource list を復活させる
/etc/apt/sources.list.d/* をリストアしたり.
% ls -A /etc/apt/sources.list.d/
atlassian-hipchat.list  chrome-remote-desktop.list  google-chrome.list  google-chrome.list.save  owncloud-client.list  spideroak.com.sources.list  steam.list  wuala.list
% sudo apt update
% sudo apt list --upgradable
一覧表示... 完了
libowncloudsync0/不明 1.8.2-1 amd64 [1.8.1+dfsg-1 からアップグレード可]
owncloud-client/不明 1.8.2-1 amd64 [1.8.1+dfsg-1 からアップグレード可]
owncloud-client-l10n/不明 1.8.2-1 all [1.8.1+dfsg-1 からアップグレード可]
% sudo apt upgrade
% sudo apt dist-upgrade
未だjessie がリリースされてそう経ってないので差分が少なくディストリビューションアップグレードはあっさり終わりました.アップデート時に面倒な設定ファイルの書き換えも1つだけでした.
コンソールでのキーマップが[標準 105 キー (国際) PC] になっていたので,[標準 101 キー PC] に変更した.
% sudo dpkg-reconfigure keyboard-configuration