🏛️
🏛️
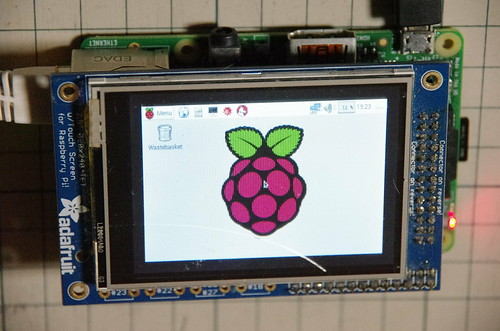
Raspberry Pi用でAdaruit製のGPIO経由(SPI)で接続する320×240 2.8"のタッチスクリーン付きのディスプレイ.動作には専用のドライバが必要.ドライバはsourceの他にAdaruitがRasbianに組み込み済みのものと,ビルド済みのリポジトリが用意されている.
Afafruit謹製のOSイメージ入手
通常のRasbianにAdafruitのリポジトリを追加する方法と,それを反映済みのOSイメージを使う方法(と自分でbuildする方法)がある.ここでは手順の少ないAfafruit謹製のOSイメージを利用する.こちらからwheesy/jessieのものが入手可能.
今回はjessie(2015-09-24-raspbian-jessie-pitft28r.zip)を利用.hashや署名は見当たらず.手元ではこんな感じだった.
$ md5sum 2015-09-24-raspbian-jessie-pitft28r.zip
e78c764abbd3426d63d9ae7180fcdfa8 2015-09-24-raspbian-jessie-pitft28r.zip
$ sha512sum 2015-09-24-raspbian-jessie-pitft28r.zip
a6be01345be6030aaf0bc85293a946be4db54e80a42dbbab0034ddff3c21e842fc10f7f066acd605ffd9d16b6d43e14631e7d5a969a7f2a0869d7d00f013d8fd 2015-09-24-raspbian-jessie-pitft28r.zip
SD Cardデバイス確認
$ dmesg | tail -3
[793679.349596] mmc0: new high speed SDHC card at address 59b4
[793679.350315] mmcblk0: mmc0:59b4 USDU1 14.9 GiB
[793679.351411] mmcblk0: p1 p2 p3
$ sudo fdisk -l /dev/mmcblk0
Disk /dev/mmcblk0: 15 GiB, 16088301568 bytes, 31422464 sectors
Units: sectors of 1 * 512 = 512 bytes
Sector size (logical/physical): 512 bytes / 512 bytes
I/O size (minimum/optimal): 512 bytes / 512 bytes
Disklabel type: dos
Disk identifier: 0xb3c5e39a
Device Boot Start End Sectors Size Id Type
/dev/mmcblk0p1 8192 131071 122880 60M c W95 FAT32 (LBA)
/dev/mmcblk0p2 131072 27228158 27097087 12.9G 83 Linux
/dev/mmcblk0p3 27228159 31422463 4194305 2G 83 Linux
$ mount|grep /dev/mmcblk0
パーティション情報の確認と消去
$ sudo wipefs /dev/mmcblk0
offset type
----------------------------------------------------------------
0x1fe dos [partition table]
$ sudo wipefs -a /dev/mmcblk0
/dev/mmcblk0: 2 bytes were erased at offset 0x000001fe (dos): 55 aa
/dev/mmcblk0: calling ioctl to re-read partition table: 成功です
$ sudo wipefs /dev/mmcblk0
※Mac/Windowsではこの辺を使うといいと思う.
イメージ書き込み
$ unzip -p 2015-09-24-raspbian-jessie-pitft28r.zip | pv | sudo ionice -c2 dd of=/dev/mmcblk0 bs=4M
4.03GiB 0:05:58 [11.5MiB/s] [ <=> ]
0+36176 レコード入力
0+36176 レコード出力
4325376000 バイト (4.3 GB) コピーされました、 452.676 秒、 9.6 MB/秒
$ sync
$ sync
$ mount|grep /dev/mmcblk0
コマンドの意味などはこちらを
書き込んだSD CardをPiTFTの繋がったRaspberry Piに挿入して起動するとXが自動起動してLXDEにpiユーザで自動ログインした状態になる.
リモート接続(ssh)
Rasbian jessieは初期状態でavahi&sshが起動しているのでIPアドレスを調べなくても接続できて便利.
$ ssh pi@raspberrypi.local -CY
リモート接続(vnc)
x11vncを使ってvinoみたいに既に起動しているX画面(DISPLAY=:0)を転送
$ sudo apt install x11vnc
$ x11vnc -display :0 &
リポジトリサーバの日本への切り替えとパッケージのアップデート
$ sudo apt edit-sources
$ cat /etc/apt/sources.list
deb http://ftp.tsukuba.wide.ad.jp/Linux/raspbian/raspbian/ jessie main contrib non-free rpi
deb-src http://ftp.tsukuba.wide.ad.jp/Linux/raspbian/raspbian/ jessie main contrib non-free rpi
deb http://apt.adafruit.com/raspbian/ jessie main
$ sudo apt update && sudo apt upgrade
Xの確認
$ ps -ef|grep X
root 557 550 0 05:50 tty7 00:00:01 /usr/bin/X :0 -seat seat0 -auth /var/run/lightdm/root/:0 -nolisten tcp vt7 -novtswitch
pi 733 698 0 05:50 ? 00:00:00 /usr/bin/lxsession -s LXDE-pi -e LXDE
pi 837 733 1 05:51 ? 00:00:02 lxpanel --profile LXDE-pi
pi 838 733 0 05:51 ? 00:00:01 pcmanfm --desktop --profile LXDE-pi
pi 968 942 0 05:55 pts/0 00:00:00 grep --color=auto X
$ DISPLAY=:0 xrandr --verbose
xrandr: Failed to get size of gamma for output default
Screen 0: minimum 320 x 240, current 320 x 240, maximum 320 x 240
default connected 320x240+0+0 (0x4f) normal (normal) 0mm x 0mm
Identifier: 0x4e
Timestamp: 35831
Subpixel: unknown
Clones:
CRTC: 0
CRTCs: 0
Transform: 1.000000 0.000000 0.000000
0.000000 1.000000 0.000000
0.000000 0.000000 1.000000
filter:
320x240 (0x4f) 0.000MHz *current
h: width 320 start 0 end 0 total 320 skew 0 clock 0.00KHz
v: height 240 start 0 end 0 total 240 clock 0.00Hz
$ ls -l /dev/fb*
crw-rw---- 1 root video 29, 0 Sep 24 17:32 /dev/fb0
crw-rw---- 1 root video 29, 1 Feb 3 05:52 /dev/fb1
PiTFT分のXだけが起動していて,ディスプレイ番号は:0のよう.解像度は320x240だけ.モニタ名はdefault?
XRandRのpanningを使って画面をスクロールして広く使う(失敗)
やっと本題.
xrandrのmanを見るとpanningというそれらしい設定が.
Per-output options
--panning widthxheight[+x+y[/track_widthxtrack_height+track_x+track_y[/border_left/border_top/border_right/border_bottom]]]
This option sets the panning parameters. As soon as panning is enabled, the CRTC position can change with every pointer move. The first four param‐
eters specify the total panning area, the next four the pointer tracking area (which defaults to the same area). The last four parameters specify the
border and default to 0. A width or height set to zero disables panning on the according axis. You typically have to set the screen size with --fb
simultaneously.
--transform a,b,c,d,e,f,g,h,i
Specifies a transformation matrix to apply on the output. Automatically a bilinear filter is selected. The mathematical form corresponds to:
a b c
d e f
g h i
The transformation is based on homogeneous coordinates. The matrix multiplied by the coordinate vector of a pixel of the output gives the transformed
coordinate vector of a pixel in the graphic buffer. More precisely, the vector (x y) of the output pixel is extended to 3 values (x y w), with 1 as
the w coordinate and multiplied against the matrix. The final device coordinates of the pixel are then calculated with the so-called homogenic divi‐
sion by the transformed w coordinate. In other words, the device coordinates (x' y') of the transformed pixel are:
x' = (ax + by + c) / w' and
y' = (dx + ey + f) / w' ,
with w' = (gx + hy + i) .
Typically, a and e corresponds to the scaling on the X and Y axes, c and f corresponds to the translation on those axes, and g, h, and i are respec‐
tively 0, 0 and 1. The matrix can also be used to express more complex transformations such as keystone correction, or rotation. For a rotation of
an angle T, this formula can be used:
cos T -sin T 0
sin T cos T 0
0 0 1
As a special argument, instead of passing a matrix, one can pass the string none, in which case the default values are used (a unit matrix without
filter).
--scale xxy
Changes the dimensions of the output picture. Values superior to 1 will lead to a compressed screen (screen dimension bigger than the dimension of
the output mode), and values below 1 leads to a zoom in on the output. This option is actually a shortcut version of the --transform option.
--scale-from wxh
Specifies the size in pixels of the area of the framebuffer to be displayed on this output. This option is actually a shortcut version of the
--transform option.
--primary
Set the output as primary. It will be sorted first in Xinerama and RANDR geometry requests.
ちょっと複雑そう.xrandrのGUIの皮のarandr/lxrandrで設定できると便利なんだろうけど実装された機能が少なくてこの当たりの設定は使えない感じで残念.
#arandrは外部モニタの設定や解像度の変更にはよく使ってます.
XRandRを手動で設定してmodeの登録を試みる
cvtコマンドで取得した値をxrandrに渡すといいはずだけどうまく行かない.
$ cvt 800 600
# 800x600 59.86 Hz (CVT 0.48M3) hsync: 37.35 kHz; pclk: 38.25 MHz
Modeline "800x600_60.00" 38.25 800 832 912 1024 600 603 607 624 -hsync +vsync
$ xrandr --newmode "800x600_60.00" 38.25 800 832 912 1024 600 603 607 624 -hsync +vsync
$ xrandr --addmode default 800x600_60.00
xrandr: cannot find output "default"
$ DISPLAY=:0 xrandr --addmode default 800x600_60.00
xrandr: Failed to get size of gamma for output default
xrandr: cannot find mode "800x600_60.00"
$ DISPLAY=:0 xrandr --addmode default 800x600_60.00
xrandr: Failed to get size of gamma for output default
xrandr: cannot find mode "800x600_60.00"
PC(i915なDebian stretch amd64)では想定した動作になった.
この例では存在するモードよりも広い1904×720のモードを追加した後,画面のモードを640×480にして仮想スクリーンを1904×720にしている.マウスカーソルを端に持って行くと自動スクロールする.
$ xrandr | grep LVDS1 -A5
LVDS1 connected 1366x768+0+0 (normal left inverted right x axis y axis) 277mm x 156mm panning 1366x768+0+0
1366x768 60.00*+
1360x768 59.80 59.96
1024x768 60.00
800x600 60.32 56.25
640x480 59.94
$ cvt 1904 720
# 1904x720 59.97 Hz (CVT) hsync: 44.86 kHz; pclk: 111.25 MHz
Modeline "1904x720_60.00" 111.25 1904 2000 2192 2480 720 723 733 748 -hsync +vsync
$ cvt 1904 720
# 1904x720 59.97 Hz (CVT) hsync: 44.86 kHz; pclk: 111.25 MHz
Modeline "1904x720_60.00" 111.25 1904 2000 2192 2480 720 723 733 748 -hsync +vsync
$ xrandr --newmode "1904x720_60.00" 111.25 1904 2000 2192 2480 720 723 733 748 -hsync +vsync
$ xrandr --addmode VGA1 1904x720_60.00
$ xrandr --output LVDS1 --mode 640x480 --panning 1904x720
そもそもpanningはmodeを追加しなくても使えるようだ.
$ xrandr --output LVDS1 --mode 1366x768 --panning 2000x768
$ xrandr --output LVDS1 --mode 1366x768 --panning 2732x1536 --scale 2x2
ということはこれだけでいいはずだけどモニタ名がうまく行けてない.モニタ名をドライバでちゃんと設定してない?
$ DISPLAY=:0 xrandr default --mode 320x240 --panning 800x600
xrandr: unrecognized option 'default'
Try 'xrandr --help' for more information.$ DISPLAY=:0 xrandr default --mode 320x240 --panning 800x600
xrandr: unrecognized option 'default'
Try 'xrandr --help' for more information.
Adafruitのフォーラムに同じ質問があったけど動いて無さそう.
もう少し叩いてみたらモニタ名はdefaultでOKのよう.320×240より小さなmodeを作ってみてもダメ.
xrandrコマンドを引数無しで実行した時のmaximum 320 x 240がいけないのかも.PCではmaximum 32767 x 32767と恐らくビデオカードの最大解像度であろう値が表示される.VRAMを増やしたりすると行けるけるのかもしれない.
$ DISPLAY=:0 xrandr
xrandr: Failed to get size of gamma for output default
Screen 0: minimum 320 x 240, current 320 x 240, maximum 320 x 240
default connected 320x240+0+0 0mm x 0mm
320x240 0.00*
$ DISPLAY=:0 xrandr --output default --auto --mode 320x240 --panning 800x600
xrandr: Failed to get size of gamma for output default
xrandr: screen cannot be larger than 320x240 (desired size 800x600)
$ DISPLAY=:0 xrandr --output default --auto --mode 160x120 --panning 320x240
xrandr: cannot find mode 160x120
$ cvt 160 120
# 160x120 50.08 Hz (CVT 0.02M3) hsync: 6.51 kHz; pclk: 1.25 MHz
Modeline "160x120_60.00" 1.25 160 168 176 192 120 123 127 130 -hsync +vsync
$ xrandr --newmode "160x120_60.00" 1.25 160 168 176 192 120 123 127 130 -hsync +vsync
$ DISPLAY=:0 xrandr --newmode "160x120_60.00" 1.25 160 168 176 192 120 123 127 130 -hsync +vsync
xrandr: Failed to get size of gamma for output default
$ DISPLAY=:0 xrandr --addmode default 160x120_60.00
xrandr: Failed to get size of gamma for output default
$ DISPLAY=:0 xrandr
xrandr: Failed to get size of gamma for output default
Screen 0: minimum 320 x 240, current 320 x 240, maximum 320 x 240
default connected 320x240+0+0 0mm x 0mm
320x240 0.00*
160x120_60.00 50.08
pi@raspberrypi ~ $ DISPLAY=:0 xrandr --output default --auto --mode 160x120_60.00 --panning 320x240
xrandr: Failed to get size of gamma for output default
xrandr: Configure crtc 0 failed
恐らくこれ以上はsourceを修正しないとダメだと思う.
fbcpを利用してRaspberry Pi標準のディスプレイをコピーして利用
フレームバッファをコピーするfbcpを利用する方法.便利だけどタッチパネル機能が使えない.
内蔵が/dev/fb0でPiTFTが/dev/fb1になっているので通常のRaspberry Piで行った設定をそのままPiTFTの画面に映すことが出来る.
フレームバッファのコピーなのでXだけでなくコンソール利用時にも使える.
fbcpのbuild
$ sudo apt install cmake
$ git clone https://github.com/tasanakorn/rpi-fbcp.git
$ cd rpi-fbcp
$ mkdir build
$ cd build
$ cmake ..
$ make
fbcpコマンドを適当な場所に置く.
$ sudo cp fbcp /usr/local/bin/
/dev/fb1を指定しているファイルを退避して,起動時にfbcpを起動するよう設定して再起動.
$ sudo mv /etc/X11/xorg.conf.d/99-fbdev.conf ~pi/99-fbdev.conf
$ sudo sed -i 's/exit/\/usr\/local\/bin\/fbcp \&\n\nexit/g' /etc/rc.local
$ sudo reboot
コンソールの途中からfbcpが動作してXも表示される.解像度は656×416になっている.もっと高解像度にもできるが使いやすさを考えるとこのくらいでいいと思う.
$ DISPLAY=:0 xrandr --verbose
xrandr: Failed to get size of gamma for output default
Screen 0: minimum 656 x 416, current 656 x 416, maximum 656 x 416
default connected 656x416+0+0 (0x4f) normal (normal) 0mm x 0mm
Identifier: 0x4e
Timestamp: 19289
Subpixel: unknown
Clones:
CRTC: 0
CRTCs: 0
Transform: 1.000000 0.000000 0.000000
0.000000 1.000000 0.000000
0.000000 0.000000 1.000000
filter:
656x416 (0x4f) 0.000MHz *current
h: width 656 start 0 end 0 total 656 skew 0 clock 0.00KHz
v: height 416 start 0 end 0 total 416 clock 0.00Hz
過去の試み