Android端末をLinuxのタッチパッド替わりにしたい(Bluetooth利用のBlink)

最近またポインティングデバイスにApple Wireless Trackpadを利用するようになりましたが持ち運びには少し嵩張ります.マウスを持ち運ぶのもかさばります.
Ubuntu TouchでHDMI接続時にタッチデバイスになるというのを見てAndroid端末をタッチデバイスにすることが出来るのでは?それなら荷物増え無いしいいかもと思って少し調べてみました.

BlinkはBluetooth接続かつPC側でデーモンを動かす必要があります.
先ずBluetoothペアリングをしておき,PC側でデーモンを導入します.

  • 必要パッケージの導入

$ sudo apt install bluez python-bluez xdotoolsudo apt-get install bluez python-bluez xdotool
  • デーモンの導入

$ git clone https://github.com/drpain/blink-server.git ~/.blink

以下のようにしてデーモンを起動するのですが,この記事を書いている時点でのDebian stretch testing amd64では以下のようなエラーとなります.

$ sudo ~/.blink/bluetooth_server.py
Traceback (most recent call last):
  File "/home/mk/.blink/bluetooth_server.py", line 25, in <module>
    profiles         = [ SERIAL_PORT_PROFILE ]
  File "/usr/lib/python2.7/dist-packages/bluetooth/bluez.py", line 176, in advertise_service
    raise BluetoothError (str (e))
bluetooth.btcommon.BluetoothError: (2, 'No such file or directory')

GuihubのHELPを参考に*/etc/bluetooth/main.conf*を以下のように修正します.

diff --git a/bluetooth/main.conf b/bluetooth/main.conf
index 372fd8c..2f7cc4a 100644
--- a/bluetooth/main.conf
+++ b/bluetooth/main.conf
@@ -64,6 +64,9 @@
 # 'false'.
 #FastConnectable = false

+# "drpain/blink-server: This is the server you would need to be able to run the Blink Android Application." https://github.com/drpain/blink-server
+DisablePlugins = pnat
+
 #[Policy]
 #
 # The ReconnectUUIDs defines the set of remote services that should try

設定を反映するためにbluetoothdを再起動してサーバを再起動します.

$ sudo service bluetooth restart

サーバは要rootのようです.
この状態でAndroid側からクライアントPCを選択して接続すればok.

$ sudo ~/.blink/bluetooth_server.py
READY FOR CONNECTIONS, RFCOMM channel 1
('INBOUND CONNECTION ', ('68:76:4F:3B:D1:E0', 1))
COMMAND RECEIVED [{"action":"mouse-move","x":null,"y":null}]
['xdotool', 'mousemove_relative', '--', 'None', 'None']
COMMAND RECEIVED [{"action":"mouse-move","x":-1,"y":0}]
['xdotool', 'mousemove_relative', '--', '-1', '0']
COMMAND RECEIVED [{"action":"mouse-move","x":0,"y":0}]
['xdotool', 'mousemove_relative', '0', '0']
COMMAND RECEIVED [{"action":"mouse-move","x":-1,"y":0}]
['xdotool', 'mousemove_relative', '--', '-1', '0']

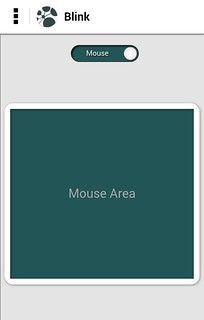
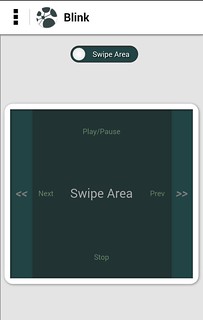
上の方のモード切替スイッチをタップして規定の「Swipe Area」から「Mouse」にします.「Mouse Area」で操作するとxdotoolのログが大量に出つつ操作できます.

27629912281 e0ba729509 n
27094267013 3fb8577a76 n

操作は少し解りづらくてこんな感じです.

  • タップ→左クリック

  • タップ, ホールド, リリース → 右クリック

中クリックやドラッグは多分未実装で使えません.
カーソル移動はちらつきますがとりあえず使える感じです.

でも導入に要設定変更&要rootなのが面倒ですね.
awesomeとかでApple Wireless Trackpadを設定する

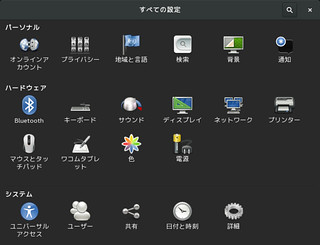
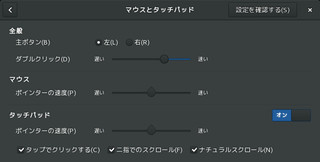
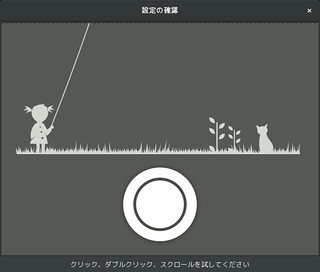
Bluetooth接続のApple Wireless Trackpadですが,GnomeとかだとBluetoothでペアリングした後こんな感じでGUIで設定できるのですが,

27082898093 594ed9ea4e n
27082898303 067a324e77 n
27414891970 2128414b0d n

awesomeだと効かないようです.ペアリングした後カーソル移動,2本指スクロール,右クリックはなどは動作するのですが,一番利用する左クリックが動作しません.

こいつはDynaptics driver用のコマンドのsynclientを使って設定内容の確認とアドホックな動作確認をします.
コマンドが存在しない場合 xserver-xorg-input-synaptics pkgを導入してください.
-l optionで設定項目の確認が出来ます.

$ synclient -l
Parameter settings:
    LeftEdge                = -2393
    RightEdge               = 2651
    TopEdge                 = -2030
    BottomEdge              = 2139
    FingerLow               = 70
    FingerHigh              = 75
    MaxTapTime              = 180
    MaxTapMove              = 346
    MaxDoubleTapTime        = 100
    SingleTapTimeout        = 180
    ClickTime               = 100
    EmulateMidButtonTime    = 0
    EmulateTwoFingerMinZ    = 100
    EmulateTwoFingerMinW    = 50
    VertScrollDelta         = 157
    HorizScrollDelta        = 157
    VertEdgeScroll          = 0
    HorizEdgeScroll         = 0
    CornerCoasting          = 0
    VertTwoFingerScroll     = 1
    HorizTwoFingerScroll    = 1
    MinSpeed                = 1
    MaxSpeed                = 1.75
    AccelFactor             = 0.0253743
    TouchpadOff             = 0
    LockedDrags             = 0
    LockedDragTimeout       = 5000
    RTCornerButton          = 0
    RBCornerButton          = 0
    LTCornerButton          = 0
    LBCornerButton          = 0
    TapButton1              = 0
    TapButton2              = 2
    TapButton3              = 3
    ClickFinger1            = 1
    ClickFinger2            = 3
    ClickFinger3            = 2
    CircularScrolling       = 1
    CircScrollDelta         = 0.1
    CircScrollTrigger       = 0
    CircularPad             = 0
    PalmDetect              = 1
    PalmMinWidth            = 10
    PalmMinZ                = 200
    CoastingSpeed           = 50
    CoastingFriction        = 50
    PressureMotionMinZ      = 30
    PressureMotionMaxZ      = 160
    PressureMotionMinFactor = 1
    PressureMotionMaxFactor = 1
    GrabEventDevice         = 0
    TapAndDragGesture       = 1
    AreaLeftEdge            = 0
    AreaRightEdge           = 0
    AreaTopEdge             = 0
    AreaBottomEdge          = 0
    HorizHysteresis         = 4
    VertHysteresis          = 4
    ClickPad                = 0
    RightButtonAreaLeft     = 0
    RightButtonAreaRight    = 0
    RightButtonAreaTop      = 0
    RightButtonAreaBottom   = 0
    MiddleButtonAreaLeft    = 0
    MiddleButtonAreaRight   = 0
    MiddleButtonAreaTop     = 0
    MiddleButtonAreaBottom  = 0

とりあえずタップの設定をしてみます.これでタップが出来るようになったら設定項目は当たりです.

$ synclient TapButton1=1
$ synclient -l|grep TapButton1
    TapButton1              = 1

設定項目が判ったら設定ファイルに書いておきます.
今回は /etc/X11/xorg.conf.d/21-apple-touchpad.conf にしました.
とりあえずタップの設定だけ以下のように設定しました.
ファイルの用意ができたらXの再起動を行います.awesomeの場合 Mod4 + Shift + q とかで一旦Xを終了してログインし直します.

Section "InputClass"
    Identifier "touchpad"
    Driver "synaptics"
    MatchIsTouchpad "on"
        Option "TapButton1" "1" # 1本指タップを左クリックに
EndSection

他の設定項目も同様に設定していきます.
現在こんな感じにしています.

Section "InputClass"
    Identifier "touchpad"
    Driver "synaptics"
    MatchIsTouchpad "on"
        Option "TapButton1" "1" # 1本指タップを左クリックに
        Option "TapButton2" "3" # 2本指タップを右クリックに
        Option "TapButton3" "2" # 3本指タップを中クリックに
        Option "VertTwoFingerScroll" "on"       # 縦スクロールを有効
        Option "HorizTwoFingerScroll" "on"      # 横スクロールを有効
        Option "PalmDetect" "1" # 手のひら検出
EndSection

今回Debian stretch testing amd64ですが他の環境でも同様に行けると思います.

$ screenfetch
         _,met$$$$$gg.           mk@x220
      ,g$$$$$$$$$$$$$$$P.        OS: Debian testing stretch
    ,g$$P""       """Y$$.".      Kernel: x86_64 Linux 4.5.0-2-amd64
   ,$$P'              `$$$.      Uptime: 1d 12h 8m
  ',$$P       ,ggs.     `$$b:    Packages: 4379
  `d$$'     ,$P"'   .    $$$     Shell: bash 4.3.42
   $$P      d$'     ,    $$P     Resolution: 1366x768
   $$:      $$.   -    ,d$$'     WM: Awesome
   $$\;      Y$b._   _,d$P'      WM Theme: awesome
   Y$$.    `.`"Y$$$$P"'          CPU: Intel Core i5-2540M CPU @ 3.3GHz
   `$$b      "-.__               GPU: Mesa DRI Intel(R) Sandybridge Mobile
    `Y$$                         RAM: 4288MiB / 15934MiB
     `Y$$.
       `$$b.
         `Y$$b.
            `"Y$b._
                `""""

Rasbperry Piのomxplayerでのウィンドウ表示&複数表示

展示でRaspberry Piのでぅくトップを賑やかにしたいなと思い,livestreamerでストリーミングを表示したら良さそうと思ったのですが,Raspberry Piのomxplayerだと基本的に全画面です.
man(1)を見ると—​winというものを使うとウィンドウ表示が使えそう.

               --win ´x1 y1 x2 y2´     Set position of video window
               --win x1,y1,x2,y2       Set position of video window

現在の解像度を確認します.1366×768でした.

$ xdpyinfo | grep dimensions
  dimensions:    1366x768 pixels (361x203 millimeters)

livestreamer から omxplayer を呼び出すようにするとうまく行きました.
この例では右下1/4がlivestreamerで取得したストリーミング動画で埋まります.
直接描画されるのでX関係なくXの上に描画されます.

$ /usr/local/bin/livestreamer --player "omxplayer --win '684 387 1366 768'" --fifo http://www.ustream.tv/channel/iss-hdev-payload --default-stream best

以下のように同時に4枚表示とかも行けました.試してませんが9枚も行けるかも.

$ omxplayer --win '0 0 684 387' 2016-06-07.ts | \
omxplayer --win '683 0 1366 387' 2016-06-07.ts | \
omxplayer --win '0 386 684 768' 2016-06-07.ts | \
omxplayer --win '684 387 1366 768' 2016-06-07.ts


RaspbianでUVCデバイスが認識できなくて困る

昨日の話なのですが,Rasbianの入ったRaspberry PiでUVCのWebCam(logitech c270)が認識しなくて困りました.
接続してdmesgやlsusbには該当のvid/pidは出てきます.でも/dev/video?などは出てこず.
手動でomdule を読みこませようとするとこんなエラー.

$ sudo modprobe uvcvideo
modprobe: ERROR: ../libkmod/libkmod.c:557 kmod_search_moddep() could not open moddep file '/lib/modules/4.4.9-v7+/modules.dep.bin'

apt update && apt upgradeでkernel更新したけど再起動して反映していない&Raspbianでは古いmoduleはupgraed時に消されるということだったようです.
再起動して新しいKernelにして解決でした.
通常のDebian等では残ってるのでちょっと嵌まりましたorz

Raspbian jessieでもhiptextを試す

さっき

というのを書きましたが,なんとなくRaspberry Pi B+ の Raspbian jessie lite でも`hiptext`を試してみました.

$ sudo apt install build-essential libpng12-dev libjpeg-dev     libfreetype6-dev libgif-dev ragel libavformat-dev libavcodec-dev     libswscale-dev libgflags-dev libgoogle-glog-dev git
$ git clone https://github.com/jart/hiptext.git
$ cd hiptext
$ time make
   :
real    22m7.443s
user    21m53.190s
sys     0m8.910s

て感じでほぼREADMEのままmake一発でした.違ったのは導入パッケージに`git`が必要だったくらいです.
思いの外makeに時間が掛かりましたがRaspberry Pi B+で試しているので2Bや3Bだともっと速いでしょう.
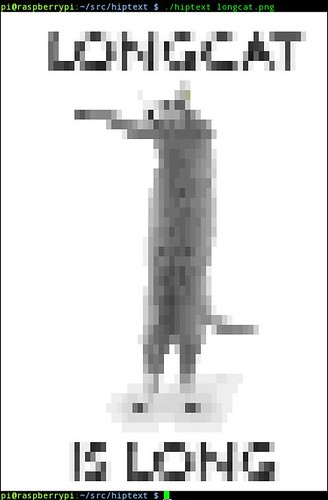
Balls.pngやObama.jpgはうまく行き,さっきうまく行かなかったTux.pngは同じようにコケたので同じ動きのようです.

恐らく Debian jessie でも同様だと思います.

27293516472 deedbe97a4

画像や動画をtextに変換するhiptextを試す

類似のものでlibcacaとかがありますが,

Turn images into text better than caca/aalib

とのことでもっといいものらしいです.
Texttop[1]で使われているので興味を持ったのですが,そのままではBuild出来なかったのでメモです.

build

READMEではこの辺が必要とのことです.

sudo apt-get install build-essential libpng12-dev libjpeg-dev \
    libfreetype6-dev libgif-dev ragel libavformat-dev libavcodec-dev \
    libswscale-dev libgflags-dev libgoogle-glog-dev

Debian stretch testingではこんな感じ?

$ sudo apt-get install build-essential libpng-dev libjpeg-dev \
      libfreetype6-dev libgif-dev ragel libavformat-dev libavcodec-dev \
      libswscale-dev libgflags-dev libgoogle-glog-dev

後はmakeするだけなんですが,こんなエラーが.新しいlibavに追従できてない感じ?

g++ -g -O3 -std=c++11 -Wall -Wextra -fno-exceptions -fno-rtti -MD  -march=native -c -o movie.o movie.cc
movie.cc: In member function ‘void Movie::PrepareRGB(int, int)’:
movie.cc:56:42: error: ‘PIX_FMT_RGB24’ was not declared in this scope
                       width_, height_, PIX_FMT_RGB24, SWS_FAST_BILINEAR,
                                          ^
In file included from graphic.h:10:0,
                 from movie.h:9,
                 from movie.cc:4:
movie.cc:64:38: error: ‘avcodec_alloc_frame’ was not declared in this scope
 CHECK(frame_ = avcodec_alloc_frame());
                                      ^
movie.cc:66:19: warning: ‘int avpicture_get_size(AVPixelFormat, int, int)’ is deprecated [-Wdeprecated-declarations]
   int rgb_bytes = avpicture_get_size(PIX_FMT_RGB24, width_, height_);
                   ^
In file included from /usr/include/x86_64-linux-gnu/libavformat/avformat.h:318:0,
                 from movie.cc:10:
/usr/include/x86_64-linux-gnu/libavcodec/avcodec.h:4898:5: note: declared here
 int avpicture_get_size(enum AVPixelFormat pix_fmt, int width, int height);
     ^
movie.cc:69:14: warning: ‘int avpicture_fill(AVPicture*, const uint8_t*, AVPixelFormat, int, int)’ is deprecated [-Wdeprecated-declarations]
   int prep = avpicture_fill(reinterpret_cast<AVPicture*>(frame_rgb_),
              ^
In file included from /usr/include/x86_64-linux-gnu/libavformat/avformat.h:318:0,
                 from movie.cc:10:
/usr/include/x86_64-linux-gnu/libavcodec/avcodec.h:4883:5: note: declared here
 int avpicture_fill(AVPicture *picture, const uint8_t *ptr,
     ^
movie.cc: In member function ‘Graphic Movie::Next()’:
movie.cc:94:5: warning: ‘void av_free_packet(AVPacket*)’ is deprecated [-Wdeprecated-declarations]
     av_free_packet(&packet);
     ^
In file included from /usr/include/x86_64-linux-gnu/libavformat/avformat.h:318:0,
                 from movie.cc:10:
/usr/include/x86_64-linux-gnu/libavcodec/avcodec.h:4040:6: note: declared here
 void av_free_packet(AVPacket *pkt);
      ^
movie.cc:94:27: warning: ‘void av_free_packet(AVPacket*)’ is deprecated [-Wdeprecated-declarations]
     av_free_packet(&packet);
                           ^
In file included from /usr/include/x86_64-linux-gnu/libavformat/avformat.h:318:0,
                 from movie.cc:10:
/usr/include/x86_64-linux-gnu/libavcodec/avcodec.h:4040:6: note: declared here
 void av_free_packet(AVPacket *pkt);
      ^
<ビルトイン>: ターゲット 'movie.o' のレシピで失敗しました
make: *** [movie.o] エラー 1

でも以下のPRを反映したら通りました :)

試してみる

サンプルとして,balls.jpg, obama.jpg があるのでこれを試してみます.
うまく動いていそうです.

47418

でも.pngはうまく動かない?

$ ./hiptext ~/Downloads/Tux.png
F0601 11:01:16.713266 30721 png.cc:35] Check failed: type == PNG_COLOR_TYPE_RGB || type == PNG_COLOR_TYPE_RGBA png bad type: /home/mk/Downloads/Tux.png
*** Check failure stack trace: ***
    @     0x7fa48d3c013d  google::LogMessage::Fail()
    @     0x7fa48d3c1fa3  google::LogMessage::SendToLog()
    @     0x7fa48d3bfccb  google::LogMessage::Flush()
    @     0x7fa48d3c298e  google::LogMessageFatal::~LogMessageFatal()
    @           0x41859f  LoadPNG()
    @           0x403fa8  main
    @     0x7fa489e59610  __libc_start_main
    @           0x40a229  _start
    @              (nil)  (unknown)
中止
$ convert ~/Downloads/Tux.png ./Tux.jpg
$ ./hiptext Tux.jpg

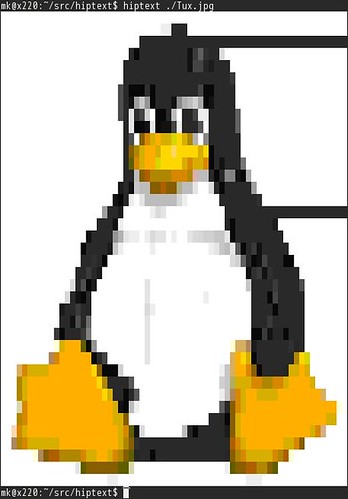
`.jpg`に変換したらいけてる感じですがなんか欠けてます.

26780171563 8d301b27a4

動画再生もいけます.再生のみで一時定位などの操作は出来ない感じ?

今のところlibcacaや動画ではvlcやmplayerなんかのほうがパッケージで導入できるのでお手軽そう.

とりあえず動くようになったので次はTexttopを試してみようと思います.