HDDのS.M.A.R.Tから温度を取得して表示してくれるhddtemp

hddtempというコマンドを知りました.熱いし熱が気になる時期だしお手軽に温度を知れるのは良さそうと試してみました.

導入

$ sudo apt install hddtemp

help

$ hddtemp -h
 Usage: hddtemp [OPTIONS] [TYPE:]DISK1 [[TYPE:]DISK2]...
 
   hddtemp displays the temperature of drives supplied in argument.
   Drives must support S.M.A.R.T.
 
  TYPE could be SATA, PATA or SCSI. If omitted hddtemp will try to guess.
 
  -b   --drivebase   :  display database file content that allow hddtemp to
                        recognize supported drives.
  -D   --debug       :  display various S.M.A.R.T. fields and their values.
                        Useful to find a value that seems to match the
                        temperature and/or to send me a report.
                        (done for every drive supplied).
  -d   --daemon      :  run hddtemp in TCP/IP daemon mode (port 7634 by default.)
  -f   --file=FILE   :  specify database file to use.
  -F   --foreground  :  don't daemonize, stay in foreground.
  -l   --listen=addr :  listen on a specific interface (in TCP/IP daemon mode).
  -n   --numeric     :  print only the temperature.
  -p   --port=#      :  port to listen to (in TCP/IP daemon mode).
  -s   --separator=C :  separator to use between fields (in TCP/IP daemon mode).
  -S   --syslog=s    :  log temperature to syslog every s seconds.
  -u   --unit=[C|F]  :  force output temperature either in Celsius or Fahrenheit.
  -q   --quiet       :  do not check if the drive is supported.
  -v   --version     :  display hddtemp version number.
  -w   --wake-up     :  wake-up the drive if need.
  -4                 :  listen on IPv4 sockets only.
  -6                 :  listen on IPv6 sockets only.
 
Report bugs or new drives to <hddtemp@guzu.net>.
hddtemp version 0.3-beta15

デバイスを指定すると温度が取得できます./dev/sd[a-z]とか/dev/sd?とかも使えました.
/dev/sdd, /dev/sdeはS.M.A.R.Tを使えないUSBアダプタ経由で繋いでいるので取得できませんでした.

$ sudo hddtemp /dev/sda
/dev/sda: VB0250EAVER: 37°C
$ sudo hddtemp /dev/sda /dev/sdb
/dev/sda: VB0250EAVER: 38°C
/dev/sdb: Hitachi HDS5C3030ALA630: 39°C
$ sudo hddtemp /dev/sd?
/dev/sda: VB0250EAVER: 37°C
/dev/sdb: Hitachi HDS5C3030ALA630: 37°C
/dev/sdc: WDC WD30EZRX-00MMMB0: 40°C
/dev/sdd: WDC WD30EZRX-00DC0B0: S.M.A.R.T. not available
/dev/sde: TOSHIBA DT01ACA300: S.M.A.R.T. not available

デーモン化もできます.tcp 7634にアクセスると値が取得できます.

$ sudo hddtemp -d /dev/sda
$ nc localhost 7634
|/dev/sda|VB0250EAVER|37|C|

停止

$ pgrep hddtemp
11832
$ sudo kill 11832

複数デバイスも行けるけどそのままでは見にくいですね.

$ sudo hddtemp -d /dev/sd?
$ nc localhost 7634
|/dev/sda|VB0250EAVER|38|C||/dev/sdb|Hitachi HDS5C3030ALA630|39|C||/dev/sdc|WDC WD30EZRX-00MMMB0|41|C||/dev/sdd|WDC WD30EZRX-00DC0B0|NA|*||/dev/sde|TOSHIBA DT01ACA300|NA|*|
$ nc localhost 7634|sed -e 's/||/|\n|/g'
|/dev/sda|VB0250EAVER|37|C|
|/dev/sdb|Hitachi HDS5C3030ALA630|38|C|
|/dev/sdc|WDC WD30EZRX-00MMMB0|40|C|
|/dev/sdd|WDC WD30EZRX-00DC0B0|NA|*|
|/dev/sde|TOSHIBA DT01ACA300|NA|*|

S.M.A.R.Tの値を元にしているのでこのツールを使わず大抵の環境で入っているsmartctlでも良い気もします.

$ sudo smartctl -a /dev/sda|grep -i temp
190 Airflow_Temperature_Cel 0x0022   063   056   045    Old_age   Always       -       37 (Min/Max 31/43)
194 Temperature_Celsius     0x0022   037   044   000    Old_age   Always       -       37 (0 11 0 0 0)

環境

$ lsb_release -d
Description:    Ubuntu 16.04.4 LTS
$ uname -m
x86_64
$ dpkg-query -W hddtemp smartmontools
hddtemp 0.3-beta15-52
smartmontools   6.4+svn4214-1
コンソールでモダンなウェブが閲覧できる Browsh を試す

browsh-header
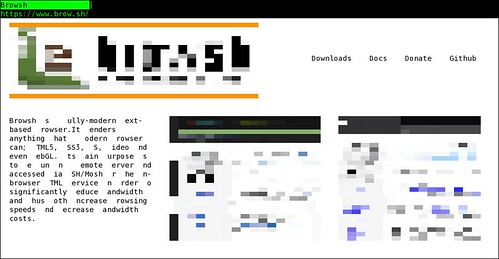
最近HTML5, CSS3, JS, videoなども閲覧可能な端末上でブラウジング出来るBrowshというものを知りました.

BrowshのバックエンドはFirefoxで,その画面を変換して表示しているようです.キーボード,マウスで操作できます.

Firefox -> VNC -> Browsh -> Termina/http

各種環境の単一のバイナリ(別途Firefoxが必要)や,docker imageが提供されています.arm版も用意されていますが,Firefox 57移行が必要なのでRaspberry PiのRaspbianではひと工夫要りそうです.

また,sshで体験できるようにもなっています.まずはこれで体験してみるのがお手軽で良いと思います.

$ ssh brow.sh

しかし,今日試したところ混んでいるようで繋がりませんでした(◞‸◟)

All of Browsh's servers are currently busy. Please try again soon.
Shared connection to brow.sh closed.

導入

手元で試してみます.今回は Linux Static: x64 を試しました.ちなみにv1.2.3の時はうまく動作しませんでしたが,現在のv1.3.3では動作するようになりました :)

BroushにはFOrefox 57以降が必要です.もし導入していない場合はFirefoxを導入します.そして対応バイナリを入手してchecksumを確認,実行権を付与します.

$ sudo apt install firefox
$ wget https://github.com/browsh-org/browsh/releases/download/v1.3.3/browsh_1.3.3_linux_amd64 https://github.com/browsh-org/browsh/releases/download/v1.3.3/browsh_1.3.3_checksums.txt
$ sha256sum -c browsh_1.3.3_checksums.txt 2>/dev/null | grep -v 'FAILED open or read'
browsh_1.3.3_linux_amd64: OK
$ chmod u+x browsh_1.3.3_linux_amd64

実行(TTY)

端末上で実行します.ヘッドレスでFirefoxが起動してからBrowshが利用できるようになります.

$ ./browsh_1.3.3_linux_amd64

以下のショートカットとマウス操作が可能です.

  • キーボード・ショートカット
    F1 : ドキュメント( https://www.brow.sh/docs/introduction/ )の表示
    カーソルキー,PgUp/PgDn : 画面スクロール
    CTRL+q : Browshの終了
    CTRL+l : URLバーにフォーカス
    BACKSPACE : 前の画面に移動
    CTRL+r : ページ再読込
    CTRL+t : 新しいタブ
    CTRL+w : タブを閉じる
    CTRL+TAB : 次のタブに移動
    ALT+SHIFT+p : スクリーンショットの取得(動作しない?)
    ALT+m : モノクロモードトルグ
    ALT+u : ユーザエージェントデスクトップ,モバイル切り替え

マウス操作はリンククリックだけだと思います.リンククリックもキーボードで出来ると良いのですが今のところ出来ません.issueで上がっているので出来るようになるかもしれません,

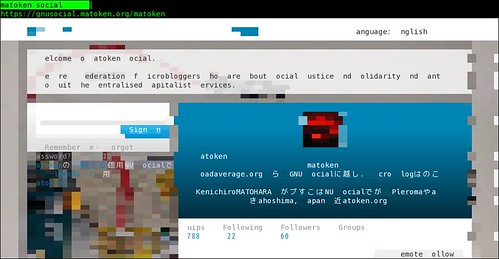
以下は手元で動かした時の表示例です.表示が崩れる場合は端末ソフトを変えるとましになったりします.
手元ではsakuraはしましまになってしまいました.以下のスクリーンショットはgnome-terminalのものです.

20180714_21:07:42-1367220180714_21:07:50-13839

残念ながら現在日本語などのワイド文字には未対応です.Issueに上がっているのでそのうち直ると思います.

http-server機能を使う

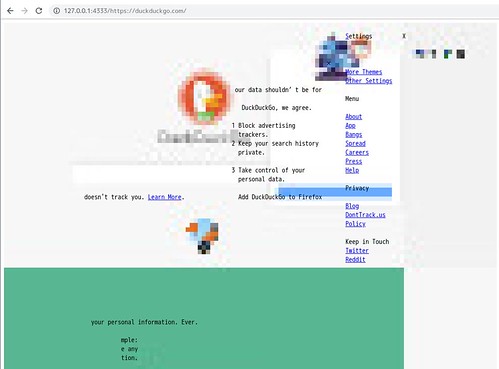
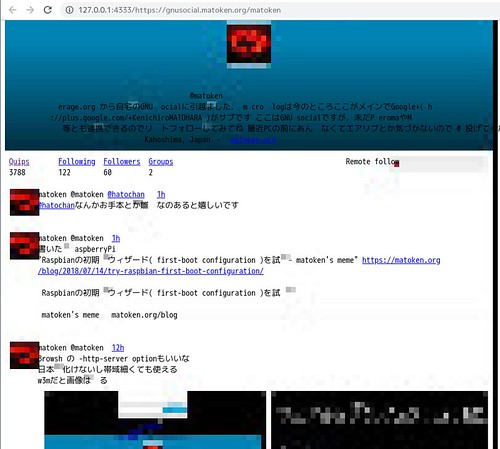
-http-server オプションを使うとBrowshをhttp proxyのように他のウェブブラウザで表示結果を利用できます.この場合多少崩れますが日本語も表示できます.細い回線だけでなく古い機械のウェブブラウザや,性能の低いマシンでアクセスするのにも良さそうです.

$ ./browsh_1.3.3_linux_amd64 --help 2>&1 | grep http-server$ -A1
  -http-server
        Run as an HTTP service
$ ./browsh_1.3.3_linux_amd64 -http-server -http-server-bind 127.0.0.1

既定値では,4333ポートで利用できます.
http://127.0.0.1:4333/
任意のURLを開く場合はこのURLの後ろにアクセスしたいURLを付与します.
http://127.0.0.1:4333/https://duckduckgo.com/

Chromeでアクセス
20180714_21:07:35-18304
20180714_21:07:55-18562

w3mでアクセス
20180714_21:07:31-18905

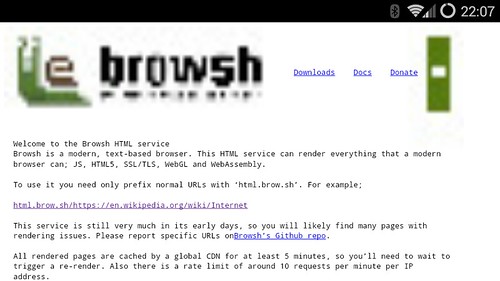
2011年発売のAndroid端末のAndroidブラウザでアクセス
image%3A52713

ちょっと崩れるけどいい感じです :)
ただ,何故かGoogle+にアクセスするとBrowshのページになってしまいます(TTYだとOK)

テキストブラウザはelinksやw3mなどありますが,最近のリッチな環境には追従できていません(JavaScript機能の入ったw3mは以前あった).フューチャーフォン時代はそちらのページを利用したりしていましたが最近はスマートフォン対応でそういったページも無くなってきています.ということでBroushのこれからに期待です.

余録

仕組みなどがやはり端末でリモートデスクトップが利用できるtexttopに似ているなと思ってGitHubにアクセスしてみるとBroushに転送されました.同じ人が作ったもので途中からBrowshに変わったようです.

環境

Browsh : Linux Static: x64 v1.3.3

$ lsb_release -d
Description:    Debian GNU/Linux unstable (sid)
$ uname -m
x86_64
$ dpkg-query -W firefox
firefox    61.0-2

Raspbianの初期設定ウィザード( first-boot configuration )を試す

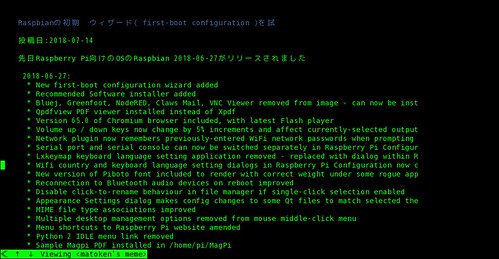
先日Raspberry Pi向けのOSのRaspbian 2018-06-27がリリースされました.

2018-06-27:
  * New first-boot configuration wizard added
  * Recommended Software installer added
  * Bluej, Greenfoot, NodeRED, Claws Mail, VNC Viewer removed from image - can now be installed from Recommended Applications
  * Qpdfview PDF viewer installed instead of Xpdf
  * Version 65.0 of Chromium browser included, with latest Flash player
  * Volume up / down keys now change by 5% increments and affect currently-selected output device rather than internal device only
  * Network plugin now remembers previously-entered WiFi network passwords when prompting for reconnection
  * Serial port and serial console can now be switched separately in Raspberry Pi Configuration
  * Lxkeymap keyboard language setting application removed - replaced with dialog within Raspberry Pi Configuration
  * Wifi country and keyboard language setting dialogs in Raspberry Pi Configuration now callable from other applications
  * New version of Piboto font included to render with correct weight under some rogue applications
  * Reconnection to Bluetooth audio devices on reboot improved
  * Disable click-to-rename behaviour in file manager if single-click selection enabled
  * Appearance Settings dialog makes config changes to some Qt files to match selected theme
  * MIME file type associations improved
  * Multiple desktop management options removed from mouse middle-click menu
  * Menu shortcuts to Raspberry Pi website amended
  * Python 2 IDLE menu link removed
  * Sample Magpi PDF installed in /home/pi/MagPi
  * Various minor tweaks, bug fixes and appearance changes
  * Bluetooth updates
    - Firmware with Bluetooth 4.2 features
    - SCO profile suppot added via bthelper.service
  * Linux kernel 4.14.50+
  * Raspberry Pi firmware 748fb17992426bb29d99224b93cb962fefbdc833

* New first-boot configuration wizard added が気になります.初回起動時にセットアップウィザードが走るようになったようです.気になるので試してみました.

先ずはOSイメージを入手.
以下のページから RASPBIAN STRETCH WITH DESKTOP の方を入手します.

適当な方法でイメージをSD cardに書き込みます.

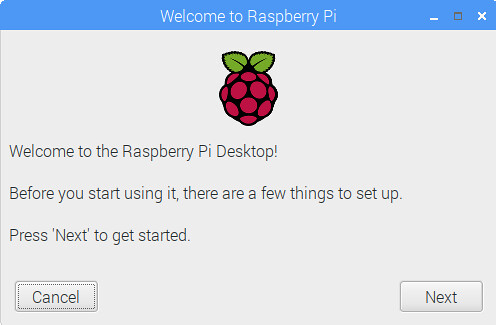
HDMIモニタに接続,若しくはVNC経由(今回は後者)で起動すると「Welcome to Raspberry Pi」というウィンドウが表示されます.

Welcome to Raspberry Pi_001

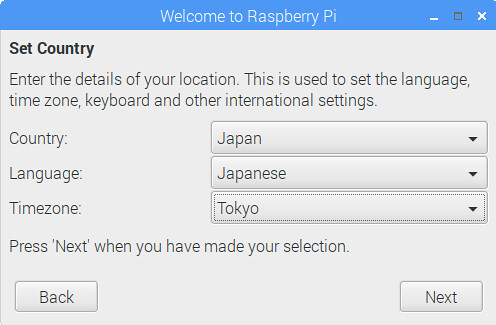
まずは国関連の設定.以下は日本でに言語環境で利用する場合です.

Country: Japan
Language : Japanise
Timezone: Tokyo

Welcome to Raspberry Pi_003

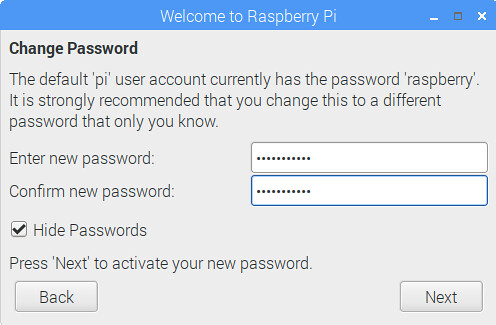
次はpi アカウントのパスワードの設定です.初期状態ではraspberryですが,ここのままだとsshやVNCなどのリモート接続を有効にすると誰でも入れてしまい乗っ取られてしまうのでぜひ変更しましょう.(piアカウントを無効にして別のユーザを作るのもいいですね)

Welcome to Raspberry Pi_005

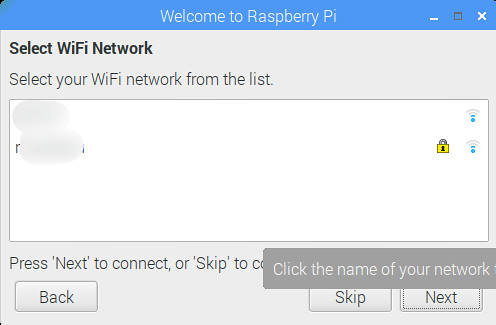
次にWi-Fiの設定です.今回試した Raspberry Pi は Raspberry Pi 2 B でWi-Fiは付いていませんがUSBのWi-Fiドングルを刺していたらこの画面になりました.付けていなくてもRaspberry Pi 3 B / Raspberry Pi 3 B+ / Raspberry Pi Zero W でも設定できると思います.

Welcome to Raspberry Pi_008

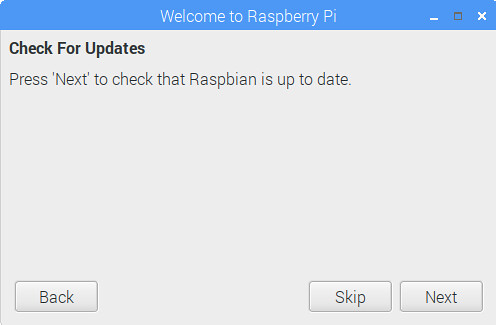
次は Update です.しばらく時間がかかります.

Welcome to Raspberry Pi_009

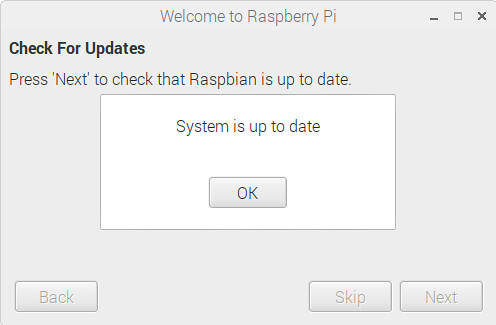
Updateが終了すると「System is up to date」と表示されます.

Welcome to Raspberry Pi_014

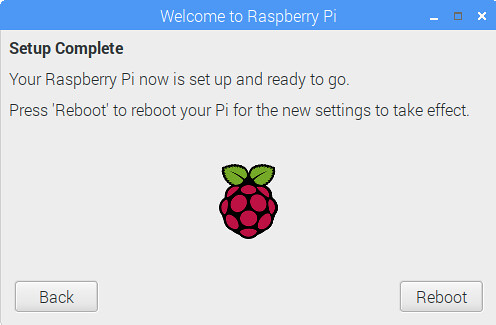
これでおしまい.「Reboot」ボタンで設定が反映されます.

Welcome to Raspberry Pi_015

もしまたこのウィザードを実行したい場合はpiwizコマンドで実行できます.

$ sudo -i piwiz

もし,以前からのRaspbianで実行したい場合はpiwizパッケージを導入することで実行できるようになります.

$ sudo apt update
$ sudo apt install piwiz

raspi-configrc_guiの簡易版みたいな感じですね.
画面は英語ですが,言語ファイルがあるので日本語化もできそうです.しかし,日本語化が反映されるのは設定後?となるとあまり意味はないですかね…….

ObscuraCamで顔写真に自動的にモザイクをかける(Android)

この記事で紹介されていたObscuraCamを試してみたところいい感じです.

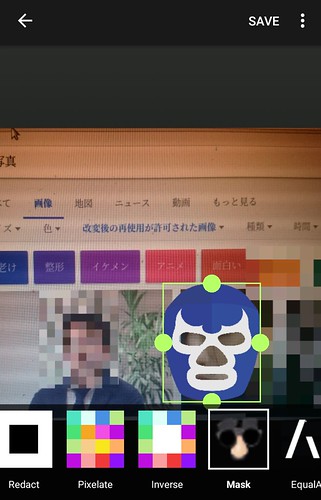
画像の中の顔を認識してモザイクをかけてくれます.認識率は思ったよりも良さそうです.認識に漏れても簡単に手動でモザイクをかけることも出来ます.手動の場合,モザイクの他に黒塗りやマスク(ヒゲメガネ,スマイリー,マスクマン)も選べます.

New photo added to gallery
Screenshot_2018-07-13-21-22-14

イラストにも試してみましたがやはりあまり認識しません.でもおじさんは認識して以下の今井哲也(@imaitetsuya)さんのイラストだとそれぞれ蔵六と内藤だけモザイクに.

イベントとかで写真を撮ってすぐ投稿というときに良さそうです.

環境

  • LGL22
  • Android 4.4.2
  • ObscuraCam v4.0.1-alpha-1

Mailmanのban_listを画像にする

最近Mailmanにbotからであろう登録が沢山やってくるようになりました.登録メールアドレスは大抵メジャーなフリーメールアドレスで生きているようなのですが,quotaや転送量のエラーとなって帰ってきます.これらのエラーメールでメールボックスがあふれて辛いです.

Mailmanにcaptchaか何かを設置できるプラグインとか無いかなと探してみたのですが,公式ではないようです.sourceを修正してGoogleのReCaptchaを実装している人は居ますが,バージョンアップのたびにパッチするのは面倒です.最近もセキュリティホールが見つかっていますし放置するわけにも生きません.

該当メールを見ると幸いメールアドレスは使い回しでバリエーションは多くありません.とりあえずMailmanのban_listにこれらのメールアドレスを登録してmailqに溜まっている該当メールはdropしました.1週間くらいしたらリモートからのエラーメールも無くなって静かになると良いなと思っています.
ban_listに登録しましたが,もしかしたらbotではなく普通に登録しようとしてメールボックスがあふれている人も居るかもしれません.それが解るようにban_listを申し込みページに表示することにしました.そのまま表示するのは良くない気がするので画像にしてノイズを散らして波型変形をかけてみました.
Mailmanのconfig_listコマンドで設定を出力してban_listをファイルに書き出し,Imagemagickのconvertコマンドでノイズと波型変形のフィルタをかけて画像を生成しました.
こんな感じの画像になります.これを申し込みページに説明と一緒に載せます.(ノイズのせいで容量が大きく……)

image

cronに登録しました.

$ sudo -u list crontab -l|grep ban_list
39 * * * *      /usr/lib/mailman/bin/config_list -c -o /dev/stdout users|grep ^ban_list |sed -e 's/^.*\[\|\]\|'\''\|'\ '//g'|sed -e 's/\@/ at /g'|tr -s ',' '\n' | sort -n > /var/lib/mailman/lists/users/ban_list && convert -size 1024x600 -background '#FFFFFF' -density 36 -gravity Center -fill black -font SetoFont label:"users ban_list `stat -c \%y /var/lib/mailman/lists/users/ban_list|cut -f1 -d.`\n\n`cat /var/lib/mailman/lists/users/ban_list`" -attenuate 5 -noise 7 +noise Gaussian -wave 15x`expr \( 100 + $((RANDOM \% 100)) \)` /var/lib/mailman/archives/public/users/ban_list.jpg

……長いですね.それに画像サイズ固定なのでlistが増えると文字サイズが小さくなってしまいます.てことでscriptに.

#!/bin/sh
 
LISTNAME='users'
FONT='SetoFont'
BANLIST='/var/lib/mailman/lists/users/ban_list'
IMAGE='/var/lib/mailman/archives/public/users/ban_list.jpg'
 
# ban_listを抽出してファイルに書き出し
/usr/lib/mailman/bin/config_list -c -o /dev/stdout ${LISTNAME} | grep ^ban_list | sed -e 's/^.*\[\|\]\|'\''\|''//g' | sed -e 's/\@/ at /g' | tr -s ',' '\n' | sort -n > ${BANLIST}
 
# ban_listの行数によって画像高さを計算
BANWC=`wc -l ${BANLIST} | cut -d -f1`
HIGHT=`expr \( ${BANWC} \* 60 + 120 \)`
 
# 画像に書き出す文字列を作成
LABEL="users ban_list `stat -c \%${BANLIST} | cut -f1 -d.`\n\n`cat ${BANLIST}`"
 
# 波型変形の波の深さを計算
WAVEX=`expr \( 10 + $((RANDOM % 10)) \)`
WAVEY=`expr \( 100 + $((RANDOM % 100)) \)`
 
# 画像作成
convert -size 1024x${HIGHT} -background '#FFFFFF' -density 36 -gravity Center -fill black -font ${FONT} label:"${LABEL}" -attenuate 5 -noise 7 +noise Gaussian -wave ${WAVWX}x${WAVEY} ${IMAGE}
 

てことでとりあえずの対処療法ですが…….

環境

$ lsb_release -d
Description:    Debian GNU/Linux 9.4 (stretch)
$ uname -m
x86_64
$ dpkg-query -W mailman
mailman 1:2.1.23-1+deb9u2
$ dpkg-query -W imagemagick
imagemagick     8:6.9.7.4+dfsg-11+deb9u4

マルチUSB書き込みツールのPopsicle

USBメモリなどにOSイメージなどを書き込む時GUIだとEtcherやUNetBootinなどのツールを使ったりしますが,同時に複数の媒体への書き込みに対応していません.同時に書き込みたい場合私はteeコマンドとddコマンドを利用したりしていましたが,PodsicleというツールがGUI/CUIで同時書き込みに対応しているようなので試してみました.Rust製MITライセンスです.

導入

$ git clone https://github.com/pop-os/popsicle
$ cd popsicle
$ make
$ sudo make install

make installだとGUT/CUIの療法が導入されます.make install-gtkだとGTK(GUI)のみ,make install-cliだとCLIのみです.

GUI利用

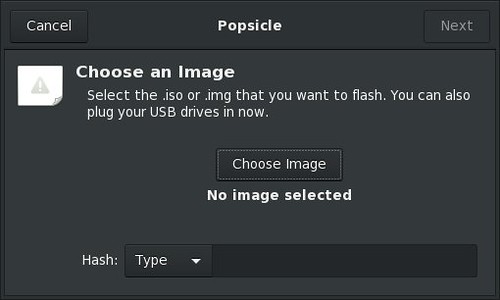
popsicle-gtkを起動すると書き込みイメージの選択画面になります.ここでイメージを指定すると読み込みチェックが走りしばらく待たされます.(CUIではチェックしないことも出来る)
20180708_08:07:50-31395

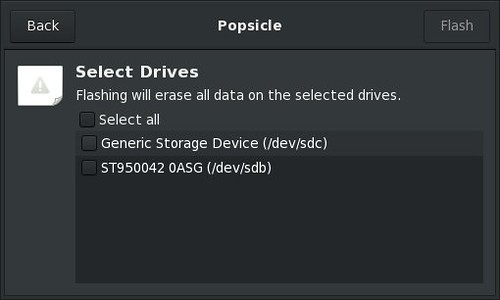
次に書き込み先のデバイス選択です.書き込みたいデバイスをチェックします.この画面になってからUSBメモリの抜き差しをしても反映されるので便利です.ちなみに内蔵SD cardの/dev/mmcblk0`はここにはでてきませんでした(CUIでは利用できます).
#SD-USB変換でUSB経由だとSD card書き込み可能です.

20180708_09:07:39-21924

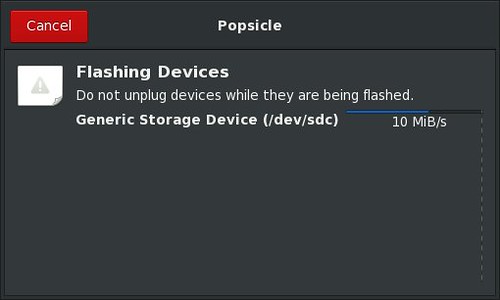
書き込み中画面です.複数デバイスの場合はそれぞれプログレスが表示されます.

20180708_09:07:54-30224

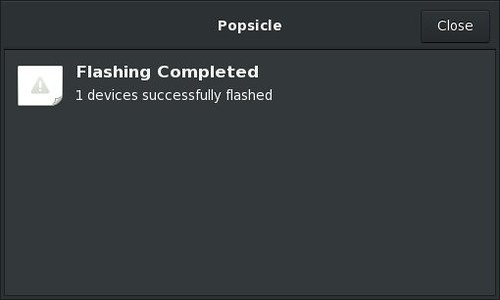
書き込み完了.

20180708_09:07:17-32223

CUI利用

CUIはpopsicleコマンドです.

$ popsicle -h
popsicle_cli 0.1.5
USB Flasher
 
USAGE:
    popsicle [FLAGS] <IMAGE> [DISKS]...
 
FLAGS:
    -a, --all        Flash all detected USB drives
    -c, --check      Check written image matches read image
    -h, --help       Prints help information
    -u, --unmount    Unmount mounted devices
    -V, --version    Prints version information
    -y, --yes        Continue without confirmation
 
ARGS:
    <IMAGE>       Input image file
    <DISKS>...    Output disk devices

イメージファイルと書き込み先のデバイスを指定して実行すると書き込めます.GUIでは/dev/mmcblk0は出てきませんでしたが,CUIでは書き込めました.

$ sudo popsicle ~/Downloads/2018-06-27-raspbian-stretch.img /dev/sdc /dev/sdd /dev/mmcblk0

ちなみにddで書き込む時は圧縮イメージファイルを展開しながら書き込むことが多い(zcat image.gz|pv|sudo dd of=/dev/sdz bs=4M)のですが,そういったことは出来なさそうです.

$ zcat ~/Downloads/2018-06-27-raspbian-stretch.zip | popsicle -u - /dev/mmcblk0 
popsicle: error with image at '-': image could not be opened: No such file or directory (os error 2)
$ zcat ~/Downloads/2018-06-27-raspbian-stretch.zip | popsicle -u /dev/stdin /dev/mmcblk0 
popsicle: error with image at '/dev/stdin': image was not a file
$ mkfifo zip.img
$ zcat ~/Downloads/2018-06-27-raspbian-stretch.zip > ./zip.img  &
$ sudo popsicle ./zip.img /dev/mmcblk0
popsicle: error with image at './zip.img': image was not a file

関連

端末上で遊べる障害物避けゲームのascii runner

端末上で遊ぶ障害物をスペースバーでジャンプして避けるゲーム.自キャラの4本足の生き物の動きがコミカルです.でも案外難しい.
macOS/Linux のamd64 だったらバイナリやパッケージがあるのでそれを使うのが良いです.
buildする場合はこんな感じで(結構時間掛かった)

$ sudo apt install haskell-stack $ git clone https://github.com/smallhadroncollider/ascii-runner $ cd ascii-runner $ stack build $ stack install $ runner 

端末での操作をSVG形式で記録する termtosvg

ttyrec/playみたいに端末操作を録画出来るアプリケーション.再生はウェブブラウザなどでできます.

導入はpipで

$ pip3 install termtosvg
$ termtosvg -h
usage: termtosvg [output_file] [--font FONT] [--theme THEME] [--help] [--verbose]
Record a terminal session and render an SVG animation on the fly
positional arguments:
output_file    optional filename of the SVG animation; if missing, a random
filename will be automatically generated
optional arguments:
-h, --help     show this help message and exit
--font FONT    font to specify in the CSS portion of the SVG animation
(DejaVu Sans Mono, Monaco...). If the font is not installed
on the viewer's machine, the browser will display a default
                 monospaced font instead.
  --theme THEME  color theme used to render the terminal session (circus,
                 classic-dark, classic-light, dracula, isotope, marrakesh,
                 material, monokai, solarized-dark, solarized-light, zenburn)
  -v, --verbose  increase log messages verbosity
See also 'termtosvg record --help' and 'termtosvg render --help'

導入後実行するとそのまま端末に戻ってexitするまでの操作を記録してくれる.exitするとSVGを書き出してそのファイル名を教えてくれる.

mk@T430s:~ (551)$ termtosvg
Recording started, enter "exit" command or Control-D to end
mk@T430s:~ (554)$ cowsay -f duck "hello termtosvg!"
__________________
< hello termtosvg! >
------------------
\
\
\ >()_
(__)__ _
mk@T430s:~ (555)$ cowsay -f duck "hello termtosvg!"|lolcat
__________________
< hello termtosvg! >
------------------
\
\
\ >()_
(__)__ _
mk@T430s:~ (556)$ exit
Recording ended, SVG animation is /tmp/termtosvg_vpd7hh0z.svg

出来上がったファイルはSVGなので中を見てコピペとか出来なくはない.

$ xmllint --format /tmp/termtosvg_vpd7hh0z.svg|head
<?xml version="1.0" encoding="utf-8"?>
<svg xmlns="http://www.w3.org/2000/svg" xmlns:ev="http://www.w3.org/2001/xml-events" xmlns:xlink="http://www.w3.org/1999/xlink" baseProfile="full" height="408" version="1.1" width="640">
<defs>
<style type="text/css"><![CDATA[* {font-family: "DejaVu Sans Mono", monospace; font-style: normal; font-size: 14px}
text {dominant-baseline: text-before-edge}
.bold {font-weight: bold}
.background {fill: #002b36}]]></style>
<g id="1">
<text fill="#93a1a1" lengthAdjust="spacingAndGlyphs" textLength="144" x="0">mk@T430s:~ (554)$ </text>
<text fill="#002b36" lengthAdjust="spacingAndGlyphs" textLength="8" x="144"> </text>

以下にexampleがある

サーバにアップロードして共有だとasciinemaが便利だけどこれはこれでファイル一個なので便利そうです.
Python製でライセンスはBSD 3-Clause Licenseです.

Bittorrentでダウンロードしたファイルのハッシュ値が一致しなくて困る

Raspbianの新しいバージョンがリリースされていた(2018-06-27)ので,Bittorentファイルを入手してTransmission-gtkでダウンロードしました.

2018-06-27:
* New first-boot configuration wizard added
* Recommended Software installer added
* Bluej, Greenfoot, NodeRED, Claws Mail, VNC Viewer removed from image - can now be installed from Recommended Applications
* Qpdfview PDF viewer installed instead of Xpdf
* Version 65.0 of Chromium browser included, with latest Flash player
* Volume up / down keys now change by 5% increments and affect currently-selected output device rather than internal device only
* Network plugin now remembers previously-entered WiFi network passwords when prompting for reconnection
* Serial port and serial console can now be switched separately in Raspberry Pi Configuration
* Lxkeymap keyboard language setting application removed - replaced with dialog within Raspberry Pi Configuration
* Wifi country and keyboard language setting dialogs in Raspberry Pi Configuration now callable from other applications
* New version of Piboto font included to render with correct weight under some rogue applications
* Reconnection to Bluetooth audio devices on reboot improved
* Disable click-to-rename behaviour in file manager if single-click selection enabled
* Appearance Settings dialog makes config changes to some Qt files to match selected theme
* MIME file type associations improved
* Multiple desktop management options removed from mouse middle-click menu
* Menu shortcuts to Raspberry Pi website amended
* Python 2 IDLE menu link removed
* Sample Magpi PDF installed in /home/pi/MagPi
* Various minor tweaks, bug fixes and appearance changes
* Bluetooth updates
- Firmware with Bluetooth 4.2 features
- SCO profile suppot added via bthelper.service
* Linux kernel 4.14.50+
* Raspberry Pi firmware 748fb17992426bb29d99224b93cb962fefbdc833  

一晩経って確認するとダウンロードが終わっていたので念の為ハッシュ値を確認すると合いません.

$ ls -l ./2018-06-27-raspbian-stretch-lite.zip
-rw-r--r-- 1 mk mk 366870528 6月 30 03:02 ./2018-06-27-raspbian-stretch-lite.zip
$ sha256sum 2018-06-27-raspbian-stretch-lite.zip
ce2d2babed81d5b2d6b919dc8dc92bc915a7d89f09f3aaad1d9ae01f2471eb25 2018-06-27-raspbian-stretch-lite.zip
$ echo 3271b244734286d99aeba8fa043b6634cad488d211583814a2018fc14fdca313
3271b244734286d99aeba8fa043b6634cad488d211583814a2018fc14fdca313

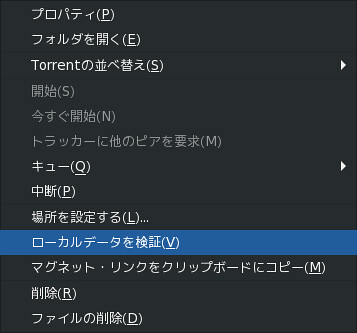
Transmission-gtk の該当Torrentで右クリックし,「ローカルデータを検証」を行うとダウンロードファイルが99%になりました.この状態でしばらく放置すると再度100%になり,今度はハッシュ値が合致しました.なぜこういう動きになったのかは謎です…….

shutter_18-06-30_06:29:30_001

環境

$ dpkg-query -W transmission-gtk
transmission-gtk        2.94-1+b1
$ dpkg-query -W transmission-common
transmission-common     2.94-1
$ lsb_release -d
Description:    Debian GNU/Linux unstable (sid)
$ uname -m
x86_64