Debian, Ubuntu で 上流のパッケージを借りてくる

以前以下のような記事を書きました.

今でもこのblogの中ではアクセスが多く,最近もトラックバックをもらいました.

この当時は arm64 の mozcパッケージがなくて自分でbuild したという話なのですが,現在はDebian では buster(testing), Ubuntu ではartful(17.10) 以降でパッケージが存在します.
なのでこの野良パッケージを使うよりも公式の上流パッケージを借りるほうが大抵の場合いいと思います.
ということで手順を書いておきます.

パッケージファイルだけが必要な場合はパッケージのページからダウンロード可能です.

野良パッケージは近日中に削除します.

Debian stretch arm64 に Debian buster arm64 の mozc を借りてくる

Debian stretch arm64 では mozc-data しかない
$ apt-cache search mozc
mozc-data - Mozc input method - data files

buster(testing) のmozc を借りてくることにする.

/etc/apt/preferences で buster の優先度を下げる

/etc/apt/preferences
Package: *
Pin: release n=buster
Pin-Priority: 100
/etc/apt/sources.list に buster(testing)追加 設定
deb http://deb.debian.org/debian buster main

sources.list の編集には apt edit-sources を使うと文法チェックをしてくれるのでおすすめ

パッケージ情報の更新
$ sudo apt update
mozcパッケージの確認
$ apt-cache search mozc
mozc-data - Mozc input method - data files
fcitx-dbus-status - Addon for Fcitx to set/get/monitor IM statuses via D-Bus
emacs-mozc - Mozc for Emacs
emacs-mozc-bin - Helper module for emacs-mozc
fcitx-mozc - Mozc engine for fcitx - Client of the Mozc input method
ibus-mozc - Mozc engine for IBus - Client of the Mozc input method
mozc-server - Server of the Mozc input method
mozc-utils-gui - GUI utilities of the Mozc input method
uim-mozc - Mozc engine for uim - Client of the Mozc input method
パッケージの導入
$ apt install fcitx-mozc -t buster

後は通常の apt update && apt upgrade で stretch で導入したパッケージは stretch で,buster で導入したパッケージはbuster で更新されるはず.

Ubuntu 16.04 LTS xenial arm64 に Ubuntu 18.04 LTS bionic arm64 の mozc を借りてくる

Debianの手順と同じでもokだと思うけど念の為以下の手順を真似してみる.

mozc は Ubuntu 17.10 artful から対応しているが,もうサポートされないのでUbuntu 18.04 bionic を使う.

標準のリリースを xenial に設定

/etc/apt/apt.conf.d/01ubuntu
APT::Default-Release "xenial";

mozc をpinningする

/etc/apt/preferences
Package: *mozc*
Pin: release n=xenial
Pin-Priority: -10

Package: *mozc*
Pin: release n=bionic
Pin-Priority: 900

/etc/apt/sources.list に buster(testing) を 追加 設定

/etc/apt/sources.list
deb http://ports.ubuntu.com/ bionic main universe

※sources.list の編集には apt edit-sources を使うと文法チェックをしてくれるのでおすすめ
※mirrorにより arm64 が置かれていないので注意

パッケージ情報の更新
$ sudo apt update
検索結果にmozcが出てくる
$ apt-cache search mozc
mozc-data - Mozc input method - data files
ibus-mozc - Mozc engine for IBus - Client of the Mozc input method
mozc-server - Server of the Mozc input method
mozc-utils-gui - GUI utilities of the Mozc input method
emacs-mozc - Mozc for Emacs
emacs-mozc-bin - Helper module for emacs-mozc
fcitx-mozc - Mozc engine for fcitx - Client of the Mozc input method
uim-mozc - Mozc engine for uim - Client of the Mozc input method
パッケージの導入
$ sudo apt install fcitx-mozc -t bionic
Redshift-gtk が位置情報を取得出来なくて困る

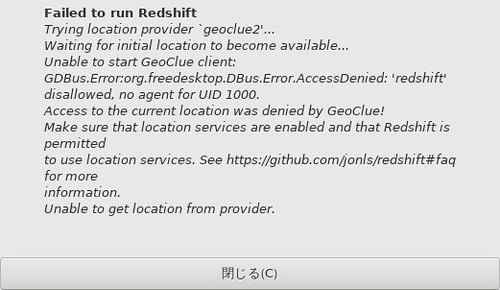
太陽の動きに合わせてモニタの色や明るさの調整をしてくれる f.LuxインスパイアなRedshiftというプログラムがあるのですが,新しい環境に導入しても動作しません.位置情報が取得できないようです.

44624259834 09ae5f8845

$ redshift
位置プロバイダ `geoclue2' を試行しています...
プロバイダ `geoclue2' を使用します。
方式 `randr' を使用します。
初期位置が取得可能になるのを待機しています...
Unable to start GeoClue client: GDBus.Error:org.freedesktop.DBus.Error.AccessDenied: 'redshift' disallowed, no agent for UID 1000.
Access to the current location was denied by GeoClue!
Make sure that location services are enabled and that Redshift is permitted
to use location services. See https://github.com/jonls/redshift#faq for more
information.
プロバイダから位置を取得できません。

geoclue2のdemoを試してみますがやはり動きません.agentを実行した状態だと動きます.

demoも動かない
$ sudo apt install geoclue-2-demo
$ /usr/lib/geoclue-2.0/demos/where-am-i

** (where-am-i:16681): CRITICAL **: 07:00:13.576: Failed to connect to GeoClue2 service: GDBus.Error:org.freedesktop.DBus.Error.AccessDenied: 'geoclue-where-am-i' disallowed, no agent for UID 1000
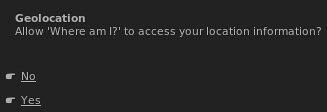
agentを実行してから試すと取得できるが確認メッセージが表示される
$ /usr/lib/geoclue-2.0/demos/agent &
$ /usr/lib/geoclue-2.0/demos/where-am-i
Geolocation service not in use
Geolocation service in use
Client object: /org/freedesktop/GeoClue2/Client/1

New location:
Latitude:    34.700000°
Longitude:   137.733300°
Accuracy:    25000.000000 meters
Timestamp:   2018年10月16日 07時01分35秒 (1539640895 seconds since the Epoch)
$ redshift
位置プロバイダ `geoclue2' を試行しています...
プロバイダ `geoclue2' を使用します。
方式 `randr' を使用します。
初期位置が取得可能になるのを待機しています...
Geolocation service not in use
Geolocation service in use
位置: 北緯 34.70°, 東経 137.73°

44434687985 2bbe2c44ec
44434688165 c1b5632101

GeoClueの設定で確認メッセージを表示しないように設定しておきます.

/etc/geoclue/geoclue.conf にredshiftの設定を追記
$ echo '[redshift]
allowed=true
system=false
users=' | sudo tee -a
/etc/geoclue/geoclue.conf
[redshift]
allowed=true
system=false
users=
agentを再起動して試す
$ kill %1
[1]+  Terminated              /usr/lib/geoclue-2.0/demos/agent
$ /usr/lib/geoclue-2.0/demos/agent &
[1] 32138
$ redshift
位置プロバイダ `geoclue2' を試行しています...
プロバイダ `geoclue2' を使用します。
方式 `randr' を使用します。
初期位置が取得可能になるのを待機しています...
Geolocation service not in use
Geolocation service in use
位置: 北緯 34.70°, 東経 137.73°
^CGeolocation service not in use

てことで,agentを実行しておけば動くようになりました.しかし,位置がかなりずれています.浜松あたりの座標が帰って来ていますが,実際は鹿児島です.
半時間はずれてそうです.

Redshift のhelpを確認すると手動で座標を指定できるようです.

redshift help
$ gtk-redshift --help
ヘルプを出力するには `redshift -h` を実行してください。
$ redshift -h
使い方: redshift -l 緯度:経度 -t 昼の色温度:夜の色温度 [オプション...]

時刻に従ってディスプレイの色温度を設定します。

  -h            このヘルプ メッセージを表示
  -v            詳細な出力
  -V            プログラムのバージョンを表示

  -b DAY:NIGHT  画面に適用する明るさ (0.1 から 1.0 の間)
  -c FILE       指定した設定ファイルから設定を読み込む
  -g R:G:B      追加で適用するガンマ補正
  -l LAT:LON    あなたの現在位置
  -l PROVIDER   自動で位置情報を更新するプロバイダを選択
                (`list' を指定すると利用可能なプロバイダの一覧が見られます)
  -m METHOD     色温度の設定方式
                (`list' を指定すると利用可能な方式の一覧が見られます)
  -o            ワン ショット モード (色温度の変更は継続して行いません)
  -O TEMP       ワン ショット 手動モード (色温度を設定します)
  -p            表示モード (パラメータの出力のみを行って終了します)
  -P            新しい色効果の適用前に既存のガンマ ランプをリセット
  -x            リセット モード (画面の調整を解除します)
  -r            色温度の緩やかな変更を無効にする
  -t DAY:NIGHT  昼間/夜間に設定する色温度

ニュートラルな温度は 6500K です。この値を用いると
ディスプレイの色温度は変更されません。これよりも高い値を設定すると
青い光が増え、低い値を設定すると赤い光が増えます。

既定値:

  昼間の温度: 6500K
  夜間の温度: 4500K

バグは <https://github.com/jonls/redshift/issues> に報告してください
$ redshift -l list
利用可能な位置プロバイダ:
  geoclue2
  manual

`-l プロバイダ名:オプション' でコロン区切りのオプションを指定します。
`-l プロバイダ名:help' でヘルプが参照できます。

OpenStreetMapなどで設定したい場所のURLで時計度の座標が確認出来ます.

座標を指定して実行してみます.小数点以下2桁しか見ないようです.

redshiftに手動で座標指定
$ redshift -l 35.69935:139.76957
方式 `randr' を使用します。
初期位置が取得可能になるのを待機しています...
位置: 北緯 35.70°, 東経 139.77°
^C
$ gtk-redshift -l 35.70:139.77 &

設定ファイルに位置情報設定しておきます.これでオプション無しでokになります.(秋葉原周辺の設定)

$ mkdir -p ~/.config/redshift
$ vi ~/.config/redshift/redshift.conf
~/.config/redshift/redshift.conf
[redshift]

location-provider=manual

[manual]
;秋葉原付近の差表
lat=35.70
lon=139.77
ADD 2020-12-28)

Debian sid amd64の redshift 1.12 ではPATHが ~/.config/redshift.conf に変わっていました.

$ redshift -V
redshift 1.12
$ dpkg-query -W redshift
redshift        1.12-4
$ man redshift | grep redshift.conf
       A  configuration  file  with  the name redshift.conf can optionally be placed in ~/.config/. The file has standard INI format. General

手動でとりあえず設定できましたが,移動するたびに設定するのは面倒なので別の位置情報取得データベースを試してみます.

GeoIPの導入とアップデート
$ sudo apt install geoip-bin geoip-database geoip-database-extra geoipupdate
$ sudo geoipupdate
$ geoiplookup $(curl -s ifconfig.me/ip)
GeoIP Country Edition: JP, Japan
GeoIP City Edition, Rev 1: JP, 13, Hyogo, Nishinomiya, 662-0934, 34.716702, 135.333298, 0, 0
GeoIP ASNum Edition: AS10013 FreeBit Co.,Ltd.

GeoIPは兵庫になりました.少し近づいたけどやはりかなりずれています.
これでうまく行ったらこんな感じで設定できるのですが.

GeoIPを使ったredshift利用例
$ gtk-redshift -l $( geoiplookup $(curl -s ifconfig.me/ip)|grep City | cut -f7-8 -d, | sed -e 's/,/:/' -e 's/\ //g' )

てことでagentを起動するのは面倒だし旅行の予定もないのでとりあえずマニュアル設定にしておきます.

環境
$ dpkg-query -W redshift redshift-gtk geoclue-2.0 geoclue-2-demo geoip-bin geoip-database geoip-database-extra geoipupdate
geoclue-2-demo  2.4.12-2
geoclue-2.0     2.4.12-2
geoip-bin       1.6.12-1
geoip-database  20180315-1
geoip-database-extra    20180315-1
geoipupdate     2.5.0-1
redshift        1.12-2
redshift-gtk    1.12-2
$ lsb_release -d
Description:    Debian GNU/Linux unstable (sid)
$ uname -m
x86_64

Raspbian stretch 2018-10-09

Raspberry Pi の Debian ベースのディストリビューションの最新版の Raspbian 2018-10-09 がリリースされたようです.

curl -sS -o – http://downloads.raspberrypi.org/raspbian/release_notes.txt | perl -e ‘$c=0;while(<STDIN>){if$c!=0 ) && ( $=~/^\ /{print $}elsif($c==0){print $_}else{exit} $c++}’
2018-10-09:
  * In startup wizard, assign keyboard to country as per Debian installer recommendations
  * In startup wizard, add option to use US keyboard in preference to country-specific option
  * In startup wizard, show IP address on first page
  * In startup wizard, check for existing wifi network connection and show it if there is one
  * In startup wizard, install language support packages for LibreOffice and other applications
  * In startup wizard, improve operation with keyboard only and no mouse
  * Password change in Raspberry Pi Configuration and startup wizard now works properly if passwords contain shell characters
  * Battery indicator plugin modified to cope with Pi-top hardware monitor crashing
  * Networking plugin hides wifi password characters by default
  * In Scratch 2 GPIO plugin, set pin from dropdown list rather than free text
  * In Scratch 2 SenseHAT plugin, swap x and y axis values for LED array
  * Include latest Adobe Flash player (31.0.0.108)
  * Include latest RealVNC Server (6.3.1)
  * Include libav-tools
  * Include ssh-import-id
  * Removed Mathematica
  * Merge in latest third-party code for Bluetooth ALSA interface
  * Add ability to prevent software update changing configuration files, by creating ~/.config/.lock file
  * Various other small bug fixes, tweaks and changes to text
  * Make dhcpcd work with 3G devices
  * Add hw acceleration to ffmpeg
  * Improved WiFi-BT coexistence parameters
  * Run fake-hwclock before systemd-fsck-root
  * Raspberry Pi PoE HAT support
  * Linux kernel 4.14.71
  * Raspberry Pi firmware 5b49caa17e91d0e64024380119ad739bb201c674

個人的には 「 Add hw acceleration to ffmpeg」 が嬉しいです.自分でbuildしなくてもよくなってそうです.

$ dpkg-query -W ffmpeg
ffmpeg  7:3.2.10-1~deb9u1+rpt2
$ ffmpeg 2>&1 | grep -o -E '\--enable-omx-rpi|\--enable-mmal'
--enable-omx-rpi
--enable-mmal

とりあえずダウンロードしておきます.

$ # ダウンロードURL確認
$ LANG=C wget --max-redirect=0 https://downloads.raspberrypi.org/raspbian_lite_latest 2>&1 | sed -En 's/Location: ([^ ]*).*$/\1/p'
https://downloads.raspberrypi.org/raspbian_lite/images/raspbian_lite-2018-10-11/2018-10-09-raspbian-stretch-lite.zip
$ # ファイル確認
$ w3m -dump https://downloads.raspberrypi.org/raspbian_lite/images/raspbian_lite-2018-10-11/
Index of /raspbian_lite/images/raspbian_lite-2018-10-11

   [ICO]                        Name                        Last    Size Description
                                                          modified
  ━━━━━━━━━━━━━━━━━━━━━━━━━━━━━━━━━━━━━━━━━━━━━━━━━━━━━━━━━━━━━━━━━━━━━━━━━━━━━━━
[PARENTDIR] Parent Directory                                           -
[ ]         2018-10-09-raspbian-stretch-lite.info        2018-10-09  54K
                                                              13:34
[ ]         2018-10-09-raspbian-stretch-lite.zip         2018-10-09 351M
                                                              13:34
[ ]         2018-10-09-raspbian-stretch-lite.zip.sha1    2018-10-11   79
                                                              11:38
[ ]         2018-10-09-raspbian-stretch-lite.zip.sha256  2018-10-11  103
                                                              11:38
[ ]         2018-10-09-raspbian-stretch-lite.zip.sig     2018-10-10  473
                                                              13:37
[ ]         2018-10-09-raspbian-stretch-lite.zip.torrent 2018-10-11  28K
                                                              11:38
  ━━━━━━━━━━━━━━━━━━━━━━━━━━━━━━━━━━━━━━━━━━━━━━━━━━━━━━━━━━━━━━━━━━━━━━━━━━━━━━━


Apache/2.4.10 (Debian) Server at downloads.raspberrypi.org Port 80
$ # bitttorrent と 署名ファイルダウンロード
$ wget https://downloads.raspberrypi.org/raspbian_lite/images/raspbian_lite-2018-10-11/2018-10-09-raspbian-stretch-lite.zip.torrent https://downloads.raspberrypi.org/raspbian_lite/images/raspbian_lite-2018-10-11/2018-10-09-raspbian-stretch-lite.zip.sig
$ # Transmission で ダウンロード
$ transmission-cli ./2018-10-09-raspbian-stretch-lite.zip.torrent
   :
$ # 署名確認
$ gpg --verify 2018-10-09-raspbian-stretch-lite.zip.sig

mysqldump を pv で制限

mysqldump 動いてる時間に同サーバで GNU social とか Nextcloud とかの mysql を利用しているアプリケーションが重くて使い物にならないです.nice + ionice は指定していますが効いてない感じ.
dump した sql を圧縮している xz コマンドが cpu を1 core 使い潰しているようです.このマシンは2 core あるのですが,もう1つの core もその他の処理でほぼ使い切って待ちが出ているような感じ.

$ vmstat 1 10
procs -----------memory---------- ---swap-- -----io---- -system-- ------cpu-----
 r  b   swpd   free   buff  cache   si   so    bi    bo   in   cs us sy id wa st
 2  0 328212 264788 212260 5628192    1    2    35   160    2   15 35  9 44 12  0
 1  1 328212 259136 212264 5628192    0    0     0   191 1497 3132 63  6 19 12  0
 1  1 328212 252492 212264 5628192    0    0     0    88  959 1716 81  6  7  6  0
 2  1 328212 248264 212264 5628196    0    0     0   114  973 1887 85  3  7  5  0
 2  0 328212 242572 212264 5628196    0    0     0    85  972 1967 74  5 15  5  0
 4  0 328212 241664 212100 5624380    0    0     0    97 1106 4226 91  7  2  2  0
 2  1 328212 234268 212100 5624384    0    0     0   140 1013 1815 70  5 19  7  0
 3  0 328212 235760 211944 5620076    0    0     0  2461 1289 4063 94  4  1  0  0
 1  0 328212 229656 211944 5620080    0    0     0   110  953 1685 61  6 18 15  0
 1  0 328212 224616 211952 5620072    0    0     0   151  983 1683 84  2  8  6  0

pv -L で帯域絞ってみました.
cpu の様子を見ながらだんだん絞っていって 128k 迄絞ってやっと xz の cpu 25〜40% 位になりました.この状態だと普通に使える感じです.
しばらくこれで試してみます.

pv で帯域制限
$ time sh -c "nice -n 19 ionice -c 3 mysqldump --defaults-file=/backup/micro/.my-backup.cnf --single-transaction --quick
--all-databases --events | pv -L 128k 2>/dev/null | nice -n 19 ionice -c 3 xz -9 > /dev/null"

real 127m16.113s
user 34m30.508s
sys 0m23.428s
cronでの実行
$ sudo -u backup crontab -l | grep mysqldump
14 3 * * *     umask 0266 && nice -n 19 ionice -c 3 /usr/bin/mysqldump --defaults-file=/mnt/backup/micro/.my-backup.cnf --single-transaction --quick --all-databases --events | pv -L 128k 2>/dev/null | nice -n 19 ionice -c 3 /usr/bin/xz -9 > /mnt/backup/micro/`date +\%F_\%T_$$`.sql.xz
環境
$ dpkg-query -W mysql-client-5.7 pv xz-utils
mysql-client-5.7        5.7.23-0ubuntu0.16.04.1
pv      1.6.0-1
xz-utils        5.1.1alpha+20120614-2ubuntu2
$ lsb_release -d
Description:    Ubuntu 16.04.5 LTS
$ uname -m
x86_64
$ grep -m1 model\ name /proc/cpuinfo
model name      : AMD Athlon(tm) II Neo N36L Dual-Core Processor

Firefox で DNS-over-HTTPS を試す

最近の Firefox はTrusted Recursive Resolver(TRR)を利用して DNS-over-HTTPS が利用できるようです.試してみました.

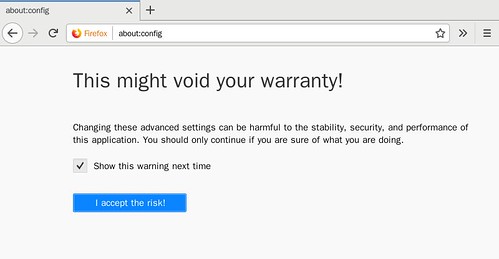
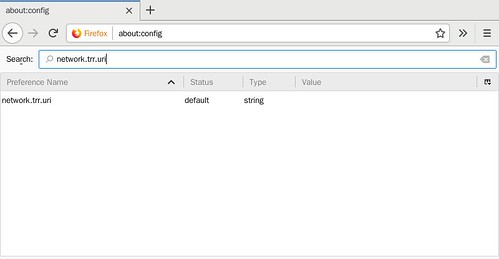
アドレスバーに about:config 入力して移動.

44211559615 6a29ddb6d5

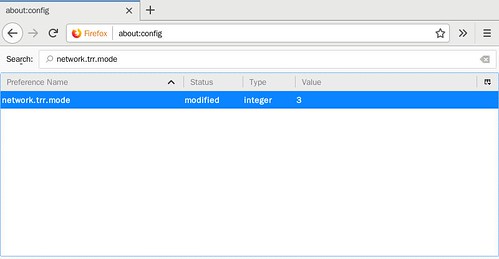
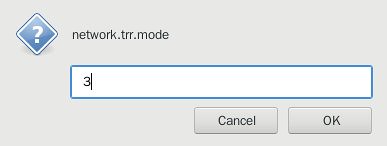
network.trr.mode を設定.今回は`3`のTRRのみ利用を指定した.

44402653684 e26c646cb0
43309711340 4b5d902ae2

  • network.trr.mode

    • 0 : TRR無効(既定値).

    • 1 : 通常のDNSとTRRを並行実行して最初に帰ってきた結果を利用する.

    • 2 : TRRを優先利用.

    • 3 : TRRのみを利用.

    • 4 : 通常のDNSを利用する.TRRは情報収集のためだけに動く.

    • 5 : TRRを明示的に無効にする

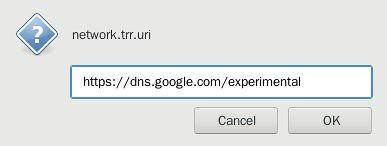
次に network.trr.uri を指定.好みのDNS-over-HTTPS のリゾルバを指定.

43309712480 d417a108b5
44402653984 c8538ce5fe

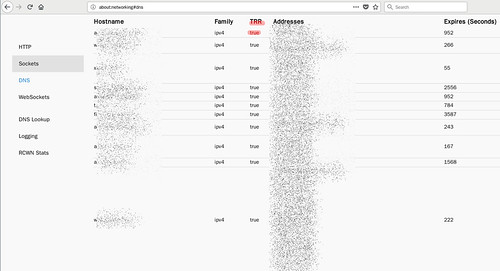
about:networking#dns にアクセスしてTRRが true になっていれば TRR を利用しているはず.

44402654944 daac2b37e3

環境
$ dpkg-query -W firefox
firefox 62.0.3-1
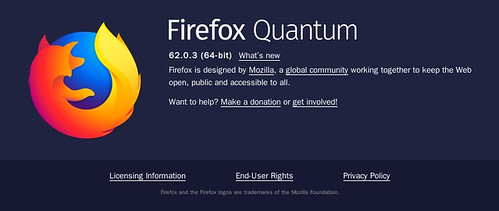
$ lsb_release -d
Description:    Debian GNU/Linux unstable (sid)
$ uname -m
x86_64

44402653394 9392330ef0

Linux で DNS-over-HTTPS を利用する

Android で DNS-over-HTTPS が簡単に出来るようになりました.

Linuxだどうなんだろうと以下の`dns-over-https` を試してみました.ここでは Debian sid amd64 で試していますが,公式の手順には Ubuntu 18.04 LTS, macOS の手順が載っています.

導入例
$ sudo apt install git golang
$ git clone https://github.com/m13253/dns-over-https.git
$ cd dns-over-https
$ make
$ sudo checkinstall
規定値のサーバは Google Public DNS になっている.変更したい場合は設定ファイル( /etc/dns-over-https/doh-client.conf )を編集
$ sudo edit /etc/dns-over-https/doh-client.conf
CleanBrowsingのセキュリティフィルターを利用する場合の設定例
diff --git a/dns-over-https/doh-client.conf b/dns-over-https/doh-client.conf
index 3b5de14..1791397 100644
--- a/dns-over-https/doh-client.conf
+++ b/dns-over-https/doh-client.conf
@@ -11,7 +11,7 @@ listen = [
 upstream_google = [

     # Google's productive resolver, good ECS, bad DNSSEC
-    "https://dns.google.com/resolve",
+    #"https://dns.google.com/resolve",

     # CloudFlare's resolver, bad ECS, good DNSSEC
     #"https://cloudflare-dns.com/dns-query",
@@ -39,6 +39,9 @@ upstream_ietf = [
     # Blog: https://blog.cloudflare.com/welcome-hidden-resolver/
     #"https://dns4torpnlfs2ifuz2s2yf3fc7rdmsbhm6rw75euj35pac6ap25zgqad.onion/dns-query",

+    # CleanBrowsing https://cleanbrowsing.org/dnsoverhttps
+    "https://doh.cleanbrowsing.org/doh/security-filter/"
+
 ]

 # Bootstrap DNS server to resolve the address of the upstream resolver
起動
$ sudo systemctl restart doh-client
名前が引けるのを確認
$ dig @127.0.0.1 | grep SERVER
;; SERVER: 127.0.0.1#53(127.0.0.1)
trace
$ dig +trace matoken.org @127.0.0.1

; <<>> DiG 9.11.4-P2-3-Debian <<>> +trace matoken.org @127.0.0.1
;; global options: +cmd
.                       24820   IN      NS      m.root-servers.net.
.                       24820   IN      NS      b.root-servers.net.
.                       24820   IN      NS      c.root-servers.net.
.                       24820   IN      NS      d.root-servers.net.
.                       24820   IN      NS      e.root-servers.net.
.                       24820   IN      NS      f.root-servers.net.
.                       24820   IN      NS      g.root-servers.net.
.                       24820   IN      NS      h.root-servers.net.
.                       24820   IN      NS      i.root-servers.net.
.                       24820   IN      NS      j.root-servers.net.
.                       24820   IN      NS      a.root-servers.net.
.                       24820   IN      NS      k.root-servers.net.
.                       24820   IN      NS      l.root-servers.net.
;; Received 239 bytes from 127.0.0.1#53(127.0.0.1) in 1334 ms

org.                    172800  IN      NS      a0.org.afilias-nst.info.
org.                    172800  IN      NS      a2.org.afilias-nst.info.
org.                    172800  IN      NS      b0.org.afilias-nst.org.
org.                    172800  IN      NS      b2.org.afilias-nst.org.
org.                    172800  IN      NS      c0.org.afilias-nst.info.
org.                    172800  IN      NS      d0.org.afilias-nst.org.
org.                    86400   IN      DS      9795 7 1 364DFAB3DAF254CAB477B5675B10766DDAA24982
org.                    86400   IN      DS      9795 7 2 3922B31B6F3A4EA92B19EB7B52120F031FD8E05FF0B03BAFCF9F891B FE7FF8E5
org.                    86400   IN      RRSIG   DS 8 1 86400 20181018050000 20181005040000 2134 . bYogBWKVV1SnjoHjS5LnLBE1mWC6UwkYT6muOjcHnuMNzJM1DY3YhSCT d9QOYlvvprUyD37xYIQ10BUZQ8hcNpnQ2TPUTNzd621lsqth6QK8zDN6 eP5AvZXlPy+9wni71rJIHy1wzepn9yrh3jp70zZhnEVxxgItWaYzsayY Jf+UfFQPmOKX0gn0GqcQ09CSZHdZhwbUT2AT1Rs0atkj6VaOy2TT1aQ1 gAtGF+5uA4uqLJegiEe/zneTeyuNE5QDQWKUNaeWEDE9kxylhv6m/3vE tQ8EHFpzOL9x+ed25LNcnRXH8K/xCW43R1FyaVNaA6xcsvGHCysqLneI v/RYMQ==
;; Received 813 bytes from 193.0.14.129#53(k.root-servers.net) in 210 ms

matoken.org.            86400   IN      NS      ns-cloud-d2.googledomains.com.
matoken.org.            86400   IN      NS      ns-cloud-d4.googledomains.com.
matoken.org.            86400   IN      NS      ns-cloud-d1.googledomains.com.
matoken.org.            86400   IN      NS      ns-cloud-d3.googledomains.com.
h9p7u7tr2u91d0v0ljs9l1gidnp90u3h.org. 86400 IN NSEC3 1 1 1 D399EAAB H9PARR669T6U8O1GSG9E1LMITK4DEM0T NS SOA RRSIG DNSKEY NSEC3PARAM
h9p7u7tr2u91d0v0ljs9l1gidnp90u3h.org. 86400 IN RRSIG NSEC3 7 2 86400 20181026101800 20181005091800 1862 org. edCrqcIYiHlMMzuacuX0DlobcQkymqClpK5C4QLzsNWtvp942bFRjbb2 WDX/6TsHO0noBNoKH2i+TU70WqpW7sVsXbjV9nkeLMZjxz/VLyAJOXWk 2ITvZwhjbe96lCSAIafm824pBx94ruieKZ2Yj8pYTBIrhDBoffjPhuem 44k=
a85qqkk8n39d1c6m55g8ucjhm6u3jjcs.org. 86400 IN NSEC3 1 1 1 D399EAAB A86TS1MQ34BR2A3D3CT8D5SCHKAPPBPJ NS DS RRSIG
a85qqkk8n39d1c6m55g8ucjhm6u3jjcs.org. 86400 IN RRSIG NSEC3 7 2 86400 20181022152743 20181001142743 1862 org. G15dhaW+53QBX9nTtsIUCnSRrMO0FCkQJE3jydb6hmRQEA328trp9OqK 6fuvl+RZBhBFeMeJV1Tz0Uezp9YvymfRWwdHiiFFLy3KBt5cTZJUXxTZ jXnMT9PoHZcIVJzN65vqQHDI2MzWYoQYr1WoKmJxOC5FQzFctZElyzEq fNQ=
;; Received 654 bytes from 199.19.56.1#53(a0.org.afilias-nst.info) in 217 ms

matoken.org.            120     IN      A       153.121.44.87
;; Received 56 bytes from 216.239.38.109#53(ns-cloud-d4.googledomains.com) in 388 ms

パケットキャプチャしてみる

  • 通常のDNS

dig 2quepghecPeuj.matoken.org
$ sudo tcpdump -n -nn -t -l -A -s0 2>/dev/null | grep 2quepghecPeuj.matoken.org
IP 192.168.2.203.49026 > 192.168.2.211.53: 49901+ [1au] A? 2quepghecPeuj.matoken.org. (66)
E..^.,..@.0t...........5.J..... .........2quepghecPeuj.matoken.org.......).........
E...z.@.@.8f.........5...w............. .2quepghecPeuj.matoken.org..............x...y,W........2....ns-cloud-d2.googledomains.com.........2....ns-cloud-d4.S........2....ns-cloud-d1.S........2....ns-cloud-d3.S.........d.... m.G.......+...."m.........D....$m.r......#P....&m............ .H`H..2.......m.G......+W.. .H`H..4.......m............ .H`H..6.......m.r......Ov.. .H`H..8.......m..)........
^C
  • DNS over HTTPS

名前は見当たらない

dig 2quepghecPeuj.matoken.org @127.0.0.1
$ sudo tcpdump -n -nn -t -l -A -s0 2>/dev/null | grep 2quepghecPeuj.matoken.org
^C

loopback 部分はHTTPSになる前の部分は見える

dig 2quepghecPeuj.matoken.org @127.0.0.1
$ sudo tcpdump -i lo -n -nn -t -l -A -s0 2>/dev/null | grep 2quepghecPeuj.matoken.org
IP 127.0.0.1.52265 > 127.0.0.1.53: 25766+ [1au] A? 2quepghecPeuj.matoken.org. (66)
E..^C...@.8..........).5.J.]d.. .........2quepghecPeuj.matoken.org.......).........
E..bD(@.@..`.........5.).N.ad............2quepghecPeuj.matoken.org..............w...y,W..)........
^C
永続化
$ sudo systemctl enable doh-client

後は /etc/network/interfaces や NetworkManager で DNS server に 127.0.0.1 を指定する.

環境
$ dpkg-query -W git golang dnsutils
dnsutils        1:9.11.4.P2+dfsg-3
git     1:2.19.0-1
golang  2:1.10~5
$ lsb_release -d
Description:    Debian GNU/Linux unstable (sid)
$ uname -m
x86_64

Dropbox を FUSE mount する dbxfs のアクセストークンを gpg で暗号化する

昨日dbxfs を試したのですが,アクセストークンのgpg での暗号化が出来ませんでした.

するとTwitterで情報をもらい,手動でDropbox app を作成してアクセストークンを入手する必要があるそうです.早速試してみたところうまく行きました!

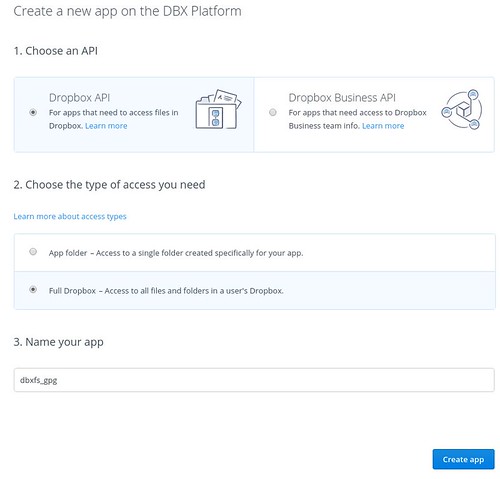
Dropbox の App Console にアクセスして,Create app で新しいアプリを作成します.
情報を入力してアプリを生成.

44379184824 11e5e5faf4

生成したアプリで Generated access token を押してアクセストークンを生成

43285861640 b2abfddc92 m

dbxfs設定ファイルの場所確認
$ ~/.local/bin/dbxfs --print-default-config-file
/home/matoken/.config/dbxfs/config.json
生成したアクセストークンを gpg で暗号化してファイルに格納.
$ echo -n 'ItBeOfobAlbofEicHefvemsajKicsEjcekDomBaHee-shwijreijKimyatIfnebir' | gpg -r EAA13B982D937827 -e -o /home/matoken/.config/dbxfs/token.gpg
暗号化したアクセストークンファイルを設定ファイルで指定する
$ jq . /home/matoken/.config/dbxfs/config.json
{
  "access_token_command": [
	"gpg",
	"--decrypt",
	"/home/matoken/.config/dbxfs/token.gpg"
  ],
  "send_error_reports": true,
  "asked_send_error_reports": true
}
mount 時に gpg で decrypt されて mount される
$ ~/.local/bin/dbxfs ~/fuse/dbxfs
Running 'gpg --decrypt /home/matoken/.config/dbxfs/token.gpg' for access token
gpg: 4096-ビットRSA鍵, ID EAA13B982D937827, 日付2015-06-11に暗号化されました
	  "K.I.Matohara <matoken@gmail.com>"
$ mount|grep dbxfs
dbxfs on /home/matoken/fuse/dbxfs type fuse (rw,nosuid,nodev,relatime,user_id=1000,group_id=1000,default_permissions)
$ ls /home/matoken/fuse/dbxfs
   :
$ fusermount -u ~/fuse/dbxfs

うまくいきました :)

環境
$ grep ^Version: ~/.local/lib/python3.6/site-packages/dbxfs-1.0.4.dist-info/METADATA
Version: 1.0.4
$ dpkg-query -W gpg libfuse2 python3-pip
gpg     2.2.10-2
libfuse2:amd64  2.9.8-2
python3-pip     9.0.1-2.3
$ lsb_release -d
Description:    Debian GNU/Linux unstable (sid)
$ uname -m
x86_64

Android 4.0 以降を DNS-over-HTTPS 対応にする Intra を少し試す

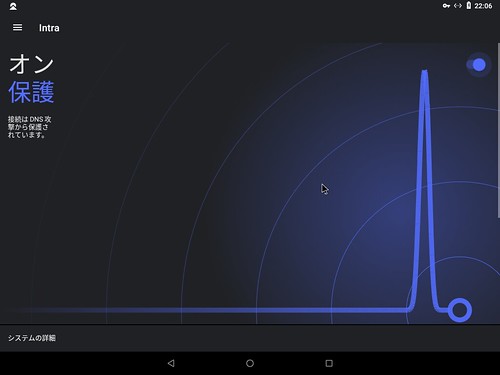
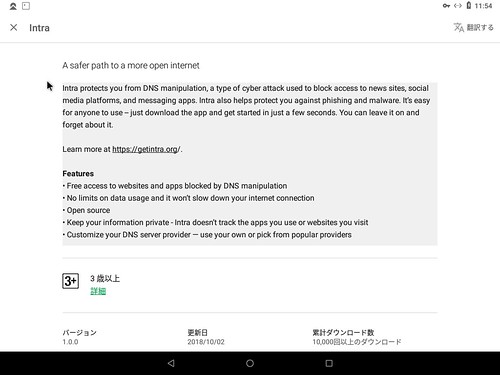
Alpabet の技術インキュベータのJigsawというところが作った Intra という Android アプリをリリースしました.

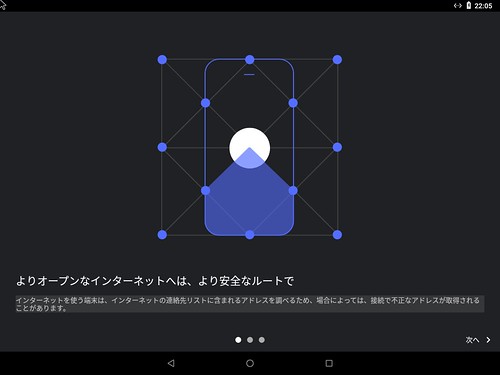
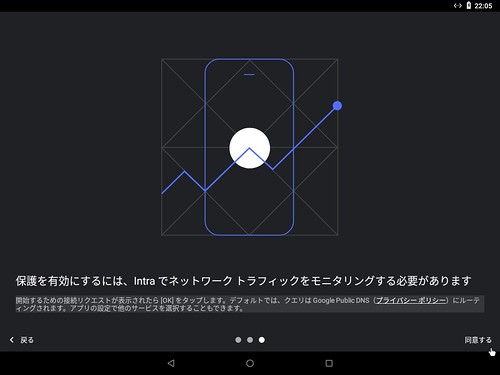
通常の DNS は暗号化されず改ざんが可能です.Intra は DNS を暗号化する DNS-over-HTTPS を Android 4.0 以降で利用できるようにするアプリです.

31226501238 7a637260f1
31226501848 d563502159
31226502538 db0efcae0a

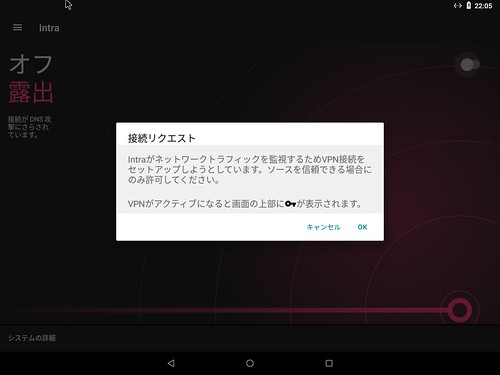
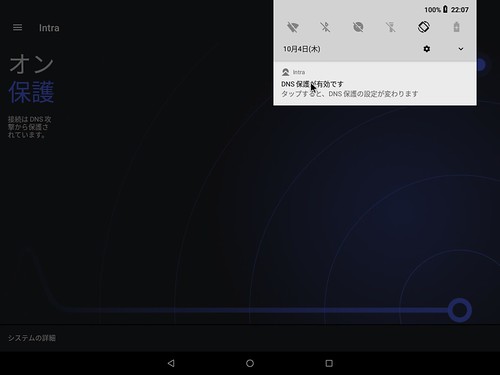
VPN接続の確認がされる

31226505068 5cc4feeeb4

DNS保護状態

31226508208 857594ce32
31226510648 7047e8ef20

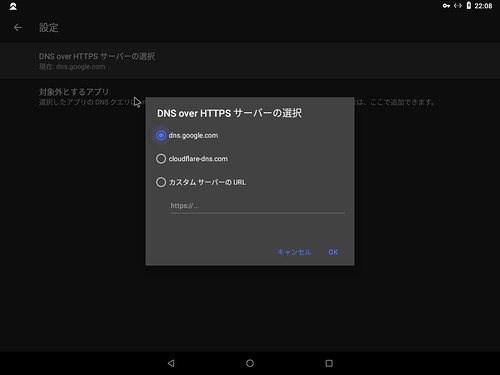
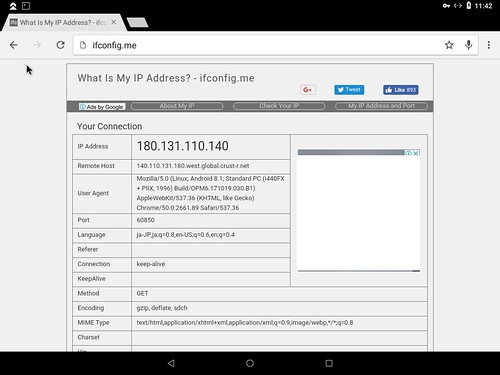
DNS-over-HTTPS サーバの既定値はGoogleで,Cloudflareも選択できる.その他のサーバも手動で指定できる

31226511688 8b413ac9b8

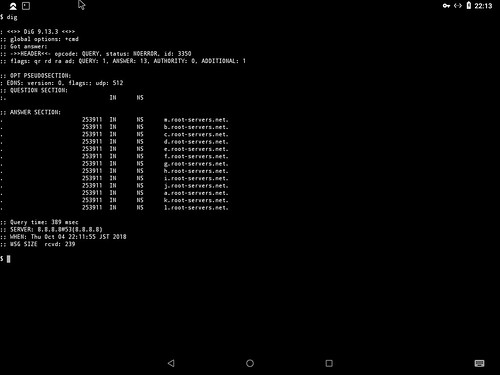
DNS は 8.8.8.8 の Google を見に行っているのがわかる

31226512688 975b1b6655

VPNが有効になっているが,IPはそのまま

45100103761 d9692f0075

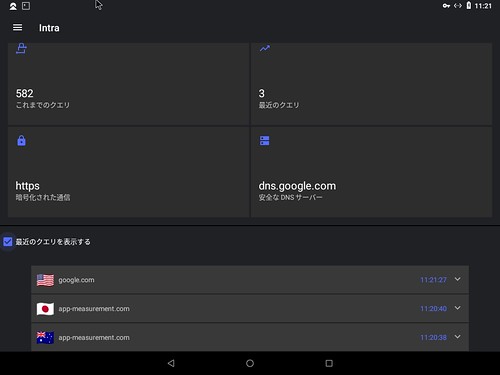
ダッシュボード画面で最近のクエリの確認も出来る

30162180647 1f64018b79

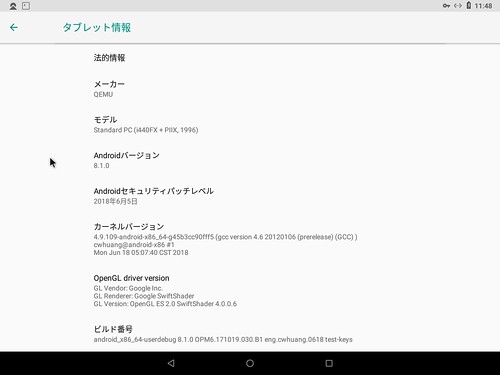
試した環境は仮想環境のAndroid 8.1.0(x86_64), Intra 1.0.0

44189409735 9ecf88c2c2
44380132464 4d9cbeacae

自分は基本的に出先では VPN を利用しているので必要ないかなと思うのですが,お手軽に無料でかつ古いデバイスにも対応しているので良さそうですね.ちなみにこの機能は Android Pie には標準搭載されているそうです.

#Wi-FiなんかでDNS改ざんして認証画面に飛ばしたりするようなのはどういう動きになるんだろう?

macOS, Linux で Dropbox を fuse mount する dbxfs を少し試す

Dropbox を FUSE mount 出来る dbxfs というものを見つけたので試してみました.

Doropbox の Linux client はファイルシステムがext4のみと制限されます.dbxfs であればおそらくこの制限も問題ないのではないかと思います.(未確認)

The Dropbox folder will need to be on an ext4-formatted hard drive or partition
Note: ecryptfs is not supported, but Dropbox will continue to sync with supported file systems that are encrypted via full disk encryption (e.g. LUKS)

導入
$ sudo apt install libfuse2 python3-pip
help
$ ~/.local/bin/dbxfs -h
usage: dbxfs [-h] [-f] [-v] [-s] [-n] [-l SMB_LISTEN_ADDRESS] [-c CONFIG_FILE]
			 [-e ENCRYPTED_FOLDERS] [--print-default-config-file]
			 [mount_point]

positional arguments:
  mount_point

optional arguments:
  -h, --help            show this help message and exit
  -f, --foreground      keep filesystem server in foreground
  -v, --verbose         show log messages, use twice for maximum verbosity
  -s, --smb             force mounting via SMB
  -n, --smb-no-mount    export filesystem via SMB but don't mount it
  -l SMB_LISTEN_ADDRESS, --smb-listen-address SMB_LISTEN_ADDRESS
						address that SMB service should listen on, append
						colon to specify port
  -c CONFIG_FILE, --config-file CONFIG_FILE
						config file path
  -e ENCRYPTED_FOLDERS, --encrypted-folder ENCRYPTED_FOLDERS
						relative paths of encrypted folders, can be used
						multiple times. requires safefs
  --print-default-config-file
						print default config file path to standard out and
						quit
初回mount
$ ~/.local/bin/dbxfs ~/fuse/dbxfs
We need an access token. Perform the following steps:
1. Go to https://www.dropbox.com/oauth2/authorize?response_type=code&client_id=vinkudorurc8kno
2. Click "Allow" (you may have to log in first)
3. Copy the authorization code.
Enter authoritization code (Ctrl-C to quit): NodigIOndefkiwitshOrackazEuweavirtyedCibEdI
We're all connected. Do you want to save your credentials for future runs? [Y/n] Y
Would you like to help us improve dbxfs by providing anonymous error reports? [Y/n] Y
Mount point "/home/matoken/fuse/dbxfs" doesn't exist, do you want to create it? [Y/n] Y
  1. のurl をブラウザで開いて認証を行う
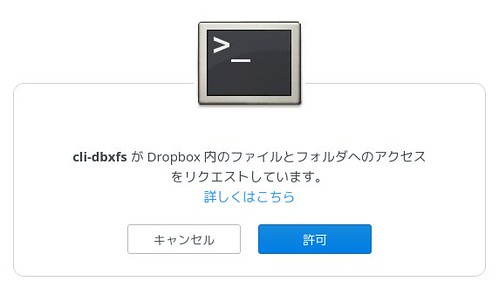
    認証後の画面で cli-dbxfs のアクセスを許可する.

45084023501 7cfd7c4058

許可後に表示されるトークンを 3. の後ろにコピー&ペーストする.

  • We’re all connected. Do you want to save your credentials for future runs?
    次回以降のために資格情報を保存するか?
  • Would you like to help us improve dbxfs by providing anonymous error reports?
    匿名のエラー報告を行いdbxfsに改善の支援を行うか?
  • Mount point “/home/matoken/fuse/dbxfs” doesn’t exist, do you want to create it?
    マウントポイントが存在しないので作成するか?
マウント確認
$ ls ~/fuse/dbxfs/
アンマウントする
$ fusermount -u ~/fuse/dbxfs
資格情報を保存していた場合2回目以降のマウントは何も聞かれない
$ ~/.local/bin/dbxfs ~/fuse/dbxfs

.

アクセストークンをpgpファイルに格納することも出来るようだが手元の環境では未だうまく行っていない(多分何か勘違いをしている)

EDIT: やはり使い方が間違っていた.次の記事に書いた -> Dropbox を FUSE mount する dbxfs のアクセストークンを gpg で暗号化する – matoken’s meme

設定ファイルの場所確認
$ ~/.local/bin/dbxfs --print-default-config-file
/home/matoken/.config/dbxfs/config.json
アクセストークンをpgpファイルにする
$ jq . /home/matoken/.config/dbxfs/config.json
{
  "keyring_user": "yigwulbaf6shnutugaivkilj",
  "send_error_reports": true,
  "asked_send_error_reports": true
}
$ gpg -r EAA13B982D937827 -e /home/matoken/.config/dbxfs/config.json
$ ls -l /home/matoken/.config/dbxfs/config.json*
-rw-r--r-- 1 matoken matoken 115 10月  4 07:19 /home/matoken/.config/dbxfs/config.json
-rw-r--r-- 1 matoken matoken 685 10月  4 07:22 /home/matoken/.config/dbxfs/config.json.gpg
$ shred /home/matoken/.config/dbxfs/config.json
$ echo '"access_token_command": ["gpg", "--decrypt", "/home/matoken/.config/dbxfs/config.json.gpg"]' > /home/matoken/.config/dbxfs/config.json
マウント
$ ~/.local/bin/dbxfs ~/fuse/dbxfs
Running 'gpg --decrypt /home/matoken/.config/dbxfs/config.json.gpg' for access token
gpg: 4096-ビットRSA鍵, ID EAA13B982D937827, 日付2015-06-11に暗号化されました
      "K.I.Matohara <matoken@gmail.com>"
Traceback (most recent call last):
  File "/home/matoken/.local/bin/dbxfs", line 11, in <module>
    sys.exit(main())
  File "/home/matoken/.local/lib/python3.6/site-packages/dbxfs/main.py", line 212, in main
    dropbox.Dropbox(access_token).users_get_current_account()
  File "/home/matoken/.local/lib/python3.6/site-packages/dropbox/base.py", line 4245, in users_get_current_account
    None,
  File "/home/matoken/.local/lib/python3.6/site-packages/dropbox/dropbox.py", line 274, in request
    timeout=timeout)
  File "/home/matoken/.local/lib/python3.6/site-packages/dropbox/dropbox.py", line 365, in request_json_string_with_retry
    timeout=timeout)
  File "/home/matoken/.local/lib/python3.6/site-packages/dropbox/dropbox.py", line 449, in request_json_string
    timeout=timeout,
  File "/home/matoken/.local/lib/python3.6/site-packages/requests/sessions.py", line 559, in post
    return self.request('POST', url, data=data, json=json, **kwargs)
  File "/home/matoken/.local/lib/python3.6/site-packages/requests/sessions.py", line 498, in request
    prep = self.prepare_request(req)
  File "/home/matoken/.local/lib/python3.6/site-packages/requests/sessions.py", line 441, in prepare_request
    hooks=merge_hooks(request.hooks, self.hooks),
  File "/home/matoken/.local/lib/python3.6/site-packages/requests/models.py", line 310, in prepare
    self.prepare_headers(headers)
  File "/home/matoken/.local/lib/python3.6/site-packages/requests/models.py", line 444, in prepare_headers
    check_header_validity(header)
  File "/home/matoken/.local/lib/python3.6/site-packages/requests/utils.py", line 941, in check_header_validity
    raise InvalidHeader("Invalid return character or leading space in header: %s" % name)
requests.exceptions.InvalidHeader: Invalid return character or leading space in header: Authorization

持ち運びモバイルPCだと辛いでしょうが,据え置きデスクトップ環境などのオンラインのマシンでは便利そうです.

環境
$ grep ^Version: ~/.local/lib/python3.6/site-packages/dbxfs-1.0.4.dist-info/METADATA
Version: 1.0.4
$ dpkg-query -W libfuse2 python3-pip
libfuse2:amd64  2.9.8-2
python3-pip     9.0.1-2.3
$ lsb_release -d
Description:    Debian GNU/Linux unstable (sid)
$ uname -m
x86_64

ADSLモデムのNATテーブル溢れで困る

古いADSL モデムで自宅サーバを立てている場合の話なので現代では役に立たないでしょうが健忘録として書いておきます.(光回線?圏外なのですorz)

環境
ADSLモデム-SV3
Hardware Revision: 0001
Software Version: 03.20 (Tue Jul 27 20:45:13 JST 2010)
Boot ROM Version: 01.00 (Thu Jun 3 17:07:20 JST 2004)
DSP Firmware Version: 42.20
VDSP Firmware Version: 9.1.60.12

最近よく家のネットワークで名前解決できなくなることがあります.
DNSが多段になっていて無駄が多いのでそのへんの問題かなと思ったのですが,直接ISP や 8.8.8.8 とか 1.1.1.1 とかの PublicDNS に問い合わせても引けません.

ISP — Unbound — PiHole — PC

ip 直なら繋がるだろうと試すとhttpもsshも駄目です.タイムアウトになります.

ルータを再起動すると直ることもあれば,直ってもすぐに元に戻ってしまうこともあります.

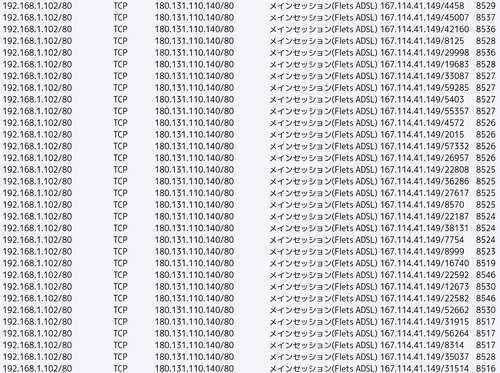
ルータのログみると tcp80 に大量のアクセスがあってそれで NAT table が溢れてしまって繋がらないということのようです.NAT table は 1024 しかないのですが,一度に 1 ipから200〜400回くらいのアクセスが来てこれが複数回来ると NAT table が溢れてしまい通信ができなくなるようです.
#NAT table を増やす設定変更項目は見当たらない

31167785778 8d6ed1d3d7

とりあえずルータを再起動しなくてもNAT table をクリアすると一時的に通信できるようになります.でもどんどんこのアクセスが来てすぐに元に戻ります.おまけにこのアクセスは「有効期限(秒)」が9000とかになっているのでなかなかクリアされません.(ほかは60のよう)
#有効期限の設定変更項目は見当たらない

ip を逆引きしてみると大抵は一般の利用者のようで名前が振られていないレンジや,ipアドレス-domain みたいな名前です.おそらく何かのウィルスに感染して攻撃をしているのではないかと思います.(Google Cloud とかもあったけど……)
幸い自宅サーバのtcp80はhttpsへのリダイレクトとテスト用なのでこれらのアクセスをブロックしてみました.
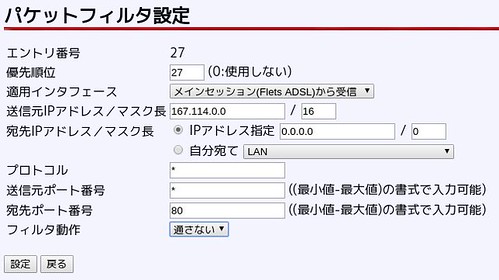
whois で inetnum を確認して,CIDR を計算して「パケットフィルタ設定」でこのネットワークの tcp80 へのアクセスを drop するように設定してNAT table クリアでドロップされるようにありました.ドロップは「セキュリティログ」で確認できます.

44992821992 770d5444e2

これを繰り返していたのですが設定は64個しか書けません.すぐに溢れました…….

別のアプローチを考えます.
このADSLモデムのweb管理画面はレガシーでcurlでアクセスできます.

NAT table の登録件数を求める
$ echo $(curl  -s -u 'user:password' 'http://192.168.1.1/cgi-bin/main.cgi?mbg_webname=nattbl'|lynx -stdin -dump -width=256|grep -m1 '現在の登録件数'|sed -e 's/^.*:\(.*\)\/.*$/\1/')
308

NATクリアも同様に出来ます.

NATテーブル消去
$ curl  -s -u 'user:password' -F 'mbg_webname=natclear' -F 'nat_clear=消去' 'http://192.168.1.1/cgi-bin/main.cgi' | lynx -stdin -dump
   NATテーブル消去
   [1]ヘルプ [2]help
   -----

   NATテーブルの消去を行いました。

   戻る

参照

   1. file:///cgi-bin/main.cgi?mbg_webname=help&mbg_helpname=natclear
   2. file:///cgi-bin/main.cgi?mbg_webname=help&mbg_helpname=natclear

これを使って NAT table を確認して,溢れそうだったらクリアするscriptを用意してみました.

script の中に書きたくないので ID/PASSWORDは ~/.netrc に書いておきます.

// EDIT : wgetに怒られたので netrc の machine を ADSL ROUTER から ADSL_ROUTER に変更(scriptも)
// wget: /home/mk/.netrc:1: "ROUTER" は不明な区切り記号(token)です

~/.netrc に追記
$ echo 'machine ADSL_ROUTER
> login user
> password  password
> ' | tee -a ~/.netrc
machine ADSL_ROUTER
login user
password  password

適当な script を用意して,

nat_clear.bash
#!/bin/bash

# ~/.netrc 読み込み
usrinfo=(`awk 'c&&c--;/ADSL_ROUTER/{c=2}' $HOME/.netrc | awk '{printf "%s ", $2}'`)
USER=${usrinfo[0]}
PASS=${usrinfo[1]}

# NAT table 登録数確認
NAT_TABLE=$(curl  -s -u "${USER}:${PASS}" 'http://192.168.1.1/cgi-bin/main.cgi?mbg_webname=nattbl'|lynx -stdin -dump -width=256|grep -m1 '現在の登録件数'|sed -e 's/^.*:\(.*\)\/.*$/\1/')

# NAT table が 750 より大きいとNAT table clear
if[ 750 -lt $NAT_TABLE ]; then
  echo "NAT table clrar(${NAT_TABLE})"
  # tcp:80 にアクセスしている ip を確認して表示
  curl  -s -u "${USER}:${PASS}" 'http://192.168.1.1/cgi-bin/main.cgi?mbg_webname=nattbl' | lynx -stdin -dump -width=256 | grep 192.168.1.102/80 | awk {'print $6'} | cut -f1 -d\/ | sort | uniq -c
  # NAT table clear
  curl  -s -u "${USER}:${PASS}" -F 'mbg_webname=natclear' -F 'nat_clear=消去' 'http://192.168.1.1/cgi-bin/main.cgi' | lynx -stdin -dump
fi

実行権を付与.

$ chmod +x nat_clear.bash

crontab に登録して5分毎に呼ぶように設定.

// EDIT: 1024使い切ってからクリアが多いので3分毎に変更した

$ crontab -e
crontab: installing new crontab
$ crontab -l | grep nat_clear.bash
*/5 * * * *     /home/mk/bin/nat_clear.bash

// EDIT: 実際に動作したときのログ追記

NAT table clrar(1024)
    837 103.234.73.6
    102 51.254.167.83
   NATテーブル消去
   [1]ヘルプ [2]help
   -----

   NATテーブルの消去を行いました。

   戻る

References

   1. file:///cgi-bin/main.cgi?mbg_webname=help&mbg_helpname=natclear
   2. file:///cgi-bin/main.cgi?mbg_webname=help&mbg_helpname=natclear

とりあえずこれで様子見中です.しかし対処療法でアクセスが増えたら耐えられなくりますね…….
サーバ機能を引っ越して外部からのアクセスを遮断したらこの問題は解決するはずですが出来たら選びたくないです.
ADSLモデムを高機能なものに置き換えると設定でどうにかなるかもとか,しかしそもそもADSL自体が収束なので製品が存在するのか?

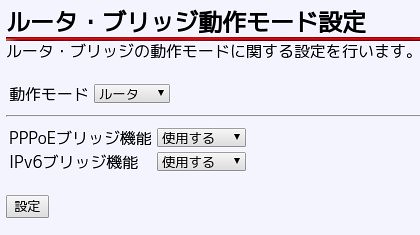
とか思いながら設定項目を見ていると「PPPoEブリッジ機能」というものがありました.これを使うとADSLモデムの裏のサーバ等からPPPoEで繋げそうな感じがします.それが出来たらn分以内にn回アクセスがあったらしばらく無視するとか柔軟な設定が出来るようになります.次はこれを試してみたいと思います.

30105335967 6ed05163ae

#光回線はよ……