pdfファイルから画像を抜き出し( pdfimages or LibreOffice )

ここ2,3日で数回使ったのでメモしておきます.

poppler-utilsのpdfimagesを使う

概要
$ apt show poppler-utils | grep Description: -A99

WARNING: apt does not have a stable CLI interface. Use with caution in scripts.

Description: PDF 向けユーティリティ (Poppler ベース)
 Poppler は xpdf PDF ビューアを基に作られた PDF 描画ライブラリです。
 .
 本パッケージには (Poppler ベースの) コマンドラインユーティリティが含まれ、
 PDF 文書の情報の取得、他の形式への変換、編集ができます。
  * pdfdetach -- 埋め込みファイル (添付ファイル) の一覧出力または抽出
  * pdffonts -- フォント分析ツール
  * pdfimages -- 画像抽出ツール
  * pdfinfo -- 文書情報
  * pdfseparate -- ページ抽出ツール
  * pdfsig -- デジタル署名の検証
  * pdftocairo -- PDF から PNG/JPEG/PDF/PS/EPS/SVG への Cairo を使った変換ツール
  * pdftohtml -- PDF から HTML への変換ツール
  * pdftoppm -- PDF から PPM/PNG/JPEG 画像への変換ツール
  * pdftops -- PDF から PostScript (PS) への変換ツール
  * pdftotext -- テキストの抽出
  * pdfunite -- 文書の併合ツール
導入
$ sudo apt install poppler-utils
usage
$ pdfimages
pdfimages version 0.69.0
Copyright 2005-2018 The Poppler Developers - http://poppler.freedesktop.org
Copyright 1996-2011 Glyph & Cog, LLC
Usage: pdfimages [options] <PDF-file> <image-root>
  -f <int>       : first page to convert
  -l <int>       : last page to convert
  -png           : change the default output format to PNG
  -tiff          : change the default output format to TIFF
  -j             : write JPEG images as JPEG files
  -jp2           : write JPEG2000 images as JP2 files
  -jbig2         : write JBIG2 images as JBIG2 files
  -ccitt         : write CCITT images as CCITT files
  -all           : equivalent to -png -tiff -j -jp2 -jbig2 -ccitt
  -list          : print list of images instead of saving
  -opw <string>  : owner password (for encrypted files)
  -upw <string>  : user password (for encrypted files)
  -p             : include page numbers in output file names
  -q             : don't print any messages or errors
  -v             : print copyright and version info
  -h             : print usage information
  -help          : print usage information
  --help         : print usage information
  -?             : print usage information
pdfファイル内の画像リスト確認
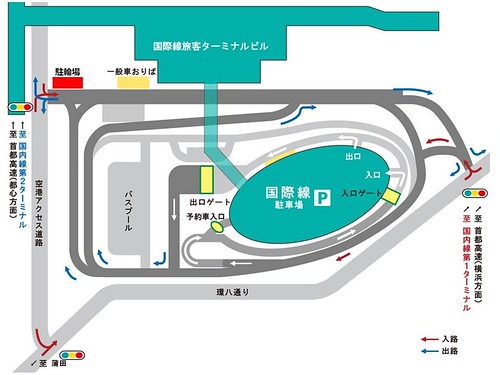
$ pdfimages ./bicycle_parking.pdf -list
page   num  type   width height color comp bpc  enc interp  object ID x-ppi y-ppi size ratio
--------------------------------------------------------------------------------------------
   1     0 image     340   120  rgb     3   8  image  no         5  0   221   221 9576B 7.8%
   1     1 image     960   720  rgb     3   8  jpeg   yes       14  0   170   170 64.2K 3.2%
pdfファイルから画像抜き出し既定値では.ppm形式
$ pdfimages ./bicycle_parking.pdf ./bicycle_parking-images
$ ls -l ./bicycle_parking-images*
-rw-r--r-- 1 matoken matoken  122415 11月 12 21:40 ./bicycle_parking-images-000.ppm
-rw-r--r-- 1 matoken matoken 2073615 11月 12 21:40 ./bicycle_parking-images-001.ppm
$ identify ./bicycle_parking-images-000.ppm
./bicycle_parking-images-000.ppm PPM 340x120 340x120+0+0 8-bit sRGB 122415B 0.000u 0:00.000
png形式に変換して保存
$ pdfimages ./bicycle_parking.pdf ./bicycle_parking-images -png
$ ls -l ./bicycle_parking-images*
-rw-r--r-- 1 matoken matoken  10274 11月 12 21:46 ./bicycle_parking-images-000.png
-rw-r--r-- 1 matoken matoken 321115 11月 12 21:46 ./bicycle_parking-images-001.png
$ identify ./bicycle_parking-images-000.png
./bicycle_parking-images-000.png PNG 340x120 340x120+0+0 8-bit sRGB 10274B 0.000u 0:00.000
jpegファイルはjpegとして保存(それ以外はppm)
$ pdfimages ./bicycle_parking.pdf ./bicycle_parking-images -j
$ ls -l ./bicycle_parking-images*
-rw-r--r-- 1 matoken matoken 122415 11月 12 21:48 ./bicycle_parking-images-000.ppm
-rw-r--r-- 1 matoken matoken  65695 11月 12 21:48 ./bicycle_parking-images-001.jpg

LibreOfficeでOpenDocumentFormatに変換して画像だけ抜き出し

OpenDocumentFormatはzip形式で圧縮されてその中に画像ファイルも含まれるのでDraw形式に変換して画像ディレクトリの格納されている Pictures だけ展開すると画像が取り出せる.

導入はディストリビューションのほかFlatpack, snapなども公式で配布されているのでお好みで.今回は Debian sid amd64 でapt installしたもの.

$ libreoffice --headless --nologo --nofirststartwizard --convert-to odg ./bicycle_parking.pdf
convert /home/matoken/Downloads/bicycle_parking.pdf -> /home/matoken/Downloads/bicycle_parking.odg using filter : draw8
$ unzip ./bicycle_parking.odg Pictures/*
Archive:  ./bicycle_parking.odg
 extracting: Pictures/10000000000003C0000002D0136E1A08DF8E2B28.jpg
 extracting: Pictures/100000000000015400000078BA7345C344D8D008.png
$ ls -lA Pictures/
合計 80
-rw-r--r-- 1 matoken matoken 10812 11月 12 12:56 100000000000015400000078BA7345C344D8D008.png
-rw-r--r-- 1 matoken matoken 65695 11月 12 12:56 10000000000003C0000002D0136E1A08DF8E2B28.jpg
$ identify Pictures/*
Pictures/100000000000015400000078BA7345C344D8D008.png PNG 340x120 340x120+0+0 8-bit sRGB 10812B 0.000u 0:00.000
Pictures/10000000000003C0000002D0136E1A08DF8E2B28.jpg JPEG 960x720 960x720+0+0 8-bit sRGB 65695B 0.000u 0:00.000

環境

$ dpkg-query -W poppler-utils unzip libreoffice imagemagick
imagemagick     8:6.9.10.14+dfsg-7
libreoffice     1:6.1.3-1
poppler-utils   0.69.0-2
unzip   6.0-21
$ lsb_release -d
Description:    Debian GNU/Linux unstable (sid)
$ uname -m
x86_64

羽田空港の駐輪場メモ 2018.11

羽田空港に駐輪場が出来たようです.

羽田空港で進められていた自転車置き場の新設工事がほぼ終わり、一日午前五時にオープンする。

 自転車置き場ができるのは国際線ターミナルビル近くの歩道脇。スペースは百七十一台分。空港スタッフか観光客かを問わず、誰でも無料で使うことができる。監視カメラも設置し、盗難を防ぐ。

羽田空港国内線のページはまだ駐輪場なしのまま.

空港内には自転車の駐輪場はございません。あらかじめご了承ください。

国際線は地図にはないけど以下の記述がある.

※駐輪場は2018年11月1日より運用開始します。

東京国際空港駐輪場の運用開始についてのpdfには地図あり.

45101840734 4e290df6c9

管理規定管理規定を見るとこんな感じのことが書かれている.

1.施設概要
(1)名 称 東京国際空港駐輪場
(2)場 所 下図のとおり
(3)台 数 171台
(4)運営時間 24時間
2.供用開始日 平成30年11月1日(木)午前5時
3.利用対象者
(1)空港従業員(事前登録制として、自転車に利用登録証シールを貼付)
(2)一般空港利用者(航空旅客・ターミナル見学者等)
4.利用料 無料
5.利用方法 防犯登録済みの自転車に限る

地図からするとこのあたりでしょうか?(OpenStreetCam には見当たらず)

元のニュースでは誰でも利用できるとなっていますが,「防犯登録済みの自転車に限る」となっているので訪日の方が自分の自転車を停めるのは難しそう.そして一般車の降車場のそばで屋外で無人なので監視カメラがあるにしても空港観光の短時間の一時駐輪以上には怖くて使えないかなという感じ.羽田空港のそばに停めたいなら屋内で係員の居る駐輪場を使うほうが安心できそうです.(どうせならはんだ付けカフェや弁当屋さんみたいに監視カメラ映像を配信してくれたら確認できるし安心感ありそう)

関東在住時に羽田空港を使う際は基本的に輪行していたので羽田で駐輪することはありませんでした.よくやっていたのは新橋駅まで自走してモノレールの始発から輪行でした.始発だし荷物置き場もあるので自転車輪行がしやすくていい感じす.(羽田から自転車で脱出するのは面倒で1度しかやったことない……)

現地で確認してみたいですね,誰か確認してMapillaryやOpenStreetCamにUpしませんか?

Googleの社名変更で apt update エラー

パッケージ情報更新のために apt update 中にエラーが発生しました.Googleのアプリケーション(Google Chrome等)を導入ししたときに入るGoogleのリポジトリで Google, Inc.Google LLC に変わったためのようです.

E: Repository 'http://dl.google.com/linux/chrome/deb stable Release' changed its 'Origin' value from 'Google, Inc.' to 'Google LLC'
N: This must be accepted explicitly before updates for this repository can be applied. See apt-secure(8) manpage for details.
Do you want to accept these changes and continue updating from this repository? [y/N]

Google LCCには去年変わっていてこのリポジトリにもやっと修正が入ったということのようです.(Androidアプリなどはもっと早かったですね)

ここで y で受け入れると次からこのエラーは現れません.

ヒット:4 http://dl.google.com/linux/chrome/deb stable Release
環境1
$ dpkg-query -W apt
apt     1.7.0
$ lsb_release -d
Description:    Debian GNU/Linux unstable (sid)
$ uname -m
x86_64
環境2
$ dpkg-query -W apt
apt     1.7.0
$ lsb_release -d
Description:    Parrot 4.3
$ uname -m
x86_64

microSD cardが壊れたので高耐久モデルのmicroSD cardを入手

Raspbery Pi に使っていた 4GB の microSD が壊れてしまいました.wipefsでパーティション情報を消すのに数分.OSイメージを書き込みしようとしても1日動かしても終わりません.
とりあえずデジタルカメラに使っていた SD card を microSD アダプタ経由でと思いましたがどうもアダプタの制度がいまいちなのかすぐ SD を見失ってしまいちょっとつらい感じです.ということで数年ぶりに microSD を購入しました.

容量としては4GBあればok,しかしそのへんの容量はもう殆ど無いし割高.山の奥とかSanDiskとかも考えましたが,TranscendのMLC高耐久モデルが高耐久の割には安い感じです.ECCも付いています.とりあえずAmazonのカートに入れておいたら100円引きクーポンが現れたのでそのタイミングで購入しました.
1,780円から100円引きで1,680円でした.

カタログスペックはこんな感じ(気になるところの抜粋)

容量	16 GB/32 GB/64 GB/128 GB
フラッシュ種類	MLC NANDフラッシュ
動作環境温度	-25°C (-13°F) ~ 85°C (185°F)
動作電圧	2.7V ~ 3.6V
スピードクラス	UHS-I U1  Class 10
読出し(最大)	90 MB/s
書込み(最大)	50 MB/s
耐久性(最大)	16 GB: 3,000時間
保証	2年保証

耐久性の 3,000時間というのは 製品情報シート(pdf) によると26 Mbpsのときの時間のようです.
26 Mbps を 3000 時間 → ( 26 / 8 ) * ( 3000 * 60 * 60 ) = 35100000 MB → 35.1 TB かな?
全領域を使うドライブレコーダーならこれに近い数字が出そうですが OS 領域として使うならもっとずっと少ない書き込みで壊れそう.
(圧縮すると数倍伸びそう?Btrfs?JFFS2?FuseCompress??ウェアレベリング…据え置きならSSDのほうがいいか)

Transcendの他のMLCモデルのほうが少し安いが,説明では書込み頻度の高い使用環境では高耐久モデルを勧めている.

ドライブレコーダーや監視カメラなどの書込み頻度の高い使用環境では、保証対象外となりますので、高耐久microSDカードをご使用下さい。推奨型番:TS16GUSDHC10V

04日に注文して07日にコンビニに届いたので受け取ってきました.金色!

45780982671 d761eb6c1f45056103954 e34355a8cc44867753465 999996904d

念の為製品照合システムで本物か確認しておきます.
シリアル番号を確認してこのページのフォームに入力することで照合できます.

シリアル番号はパッケージには見当たらず本体の裏面にありました.肉眼では見にくい.

30840856717 61f2c466d2
30841825187 8fa3335f57 m

本物でした :)

44867714815 2f337e8f00

安心したところでPCに挿してとりあえず簡易テストを.

$ dmesg -Tw
   :
[水 11月  7 21:33:42 2018] mmc0: new high speed SDHC card at address 59b4
[水 11月  7 21:33:42 2018] mmcblk0: mmc0:59b4 USDU1 14.6 GiB
[水 11月  7 21:33:43 2018]  mmcblk0: p1
^c
$ sudo wipefs -a /dev/mmcblk0
$ sudo hdparm -vtT /dev/mmcblk0

/dev/mmcblk0:
 HDIO_DRIVE_CMD(identify) failed: Invalid argument
 readonly      =  0 (off)
 readahead     = 256 (on)
 HDIO_DRIVE_CMD(identify) failed: Invalid argument
 geometry      = 478432/4/16, sectors = 30619648, start = 0
 Timing cached reads:   6072 MB in  2.00 seconds = 3039.10 MB/sec
 HDIO_DRIVE_CMD(identify) failed: Invalid argument
 Timing buffered disk reads:  62 MB in  3.07 seconds =  20.20 MB/sec
 $ zcat ./2018-10-09-raspbian-stretch-lite.zip | pv | sudo dd of=/dev/mmcblk0 bs=4M ;sync
 1.74GiB 0:00:14 [ 120MiB/s] [ <=> ]
 0+53380 レコード入力
 0+53380 レコード出力
 1866465280 bytes (1.9 GB, 1.7 GiB) copied, 271.655 s, 6.9 MB/s
$ uname -a
Linux raspberrypi 4.14.71+ #1145 Fri Sep 21 15:06:38 BST 2018 armv6l GNU/Linux

EDIT: eLinux.orgの簡易テストを追記( RPi SD cards – eLinux.org )

$ sync; dd if=/dev/zero of=~/test.tmp bs=500K count=1024
1024+0 records in
1024+0 records out
524288000 bytes (524 MB, 500 MiB) copied, 74.6846 s, 7.0 MB/s
$ sync; echo 3 | sudo tee /proc/sys/vm/drop_caches
3
$ sync; time dd if=~/test.tmp of=/dev/null bs=500K count=1024
1024+0 records in
1024+0 records out
524288000 bytes (524 MB, 500 MiB) copied, 22.9698 s, 22.8 MB/s

real    0m22.989s
user    0m0.002s
sys     0m2.790s

#ランダムもfioで少し試した → https://gist.github.com/matoken/6e3a4d07e36698470bac6ec75bb2c1d1

大体シーケンシャルリードで 20MB/s.シーケンシャルライトで 6.9MB/sくらいのよう.
カタログの 読出し(最大) 90 MB/s 書込み(最大) 50 MB/s からすると大分遅く感じますね.
といってもこれまで使っていたものの倍以上の速度は出ています.

てことでしばらくはこの card で Raspberry Pi を運用してみようと思います.

#こういう安いやつを買って壊れたら買い換えるほうがいいような気がしなくもない

Raspberry Pi の USB-OTG ethernet の MAC address を model B の ethernet と同じ規則で設定する

Raspberry Pi model A/A+/Zero/ZeroW/ZeroHW/Compute Module/Compute module 3ではUSB-OTGが利用できます.(ZeroHW/Compute Module/Compute module 3は自分は未確認)

USB-OTGでUSBをEthernetにしてHostPCからアクセスするようにするとUSBケーブル1本で電源と併用できて便利です.

このときMACアドレスはモジュール読み込み毎に自動生成されます.
以下の例では,接続先(PC等)から見えるMACが HOST MAC 6a:b3:b1:5e:22:89 で,Raspberry Pi の中でのMACが MAC ae:3a:c7:8e:50:38 になっています.

$ sudo modprobe g_ether
$ dmesg | tail -15
[   88.517568] using random self ethernet address
[   88.517590] using random host ethernet address
[   88.519210] usb0: HOST MAC 6a:b3:b1:5e:22:89
[   88.520195] usb0: MAC ae:3a:c7:8e:50:38
[   88.520396] using random self ethernet address
[   88.520412] using random host ethernet address
[   88.520534] g_ether gadget: Ethernet Gadget, version: Memorial Day 2008
[   88.520546] g_ether gadget: g_ether ready
[   88.520580] dwc2 20980000.usb: bound driver g_ether
[   88.866651] IPv6: ADDRCONF(NETDEV_UP): usb0: link is not ready
[   94.048758] dwc2 20980000.usb: new device is high-speed
[   94.128837] dwc2 20980000.usb: new device is high-speed
[   94.197523] dwc2 20980000.usb: new address 9
[   96.057234] g_ether gadget: high-speed config #1: CDC Ethernet (ECM)
[   96.095719] IPv6: ADDRCONF(NETDEV_CHANGE): usb0: link becomes ready
$ /sbin/ifconfig usb0
usb0: flags=4163<UP,BROADCAST,RUNNING,MULTICAST>  mtu 1500
        inet 10.42.0.212  netmask 255.255.255.0  broadcast 10.42.0.255
        inet6 fe80::5855:ab0c:6628:557c  prefixlen 64  scopeid 0x20<link>
        ether ae:3a:c7:8e:50:38  txqueuelen 1000  (Ethernet)
        RX packets 208  bytes 17243 (16.8 KiB)
        RX errors 0  dropped 0  overruns 0  frame 0
        TX packets 67  bytes 7696 (7.5 KiB)
        TX errors 0  dropped 0 overruns 0  carrier 0  collisions 0

これは毎回変わるのでふと気づくとホストPCのネットワークの設定が沢山になっていたり…….

$ nmcli connection show | grep ethernet | wc -l
25

MAC addressを固定するにはモジュール読み込み時に指定してあげればOKです.

$ sudo rmmod g_ether
$ sudo modprobe g_ether host_addr=de:ad:fe:ef:00:01 dev_addr=de:ad:fe:ef:00:00
$ dmesg | egrep usb0:.*MAC | tail -2
[ 1067.248443] usb0: HOST MAC de:ad:fe:ef:00:01
[ 1067.248958] usb0: MAC de:ad:fe:ef:00:00

永続化するには,g_etherモジュールを読んでいるところで指定してあげます.

/boot/cmdline.txt の場合 rootwait の前に以下を追加
modules-load=dwc2,g_cdc g_ether.host_addr=de:ad:fe:ef:00:01 g_ether.dev_addr=de:ad:fe:ef:00:00
/etc/modules の場合
g_ether g_ether.host_addr=de:ad:fe:ef:00:01 g_ether.dev_addr=de:ad:fe:ef:00:00
Note

※g_cdcの場合はこんな感じで

g_cdc g_cdc.host_addr=de:ad:fe:ef:00:01 g_cdc.dev_addr=de:ad:fe:ef:00:00

/etc/rc.local の場合 exit より前の行に以下を追加(※model Aの場合 cmdline.txt, modules 共に module は読み込まれるけど動作はうまく行かないことが多いので rc.local が良さそう)
modprobe g_ether host_addr=de:ad:fe:ef:00:01 dev_addr=de:ad:fe:ef:00:00

このときのMAC addressは g_ether が自動生成したものを使うのが無難だとおもうのですが,ランダムとかでいんだろうか?という不安があります.

ベンダーIDに使われていない領域だったら多分問題ないですが,これから埋まることもありそうです.(IPアドレスのプライベートIPアドレスのような領域があるのかもしれ無いけど未確認)

Raspberry Pi model B シリーズのNICには Raspberry Pi Foundation のベンダーコードが使われています.

nmap のMAC addressベンダー情報のファイルから確認
$ grep -i raspberry /usr/share/nmap/nmap-mac-prefixes
B827EB Raspberry Pi Foundation

Raspberry Pi の smsc95xx の MAC address の生成は,上6桁はベンダーIDの b8:27:eb を,下6桁はボードのserialの下6桁を割り当てているようです.

MAC address generation
To have a predetermined MAC address, a given SMSC LAN9512 must be attached to an EEPROM that contains the MAC address. But on the Raspberry Pi Model B, this EEPROM is not present; therefore, this driver must assign a MAC address itself. We do this by generating a MAC address from the board’s serial number. This guarantees that a given Raspberry Pi will always have the same MAC address and that two Raspberry Pis are extremely unlikely to be assigned the same MAC address.

手元の Raspberry Pi 2 Model B を確認すると確かにそうなっているようです.

$ ifconfig | grep ether
		ether b8:27:eb:ff:56:0a  txqueuelen 1000  (Ethernet)
$ grep Serial /proc/cpuinfo
Serial          : 0000000094ff560a
$ sed -n "s/^Serial.*:.*\(..\)\(..\)\(..\)$/b8:27:eb:\1:\2:\3/p" /proc/cpuinfo
b8:27:eb:ff:56:0a
$ cat /proc/device-tree/model ;echo
Raspberry Pi 2 Model B Rev 1.1
Note

16進数6桁は 0xFFFFFF → 16777215です,Raspberry Pi は2018年3月時点で190万台出荷しているようなので2周目に入っています.低い確率でしょうが同じMAC addressが割り当てられる可能性が…….

we’ve sold 19 million Raspberry Pis in total

内蔵ネットワークに自分でMAC addressを指定したい場合はこんな感じでいけます.

/boot/cmdline.txt に以下を設定
smsc95xx.macaddr=b8:27:eb:00:00:00
/etc/network/interfaces でも設定できるはずだがRaspbianでは未確認
hwaddress ether b8:27:eb:00:00:00

CPU Serialを詐称する手も?

ということで,Raspberry Pi model A / Zero でもこの MAC address が利用できそうな感じです.外向けの HOST MAC をこのアドレスにしてみます.

$ sed -n "s/^Serial.*:.*\(..\)\(..\)\(..\)$/b8:27:eb:\1:\2:\3/p" /proc/cpuinfo | tee ~/macaddress
b8:27:eb:d8:63:18
$ sudo vi /boot/cmdline.txt
$ sudo reboot
  :
  :
$ dmesg | grep usb0
[    4.937660] usb0: HOST MAC b8:27:eb:d8:63:18
[    4.937845] usb0: MAC 86:d7:fe:57:f2:d5

ホストPCでもちゃんと指定したものになっています.

$ /sbin/ifconfig enxb827ebd86318 | grep ether
			 ether b8:27:eb:d8:63:18  txqueuelen 1000  (Ethernet)

とりあえずこれで使ってみようと思います.

環境
$ lsb_release -d
Description:    Raspbian GNU/Linux 9.4 (stretch)
$ uname -m
armv6l
$ cat /proc/device-tree/model ;echo
Raspberry Pi Model A Rev 2

壊れたzipファイルからデータを復旧する

Flickrからダウンロードしたアーカイブがダウンロードに失敗したのか内容が見られないです.
アーカイブが壊れている場合 -F でどうにかなりそう?

$ zip -l data-download-1.zip
		zip warning: missing end signature--probably not a zip file (did you
		zip warning: remember to use binary mode when you transferred it?)
		zip warning: (if you are trying to read a damaged archive try -F)

zip error: Zip file structure invalid (data-download-1.zip)

-F では駄目で -FF を試してみる

$ zip -F data-download-1.zip --out data-download-1_fix.zip
Fix archive (-F) - assume mostly intact archive
		zip warning: bad archive - missing end signature
		zip warning: (If downloaded, was binary mode used?  If not, the
		zip warning:  archive may be scrambled and not recoverable)
		zip warning: Can't use -F to fix (try -FF)

zip error: Zip file structure invalid (data-download-1.zip)

-FF である程度救える感じ

$ zip -FF data-download-1.zip --out data-download-1_fix.zip
Fix archive (-FF) - salvage what can
		zip warning: Missing end (EOCDR) signature - either this archive
					 is not readable or the end is damaged
Is this a single-disk archive?  (y/n): y
  Assuming single-disk archive
Scanning for entries...
 copying: img_20140426_180357_13952989767_o.jpg  (1935629 bytes)
 copying: img_20140723_180327_14575993850_o.jpg  (2639807 bytes)
 copying: img_20140723_180323_14576035839_o.jpg  (3302817 bytes)
 copying: img_20140723_180400_14576043890_o.jpg  (3611376 bytes)
   :
 copying: imgp1491_15854514735_o.jpg
		zip warning: no end of stream entry found: imgp1491_15854514735_o.jpg
		zip warning: rewinding and scanning for later entries

こういう耐障害性は非圧縮tarやafioとかのほうが強いでしょうがWindowsなんかでは多分標準で扱えないしダウンロードに失敗した場合は再度試みることが出来るのでやっぱzipでいいのかな.

ちなみに今回はFlickrから同じファイルを3回ダウンロードしても全部同じ内容で壊れていたので恐らくFlickr側で壊れているなてことでデータを再リクエストしました…….

環境
$ dpkg-query -W zip tar afio
afio    2.5.1.20160103+gitc8e4317-1
tar     1.30+dfsg-2
zip     3.0-11+b1
$ lsb_release -d
Description:    Debian GNU/Linux unstable (sid)
$ uname -m
x86_64

宮崎でタンデム自転車のイベントと鹿児島でタンデム自転車を借りることの出来る場所

先日鹿児島県でも2輪端でも一般公道走行が解禁になりましたが,

宮崎でこんなイベントがあるようです.

全行程だけでなく、部分参加も可です。
自転車のない方には、レンタサイクルをご用意したいと思います。
期日 2018/11/17~20(サイクリング実施は 11/18~20)
開催地 西都市 宮崎市 綾町
サイクリングのみの参加費は無料です。

現在タンデム自転車だけで14台!

ちなみに鹿児島だと,大隅の菅原小跡に最近出来た「鹿児島FunRide鹿屋店」でレンタサイクルがあるようです.(このpostはフライングしてるけど)

旧大隅線後の自転車道のフィットネスパースがすぐそばですが車止めが多いのでタンデムは辛いかも.海岸線を南は浜田,北は桜島(時間や体力があればもっと)くらいがほぼ平坦で走りやすいと思います.

後は南さつま町の吹上浜サイクリングロードに併設された施設にもあると思うのですが,未確認.(先日行ったときに確認しようと思っていたのだけどトラブルで時間が押して断念)

Googleドライブにコマンドラインでアクセスするskickaを試す

Googleドライブにコマンドラインでアクセスできる skicka を少し試してみました.

GOPATHを設定していない場合設定
$ GOPATH=~/go
$ PATH=${PATH}:~/go/bin
skickaの導入
$ go get github.com/google/skicka

skickaの設定を行います.
init コマンドで設定ファイルを生成します.
設定ファイルは ~/.skicka.config として作れれます.
次にlsコマンドを発行します.初回実行時にはウェブブラウザが起動して認証処理が走ります.許可すると自動的に認証が完了してls処理が走ります.
認証情報は`~/.skicka.tokencache.json` に保存されます.
ls実行時に次回以降のためにメタデータを作成します.ファイルが多いと時間がかかります.プログレスが表示されるのでしばらく待ちましょう.
メタデータは ~/.skicka.metadata.cache に保存されます.

skickaの初期設定
$ skicka init
$ skicka ls

サーバなどでウェブブラウザを起動するのが難しい場合は -no-browser-authls コマンドの に付けて起動すると認証URLが表示されるのでそれを操作PCなどで開いて認証を行い,表示された認証コードをコマンドラインに貼り付けます.

$ skicka -no-browser-auth ls
Go to the following link in your browser:
https://accounts.google.com/o/oauth2/auth?client_id=952283912845-sjotrejbktpinel08hrnspl33d8gho1e.apps.googleusercontent.com&redirect_uri=urn%3Aietf%3Awg%3Aoauth%3A2.0%3Aoob&response_type=code&scope=https%3A%2F%2Fwww.googleapis.com%2Fauth%2Fdrive&state=st1541320926479298710
Enter verification code: 4/iwBrjQFEvm2p0nQGXJuRQgTZFZZ6BmXkT7Up7Wl3UYS7NWEyiltTc6E
Usage
$ ~/go/bin/skicka
usage: skicka [skicka options] <command> [command options]

Supported commands are:
  cat       Print the contents of the given file
  download  Download a file or folder hierarchy from Drive to the local disk
  df        Display free space on Drive
  du        Report disk usage for a folder hierarchy on Drive
  fsck      Check consistency of files in Drive and local metadata cache
  genkey    Generate a new encryption key
  init      Create an initial skicka configuration file
  ls        List the contents of a folder on Google Drive
  mkdir     Create a new folder or folder hierarchy on Drive
  rm        Remove a file or folder on Google Drive
  upload    Upload a local file or directory hierarchy to Drive

'skicka help' prints more detailed documentation.
help
$ ~/go/bin/skicka help                                                                                                             [45/2151]
skicka is a tool for working with files and folders on Google Drive.
See http://github.com/google/skicka/README.md for information about getting started.

usage: skicka [common options] <command> [command options]

Commands and their options are:
  cat        Print the contents of the Google Drive file to standard output.
             Arguments: drive_path ...

  download   Recursively download either a single file, or all files from a
             Google Drive folder to a local directory. If the corresponding
             local file already exists and has the same contents as the its
             Google Drive file, the download is skipped.
             Arguments: [-ignore-times] [-download-google-apps-files]
                        drive_path local_path

  df         Prints the total space used and amount of available space on
             Google Drive.

  du         Print the space used by the Google Drive folder and its children.
             Arguments: [drive_path ...]

  fsck       [EXPERIMENTAL/NEW] Use at your own risk.
             Perform a number of consistency checks on files stored in Google
             Drive, including verifying metadata and removing duplicate files
             with the same name.
             Arguments: [--trash-duplicates] [drive_path]

  help       Print this help text.

  genkey     Generate a new key for encrypting files.

  init       Create an initial ~/.skicka.config configuration file. (You
             will need to edit it before using skicka; see comments in the
             configuration file for details.)

  ls         List the files and directories in the given Google Drive folder.                                                                          [8/2151]
             Arguments: [-d, -l, -ll, -r] [drive_path ...],
             where -l and -ll specify long (including sizes and update
             times) and really long output (also including MD5 checksums),
             respectively.  The -r argument causes ls to recursively list
             all files in the hierarchy rooted at the base directory, and
             -d causes directories specified on the command line to be
             listed as files (i.e., their contents aren't listed.)

  mkdir      Create a new directory (folder) at the given Google Drive path.
             Arguments: [-p] drive_path ...,
             where intermediate directories in the path are created if -p is
             specified.

  rm         Remove a file or directory at the given Google Drive path.
             Arguments: [-r, -s] drive_path ...,
             where files and directories are recursively removed if -r is
             specified and the google drive trash is skipped if -s is
             specified. The default behavior is to fail if the drive path
             specified is a directory and -r is not specified, and to send
             files to the trash instead of permanently deleting them.

  upload     Uploads all files in the local directory and its children to the
             given Google Drive path. Skips files that have already been
             uploaded.
             Arguments: [-ignore-times] [-encrypt] [-follow-symlinks <maxdepth>]
                        local_path drive_path

Options valid for both "upload" and "download":
  -dry-run         Don't actually upload or download, but print the paths of
                   all files that would be transferred.
  -ignore-times    Normally, skicka assumes that if the timestamp of a local
                   file matches the timestamp of the file on Drive and the
                   files have the same size, then it isn't necessary to
                   confirm that the file contents match. The -ignore-times
                   flag can be used to force checking file contents in this
                   case.

General options valid for all commands:
  -config <filename>     General skicka configuration file. Default: ~/.skicka.config.
  -debug                 Enable debugging output.
  -dump-http             Dump http traffic.
  -metadata-cache-file <filename>
                         File to store metadata about Google Drive contents.
                         Default: ~/.skicka.metadata.cache
  -no-browser-auth       Disables attempting to open the authorization URL in a web
                         browser when initially authorizing skicka to access Google Drive.
  -quiet                 Suppress non-error messages.
  -tokencache <filename> OAuth2 token cache file. Default: ~/.skicka.tokencache.json.
  -verbose               Enable verbose output.
ファイルのアップロード
$ skicka upload ~/Pictures/$(ls -tr1 ~/Pictures/|tail -1) /
Files:  14.41 KiB / 14.41 KiB [====================================================================================================================] 100.00% 3s
2018/11/04 17:45:32 Preparation time 1s, sync time 3s
2018/11/04 17:45:32 Updated 1 Drive files, 0 local files
2018/11/04 17:45:32 14.41 kiB read from disk, 0 B written to disk
2018/11/04 17:45:32 14.41 kiB uploaded (3.98 kiB/s), 0 B downloaded (0 B/s)
2018/11/04 17:45:32 52.08 MiB peak memory used
ファイルを確認
$ skicka ls|grep jpg
20180307_23:03:21-10889.jpg
20181104_17:11:45-30082.jpg
ファイルのダウンロード
$ skicka rm 20181104_17:11:45-30082.jpg
$ diff ~/Pictures/20181104_17:11:45-30082.jpg /tmp/20181104_17:11:45-30082.jpg
$ ls -l ~/Pictures/20181104_17:11:45-30082.jpg /tmp/20181104_17:11:45-30082.jpg
-rw-r--r-- 1 matoken matoken 14760 11月  4 17:41 /home/matoken/Pictures/20181104_17:11:45-30082.jpg
-rw-r--r-- 1 matoken matoken 14760 11月  4 17:41 /tmp/20181104_17:11:45-30082.jpg
ファイルの削除
$ skicka rm /20181104_17:11:45-30082.jpg

skickaには暗号化機能があります.upload時に -encrypt オプションを付与することによりファイルを暗号化してGoogleドライブに保存できます.そのためには準備が必要です.
SKICKA_PASSPHRASE という環境変数にパスフレーズを設定した状態で,skicka genkey を実行して生成された情報を設定ファイルの ~/.skicka.config に書き込みます.

暗号化のためのkey等を生成する(環境変数はexportしないと認識しなかった)
$ read -sp "skicka pass: " SKICKA_PASSPHRASE && export SKICKA_PASSPHRASE && skicka genkey
skicka pass: ; Add the following lines to the [encryption] section
; of your ~/.skicka.config file.
        salt=62cd4c08693c935f35c45be5261907127ef14055f197bb19bae36616fedecb54
        passphrase-hash=23f702efce4fe7bf775d3bc80f07e2a765589016b537bf322ed5e0c8f2f6ce90
        encrypted-key=463c9c75b3aa98e5401bb5fde6d681f8053d39d3e5ce49ef22bcc58977736162
        encrypted-key-iv=d2533e58f6c9bb976a66d499280ce8c2
設定ファイルに暗号化情報を書き込む(コメントを外すのを忘れずに)
$ vi ~/.skicka.config
$ grep -A5 encryption ~/.skicka.config
[encryption]
        ; Run 'skicka genkey' to generate an encyption key.
        salt=62cd4c08693c935f35c45be5261907127ef14055f197bb19bae36616fedecb54
        passphrase-hash=23f702efce4fe7bf775d3bc80f07e2a765589016b537bf322ed5e0c8f2f6ce90
        encrypted-key=463c9c75b3aa98e5401bb5fde6d681f8053d39d3e5ce49ef22bcc58977736162
        encrypted-key-iv=d2533e58f6c9bb976a66d499280ce8c2

upload時に -encrypt を指定すると暗号化され,.aes256 という拡張子付きで保存されます.

暗号化しながら保存する
$ skicka mkdir encryption
$ skicka upload -encrypt ~/Pictures/20181105_19\:11\:18-8911.jpg /encryption/
$ skicka ls /encryption/
20181105_19:11:18-8911.jpg.aes256

元のファイル名ではダウンロードできず,.aes256 拡張子付きのファイル名ではダウンロードできた.このファイルは .aes256 の拡張子付きのままだが,復号されている.

ダウンロード
$ skicka download /encryption/20181105_19:11:18-8911.jpg ./
skicka: /encryption/20181105_19:11:18-8911.jpg: not found on Drive
$ skicka download /encryption/20181105_19:11:18-8911.jpg.aes256 ./
$ file ./20181105_19\:11\:18-8911.jpg.aes256
./20181105_19:11:18-8911.jpg.aes256: JPEG image data, JFIF standard 1.01, aspect ratio, density 1x1, segment length 16, baseline, precision 8, 933x600, frames
3
$ identify ./20181105_19\:11\:18-8911.jpg.aes256
./20181105_19:11:18-8911.jpg.aes256 JPEG 933x600 933x600+0+0 8-bit sRGB 92988B 0.000u 0:00.000
$ display ./20181105_19\:11\:18-8911.jpg.aes256

ウェブブラウザからダウンロードしたファイルは暗号化されている.データ量は少し増えている.

$ file 20181105_19_11_18-8911.jpg.aes256.jpg.aes256
20181105_19_11_18-8911.jpg.aes256.jpg.aes256: data
$ ls -la 201811*
-rw-r--r-- 1 matoken matoken 92988 11月  5 19:30 20181105_19:11:18-8911.jpg.aes256
-rw-r--r-- 1 matoken matoken 93004 11月  5 21:46 20181105_19_11_18-8911.jpg.aes256.jpg.aes256
環境
$ dpkg-query -W golang git bash
bash    4.4.18-3.1
git     1:2.19.1-1
golang  2:1.10~5
$ lsb_release -d
Description:    Debian GNU/Linux unstable (sid)
$ uname -m
x86_64

特定プロセスのcpu利用率を制限するcpulimitを試す

先日mysqldump + xz 圧縮の間に pv を挟んで帯域制限をして xz の負荷を下げました.

しかしこの方法ではそんなに負荷がない mysqldump もずっと動かしっぱなしで db にもよろしく無いです.mysqldump は先に済ませて xz だけを制限することにします.

before
umask 0266 && nice -n 19 ionice -c 3 /usr/bin/mysqldump --defaults-file=/mnt/backup/micro/.my-backup.cnf --single-transaction --quick --all-databases --events | pv -L 128k 2>/dev/null | nice -n 19 ionice -c 3 /usr/bin/xz -9 > /mnt/backup/micro/`date +\%F_\%T_$$`.sql.xz
after
DUMP="/mnt/backup/micro/`date +\%F_\%T_$$`.sql"; umask 0266 && nice -n 19 ionice -c 3 /usr/bin/mysqldump --defaults-file=/mnt/backup/micro/.my-backup.cnf --single-transaction --quick --all-databases --events > ${DUMP} && pv -L 128k nice -n 19 ionice -c 3 /usr/bin/xz -9 > ${DUMP}.xz && rm ${DUMP}

一応動くけどcrontabなので1行で書いてあって見にくいしあまりいけてないですね.
せめてファイルに分けたほうが良さそう.

LimitCPU

pvでもいいのですが,cpu利用率を制限できないかなと思いました.xzのオプションでは見当たらずLinux環境なので cgroups で制限しようかとも思ったのですが, LimitCPU というものを見つけました.これは SIGSTOPSIGCONT のPOSIXシグナルをプロセスに送信することにより実現しているので,POSIX環境ならどこでも動きそうなのでこちらを試してみました.

LimitCPUはメンテされなくなったCPUlimitのフォークでコマンドやパッケージ名は cpulimit です.(混乱する><)

導入
$ sudo apt install cpulimit
usage
$ cpulimit -h
CPUlimit version 2.1
Usage: cpulimit TARGET [OPTIONS...] [-- PROGRAM]
   TARGET must be exactly one of these:
      -p, --pid=N        pid of the process
      -e, --exe=FILE     name of the executable program file
                         The -e option only works when
                         cpulimit is run with admin rights.
      -P, --path=PATH    absolute path name of the
                         executable program file
   OPTIONS
      -b  --background   run in background
      -c  --cpu=N        override the detection of CPUs on the machine.
      -l, --limit=N      percentage of cpu allowed from 1 up.
                         Usually 1 - 200, but can be higher
                         on multi-core CPUs (mandatory)
      -q, --quiet        run in quiet mode (only print errors).
      -k, --kill         kill processes going over their limit
                         instead of just throttling them.
      -r, --restore      Restore processes after they have
                         been killed. Works with the -k flag.
      -s, --signal=SIG   Send this signal to the watched process when cpulimit exits.
                         Signal should be specificed as a number or
                         SIGTERM, SIGCONT, SIGSTOP, etc. SIGCONT is the default.
      -v, --verbose      show control statistics
      -z, --lazy         exit if there is no suitable target process,
                         or if it dies
          --             This is the final CPUlimit option. All following
                         options are for another program we will launch.
      -h, --help         display this help and exit

制限はプロセスIDでの制限,プログラム名での制限,指定したプログラムを制限することが可能です.
cpuが複数ある場合は -l の値はcpu 1つあたり100として,100 * cpu数 を元に指定します.cpu 2つで 50% 利用したい場合は -l 100 になると思います.

プロセスID 1234 のプログラムをcpuを2つ利用,cpuを50%(2コアなので実際は100%分)
$ cpulimit -c 2 -p 1234 -l 50
xzというプログラムをcpu利用率を25%に制限
$ cpulimit -c 2 -l 50 - xz

※xzの前の - はなくてもいいが cpulimit のオプションの最後を示す.

cpuを1つだけ利用.cpu利用率を25%に制限しつつxzを実行できます.
$ cpulimit -c 1 -l 25 -z -  xz -9 datafile
  • -c : 利用するcpu数

  • -p : 制限するプロセスID

  • -l : 制限するcpu利用率

  • -z : 指定したプロセスが完了したらcpulimitも終了する(通常は関しを続けて同じ条件に一致するプロセスが現れたら制限する)

今回はxzを制限したいのでこんな感じに.
あまり変わりませんね…….

DUMP="/mnt/backup/micro/`date +\%F_\%T_$$`.sql"; umask 0266 && nice -n 19 ionice -c 3 /usr/bin/mysqldump --defaults-file=/mnt/backup/micro/.my-backup.cnf --single-transaction --quick --all-databases --events > ${DUMP} && nice -n 19 ionice -c 3 cpulimit -c1 -l 25 - /usr/bin/xz -9 ${DUMP}

バックアップ専用ユーザとして分けてあるのでそのユーザで cpulimit -c 1 -l 25 - xz とかしてxzという名前のプロセスを全部制限してしまうのもありかもしれません.monit とかで監視させればいい感じかも?そうすると,

DUMP="/mnt/backup/micro/`date +\%F_\%T_$$`.sql"; umask 0266 && nice -n 19 ionice -c 3 /usr/bin/mysqldump --defaults-file=/mnt/backup/micro/.my-backup.cnf --single-transaction --quick --all-databases --events > ${DUMP} && /usr/bin/xz -9 ${DUMP}

あまり変わりませんね…….

環境
$ dpkg-query -W cpulimit xz-utils
cpulimit        2.2-1
$ lsb_release -d
Description:    Ubuntu 16.04.5 LTS
$ uname -m
x86_64

rsyncで同期したファイルの内容が間違っていて困る

最近外のサーバのffmpegで生成したファイルをrsyncコマンドで家にコピーしています.しかし,先日rsyncでコピーが正常終了したファイルなのに再生が出来ないファイルが現れました.
恐らくffmpegの処理が最後まで終わっていない状態でrsyncを開始して,ffmpegの -movflags faststart が最後のあたりでrsyncで転送が終わった領域を書き換えたのではないかと思います.
rsyncはチェックサムを確認していたのでは?と確認するとどうも明示的にチェックサムのオプションを付与しないと簡易的なチェックしかしていないようです.
少し確認してみました.

内容が違うけれどファイルサイズとタイムスタンプの同じファイルを用意する.

$ mkdir from to
$ echo '0123456789' > from/01
$ echo '0123456780' > to/01
$ touch -d0 from/01
$ touch -d0 to/01
$ ls -l from/01 to/01
-rw-r--r-- 1 matoken matoken 11 11月  2 00:00 from/01
-rw-r--r-- 1 matoken matoken 11 11月  2 00:00 to/01

rsync の --archive option でコピーすると同じファイルと認識されて同期されない.内容も異なったまま.

$ rsync -av from/ to/
sending incremental file list

sent 73 bytes  received 12 bytes  170.00 bytes/sec
total size is 11  speedup is 0.13
$ diff from/01 to/01
1c1
< 0123456789
---
> 0123456780

rsync の --checksum optionを付与すると別のファイルと認識されて同期されて内容も同一になる.

$ rsync -av --checksum from/ to/
sending incremental file list
01

sent 147 bytes  received 35 bytes  364.00 bytes/sec
total size is 11  speedup is 0.06
$ diff from/01 to/01

ということでこんな感じに変更した.

$ rsync -avAHXce ssh --partial --append user@server:from/ to/

#実際はよく回線切れるのでwhile loop に入れてある.

EDIT: 転送済み部分のチェックはこれではNGで --append(既存のファイルに追記)を削る必要があった.--append-verify で行けそうな気がしたがこれもNGだった.

環境
$ dpkg-query -W rsync
rsync   3.1.2-2.2
$ lsb_release -d
Description:    Ubuntu 18.10
$ uname -m
x86_64