![]()
ターミナルの録画再生共有などができるソフトウェアのasciinemaの3.0がリリースされました.
今回のリリースはrustで書き直され,ファイル形式も新しくなったようです.(asciicast v3 file format)また,ターミナルのウェブによるライブストリーミング機能も付きました.
自分のDebian環境ではパッケージ度導入しているのですが,出たばかりなのでunstableでも2.4.0です.
$ rmadison asciinema
asciinema  | 2.0.2-2       | oldoldstable | source, all
asciinema  | 2.2.0-1       | oldstable    | source, all
asciinema  | 2.4.0-1       | stable       | source, all
asciinema  | 2.4.0-1       | testing      | source, all
asciinema  | 2.4.0-1       | unstable     | source, all
LinuxではReleasesページにx86_64, aarch64のバイナリが用意されています.
armhfでのビルド
Raspberry Pi OS bookworm armhf環境でビルドを試してみました.
パッケージで導入したRustが古いようです,rust 1.66以降が必要そうです.
$ git clone https://github.com/asciinema/asciinema
$ cd asciinema
$ cargo build --release
  :
error: package `toml v0.8.23` cannot be built because it requires rustc 1.66 or newer, while the currently active rustc version is 1.63.0
Either upgrade to rustc 1.66 or newer, or use
cargo update -p toml@0.8.23 --precise ver
where `ver` is the latest version of `toml` supporting rustc 1.63.0
以下のManual installationからarmv7-unknown-linux-gnueabihf版のrustup-initを入手します.
$ wget https://static.rust-lang.org/rustup/dist/armv7-unknown-linux-gnueabihf/rustup-init
    https://static.rust-lang.org/rustup/dist/armv7-unknown-linux-gnueabihf/rustup-init.sha256
$ sha256sum --check rustup-init.sha256
./rustup-init: OK
$ chmod u+x ./rustup-init
rustup-initコマンドを実行して新しいrustを導入します.
$ ./rustup-init
  :
Continue? (y/N) y
1) Proceed with standard installation (default - just press enter)
2) Customize installation
3) Cancel installation
>1
  :
info: installing component 'rustfmt'
info: default toolchain set to 'stable-armv7-unknown-linux-gnueabihf'

  stable-armv7-unknown-linux-gnueabihf installed - rustc 1.90.0 (1159e78c4 2025-09-14)


Rust is installed now. Great!

To get started you may need to restart your current shell.
This would reload your PATH environment variable to include
Cargo's bin directory ($HOME/.cargo/bin).

To configure your current shell, you need to source
the corresponding env file under $HOME/.cargo.

This is usually done by running one of the following (note the leading DOT):
. "$HOME/.cargo/env"            # For sh/bash/zsh/ash/dash/pdksh
source "$HOME/.cargo/env.fish"  # For fish
source $"($nu.home-path)/.cargo/env.nu"  # For nushell
バージョンを確認します.最近リリースされた1.90.0が使えるようになりました.
$ which cargo
/usr/bin/cargo
$ /usr/bin/cargo -V
cargo 1.65.0
$ ~/.cargo/bin/cargo -V
warning: `/home/matoken/.cargo/config` is deprecated in favor of `config.toml`
note: if you need to support cargo 1.38 or earlier, you can symlink `config` to `config.toml`
cargo 1.90.0 (840b83a10 2025-07-30)
rust 1.90.0を使って再度asciinemaをbuildします.今度は成功.
$ PATH=~/.cargo/bin:$PATH cargo build --release

    Finished `release` profile [optimized] target(s) in 39m 49s
asciinemaのusageとversionを確認.3.0.0になっています.
$ target/release/asciinema
Terminal session recorder, streamer, and player

Usage: asciinema [OPTIONS] <COMMAND>

Commands:
  record   Record a terminal session [aliases: rec]
  stream   Stream a terminal session
  session  Record and stream a terminal session
  play     Play back a terminal session
  upload   Upload a recording to an asciinema server
  auth     Authenticate this CLI with an asciinema server account
  cat      Concatenate multiple recordings
  convert  Convert a recording to another format
  help     Print this message or the help of the given subcommand(s)

Options:
  -q, --quiet    Quiet mode - suppress diagnostic messages
  -h, --help     Print help (see more with '--help')
  -V, --version  Print version

$ target/release/asciinema --version
asciinema 3.0.0
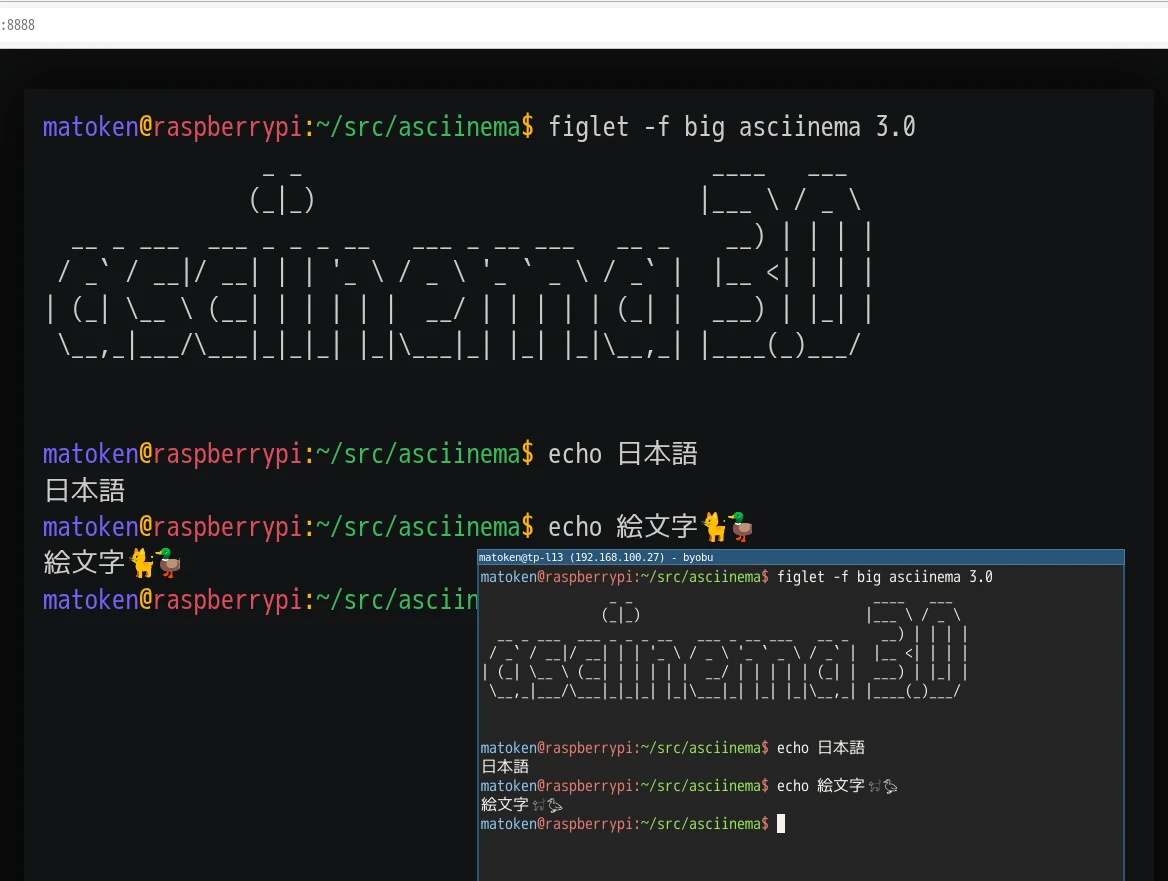
asciinema 3,0を試す
ライブストリーミング機能を試す
新機能のライブストリーミング機能を試します.
ローカルとリモートが選べます.
$ target/release/asciinema stream
error: the following required arguments were not provided:
  <--local [<IP:PORT>]|--remote [<STREAM-ID|WS-URL>]>

Usage: asciinema stream <--local [<IP:PORT>]|--remote [<STREAM-ID|WS-URL>]>

For more information, try '--help'.
$ target/release/asciinema stream -h
Stream a terminal session

Usage: asciinema stream [OPTIONS] <--local [<IP:PORT>]|--remote [<STREAM-ID|WS-URL>]>

Options:
  -l, --local [<IP:PORT>]            Stream via the local HTTP server
  -r, --remote [<STREAM-ID|WS-URL>]  Stream via remote asciinema server
  -c, --command <COMMAND>            Command to start in the session [default: $SHELL]
  -I, --capture-input                Enable input (keyboard) capture
      --capture-env <VARS>           Comma-separated list of environment variables to capture
                                     [default: SHELL]
  -t, --title <TITLE>                Title of the session
      --headless                     Headless mode - don't use the terminal for I/O
      --window-size <COLSxROWS>      Override session's terminal window size
      --return                       Return the session's exit status
      --log-file <PATH>              Log file path
      --server-url <URL>             asciinema server URL
  -q, --quiet                        Quiet mode - suppress diagnostic messages
  -h, --help                         Print help (see more with '--help')

Examples:

  asciinema stream --local
      Streams a shell session via the local HTTP server listening on an ephemeral port on 127.0.0.1

  asciinema stream --local 0.0.0.0:8080
      Streams via the local HTTP server listening on port 8080 on all network interfaces

  asciinema stream --remote
      Streams via an asciinema server for public viewing

  asciinema stream -l -r
      Streams both locally and remotely simultaneously

  asciinema stream -r --command "ping asciinema.org"
      Streams execution of the ping command

  asciinema stream -r <ID> -t "Live coding"
      Streams via a remote server, reusing the existing stream ID and setting the stream title
まずはローカルを試します.既定値ではlocalhostしか使えないようなのでlan内で使えるようにipアドレスと適当なportを指定して起動します.
$ target/release/asciinema stream --local 10.42.0.253:9999
::: asciinema session started
::: Live streaming at http://10.42.0.253:9999
::: Press <ctrl+d> or type 'exit' to end
$ ^d
exit
::: asciinema session ended
この状態でウェブブラウザで Live streaming at の後ろのアドレスにアクセスするとasciinema端末のストリーミングが表示されます.
次はリモート.
初回は認証が必要です.authサブコマンドを実行したときに表示されるurlにアクセスして認証します.
$ target/release/asciinema auth
Open the following URL in a web browser to authenticate this CLI with your asciinema.org user account:

https://asciinema.org/connect/abc123de-f345-7890-1234-abc123def456

This will associate all recordings uploaded from this machine with your account (including past uploads), and enable public live streaming via asciinema.org.
リモートサーバは未指定時の既定値ではasciinema.orgが利用されます.
$ target/release/asciinema stream --remote
::: asciinema session started
::: Live streaming at https://asciinema.org/s/aBcDeFgHiJkLmNoP
::: Press <ctrl+d> or type 'exit' to end
この状態でウェブブラウザで Live streaming at の後ろのアドレスにアクセスするとasciinema.orgで端末のストリーミングが表示されます.
閲覧のみですがデモにいい感じそうです.
録画と再生
以前は録画時にリモートにアップロードすると録画ファイルは消えていましたが,asciinema 3.0ではローカルにファイルが残るようになっています.
また,録画形式もasciicast v2, asciicast v3(default), raw, txtから選べるようになっています.基本的に規定値のasciicast v3形式でいいでしょうが,セルフホスト環境などでv3非対応の場合などはv2形式にする感じでしょうか.もしv3で録画したあとv2が必要だった(もしくはその逆)の場合でも後述の変換コマンドで相互変換が可能です.
$ target/release/asciinema rec -h                                                                                                                [4/1462]
Record a terminal session

Usage: asciinema record [OPTIONS] <FILE>

Arguments:
  <FILE>  Output file path

Options:
  -f, --output-format <FORMAT>   Output file format [default: asciicast-v3] [possible values:
                                 asciicast-v3, asciicast-v2, raw, txt]
  -c, --command <COMMAND>        Command to start in the session [default: $SHELL]
  -I, --capture-input            Enable input (keyboard) capture
      --capture-env <VARS>       Comma-separated list of environment variables to capture [default:
                                 SHELL]
  -a, --append                   Append to an existing recording file
      --overwrite                Overwrite the output file if it already exists
  -t, --title <TITLE>            Title of the recording
  -i, --idle-time-limit <SECS>   Limit idle time to a given number of seconds
      --headless                 Headless mode - don't use the terminal for I/O
      --window-size <COLSxROWS>  Override session's terminal window size
      --return                   Return the session's exit status
      --log-file <PATH>          Log file path
  -q, --quiet                    Quiet mode - suppress diagnostic messages
  -h, --help                     Print help (see more with '--help')

Examples:

  asciinema rec demo.cast
      Records a shell session to a file

  asciinema rec --command "python script.py" demo.cast
      Records execution of a Python script

  asciinema rec --idle-time-limit 2 demo.cast
      Records with idle time capped at 2 seconds

  asciinema rec --capture-input --title "API Demo" demo.cast
      Records with keyboard input and sets a title

  asciinema rec --append demo.cast
      Continues recording to an existing file

  asciinema rec demo.txt
      Records as a plain-text log - output format inferred from the .txt extension
録画してみる.
$ target/release/asciinema rec hello-asciinema3.0.cast
::: asciinema session started
::: Recording to hello-asciinema3.0.cast
::: Press <ctrl+d> or type 'exit' to end
$
$ ^d
exit
::: asciinema session ended
::: Recorded to hello-asciinema3.0.cast
録画ファイルから再生.
$ target/release/asciinema play hello-asciinema3.0.cast
::: Replaying session from hello-asciinema3.0.cast
$
exit
::: Playback ended
録画ファイルのasciinema.orgへのアップロード
asciicast v1, v2, v3形式のファイルをasciinemaサーバにアップロードします.今回は既定値のasciinema.orgへアップロードします.
$ target/release/asciinema upload -h
Upload a recording to an asciinema server

Usage: asciinema upload [OPTIONS] <FILE>

Arguments:
  <FILE>  The path to the asciicast recording file to upload, in a supported asciicast format (v1,
          v2, or v3)

Options:
      --server-url <URL>  asciinema server URL
  -q, --quiet             Quiet mode - suppress diagnostic messages
  -h, --help              Print help (see more with '--help')
録画ファイルを指定してアップロードします.成功したら共有urlが表示されます.
$ target/release/asciinema upload hello-asciinema3.0.cast
View the recording at:

    https://asciinema.org/a/OyMKojer2JRgnQbICxZ14mmKC
Tip | 大きなファイルはアップロードに失敗します.asciinema serverをセルフホストしたり,asciinema playerをセルフホストすることで大きなファイルを共有することが可能です. |
asciicast形式の変換
asciinema 3.0でファイル形式がasciicast v3になりました.
convertコマンドでasciicast v1, v2, v3を相互に変換可能になっています.また,rawからのasciicast形式への変換もできるようです.以前は別のサードパーティツールを使っていましたがasciinemaコマンドだけで完結できるようになったようです.
$ target/release/asciinema convert -h
Convert a recording to another format

Usage: asciinema convert [OPTIONS] <INPUT> <OUTPUT>

Arguments:
  <INPUT>   The source recording to convert. Can be a local file path, HTTP(S) URL for remote files,
            or '-' to read from standard input. Remote URLs allow converting recordings directly
            from the web without need for manual downloading. Supported input formats include
            asciicast v1, v2 and v3
  <OUTPUT>  The output path for the converted recording. Can be a file path or '-' to write to
            standard output

Options:
  -f, --output-format <FORMAT>  Output file format [default: asciicast-v3] [possible values:
                                asciicast-v3, asciicast-v2, raw, txt]
      --overwrite               Overwrite the output file if it already exists
  -q, --quiet                   Quiet mode - suppress diagnostic messages
  -h, --help                    Print help (see more with '--help')

Examples:

  asciinema convert old.cast new.cast
      Converts a recording to the latest asciicast format (v3)

  asciinema convert demo.cast demo.txt
      Exports a recording as a plain-text log - output format inferred from the .txt extension

  asciinema convert --output-format raw demo.cast demo.txt
      Exports as raw terminal output

  asciinema convert -f txt demo.cast -
      Exports as plain text to stdout

  asciinema convert https://asciinema.org/a/569727 starwars.cast
      Downloads a remote recording and converts it to the latest asciicast format (v3)
変換してみます.
$ target/release/asciinema convert --output-format asciicast-v2 hello-asciinema3.0.cast hello-asciinema3.0.v2.cast
$ target/release/asciinema convert --output-format asciicast-v3 hello-asciinema3.0.v2.cast hello-asciinema3.0.v3.cast
変換後のファイルをplayコマンドで再生してみると問題なく再生できました.
おわりに
asciinema 3.0がリリースされました.標準でローカルに録画ファイルが残るようになったり,ストリーミング機能,ファイル形式変換機能が便利そうです.
その他asciicast v3形式に対応したplayerも試してみたいところです.
One thought to “asciinema 3.0とRaspberry Pi armhf環境でのビルド”
Reposts