EDIT: 現在は次の記事の手順のほうが良いと思います -> Debian, Ubuntu で 上流のパッケージを借りてくる – matoken’s meme

先日Ubuntu 16.04 arm64環境でmozc pkgを作りました.
今回はDebian stretch arm64でも作ってみました.
環境はQualcomの96BoardのDragonBoard 410cにDebian stretch aarch64のイメージ(dragonboard410c_sdcard_install_debian-233.zip)を使いました.
OSイメージの入手や導入方法などは以下のあたりにあります.
手元では以下のような感じでsd cardに書き込んだ後dipスイッチでsd起動にして起動してeMMCに導入しました.
$ md5sum dragonboard410c_sdcard_install_debian-233.zip
ef17a1602cf0ef300e123a3224e0699d  dragonboard410c_sdcard_install_debian-233.zip
$ unzip -l dragonboard410c_sdcard_install_debian-233.zip
Archive:  dragonboard410c_sdcard_install_debian-233.zip
  Length      Date    Time    Name
---------  ---------- -----   ----
4055891968  2017-05-11 05:25   db410c_sd_install_debian.img
    13953  2017-05-04 21:45   LICENSE
---------                     -------
4055905921                     2 files
$ unzip -p dragonboard410c_sdcard_install_debian-233.zip LICENSE | lv
$ unzip -p dragonboard410c_sdcard_install_debian-233.zip db410c_sd_install_debian.img | pv | sudo dd of=/dev/mmcblk0 bs=4M
$ sync
$ sync
$ sync
後の手順はほぼ前回のUbuntuと同じですが,
dpkg-buildpackage: error: fakeroot not found, either install the fakeroot
package, specify a command with the -r option, or run this as root
とfakerootが無いと起こられたので導入パッケージにfakerootを追加したのと,
virtual memory exhausted: Cannot allocate memory
という感じでコケたので以下のような感じでスワップファイルを追加して回避しました.前回のUbuntuを入れてる方の機械はRAM2GBなのでRAM1GB+SWAP1GBでも行けると思いますが念の為2GB追加しました.
$ dd if=/dev/zero of=/var/tmp/swap bs=1M count=2048
$ sudo chmod 600 /var/tmp/swap
$ sudo chown 0.0 /var/tmp/swap
$ sudo mkswap /var/tmp/swap
$ sudo swapon /var/tmp/swap
$ free
              total        used        free      shared  buff/cache   available
Mem:         945868      225736      444948       40784      275184      608980
Swap:       2097148           0     2097148
で,パッケージングと導入の手順はこんな感じでした.
$ sudo apt update
$ sudo apt upgrade
$ sudo apt install build-essential devscripts fakeroot
$ sudo apt build-dep mozc
$ apt source mozc
$ wget https://gist.githubusercontent.com/matoken/afce66ce67392c11d3ed20d7bbab5833/raw/2bb0163f30291caa6ba7b41b3d4352c7e6c0b6a7/patch
$ patch -p0 < patch
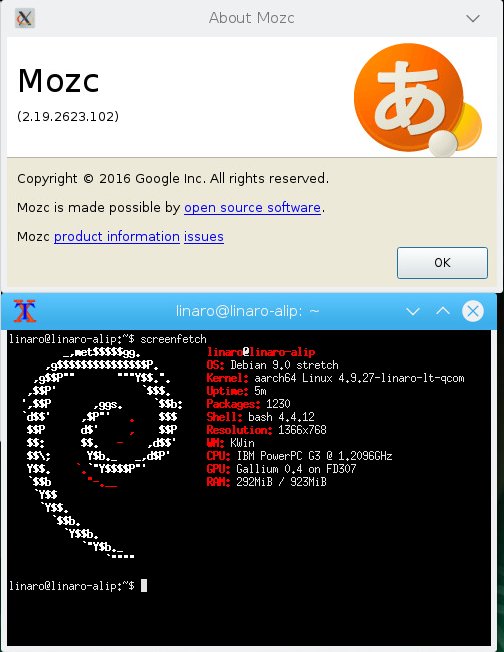
$ cd mozc-2.19.2623.102+dfsg
$ time dpkg-buildpackage -us -uc -j4
:
real 111m31.882s
user 88m2.352s
sys 10m59.828s
$ dch -i
$ head debian/changelog
mozc (2.19.2623.102+dfsg-1.1) unstable; urgency=medium
* Non-maintainer upload.
* Update debian/control.
- Add arm64 to Architecture list.
-- K.I.Matohara <matoken@gmail.com> Sat, 03 Jun 2017 22:15:19 +0000
mozc (2.19.2623.102+dfsg-1) unstable; urgency=medium
$ dpkg-buildpackage -j4
$ ls -la ../*dfsg-1.1_*
-rw-r--r-- 1 linaro linaro 2130510 Jun 4 01:10 ../emacs-mozc-bin-dbgsym_2.19.2623.102+dfsg-1.1_arm64.deb
-rw-r--r-- 1 linaro linaro 157710 Jun 4 01:10 ../emacs-mozc-bin_2.19.2623.102+dfsg-1.1_arm64.deb
-rw-r--r-- 1 linaro linaro 28118 Jun 4 01:10 ../emacs-mozc_2.19.2623.102+dfsg-1.1_arm64.deb
-rw-r--r-- 1 linaro linaro 2765446 Jun 4 01:10 ../fcitx-mozc-dbgsym_2.19.2623.102+dfsg-1.1_arm64.deb
-rw-r--r-- 1 linaro linaro 224574 Jun 4 01:10 ../fcitx-mozc_2.19.2623.102+dfsg-1.1_arm64.deb
-rw-r--r-- 1 linaro linaro 3088148 Jun 4 01:10 ../ibus-mozc-dbgsym_2.19.2623.102+dfsg-1.1_arm64.deb
-rw-r--r-- 1 linaro linaro 189886 Jun 4 01:10 ../ibus-mozc_2.19.2623.102+dfsg-1.1_arm64.deb
-rw-r--r-- 1 linaro linaro 14134 Jun 4 01:10 ../mozc-data_2.19.2623.102+dfsg-1.1_all.deb
-rw-r--r-- 1 linaro linaro 24825020 Jun 4 01:11 ../mozc-server-dbgsym_2.19.2623.102+dfsg-1.1_arm64.deb
-rw-r--r-- 1 linaro linaro 12310852 Jun 4 01:11 ../mozc-server_2.19.2623.102+dfsg-1.1_arm64.deb
-rw-r--r-- 1 linaro linaro 9823936 Jun 4 01:11 ../mozc-utils-gui-dbgsym_2.19.2623.102+dfsg-1.1_arm64.deb
-rw-r--r-- 1 linaro linaro 755758 Jun 4 01:11 ../mozc-utils-gui_2.19.2623.102+dfsg-1.1_arm64.deb
-rw-r--r-- 1 linaro linaro 18228 Jun 4 04:00 ../mozc_2.19.2623.102+dfsg-1.1_arm64.buildinfo
-rw-r--r-- 1 linaro linaro 6898 Jun 4 04:00 ../mozc_2.19.2623.102+dfsg-1.1_arm64.changes
-rw-r--r-- 1 linaro linaro 1921396 Jun 4 01:10 ../uim-mozc-dbgsym_2.19.2623.102+dfsg-1.1_arm64.deb
-rw-r--r-- 1 linaro linaro 192712 Jun 4 01:10 ../uim-mozc_2.19.2623.102+dfsg-1.1_arm64.deb
$ sudo apt install ../mozc-server_2.19.2623.102+dfsg-1.1_arm64.deb ../fcitx-mozc_2.19.2623.102+dfsg-1.1_arm64.deb ../mozc-data_2.19.2623.102+dfsg-1.1_all.deb ../mozc-utils-gui_2.19.2623.102+dfsg-1.1_arm64.deb
$ sudo apt install fcitx-ui-classic
これも一応この辺に置いておきました.多分そのうち消します.(Versionが上がった頃?)
これでとりあえず手元のUbuntu/Debianで利用できるようになりましたが,mozcのバージョンアップ毎にbuildが必要です.なのでBTS予定.あとクロスで試すのとMultiarchも試してみたいです.
参考URL