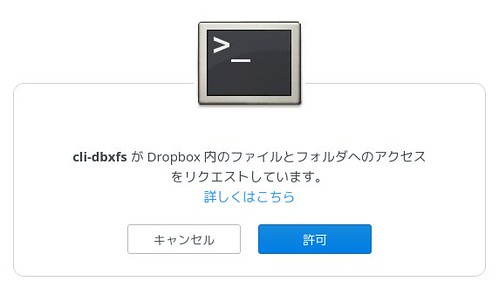
昨日dbxfs を試したのですが,アクセストークンのgpg での暗号化が出来ませんでした.
するとTwitterで情報をもらい,手動でDropbox app を作成してアクセストークンを入手する必要があるそうです.早速試してみたところうまく行きました!
To use gpg you must manually obtain an access token to your account. You can do this by creating an app at https://t.co/6YOnZfMYMv
— Rian Hunter (@cejetvole) 2018年10月3日
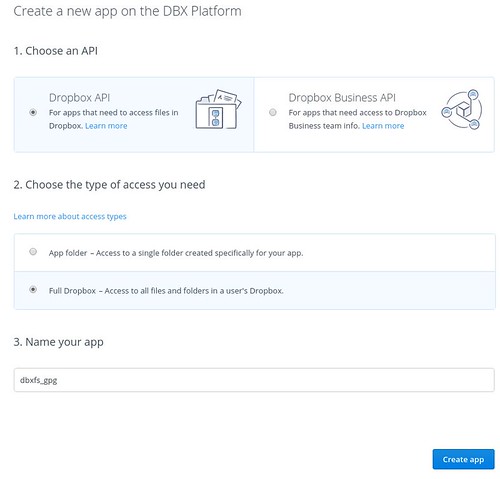
Dropbox の App Console にアクセスして,
Create app で新しいアプリを作成します.情報を入力してアプリを生成.
生成したアプリで
Generated access token を押してアクセストークンを生成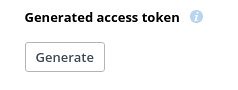
dbxfs設定ファイルの場所確認
$ ~/.local/bin/dbxfs --print-default-config-file
/home/matoken/.config/dbxfs/config.json
生成したアクセストークンを gpg で暗号化してファイルに格納.
$ echo -n 'ItBeOfobAlbofEicHefvemsajKicsEjcekDomBaHee-shwijreijKimyatIfnebir' | gpg -r EAA13B982D937827 -e -o /home/matoken/.config/dbxfs/token.gpg
暗号化したアクセストークンファイルを設定ファイルで指定する
$ jq . /home/matoken/.config/dbxfs/config.json
{
  "access_token_command": [
	"gpg",
	"--decrypt",
	"/home/matoken/.config/dbxfs/token.gpg"
  ],
  "send_error_reports": true,
  "asked_send_error_reports": true
}
mount 時に gpg で decrypt されて mount される
$ ~/.local/bin/dbxfs ~/fuse/dbxfs
Running 'gpg --decrypt /home/matoken/.config/dbxfs/token.gpg' for access token
gpg: 4096-ビットRSA鍵, ID EAA13B982D937827, 日付2015-06-11に暗号化されました
	  "K.I.Matohara <matoken@gmail.com>"
$ mount|grep dbxfs
dbxfs on /home/matoken/fuse/dbxfs type fuse (rw,nosuid,nodev,relatime,user_id=1000,group_id=1000,default_permissions)
$ ls /home/matoken/fuse/dbxfs
   :
$ fusermount -u ~/fuse/dbxfs
うまくいきました :)
環境
$ grep ^Version: ~/.local/lib/python3.6/site-packages/dbxfs-1.0.4.dist-info/METADATA
Version: 1.0.4
$ dpkg-query -W gpg libfuse2 python3-pip
gpg     2.2.10-2
libfuse2:amd64  2.9.8-2
python3-pip     9.0.1-2.3
$ lsb_release -d
Description:    Debian GNU/Linux unstable (sid)
$ uname -m
x86_64