terminalで動作するMastodon clientのnanotodonを試してみた

mikutodonをDebian jessie armhfに入れてみた.Makefileを修正したら動いたけど文字化けする.ちなみにDebian sid amd64では問題なく動作した.

$ cat /etc/debian_version 
8.10
$ uname -m
armv7l

ライブラリ等導入

$ sudo apt install build-essential libcurl4-openssl-dev libjson-c-dev libncurses-dev libncursesw5
$ dpkg-query -W build-essential libcurl4-openssl-dev libjson-c-dev libncurses-dev libncursesw5
build-essential 11.7
libcurl4-openssl-dev:armhf      7.38.0-4+deb8u11
libjson-c-dev:armhf     0.11-4
libncurses-dev  
libncursesw5:armhf      5.9+20140913-1+deb8u2

<追記>
入ってない場合gitも必要ですね $ sudo apt install git
</追記>

source入手

$ git clone https://github.com/taka-tuos/nanotodon

make

コケた

$ cd nanotodon
$ make
make -r nanotodon
make[1]: Entering directory '/home/chip/src/nanotodon'
gcc -c -g -o nanotodon.o nanotodon.c
nanotodon.c: In function 'stream_event_notify':
nanotodon.c:110:12: warning: initialization discards 'const' qualifier from pointer target type
  char *t = json_object_get_string(notify_type);
            ^
nanotodon.c: At top level:
nanotodon.c:138:6: warning: conflicting types for 'stream_event_update'
 void stream_event_update(struct json_object *jobj_from_string)
      ^
nanotodon.c:128:3: note: previous implicit declaration of 'stream_event_update' was here
   stream_event_update(status);
   ^
nanotodon.c: In function 'stream_event_update':
nanotodon.c:180:14: warning: initialization discards 'const' qualifier from pointer target type
  char *src = json_object_get_string(content);
              ^
nanotodon.c:226:3: error: 'for' loop initial declarations are only allowed in C99 or C11 mode
   for (int i = 0; i < json_object_array_length(media_attachments); ++i) {
   ^
nanotodon.c:226:3: note: use option -std=c99, -std=gnu99, -std=c11 or -std=gnu11 to compile your code
nanotodon.c:245:3: error: 'for' loop initial declarations are only allowed in C99 or C11 mode
   for(int i = 0; i < term_w - (l + 4); i++) waddstr(scr, " ");
   ^
nanotodon.c: At top level:
nanotodon.c:589:6: warning: conflicting types for 'do_htl'
 void do_htl()
      ^
nanotodon.c:303:2: note: previous implicit declaration of 'do_htl' was here
  do_htl();
  ^
nanotodon.c: In function 'do_htl':
nanotodon.c:618:3: error: 'for' loop initial declarations are only allowed in C99 or C11 mode
   for (int i = json_object_array_length(jobj_from_string) - 1; i >= 0; i--) {
   ^
nanotodon.c: In function 'main':
nanotodon.c:751:2: error: 'for' loop initial declarations are only allowed in C99 or C11 mode
  for(int i = 0; i < term_w; i++) mvaddch(5, i, '-');
  ^
nanotodon.c:777:4: error: 'for' loop initial declarations are only allowed in C99 or C11 mode
    for(int i = 0; i < term_w; i++) mvaddch(5, i, '-');
    ^
nanotodon.c:802:3: error: 'for' loop initial declarations are only allowed in C99 or C11 mode
   for(int i = 0; i < txt.stringlen; i++) {
   ^
Makefile.in:21: recipe for target 'nanotodon.o' failed
make[1]: *** [nanotodon.o] Error 1
make[1]: Leaving directory '/home/chip/src/nanotodon'
Makefile.in:11: recipe for target 'default' failed
make: *** [default] Error 2

Makefileを修正したら通った

diff --git a/Makefile b/Makefile
index ac1828f..a35ee6a 100644
--- a/Makefile
+++ b/Makefile
@@ -1,7 +1,7 @@
 TARGET         = nanotodon
 OBJS_TARGET    = nanotodon.o
 
-CFLAGS = -g
+CFLAGS = -g -std=gnu99
 LDFLAGS = 
 LIBS = -lc -lm -lcurl -ljson-c -lncursesw -lpthread
 

文字化け><

20180521_20:05:50-30304

Debian sid amd64ではMakefileの書き換えも必要なく文字化けもしない.

20180521_20:05:01-31796

$ cat /etc/debian_version 
buster/sid
$ uname -m
x86_64
$ dpkg-query -W build-essential libcurl4-openssl-dev libjson-c-dev libncurses-dev libncursesw5
build-essential 12.5
libcurl4-openssl-dev:amd64      7.60.0-1
libjson-c-dev:amd64     0.12.1-1.3
libncurses-dev:amd64    6.1+20180210-3
libncursesw5:amd64      6.1+20180210-3

system fontが汎用CJKになっていた

なんかPCを再起動してからフォントが変になっていました.中国語混じりのような汎用CJKらしきフォントになっています.今のフォントを調べるのは何だろうと探すと以下のページを見つけました.

fc-matchコマンドで確認するとWenQuanYi Zen Heiというフォントが設定されている状態のようです.パッケージを確認するとfonts-wqy-microheiのようです.おまけにfonts-wqy-zenheiという中国語フォントも入っていたのでこれらを削除しました.(fonts-notoも入っているのでもし中国語を表示する必要が出ても問題ないはず)

$ fc-match :lang=ja
wqy-zenhei.ttc: "WenQuanYi Zen Hei" "Regular"
$ apt-cache search WenQuanYi
fonts-wqy-microhei - Sans-serif style CJK font derived from Droid
fonts-wqy-zenhei - "WenQuanYi Zen Hei" A Hei-Ti Style (sans-serif) Chinese font
xfonts-wqy - WenQuanYi Bitmap Song CJK font for X
$ dpkg -l|grep -i  fonts-wqy
ii  fonts-wqy-microhei                            0.2.0-beta-3                            all          Sans-serif style CJK font derived from Droid
ii  fonts-wqy-zenhei                              0.9.45-7                                all          "WenQuanYi Zen Hei" A Hei-Ti Style (sans-serif) Chinese font
$ sudo apt purge fonts-wqy-microhei fonts-wqy-zenhei

dgm3を再起動してログインし直すと以前設定したフォントになっていました.

$ fc-match 
umeplus-p-gothic.ttf: "UmePlus P Gothic" "Regular"

logを見るとfonts-wqy-microheiの0.2.0-beta-3 で0.2.0-beta-2をアップデートしたものが見つかりました.恐らくこのタイミングで置き換わったのではないかと思います.それ以前の1年ほどのログの中にはなかったのでそれ以前に導入されたパッケージのようです.

中を見るとこのような設定が.

$ find fonts-wqy-microhei_0.2.0-beta-3_all -type f -print | grep etc
fonts-wqy-microhei_0.2.0-beta-3_all/etc/fonts/conf.avail/65-wqy-microhei.conf

以下を見ると標準より大きい数字なので手動で設定したフォントより優先度が高いので置き換わったのでしょうか?だとすると中途半端に設定をいじっていた自分のせいのようですorz

  1. 各日本語フォントパッケージは、/usr/share/fonts/truetype/

ttf-japanese-mincho.ttf または ttf-japanese-gothic.ttf をalternativesパスとして登録する。alternatives優先順位は次のように 規定する。

100より上: サードパーティまたはユーザ作成のフォント(IPA フォントなどはこのカテゴリに入る)
60: vl-gothic(標準)
50: ttf-sazanami-mincho, ttf-sazanami-gothic
20: ttf-kochi-mincho, ttf-kochi-gothic
20より下: 日本語を字形に含むがunified領域で中国語字形が使われているなど
日本語の表現には使いにくいフォント

とりあえず使わないであろうフォントが削除できてディスクスペースが開いたので良かったとしましょう.

環境

$ uname -m
x86_64
$ lsb_release -d
Description:    Debian GNU/Linux unstable (sid)
$ dpkg-query -W fontconfig
fontconfig      2.13.0-5

SteamのアプリがAndroidでリモートプレイが出来るSteam Linkを試す

20180521_01:05:06-2769

AndroidでSteamのホームストリーミングで遊べるSteam Linkというアプリが公開されていたのでちょっと試してみました.

先ずはPCのSteamでホームストリーミングを有効にしておきます.
20180519_01:05:27-31428

firewallはこの辺りを参考に空けておきます.

ホームストリーミングだけならこの辺?

UDP 27031 and 27036 (incoming, for In-Home Streaming)
TCP 27036 and 27037 (incoming, for In-Home Streaming)

PCでSteamを起動した状態でAndroidのSteam Linkを起動したらPCが見つかりました.しかしネットワークテストがいまいち.Wi-Fiが2.4GHz 11gの54MbpsでHostのPCもClientのAndroidも同じAPなのでこのままでは無理がありますね…….

Screenshot_20180519-015144

とりあえず強行してみるとHostPC側では動いていますが,Androidでは表示が崩れてこんな感じ.

Screenshot_20180519-015239

ちなみにHostPCはCore2DuoかつGPUもCPUのものなのでかなりスペック低いのでそのせいもありそうです.
近いうちに回線は有線1GHz+Wi-Fi 300Mbpsの環境で試してみようと思います.

このアプリケーションはPCのHost側もゲーム画面を表示してそれをAndroidに転送して動いているのでPCで別の作業をするという向けには使いづらい感じです.もし併用するなら仮想画面や別モニタに別のXを動かすとかしないといけないと思います.
とはいえAndroidでSteamゲームが遊べるのは便利そう.それにまだBETAなのでもっと良くなるでしょう.

add 2018-05-26)
iOS版はblockされたようです(◞‸◟)

画像ファイルのタイムスタンプをexifの時間に合わせる

画像ファイルをSNSなどにアップロードするときに回線が細かったりデータ転送料金が従量制だったりするときにリサイズしてアップロードしたりするのですが,サービスによってはファイルのタイムスタンプを参照して悲しいことになることも.
オリジナルのexifが残っている場合はそれを参照してファイルのタイムスタンプを修正することが可能です.
というメモ.

$ exiftool "-FileModifyDate<DateTimeOriginal" DP1M0???.resized.JPG
   10 image files updated

環境

$ dpkg-query -W libimage-exiftool-perl
libimage-exiftool-perl  10.96-1
$ lsb_release -d
Description:    Debian GNU/Linux unstable (sid)
$ uname -m
x86_64
関連

Mozcでシークレットモードやサジェストのオンオフをするコマンド機能を試す

以下のスライドを見て案外絵文字対応サービス多いのかもと思ったけど入力に日本語入力システムを使うとパスワードを覚えちゃうのが嫌だなとか,Emoji Pickerみたいなのを使うのも面倒.Mozcにはシークレットモードがあるけど( mozc_tool --mode=config_dialog のプライバシータブ )設定画面を呼び出して設定しないといけないので面倒.ショートカットか何かで切り替えが出来ないかなと探してみました.

Google日本語入力のヘルプページを見ても載っていない

フォーラムを検索すると以下ような要望と解答が.

試してみると問題なく動作するようです.

shutter_18-05-03_18:22:31_001

以下のページを見ると「こまんど」以外にも複数の単語で切り替えが出来るようです.

  • Google Developers Japan: Google 日本語入力の開発版をアップデートしました。(1.4.1003.10x)

    「コマンド」機能が追加されました。「コマンド」と入力し、変換候補を選択することで、設定ツールを起動することなく、【シークレットモード】のオン・オフ、および【プレゼンテーションモード】のオン・オフを変更することができます。

    「秘密」「シークレット」「シークレットモード」「プライバシー」「プライベート」と入力することで、【シークレットモード】のオン・オフを変更することができます。
    「サジェスト」「予測」「予測入力」「予測変換」「プレゼンテーション」「プレゼン」と入力することで、【プレゼンテーションモード】のオン・オフを変更することができます。

「きょう」「きのう」「おととい」「ことし」「きょねん」などで年月,「2018ねん」等で和暦,郵便番号で住所,「ばーじょん」でMozcのバージョンなどは知っていましたが「こまんど」は知りませんでした.
この辺りの一覧をヘルプページ辺りに作ってくれるといいのになとか.

環境

$ dpkg-query -W mozc-server
mozc-server     2.23.2815.102+dfsg-1
$ neofetch
       _,met$$$$$gg.          mk@x200 
    ,g$$$$$$$$$$$$$$$P.       ------- 
  ,g$$P"     """Y$$.".        OS: Debian GNU/Linux unstable (sid) x86_64 
 ,$$P'              `$$$.     Model: 74574PJ ThinkPad X200 
',$$P       ,ggs.     `$$b:   Kernel: 4.14.0-2-amd64 
`d$$'     ,$P"'   .    $$$    Uptime: 8 hours, 52 minutes 
 $$P      d$'     ,    $$P    Packages: 5617 
 $$:      $$.   -    ,d$$'    Shell: bash 4.4.19 
 $$;      Y$b._   _,d$P'      Resolution: 1280x800 
 Y$$.    `.`"Y$$$$P"'         WM: awesome 
 `$$b      "-.__              Terminal: sakura 
  `Y$$                        Terminal Font: Fira Code 11 
   `Y$$.                      CPU: Intel Core 2 Duo P8400 (2) @ 2.267GHz 
     `$$b.                    GPU: Intel® GM45 Express Chipset 
       `Y$$b.                 Memory: 5292MiB / 7878MiB 
          `"Y$b._ 
              `"""                                    

OpenJDK で JOSM

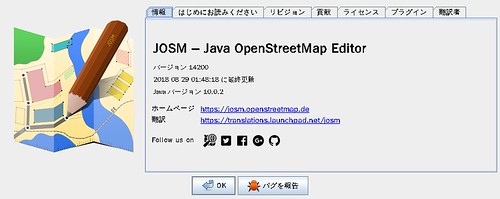
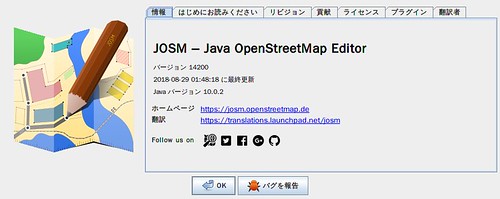
Javaで動作するOpenStreetMapエディタのJOSMをLinux上のOpenJDKで動かすメモです.
Debian sid amd64 / Ubuntu 16.04 LTS ARM64 で確認しています.

JOSMの入手

JOSMを次のページから入手します.josm-tested.jar をよく使っています.

OpenJDKインストール

2015年12月くらいにはこんなメッセージが出ていて現在はJava 8以上が必要になっています.

このバージョンのJavaはもうすぐサポート対象から外れます。 Java 8以上にアップグレードしてください!

ここでは OpenJDK 8 を導入

$ sudo apt install openjdk-8-jre

javaの確認

OpenJDK 8になっている.もし違うバージョンが表示されたら次の項目へ.

$ java -version
openjdk version "1.8.0_151"
OpenJDK Runtime Environment (build 1.8.0_151-8u151-b12-0ubuntu0.16.04.2-b12)
OpenJDK 64-Bit Server VM (build 25.151-b12, mixed mode)

javaが複数入っていてjavaコマンドの結果が想定しているバージョンではない場合切り替える

OpenJDK 8の場合はここはスキップする.

$ sudo update-alternatives --config java

JOSM起動

-Dawt.useSystemAAFontSettings=onはフォントのアンチエイリアスを有効にするオプション.LCDの場合onの代わりにlcd.

$ java -jar -Dawt.useSystemAAFontSettings=on ./josm-latest.jar
追記)
他の環境だとこの辺のどれかが使えそう(未確認)

Debian sidのkernel.sysrqの値が変わった?

先日Debian sid amd64環境でprocpsの更新がありました.

$ apt show procps
Package: procps
Version: 2:3.3.12-4
Priority: important
Section: admin
Maintainer: Craig Small <csmall@debian.org>
Installed-Size: 712 kB
Provides: watch
Depends: libc6 (>= 2.15), libncurses5 (>= 6), libncursesw5 (>= 6), libprocps6, libtinfo5 (>= 6), lsb-base (>= 3.0-10), init-system-helpers (>= 1.29~)
Recommends: psmisc
Conflicts: pgrep (<< 3.3-5), w-bassman (<< 1.0-3)
Breaks: guymager (<= 0.5.9-1), open-vm-tools (<= 2011.12.20-562307-1)
Homepage: https://gitlab.com/procps-ng/procps
Tag: admin::monitoring, implemented-in::c, interface::commandline,
 interface::text-mode, role::program, scope::utility,
 uitoolkit::ncurses, use::checking, use::monitor,
 works-with::software:running
Download-Size: 251 kB
APT-Manual-Installed: yes
APT-Sources: http://ftp.jp.debian.org/debian sid/main amd64 Packages
Description: /proc ファイルシステムユーティリティ
 本パッケージは procfs を閲覧するためのコマンドラインおよび全画面のユーティ
 リティを提供します。procfs とは "擬似的な" ファイルシステムで、カーネルによ
 り動的に生成されます。カーネルのプロセステーブル内のエントリの状態に関する
 情報 (例えば、プロセスが稼働中、停止中、または "ゾンビ" である、など) が提
 供されます。
 .
 本パッケージには次のものが含まれます: free, kill, pkill, pgrep, pmap, ps,
 pwdx, skill, slabtop, snice, sysctl, tload, top, uptime, vmstat, w, watch。

更新に伴い/etc/sysctl.confの更新がありました.

設定ファイル '/etc/sysctl.conf'
 ==> これはインストールしてから (あなたかスクリプトによって) 変更されています。
 ==> パッケージ配布元が更新版を提供しています。
   どうしますか? 以下の選択肢があります:
    Y か I  : パッケージメンテナのバージョンをインストールする
    N か O  : 現在インストールされている自分のバージョンを残す
      D     : 両バージョンの差異を表示する
      Z     : 状況を調査するためにシェルを開始する
 デフォルトでは現在使っている自分のバージョンを残します。
*** sysctl.conf (Y/I/N/O/D/Z) [デフォルト=N] ? D

差分を見ると自分で編集した部分以外はコメントだけだったのですが,気になる項目が.

@@ -61,18 +61,13 @@

 ###################################################################
 # Magic system request Key
-# 0=disable, 1=enable all
-# Debian kernels have this set to 0 (disable the key)
-# See https://www.kernel.org/doc/Documentation/sysrq.txt
+# 0=disable, 1=enable all, >1 bitmask of sysrq functions
+# Debian kernels have this set to 438 which is the OR of:
+#  64 = enable signalling of processes
+#  128 = allow reboot/poweroff
+#  256 = allow nicing of all RT tasks
+#
+# See https://www.kernel.org/doc/html/latest/admin-guide/sysrq.html
 # for what other values do
-#kernel.sysrq=1
+#kernel.sysrq=438

Magic system request Keyの項目が以前は0 or 1で有効か無効化のみだったと思うのですが,細かく指定できるようになっているようです.

0 – disable sysrq completely
1 – enable all functions of sysrq
>1 – bitmask of allowed sysrq functions (see below for detailed function description):

てことでkernel.sysrq=438は16進数で0x1B6なので

$bc
obase=16
438
1B6

以下が有効ということのようです.

2 = 0x2 – enable control of console logging level
4 = 0x4 – enable control of keyboard (SAK, unraw)
16 = 0x10 – enable sync command
32 = 0x20 – enable remount read-only
128 = 0x80 – allow reboot/poweroff
256 = 0x100 – allow nicing of all RT tasks

無効になっているのは以下の項目.

8 = 0x8 – enable debugging dumps of processes etc.
64 = 0x40 – enable signalling of processes (term, kill, oom-kill)

kernel configを見るとこの項目になっています.少なくとも4.13.0-1〜4.14.13-1以降は同じみたい.

$ zgrep ONFIG_MAGIC_SYSRQ /boot/config-`uname -r`
CONFIG_MAGIC_SYSRQ=y
CONFIG_MAGIC_SYSRQ_DEFAULT_ENABLE=0x01b6
CONFIG_MAGIC_SYSRQ_SERIAL=y

ということでコメントが実際のkernelの項目と同じになったということみたいなので動作は変わらないようです.

追記)

昔使い方を知りたくて調べたときに見つけた文章は@miurahrさん翻訳のものでした.その後 で本人に遭遇.

porgを一般ユーザで利用する

porgを一般ユーザで利用するメモ

一般ユーザで普通に使おうとするとログ保存場所の/var/lib/porgへの権限がないと怒られてしまう.

$ porg -D ~/.porg -lp program-0.10.61 make install
porg: /var/lib/porg: Permission denied

ログ保存ディレクトリを指定すると行ける.

$ porg -L ~/.porg -lp program-0.10.61 make install

manより

   -L, --logdir=DIR
          Base log  directory.  The  logs  for  the  installed  packages  are  saved  in  this  directory.  Default  is
          '/var/lib/porg', unless variable LOGDIR is set in the configuration file (type 'man porgrc' for more informa‐
          tion).

--PREFIX=${HOME}/usrみたいな時向けに

version等

$ porg -V
porg-0.10 (17 May 2016)
Written by David Ricart <http://porg.sourceforge.net>
$ dpkg-query -W porg
porg    2:0.10-1.1

Btrfsでdfで空き容量があるように見えるのに容量が無いと言われてreadonlyにされてしまう

最近Btrfsで利用中にroにされてしまうという症状が起きます.
こんな感じで怒られてroになる.
dfは87%とかで未だ空きはあるように見える.
/に使ってるとこでremount,rwも効かず再起動しないと戻せず辛い.

[ 2196.878532] BTRFS: error (device dm-1) in btrfs_truncate_inode_items:4647: errno=-28 No space left
[ 2196.878537] BTRFS info (device dm-1): forced readonly
[ 2196.881248] BTRFS error (device dm-1): pending csums is 1241088

FAQだったようでここを参照しながら

別のsystemで確認してbtrfs fi balance start -dusage=5を叩いてみました.

$ sudo btrfs fi show
Label: none uuid: e54de82f-1fdb-4f9a-b529-0952b0ea3454
        Total devices 1 FS bytes used 465.89GiB
        devid 1 size 542.28GiB used 542.28GiB path /dev/mapper/x220--vg-root

$ sudo mount -o ro /dev/mapper/x220--vg-root /mnt
$ sudo btrfs fi df /mnt
Data, single: total=538.27GiB, used=462.41GiB
System, single: total=4.00MiB, used=80.00KiB
Metadata, single: total=4.01GiB, used=3.48GiB
GlobalReserve, single: total=512.00MiB, used=0.00B
$ sudo btrfs fi balance start -dusage=5 /mnt
ERROR: error during balancing '/mnt': Read-only file system
There may be more info in syslog - try dmesg | tail
$ sudo mount -o remount,rw /mnt
$ sudo btrfs fi balance start -dusage=5 /mnt
Done, had to relocate 0 out of 546 chunks

しかしあまり変わらず暫く利用しているとまたエラーに.しかし今度はdisk fullと怒られるけどroにはならなかったです.以下のページによると,

This means the bigger the -dusage value, the more work balance will have to do (i.e. taking fuller and fuller blocks and trying to free them up by putting their data elsewhere). Also, if your FS is 55% full, using -dusage=55 is ok, but there isn’t a 1 to 1 correlation and you’ll likely be ok with a smaller dusage number, so start small and ramp up as needed.

ということで-dusage=90にしてみると結構空いた感じです.
上の方では別systemで起動して実行しましたが,オンラインでも大丈夫でした.但し処理中はかなり重くなります.そして処理に200分程かかりました.

$ sudo btrfs fi balance start -dusage=90 /
Done, had to relocate 186 out of 530 chunks
$ sudo btrfs fi show
Label: none  uuid: e54de82f-1fdb-4f9a-b529-0952b0ea3454
        Total devices 1 FS bytes used 446.08GiB
        devid    1 size 542.28GiB used 449.27GiB path /dev/mapper/x220--vg-root

この後数GBのデータを書いてみたり溜まっていたapt upgradeとかしてみましたが今のところ大丈夫そうです.
ちなみにこのfsがあるSSD(INTEL SSDSA2CW600G3)も長く使っているのでそっちも心配だったのですが,smartctl-t longしたり-aの以下のあたり見る感じでは未だ行けそう?

9 Power_On_Hours 0x0032 100 100 000 Old_age Always – 36565
228 Workload_Minutes 0x0032 100 100 000 Old_age Always – 2193912
232 Available_Reservd_Space 0x0033 100 100 010 Pre-fail Always – 0
233 Media_Wearout_Indicator 0x0032 095 095 000 Old_age Always – 0

#適当なとこでsecure eraseしておきたい…….

clipitが動かなくなっていた

clipit

暫く前からDebian sid amd64環境のclipit(クリップボード・マネージャ)が動かなくなっていました.
端末で実行するとこんな感じ

$ clipit

(clipit:23553): GLib-ERROR **: ../../../../glib/gmem.c:100: failed to allocate 18446744071610537348 bytes
Trace/breakpoint trap

sidだしなんか一時的におかしくなってるのかなととりあえず放置してたんですが暫く経っても直らない.バグレポ見るとこんな感じでそれらしいバグは見当たりません.

Querying Debian BTS for reports on clipit (source)...
7 bug reports found:

Bugs with severity important
  1) #679488  abuses xdg/autostart to get started and cannot be disabled
Bugs with severity normal
  2) #721007  clipit: Wakes up too many times per second and prevents deep sleep of cpu
  3) #771200  clipit: cannot edit 'actions'
  4) #819496  clipit clipboard history is *world* readable
Bugs with severity minor
  5) #658533  clipit: static item ordering
Bugs with severity wishlist
  6) #658532  clipit: manage history items in list view
  7) #875903  clipit: please choose a sensible default in "live" mode?

自分の環境がおかしいのか?ととりあえず設定ファイルを探すとこれのよう.

  • ~/.config/clipit/clipitrc

試しにこのファイルを退避してclipitを実行すると普通に起動しました.
てことで設定ファイルあ壊れていたようです(◞‸◟)

暫く前にinodeあふれさせてしまったのでそのときに壊れたのかもです.