Nextcloudの公開リンクURLをカスタマイズできるShareRenamerを試す

NextcloudでURLで共有を行うと,ランダムな文字列のURLが生成されます.これは第三者が推測しにくいようになっています.
しかし,印刷物などでURLを教える際には入力するのがとても面倒です.

ShareRenamerを使うとURLを任意の文字列に変更できるようになるのでこの問題が解決できそうです.

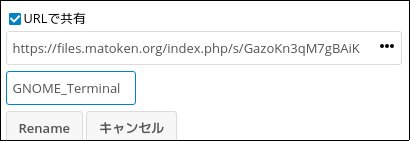
ShareRenamerを導入した後にURLで共有を行うと,rename用のテキストボックスるが現れます.このテキストボックスに任意の文字列を入力して「Rename」ボタンを押すと好きな文字列に変更できます.

20190115-21-01-54-25819.jpg

20190115-21-01-52-26787.jpg

一般公開してはいけない場合はパスワードで保護するようにしましょう.

Debian, Ubuntu で 上流のパッケージを借りてくる

以前以下のような記事を書きました.

今でもこのblogの中ではアクセスが多く,最近もトラックバックをもらいました.

この当時は arm64 の mozcパッケージがなくて自分でbuild したという話なのですが,現在はDebian では buster(testing), Ubuntu ではartful(17.10) 以降でパッケージが存在します.
なのでこの野良パッケージを使うよりも公式の上流パッケージを借りるほうが大抵の場合いいと思います.
ということで手順を書いておきます.

パッケージファイルだけが必要な場合はパッケージのページからダウンロード可能です.

野良パッケージは近日中に削除します.

Debian stretch arm64 に Debian buster arm64 の mozc を借りてくる

Debian stretch arm64 では mozc-data しかない
$ apt-cache search mozc
mozc-data - Mozc input method - data files

buster(testing) のmozc を借りてくることにする.

/etc/apt/preferences で buster の優先度を下げる

/etc/apt/preferences
Package: *
Pin: release n=buster
Pin-Priority: 100
/etc/apt/sources.list に buster(testing)追加 設定
deb http://deb.debian.org/debian buster main

sources.list の編集には apt edit-sources を使うと文法チェックをしてくれるのでおすすめ

パッケージ情報の更新
$ sudo apt update
mozcパッケージの確認
$ apt-cache search mozc
mozc-data - Mozc input method - data files
fcitx-dbus-status - Addon for Fcitx to set/get/monitor IM statuses via D-Bus
emacs-mozc - Mozc for Emacs
emacs-mozc-bin - Helper module for emacs-mozc
fcitx-mozc - Mozc engine for fcitx - Client of the Mozc input method
ibus-mozc - Mozc engine for IBus - Client of the Mozc input method
mozc-server - Server of the Mozc input method
mozc-utils-gui - GUI utilities of the Mozc input method
uim-mozc - Mozc engine for uim - Client of the Mozc input method
パッケージの導入
$ apt install fcitx-mozc -t buster

後は通常の apt update && apt upgrade で stretch で導入したパッケージは stretch で,buster で導入したパッケージはbuster で更新されるはず.

Ubuntu 16.04 LTS xenial arm64 に Ubuntu 18.04 LTS bionic arm64 の mozc を借りてくる

Debianの手順と同じでもokだと思うけど念の為以下の手順を真似してみる.

mozc は Ubuntu 17.10 artful から対応しているが,もうサポートされないのでUbuntu 18.04 bionic を使う.

標準のリリースを xenial に設定

/etc/apt/apt.conf.d/01ubuntu
APT::Default-Release "xenial";

mozc をpinningする

/etc/apt/preferences
Package: *mozc*
Pin: release n=xenial
Pin-Priority: -10

Package: *mozc*
Pin: release n=bionic
Pin-Priority: 900

/etc/apt/sources.list に buster(testing) を 追加 設定

/etc/apt/sources.list
deb http://ports.ubuntu.com/ bionic main universe

※sources.list の編集には apt edit-sources を使うと文法チェックをしてくれるのでおすすめ
※mirrorにより arm64 が置かれていないので注意

パッケージ情報の更新
$ sudo apt update
検索結果にmozcが出てくる
$ apt-cache search mozc
mozc-data - Mozc input method - data files
ibus-mozc - Mozc engine for IBus - Client of the Mozc input method
mozc-server - Server of the Mozc input method
mozc-utils-gui - GUI utilities of the Mozc input method
emacs-mozc - Mozc for Emacs
emacs-mozc-bin - Helper module for emacs-mozc
fcitx-mozc - Mozc engine for fcitx - Client of the Mozc input method
uim-mozc - Mozc engine for uim - Client of the Mozc input method
パッケージの導入
$ sudo apt install fcitx-mozc -t bionic

ssh環境での誤ったシステム停止を防ぐmolly-guard

最近 shutdown の man を見比べたりしてたのですが,そのときに systemd, sysvinit 以外に molly-guard という見知らぬものが.

$ apt-file search /sbin/shutdown
molly-guard: /sbin/shutdown
systemd-sysv: /sbin/shutdown
sysvinit-core: /sbin/shutdown

パッケージ情報をみると shutdown コマンドなどを置き換えて ssh 接続時には確認のためにホスト名を聞くようになるようです.
これにより手元のPCの再起動をしたつもりがリモートのサーバを再起動してしまうなどといったことが防げるようになります.

$ apt show molly-guard
Package: molly-guard
Version: 0.6.4
Priority: extra
Section: admin
Maintainer: Francois Marier <francois@debian.org>
Installed-Size: 57.3 kB
Depends: procps
Enhances: init, kexec-tools, mosh, openssh-server, pm-utils, systemd, sysvinit, upstart
Tag: implemented-in::shell, interface::commandline, network::server,
 protocol::ssh, role::program, scope::utility
Download-Size: 13.8 kB
APT-Manual-Installed: yes
APT-Sources: http://ftp.jp.debian.org/debian stretch/main amd64 Packages
Description: protects machines from accidental shutdowns/reboots
 The package installs a shell script that overrides the existing
 shutdown/reboot/halt/poweroff/coldreboot/pm-hibernate/pm-suspend* commands
 and first runs a set of scripts, which all have to exit successfully,
 before molly-guard invokes the real command.
 .
 One of the scripts checks for existing SSH sessions. If any of the four
 commands are called interactively over an SSH session, the shell script
 prompts you to enter the name of the host you wish to shut down. This should
 adequately prevent you from accidental shutdowns and reboots.
 .
 molly-guard diverts the real binaries to /lib/molly-guard/.  You can bypass
 molly-guard by running those binaries directly.

早速試してみます.

$ sudo apt install molly-guard
    :
package diverts others to: /lib/molly-guard/coldreboot
/sbin/halt
package diverts others to: /lib/molly-guard/halt
/sbin/pm-hibernate
/sbin/pm-suspend
/sbin/pm-suspend-hybrid
/sbin/poweroff
package diverts others to: /lib/molly-guard/poweroff
/sbin/reboot
package diverts others to: /lib/molly-guard/reboot
/sbin/shutdown
package diverts others to: /lib/molly-guard/shutdown

このあたりのコマンドが置き換わっています.

$ ls -l /sbin | grep molly
lrwxrwxrwx 1 root root        28 Aug 16  2016 coldreboot -> /lib/molly-guard/molly-guard
lrwxrwxrwx 1 root root        28 Aug 16  2016 halt -> /lib/molly-guard/molly-guard
lrwxrwxrwx 1 root root        28 Aug 16  2016 pm-hibernate -> /lib/molly-guard/molly-guard
lrwxrwxrwx 1 root root        28 Aug 16  2016 pm-suspend -> /lib/molly-guard/molly-guard
lrwxrwxrwx 1 root root        28 Aug 16  2016 pm-suspend-hybrid -> /lib/molly-guard/molly-guard
lrwxrwxrwx 1 root root        28 Aug 16  2016 poweroff -> /lib/molly-guard/molly-guard
lrwxrwxrwx 1 root root        28 Aug 16  2016 reboot -> /lib/molly-guard/molly-guard
lrwxrwxrwx 1 root root        28 Aug 16  2016 shutdown -> /lib/molly-guard/molly-guard

コマンド類は /lib/molly-guard 以下に退避されるようです.

sysvinit
$ ls -lA /lib/molly-guard
total 48
-rwxr-xr-x 1 root root 18952 Feb 13  2017 halt
-rwxr-xr-x 1 root root  2767 Aug 16  2016 molly-guard
lrwxrwxrwx 1 root root     4 Feb 13  2017 poweroff -> halt
lrwxrwxrwx 1 root root     4 Feb 13  2017 reboot -> halt
-rwxr-xr-x 1 root root 23368 Feb 13  2017 shutdown
systemd
$ ls -lA /lib/molly-guard
total 4
lrwxrwxrwx 1 root root   14 Jun 14 05:20 halt -> /bin/systemctl
-rwxr-xr-x 1 root root 2767 Aug 16  2016 molly-guard
lrwxrwxrwx 1 root root   14 Jun 14 05:20 poweroff -> /bin/systemctl
lrwxrwxrwx 1 root root   14 Jun 14 05:20 reboot -> /bin/systemctl
lrwxrwxrwx 1 root root   14 Jun 14 05:20 shutdown -> /bin/systemctl

ssh 経由で shutdown(sysvinit) を試みるとこのように hostname を求められます.ここで誤った hostname を書くと shutdown がキャンセルされました.

$ sudo shutdown -f -P -h +10 "kernel update (`uname -r`)"
W: molly-guard: SSH session detected!
Please type in hostname of the machine to shutdown: desktop
Good thing I asked; I won't shutdown debian ...
W: aborting shutdown due to 30-query-hostname exiting with code 1.

正しい hostname を指定すると shutdown が呼ばれます.

$ sudo shutdown -f -P -h +10 "kernel update (`uname -r`)"
W: molly-guard: SSH session detected!
Please type in hostname of the machine to shutdown: debian

Broadcast message from root@debian (pts/0) (Thu Sep 27 06:15:28 2018):

kernel update (4.9.0-3-amd64)
The system is going DOWN for system halt in 10 minutes!
^C
Shutdown cancelled.

ssh経由でない場合は molly-guard はすぐに shutdown を呼びます.

$ sudo shutdown -f -P -h +10 'poweroff'
^C
Shutdown cancelled.

環境

$ dpkg-query -W systemd-sysv molly-guard
molly-guard     0.6.4
systemd-sysv    232-25+deb9u4
$ dpkg-query -W sysvinit-core
sysvinit-core   2.88dsf-59.9
$ cat /etc/os-release
PRETTY_NAME="Debian GNU/Linux 9 (stretch)"
NAME="Debian GNU/Linux"
VERSION_ID="9"
VERSION="9 (stretch)"
ID=debian
HOME_URL="https://www.debian.org/"
SUPPORT_URL="https://www.debian.org/support"
BUG_REPORT_URL="https://bugs.debian.org/"
$ cat /etc/debian_version
9.5
$ uname -m
x86_64

Debian stretch で php5 / php7.0 を切り替え

update-alternatives で OK かなと思ったのですが,

$ sudo update-alternatives --config php
There are 2 choices for the alternative php (providing /usr/bin/php).

  Selection    Path             Priority   Status

--------------------

* 0            /usr/bin/php7.0   70        auto mode
  1            /usr/bin/php5     50        manual mode
  2            /usr/bin/php7.0   70        manual mode
  Press <enter> to keep the current choice[*], or type selection number: 0
$ php -v
PHP 7.0.30-0+deb9u1 (cli) (built: Jun 14 2018 13:50:25) ( NTS )
Copyright (c) 1997-2017 The PHP Group
Zend Engine v3.0.0, Copyright (c) 1998-2017 Zend Technologies
    with Zend OPcache v7.0.30-0+deb9u1, Copyright (c) 1999-2017, by Zend Technologies

apache では php5 のままです.

$ w3m -dump http://localhost/phpinfo.php|grep -m1 'PHP Version'
PHP Version 5.6.30-0+deb8u1

apache module を切り替えたらokでした.

$ sudo a2dismod php5
$ sudo a2enmod php7.0
$ systemctl restart apache2
環境
$ dpkg-query -W apache2 php5 libapache2-mod-php5 php7.0 libapache2-mod-php7.0
apache2 2.4.25-3+deb9u5
libapache2-mod-php5     5.6.30+dfsg-0+deb8u1
libapache2-mod-php7.0   7.0.30-0+deb9u1
php5    5.6.30+dfsg-0+deb8u1
php7.0  7.0.30-0+deb9u1
$ lsb_release -d
Description:    Debian GNU/Linux 9.5 (stretch)
$ uname -m
x86_64

Mailmanのban_listを画像にする

最近Mailmanにbotからであろう登録が沢山やってくるようになりました.登録メールアドレスは大抵メジャーなフリーメールアドレスで生きているようなのですが,quotaや転送量のエラーとなって帰ってきます.これらのエラーメールでメールボックスがあふれて辛いです.

Mailmanにcaptchaか何かを設置できるプラグインとか無いかなと探してみたのですが,公式ではないようです.sourceを修正してGoogleのReCaptchaを実装している人は居ますが,バージョンアップのたびにパッチするのは面倒です.最近もセキュリティホールが見つかっていますし放置するわけにも生きません.

該当メールを見ると幸いメールアドレスは使い回しでバリエーションは多くありません.とりあえずMailmanのban_listにこれらのメールアドレスを登録してmailqに溜まっている該当メールはdropしました.1週間くらいしたらリモートからのエラーメールも無くなって静かになると良いなと思っています.
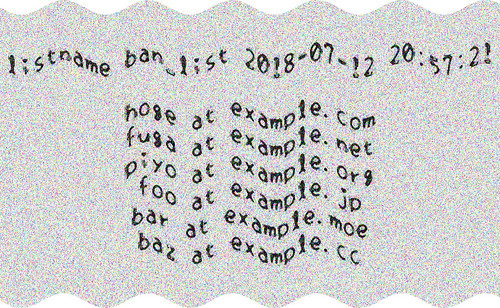
ban_listに登録しましたが,もしかしたらbotではなく普通に登録しようとしてメールボックスがあふれている人も居るかもしれません.それが解るようにban_listを申し込みページに表示することにしました.そのまま表示するのは良くない気がするので画像にしてノイズを散らして波型変形をかけてみました.
Mailmanのconfig_listコマンドで設定を出力してban_listをファイルに書き出し,Imagemagickのconvertコマンドでノイズと波型変形のフィルタをかけて画像を生成しました.
こんな感じの画像になります.これを申し込みページに説明と一緒に載せます.(ノイズのせいで容量が大きく……)

image

cronに登録しました.

$ sudo -u list crontab -l|grep ban_list
39 * * * *      /usr/lib/mailman/bin/config_list -c -o /dev/stdout users|grep ^ban_list |sed -e 's/^.*\[\|\]\|'\''\|'\ '//g'|sed -e 's/\@/ at /g'|tr -s ',' '\n' | sort -n > /var/lib/mailman/lists/users/ban_list && convert -size 1024x600 -background '#FFFFFF' -density 36 -gravity Center -fill black -font SetoFont label:"users ban_list `stat -c \%y /var/lib/mailman/lists/users/ban_list|cut -f1 -d.`\n\n`cat /var/lib/mailman/lists/users/ban_list`" -attenuate 5 -noise 7 +noise Gaussian -wave 15x`expr \( 100 + $((RANDOM \% 100)) \)` /var/lib/mailman/archives/public/users/ban_list.jpg

……長いですね.それに画像サイズ固定なのでlistが増えると文字サイズが小さくなってしまいます.てことでscriptに.

#!/bin/sh
 
LISTNAME='users'
FONT='SetoFont'
BANLIST='/var/lib/mailman/lists/users/ban_list'
IMAGE='/var/lib/mailman/archives/public/users/ban_list.jpg'
 
# ban_listを抽出してファイルに書き出し
/usr/lib/mailman/bin/config_list -c -o /dev/stdout ${LISTNAME} | grep ^ban_list | sed -e 's/^.*\[\|\]\|'\''\|''//g' | sed -e 's/\@/ at /g' | tr -s ',' '\n' | sort -n > ${BANLIST}
 
# ban_listの行数によって画像高さを計算
BANWC=`wc -l ${BANLIST} | cut -d -f1`
HIGHT=`expr \( ${BANWC} \* 60 + 120 \)`
 
# 画像に書き出す文字列を作成
LABEL="users ban_list `stat -c \%${BANLIST} | cut -f1 -d.`\n\n`cat ${BANLIST}`"
 
# 波型変形の波の深さを計算
WAVEX=`expr \( 10 + $((RANDOM % 10)) \)`
WAVEY=`expr \( 100 + $((RANDOM % 100)) \)`
 
# 画像作成
convert -size 1024x${HIGHT} -background '#FFFFFF' -density 36 -gravity Center -fill black -font ${FONT} label:"${LABEL}" -attenuate 5 -noise 7 +noise Gaussian -wave ${WAVWX}x${WAVEY} ${IMAGE}
 

てことでとりあえずの対処療法ですが…….

環境

$ lsb_release -d
Description:    Debian GNU/Linux 9.4 (stretch)
$ uname -m
x86_64
$ dpkg-query -W mailman
mailman 1:2.1.23-1+deb9u2
$ dpkg-query -W imagemagick
imagemagick     8:6.9.7.4+dfsg-11+deb9u4
Let’s Encryptの更新に失敗する

最近はこんな感じでLet’s Encryptの証明書の更新を更新しているのですが今回失敗しました.
(DocumenteRootをFQDNにしている前提)

$ sudo /bin/sh -c "/usr/bin/find /etc/letsencrypt/renewal/*.conf -type f | /usr/bin/xargs /usr/bin/basename -s .conf | xargs -n1 -I{} /usr/bin/letsencrypt renew --webroot -w /var/www/{}/ -d {}"

こんなふうに怒られます.
(仕様が変わった?)

Saving debug log to /var/log/letsencrypt/letsencrypt.log
Currently, the renew verb is capable of either renewing all installed certificates that are due to be renewed or renewing a single certificate specified by its name. If you would like to renew specific certificates by their domains, use the certonly command. The renew verb may provide other options for selecting certificates to renew in the future.

とりあえずはletsencrypt renewletsencrypt certonlyにしたら通りました.

$ sudo /bin/sh -c "/usr/bin/find /etc/letsencrypt/renewal/*.conf -type f | /usr/bin/xargs /usr/bin/basename -s .conf | xargs -n1 -I{} /usr/bin/letsencrypt certonly --webroot -w /var/www/{}/ -d {}"

これで更新できたと思ったら1つのドメインで失敗しています.

Saving debug log to /var/log/letsencrypt/letsencrypt.log
Cert is due for renewal, auto-renewing...
Renewing an existing certificate
Performing the following challenges:
http-01 challenge for files.matoken.org
Using the webroot path /var/www/files.matoken.org for all unmatched domains.
Waiting for verification...
Cleaning up challenges
Failed authorization procedure. files.matoken.org (http-01): urn:acme:error:unauthorized :: The client lacks sufficient authorization :: Invalid response from http://files.matoken.org/.well-known/acme-challenge/Be7Aiai4UH9CDqacTaEZOMH4SxSQbtFqxFcPXcCtJEs: "<!DOCTYPE HTML PUBLIC "-//IETF//DTD HTML 2.0//EN">
<html><head>
<title>404 Not Found</title>  
</head><body>
<h1>Not Found</h1>
<p"

IMPORTANT NOTES:
 - The following errors were reported by the server:

   Domain: files.matoken.org  
   Type:   unauthorized
   Detail: Invalid response from
   http://files.matoken.org/.well-known/acme-challenge/Be7Aiai4UH9CDqacTaEZOMH4SxSQbtFqxFcPXcCtJEs:
   "<!DOCTYPE HTML PUBLIC "-//IETF//DTD HTML 2.0//EN">
   <html><head>
   <title>404 Not Found</title>
   </head><body>
   <h1>Not Found</h1>
   <p"

   To fix these errors, please make sure that your domain name was
   entered correctly and the DNS A record(s) for that domain
   contain(s) the right IP address.

ファイルをDoumentRootに置いてLet’s Encryptからアクセスされるのですがそこでそのファイルが見つからないと失敗しています.このドメインはhttpを設定していませんでした.
てことでapacheでRewriteの設定をしてあげると

RewriteEngine On
RewriteRule ^ https://%{SERVER_NAME}%{REQUEST_URI} [END,QSA,R=permanent]

通りました.

$ sudo /usr/bin/letsencrypt certonly --webroot -w /var/www/files.matoken.org/ -d files.mato
ken.org
Saving debug log to /var/log/letsencrypt/letsencrypt.log
Cert is due for renewal, auto-renewing...
Renewing an existing certificate
Performing the following challenges:
http-01 challenge for files.matoken.org
Using the webroot path /var/www/files.matoken.org for all unmatched domains.
Waiting for verification...
Cleaning up challenges
Generating key (2048 bits): /etc/letsencrypt/keys/0003_key-certbot.pem
Creating CSR: /etc/letsencrypt/csr/0003_csr-certbot.pem

IMPORTANT NOTES:
 - Congratulations! Your certificate and chain have been saved at
   /etc/letsencrypt/live/files.matoken.org/fullchain.pem. Your cert
   will expire on 2018-05-31. To obtain a new or tweaked version of
   this certificate in the future, simply run certbot again. To
   non-interactively renew *all* of your certificates, run "certbot
   renew"
 - If you like Certbot, please consider supporting our work by:

   Donating to ISRG / Let's Encrypt:   https://letsencrypt.org/donate
   Donating to EFF:                    https://eff.org/donate-le

certbotのversionがかなり古いですね…….

$ dpkg -l|grep -i certbot
ii  certbot                               0.10.2-1                          all          automatically configure HTTPS using Let's Encrypt
ii  python-certbot                        0.10.2-1                          all          main library for certbot

てことでbackportのものに入れ替え.

$ sudo apt remove certbot
$ sudo apt install python-certbot-apache -t stretch-backports
$ apt show certbot
Package: certbot
Version: 0.21.1-1~bpo9+1
Priority: optional
Section: web
Source: python-certbot
Maintainer: Debian Let's Encrypt <letsencrypt-devel@lists.alioth.debian.org>
Installed-Size: 53.2 kB
Provides: letsencrypt
Depends: python3-certbot (= 0.21.1-1~bpo9+1), python3:any
Suggests: python3-certbot-apache, python3-certbot-nginx, python-certbot-doc
Breaks: letsencrypt (<= 0.6.0)
Replaces: letsencrypt
Homepage: https://certbot.eff.org/
Download-Size: 20.4 kB
APT-Manual-Installed: no
APT-Sources: http://ftp.jp.debian.org/debian stretch-backports/main amd64 Packages
Description: automatically configure HTTPS using Let's Encrypt
 The objective of Certbot, Let's Encrypt, and the ACME (Automated
 Certificate Management Environment) protocol is to make it possible
 to set up an HTTPS server and have it automatically obtain a
 browser-trusted certificate, without any human intervention. This is
 accomplished by running a certificate management agent on the web
 server.
 .
 This agent is used to:
 .
   - Automatically prove to the Let's Encrypt CA that you control the website
   - Obtain a browser-trusted certificate and set it up on your web server
   - Keep track of when your certificate is going to expire, and renew it
   - Help you revoke the certificate if that ever becomes necessary.
 .
 This package contains the main application, including the standalone
 and the manual authenticators.

N: There is 1 additional record. Please use the '-a' switch to see it

てことでclientが古かったのであまり参考になら無さそうなメモでした.

speedtest.netがcliで利用できるspeedtest-cliを試す

九里 真夏 @orumin そういえば speedtest.net って Linux の CLI client もありますね。

ってことでLinuxのcliで動くPython製のspeedtest-cliをちょっと試してみた.

speedtest.netでの回線速度計測をcliで行えます.python製でpipとかで各種環境に導入可能.

Debianだとjessie以降all, Ubuntuだと16.04LTS以降allにpkgもあるのでapt一発で入るし,Raspberry PiなどのARMアーキテクチャなんかでも問題なく動きました.

規定値の動作はipからロケーション拾ってそこから近いサーバーで計測した結果を返すようです.
自宅のipアドレスでの自動判定では静岡になってたので手動で計測サーバを変更して鹿児島と東京を試しました.

help

$ speedtest-cli -h
usage: speedtest-cli [-h] [--bytes] [--share] [--simple] [--list]
[--server SERVER] [--mini MINI] [--source SOURCE]
[--timeout TIMEOUT] [--secure] [--version]

Command line interface for testing internet bandwidth using speedtest.net.
--------------------------------------------------------------------------
https://github.com/sivel/speedtest-cli

optional arguments:
-h, --help show this help message and exit
--bytes Display values in bytes instead of bits. Does not affect
the image generated by --share
--share Generate and provide a URL to the speedtest.net share
results image
--simple Suppress verbose output, only show basic information
--list Display a list of speedtest.net servers sorted by
distance
--server SERVER Specify a server ID to test against
--mini MINI URL of the Speedtest Mini server
--source SOURCE Source IP address to bind to
--timeout TIMEOUT HTTP timeout in seconds. Default 10
--secure Use HTTPS instead of HTTP when communicating with
speedtest.net operated servers
--version Show the version number and exit

規定値では自宅は静岡になっていて静岡サーバで計測する(実際は鹿児島)

$ speedtest-cli
Retrieving speedtest.net configuration...
Retrieving speedtest.net server list...
Testing from FreeBit (180.131.110.140)...
Selecting best server based on latency...
Hosted by ClickL Network (Shizuoka) [0.02 km]: 110.464 ms
Testing download speed........................................
Download: 2.07 Mbit/s
Testing upload speed..................................................
Upload: 0.92 Mbit/s

日本のサーバを確認する

$ speedtest-cli --list|grep -i japan
14180) ClickL Network (Shizuoka, Japan) [0.02 km]
8407) Allied Telesis Capital Corporation (Sagamihara, Japan) [111.58 km]
6087) Allied Telesis Capital Corporation (Fussa-shi, Japan) [120.41 km]
6508) at2wn (Yokohama, Japan) [125.30 km]
7510) ASEINet (Tokyo, Japan) [141.71 km]
12546) TB (Tokyo, Japan) [141.71 km]
12511) h3zjp (Nerima, Japan) [142.66 km]
8348) Foxcore-LS (Sodegaura, Japan) [167.71 km]
7139) SoftEther Corporation (Tsukuba, Japan) [192.41 km]
6368) gatolabo (Maibara, Japan) [194.62 km]
6766) JAIST(ino-lab) (Nomi, Japan) [232.28 km]
13641) NextechNetworkSolutions (Nara, Japan) [237.53 km]
6476) rxy (individual) (Osaka, Japan) [264.80 km]
8832) prize3046 (Ikeda, Japan) [269.86 km]
8193) kamiari (Sendai, Japan) [427.67 km]
7976) denpa893 (Hikari, Japan) [601.03 km]
6405) Allied Telesis Capital Corporation (Misawa, Japan) [686.38 km]
13568) KSL (Kagoshima, Japan) [820.38 km]
811) GLBB Japan KK (Chatan, Japan) [1397.84 km]
6581) haza (Haebaru, Japan) [1410.56 km]

鹿児島サーバで計測してみる

$ speedtest-cli --server 13568
Retrieving speedtest.net configuration...
Retrieving speedtest.net server list...
Testing from FreeBit (180.131.110.140)...
Hosted by KSL (Kagoshima) [820.38 km]: 103.499 ms
Testing download speed........................................
Download: 2.20 Mbit/s
Testing upload speed..................................................
Upload: 0.92 Mbit/s

東京を–simple optionで計測してみる

$ speedtest-cli --simple --server 7510
Ping: 150.627 ms
Download: 1.88 Mbit/s
Upload: 0.84 Mbit/s

サーバの数を確認してみる

$ speedtest-cli --list | wc -l
6509

speedtestはJavaScriptやAdobe Flashが必要なことが多くてヘッドレス環境などでは面倒でした.
iperfやnetcatなんかはお手軽ですが,速度テスト先のサーバの用意が必要です.

今回のspeedtest-cliはお手軽に導入できて世界各地のサーバ相手にcliでspeed testも出来ていい感じです.

AsciiDocFXをARM64環境とかで試す

最近軽めのライブプレビューが出来てARM環境でも動くAsciiDoc環境がないかなーと探しています.今回はAsciiDocFX.

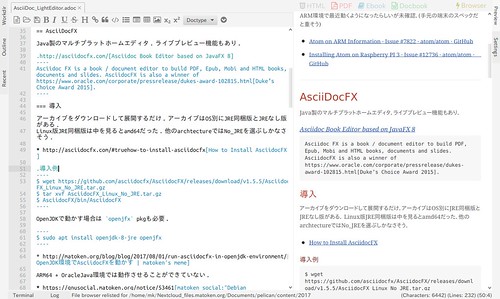
Java製のマルチプラットホームエディタ.ライブプレビュー機能もあり.

Asciidoc FX is a book / document editor to build PDF, Epub, Mobi and HTML books, documents and slides. AsciidocFX is also a winner of https://www.oracle.com/corporate/pressrelease/dukes-award-102815.html[Duke’s Choice Award 2015].

導入

アーカイブをダウンロードして展開するだけ.アーカイブはOS別にJRE同梱版とJREなし版がある.
Linux版JRE同梱版は中を見るとamd64だった.他のarchtectureではNo_JREを選ぶしかなさそう.

導入例
$ wget https://github.com/asciidocfx/AsciidocFX/releases/download/v1.5.5/AsciidocFX_Linux_No_JRE.tar.gz
$ tar xvf AsciidocFX_Linux_No_JRE.tar.gz
$ AsciidocFX/bin/AsciidocFX

OpenJDKで動かす場合は openjfx pkgも必要.

$ sudo apt install openjdk-8-jre openjfx

ARM64 + OracleJava環境では動作させることができていない.

警告

動作はしたが, overlay-scrollbar が見つからないという警告メッセージが出る.

$ ./AsciidocFX
Gtk-Message: Failed to load module "overlay-scrollbar"

overlay-scrollbar-gtk2 pkgを導入することで解決.

$ sudo apt install overlay-scrollbar-gtk2

使い勝手

  • ライブプレビューがあるのはやはり便利

    • よくずれるけども……

  • 動作はCore2Duoマシンでも起動には時間がかかるが起動すれば問題なく利用できる

    • ARM64(1.2GHz 64-Bit Quad-Core ARM Cortex A54)+OpenJDK環境ではキー入力からのタイムラグが気になって辛い

  • 書き出しフォーマットがHTML, PDF, Ebook(mobi/Epub), Docbookと豊富

    • しかしGUIでしか利用できないようでMarpと同じようなもどかしさがある

  • 基本的に3ペインで,左端はファイラー,アウトライン,最近使ったファイルが利用できるが閉じることも出来る(左端のアクティブなタブをクリック)

  • 右端ペインはプレビュー,設定が可能でこれも閉じること出来る(右端のアクティブなタブをクリック)

  • マウスの中ボタンや,shift+Insでの貼付けができない

  • 通常のコピー,ペーストもできなくなることがある

  • 利用中にフォントが滲むような表示になる

    • エディタ画面やプレビュー画面は更新で直るが他の部分は起動し直さないと直らない

てことでマウス中ボタン貼り付けや手持ちのARMで重いってことで選外に.

Debian arm64環境にOracle Java導入

AsciidocFXはOpenJDKで動かないぽいのでOracle Java入れてみようとして少しはまりました.

Oracle Javaは java-package を使うようになったのかなるほど

ということでまずは java-package pkgを導入.

$ sudo apt install java-package

Oracleからjreを入手と思ったらarmのjaeおらんかった……

jdkには Linux ARM 32 Hard Float ABI, Linux ARM 64 Hard Float ABI があるのでこれを入れてみる.

しかしぐぬぬ.

$ make-jpkg ./jdk-8u141-linux-arm64-vfp-hflt.tar.gz
Creating temporary directory: /tmp/make-jpkg.wW7eUWpw3m
Loading plugins: /usr/share/java-package/common.sh /usr/share/java-package/javase.sh /usr/share/java-package/jdk-doc.sh /usr/share/java-package/oracle-jdk-doc.sh /usr/share/java-package/oracle-jdk.sh /usr/share/java-package/oracle-jre.sh /usr/share/java-package/oracle-server-jre.sh

Detected Debian build architecture: arm64
Detected Debian GNU type: aarch64-linux-gnu

No matching packaging method was found for jdk-8u141-linux-arm64-vfp-hflt.tar.gz.
Please make sure you are using a tar.gz or a self-extracting archive
Removing temporary directory: done

jdkのarchiveを展開して jaja -version とかしてみると動くようなのでダウンロードするファイルは合っていそう.

バグとして上がっていた.

こちらのパッチを使わせてもらう.

$ wget 'https://bugs.debian.org/cgi-bin/bugreport.cgi?att=2;bug=863247;filename=java-package.patch;msg=10' -O java-package.patch
$ sudo patch -P0 -d / < ./java-package.patch
$ time make-jpkg ./jdk-8u141-linux-arm64-vfp-hflt.tar.gz
  :
real    9m58.079s
user    8m53.790s
sys     1m29.510s
$ sha256sum oracle-java8-jdk_8u141_arm64.deb
93a9b6136195616db7e33749eec783a224a125c2b3529385b548a49f5189af12  oracle-java8-jdk_8u141_arm64.deb
$ sudo dpkg -i oracle-java8-jdk_8u141_arm64.deb

javaをOracleに切り替える.

$ sudo update-alternatives --config java
There are 2 choices for the alternative java (providing /usr/bin/java).

  Selection    Path                                              Priority   Status
 ------------------------------------------------------------
* 0            /usr/lib/jvm/java-8-openjdk-arm64/jre/bin/java     1081      auto mode
  1            /usr/lib/jvm/java-8-openjdk-arm64/jre/bin/java     1081      manual mode
  2            /usr/lib/jvm/oracle-java8-jdk-arm64/jre/bin/java   318       manual mode

Press <enter> to keep the current choice[*], or type selection number: 2
update-alternatives: using /usr/lib/jvm/oracle-java8-jdk-arm64/jre/bin/java to provide /usr/bin/java (java) in manual mode
$ java -version
java version "1.8.0_141"
Java(TM) SE Runtime Environment (build 1.8.0_141-b15)
Java HotSpot(TM) 64-Bit Server VM (build 25.141-b15, mixed mode)

ところで,なぜOracle Javaをarmで動かしたかったかというとAsciidocFXが実用的かどうかを試したかったからでした.しかし警告を出してすぐに終了してしまいました…….
armで未実装の機能を使っている感じでしょうか?

$ AsciidocFX_Linux_No_JRE/AsciidocFX
Java HotSpot(TM) 64-Bit Server VM warning: G1 GC is disabled in this release.

てことで削除しました.(169MBの容量が開放されました)

$ sudo apt purge oracle-java8-jdk java-package
$ sudo rm -rf /usr/share/java-package

Debianでもarm64でmozc build

EDIT: 現在は次の記事の手順のほうが良いと思います -> Debian, Ubuntu で 上流のパッケージを借りてくる – matoken’s meme


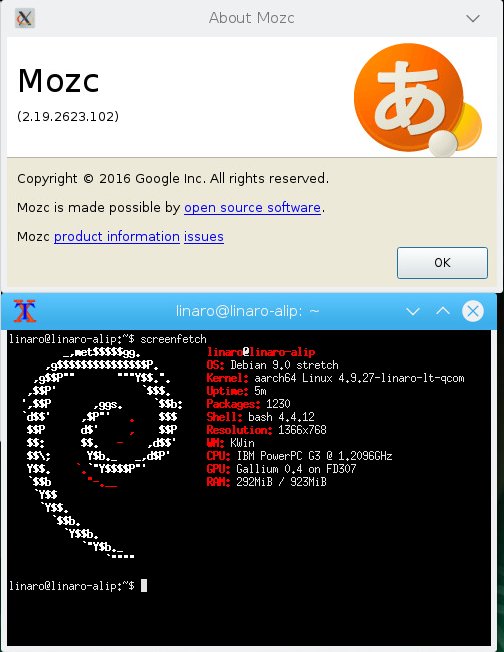
20170605_00:06:13-17276

先日Ubuntu 16.04 arm64環境でmozc pkgを作りました.

今回はDebian stretch arm64でも作ってみました.

環境はQualcomの96BoardのDragonBoard 410cにDebian stretch aarch64のイメージ(dragonboard410c_sdcard_install_debian-233.zip)を使いました.

OSイメージの入手や導入方法などは以下のあたりにあります.

手元では以下のような感じでsd cardに書き込んだ後dipスイッチでsd起動にして起動してeMMCに導入しました.

$ md5sum dragonboard410c_sdcard_install_debian-233.zip
ef17a1602cf0ef300e123a3224e0699d  dragonboard410c_sdcard_install_debian-233.zip
$ unzip -l dragonboard410c_sdcard_install_debian-233.zip
Archive:  dragonboard410c_sdcard_install_debian-233.zip
  Length      Date    Time    Name
---------  ---------- -----   ----
4055891968  2017-05-11 05:25   db410c_sd_install_debian.img
    13953  2017-05-04 21:45   LICENSE
---------                     -------
4055905921                     2 files
$ unzip -p dragonboard410c_sdcard_install_debian-233.zip LICENSE | lv
$ unzip -p dragonboard410c_sdcard_install_debian-233.zip db410c_sd_install_debian.img | pv | sudo dd of=/dev/mmcblk0 bs=4M
$ sync
$ sync
$ sync

後の手順はほぼ前回のUbuntuと同じですが,

dpkg-buildpackage: error: fakeroot not found, either install the fakeroot
package, specify a command with the -r option, or run this as root  

とfakerootが無いと起こられたので導入パッケージにfakerootを追加したのと,

virtual memory exhausted: Cannot allocate memory

という感じでコケたので以下のような感じでスワップファイルを追加して回避しました.前回のUbuntuを入れてる方の機械はRAM2GBなのでRAM1GB+SWAP1GBでも行けると思いますが念の為2GB追加しました.

$ dd if=/dev/zero of=/var/tmp/swap bs=1M count=2048
$ sudo chmod 600 /var/tmp/swap
$ sudo chown 0.0 /var/tmp/swap
$ sudo mkswap /var/tmp/swap
$ sudo swapon /var/tmp/swap
$ free
              total        used        free      shared  buff/cache   available
Mem:         945868      225736      444948       40784      275184      608980
Swap:       2097148           0     2097148

で,パッケージングと導入の手順はこんな感じでした.

$ sudo apt update
$ sudo apt upgrade
$ sudo apt install build-essential devscripts fakeroot
$ sudo apt build-dep mozc
$ apt source mozc
$ wget https://gist.githubusercontent.com/matoken/afce66ce67392c11d3ed20d7bbab5833/raw/2bb0163f30291caa6ba7b41b3d4352c7e6c0b6a7/patch
$ patch -p0 < patch
$ cd mozc-2.19.2623.102+dfsg
$ time dpkg-buildpackage -us -uc -j4
   :
real    111m31.882s
user    88m2.352s
sys     10m59.828s
$ dch -i
$ head debian/changelog 
mozc (2.19.2623.102+dfsg-1.1) unstable; urgency=medium

  * Non-maintainer upload.
  * Update debian/control.
    - Add arm64 to Architecture list.

 -- K.I.Matohara <matoken@gmail.com>  Sat, 03 Jun 2017 22:15:19 +0000

mozc (2.19.2623.102+dfsg-1) unstable; urgency=medium

$ dpkg-buildpackage -j4
$ ls -la ../*dfsg-1.1_*
-rw-r--r-- 1 linaro linaro  2130510 Jun  4 01:10 ../emacs-mozc-bin-dbgsym_2.19.2623.102+dfsg-1.1_arm64.deb
-rw-r--r-- 1 linaro linaro   157710 Jun  4 01:10 ../emacs-mozc-bin_2.19.2623.102+dfsg-1.1_arm64.deb
-rw-r--r-- 1 linaro linaro    28118 Jun  4 01:10 ../emacs-mozc_2.19.2623.102+dfsg-1.1_arm64.deb
-rw-r--r-- 1 linaro linaro  2765446 Jun  4 01:10 ../fcitx-mozc-dbgsym_2.19.2623.102+dfsg-1.1_arm64.deb
-rw-r--r-- 1 linaro linaro   224574 Jun  4 01:10 ../fcitx-mozc_2.19.2623.102+dfsg-1.1_arm64.deb
-rw-r--r-- 1 linaro linaro  3088148 Jun  4 01:10 ../ibus-mozc-dbgsym_2.19.2623.102+dfsg-1.1_arm64.deb
-rw-r--r-- 1 linaro linaro   189886 Jun  4 01:10 ../ibus-mozc_2.19.2623.102+dfsg-1.1_arm64.deb
-rw-r--r-- 1 linaro linaro    14134 Jun  4 01:10 ../mozc-data_2.19.2623.102+dfsg-1.1_all.deb
-rw-r--r-- 1 linaro linaro 24825020 Jun  4 01:11 ../mozc-server-dbgsym_2.19.2623.102+dfsg-1.1_arm64.deb
-rw-r--r-- 1 linaro linaro 12310852 Jun  4 01:11 ../mozc-server_2.19.2623.102+dfsg-1.1_arm64.deb
-rw-r--r-- 1 linaro linaro  9823936 Jun  4 01:11 ../mozc-utils-gui-dbgsym_2.19.2623.102+dfsg-1.1_arm64.deb
-rw-r--r-- 1 linaro linaro   755758 Jun  4 01:11 ../mozc-utils-gui_2.19.2623.102+dfsg-1.1_arm64.deb
-rw-r--r-- 1 linaro linaro    18228 Jun  4 04:00 ../mozc_2.19.2623.102+dfsg-1.1_arm64.buildinfo
-rw-r--r-- 1 linaro linaro     6898 Jun  4 04:00 ../mozc_2.19.2623.102+dfsg-1.1_arm64.changes
-rw-r--r-- 1 linaro linaro  1921396 Jun  4 01:10 ../uim-mozc-dbgsym_2.19.2623.102+dfsg-1.1_arm64.deb
-rw-r--r-- 1 linaro linaro   192712 Jun  4 01:10 ../uim-mozc_2.19.2623.102+dfsg-1.1_arm64.deb
$ sudo apt install ../mozc-server_2.19.2623.102+dfsg-1.1_arm64.deb ../fcitx-mozc_2.19.2623.102+dfsg-1.1_arm64.deb ../mozc-data_2.19.2623.102+dfsg-1.1_all.deb ../mozc-utils-gui_2.19.2623.102+dfsg-1.1_arm64.deb 
$ sudo apt install fcitx-ui-classic

これも一応この辺に置いておきました.多分そのうち消します.(Versionが上がった頃?)

これでとりあえず手元のUbuntu/Debianで利用できるようになりましたが,mozcのバージョンアップ毎にbuildが必要です.なのでBTS予定.あとクロスで試すのとMultiarchも試してみたいです.

参考URL