何時もはflickcurlを利用しているのですが,複数のアカウントに対応していないようなので別のツールを探してFlickr-Uploadを見つけました.
- Find your inspiration. | Flickr
- Flickr-Upload-1.6 – Module for uploading images to flickr.com – metacpan.org
const char* config_filename = ".flickcurl.conf";
Install
$ sudo apt install libflickr-upload-perl
認証
- URLを開くと認証画面になるので許可する
- リダイレクトでダミーURLに飛ばされるのでそのURLを
URL:のところに貼り付ける
$ flickr_upload --oauth
Please open this URL in your browser and follow the instructions:

https://api.flickr.com/services/oauth/authorize?oauth_token=72157697799378834-ad02ea9a475eac80&perms=write

When you authorize this app, you'll be directed to a dummy URL
that contains a confirmation code. Paste that URL here.

URL: https://127.0.0.1/?oauth_token=999999999999999999-deadbeefdeadbeef&oauth_verifier=123456bdeadbeef
Saving OAuth credentials to /home/mk/.flickroauth.st
Uploading /home/mk/.flickrrc...Can't read photo '/home/mk/.flickrrc' at /usr/share/perl5/Flickr/Upload.pm line 128, <STDIN> line 1.
~/.flickroauth.stに認証ファイルが作られる
$ ls -l /home/mk/.flickroauth.st
-rw-r--r-- 1 mk mk 673  6月 24 08:47 /home/mk/.flickroauth.st
アップロード
$ flickr_upload --public 1 ~/Pictures/20180624_06:06:55-8334.jpg
Uploading /home/mk/Pictures/20180624_06:06:55-8334.jpg...
Waiting for upload results (ctrl-C if you don't care)...
/home/mk/Pictures/20180624_06:06:55-8334.jpg is at https://www.flickr.com/tools/uploader_edit.gne?ids=12345678902
10分毎に自動アップロード
2,12,22,32,42,52 * * * * D=`date +\%m\%d\%H\%M.\%S` ; find ~/Pictures -newer ${HOME}/Pictures/.flickr_time \( -iname "*.jpg" -o -iname "*.png" \) -type f -print0 | xargs -0 -r -n1 flickr_upload --public 0 --tag 'autoupload' && touch -t ${D} ${HOME}/Pictures/.flickr_time
#*/10+2とかできればいいのに
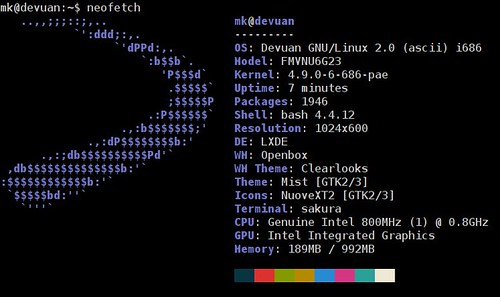
環境
$ dpkg-query -W libflickr-upload-perl
libflickr-upload-perl   1.60-1
$ lsb_release -d
Description:    Debian GNU/Linux unstable (sid)
$ uname -m
x86_64