apache httpd 2.4 で嵌まる

DP1M0712

apahce httpd 2.2.(wheezy)から2.4.(jessie)への移行で適当なサーバをえいやで上げて動かなくなったのを復旧したメモ.

virtual host が有効にならない

/etc/apache2/sites-enabled/ 以下には設定ファイルがあるのに読み込まれず default しか表示されない.

sites-available からリンクを貼り直そうとするとエラーとなる

$ sudo a2dissite example.com
ERROR: Site example.com does not exist!
$ sudo rm /etc/apache2/sites-enabled/example.com
$ sudo a2ensite example.com
ERROR: Site example.com does not exist!

エラーメッセージで検索するとファイル名を *.conf にすれば良いよう.

この部分の該当場所は /etc/apache2/apache2.conf のここ

IncludeOptional sites-enabled/*.conf

2.2からの変更を確認するとこのように変わっていた.

 # Include the virtual host configurations:
-Include sites-enabled/
+IncludeOptional sites-enabled/*.conf

ということでこんな感じで

$ sudo rm /etc/apache2/sites-enabled/example.com
$ sudo mv /etc/apache2/sites-available/example.com /etc/apache2/sites-available/example.com.conf
$ sudo  a2ensite example.com.conf

設定ファイルの数が多かったら /etc/apache2/apache2.conf の設定を * にしても良いかも(未検証)

-IncludeOptional sites-enabled/*.conf
+IncludeOptional sites-enabled/*

403 が出る

エラーログは以下のような感じ.見慣れないエラー.

[authz_core:error] [pid 20566] [client nnn.nnn.nnn.nnn:49821] AH01630: client denied by server configuration: /var/www

以下のガイドを見るとどうもacl 周りのコマンド変更のようで

Order deny,allow
Deny from all

の代わりに

Require all granted

で動くようになった.


GNU Screen v4.3.0 を少し試す

先日リリースされたGNU Screen 4.3.0 の新機能が気になったのでbuild してみた。

  • New commands:
    • ‘sort’ command sorting windows by title
    • ‘bumpleft’, ‘bumpright’ – manually move windows on window list
    • ‘collapse’ removing numbering ‘gaps’ between windows, by
      renumbering

Build とか

% sudo apt-get install build-essential
% sudo apt-get build-dep screen
% wget http://ftp.gnu.org/gnu/screen/screen-4.3.0.tar.gz http://ftp.gnu.org/gnu/screen/screen-4.3.0.tar.gz.sig
% gpg --verify screen-4.3.0.tar.gz.sig
gpg: assuming signed data in `screen-4.3.0.tar.gz'
gpg: Signature made 2015年06月14日 02時01分43秒 JST using RSA key ID C53EF3A4
gpg: Good signature from "Amadeusz Sławiński <amade@asmblr.net>"
gpg: WARNING: This key is not certified with a trusted signature!
gpg:          There is no indication that the signature belongs to the owner.
Primary key fingerprint: 2EE5 9A5D 0C50 167B 5535  BBF1 B708 A383 C53E F3A4
% tar tvzf screen-4.3.0.tar.gz
% tar xzf screen-4.3.0.tar.gz
% cd screen-4.3.0
% ./configure --prefix=$HOME/usr/local --enable-colors256 --enable-rxvt_osc --enable-use-locale --enable-pam
% make
% make install
% where screen
/home/mk/usr/local/bin/screen
/usr/bin/screen
% screen --version
Screen version 4.03.00 (GNU) 27-May-15

そして気になっていた新機能を試してみました。

  • New commands:
    • ‘sort’ command sorting windows by title

想像ではawesome みたいにウィンドウの並びが縦横分割されていい感じに並ぶのかなーと思っていたのだけど、大分違った。
Ctrl-a : して sort と打ってみると、

Sorting inside a window is not allowed. Push CTRL-a “ and try again

と言われる。Ctrl + a " してscreen のウィンドウリストを出した状態で再度叩くとこんな感じでウィンドウタイトルでソートされた。

Screenshot from 2015-06-17 19:21:38

ちなみに、

  • ‘bumpleft’, ‘bumpright’ – manually move windows on window list

も試したけどコアダンプしたorz
多分指定ウィンドウを左右に移動出来るのだと思う

[screen caught signal 11. (core dumped)]

Debian jessie2stretch

Screenshot from 2015-06-17 12:08:41

jessie がリリースされて2月近く1度目のポイントリリース もされて普通に使えています.しかし,悟りを開くためにtesting のstretch にアップグレードしてみます.

以下に記すことにより悟りを開けば、アップグレード地獄という果てしない因果応報の葛藤から人は解脱し、Debian の涅槃の境地に到達できます。

Debian リファレンス 2.1.3. 永遠のアップグレード人生 より

参考URL

以下の公式文章と,前回Wheezy から Jessie にアップグレードした時のメモを参考にしました.

パッケージを最新にする

% sudo apt update
% sudo apt upgrade

backup

pkg 情報

デイリーでファイルに落として( /usr/bin/dpkg --get-selections "*" > dpkg_--get-selections )バックアップしているのでバックアップログを見てバックアップがちゃんと取れているのを確認

/etc, /var, /home など

デイリーでバックアップしているのでバックアップログを見てバックアップがちゃんと取れているのを確認
最近の $HOME はこんな感じでバックアップしている

ionice -c2 -n7 nice -n19 rsync --stats -avze ssh --delete --bwlimit=2048 --rsync-path="/usr/bin/ionice -c2 -n7 /usr/bin/nice -n19 /usr/bin/rsync" --exclude-from "$HOME/.rsync-backup_exclude-list" --link-dest=/mnt/backup/x201s/rsync/home/`/bin/date -d '1 day ago' +\%Y\%m\%d`/ $HOME micro-backup:/mnt/backup/x201s/rsync/home/`date +%Y%m%d`/

Pin の解除

% find /etc/apt/ -type f|grep preferences
/etc/apt/preferences
% rm /etc/apt/preferences

パッケージ状態の確認

% sudo dpkg --audit
% find /etc/apt/ -type f|grep preferences
% aptitude search "~ahold"

vim パッケージを削除をされないようにする

% sudo aptitude unmarkauto vim

以下はaptitude のman より

       markauto, unmarkauto
           それぞれ、自動的にインストールされた、および手動でインストールされたという印をパッケージに添付します。パッケージの指定は「install」コマンドと
           まったく同じ方法で行います。例えば「aptitude markauto '~slibs'」を実行すると、「libs」セクションのパッケージすべてに、自動的にインストールされ
           たという印が添付されます。

           自動的にインストールしたパッケージについてのさらに詳しい情報は、aptitude リファレンスマニュアルの「自動的にインストールしたパッケージの管理」セ
           クションを参照してください。

aptitude リファレンスマニュアルの「自動的にインストールしたパッケージの管理」セクション は以下から.

ソースリストの修正

非公式なソースを削除して公式だけにする.

% sudo rm -rf /etc/apt/sources.list.d
% sudo vi /etc/apt/sources.list
% grep -v ^# /etc/apt/sources.list|uniq

deb http://ftp.jp.debian.org/debian/ jessie main non-free contrib
deb-src http://ftp.jp.debian.org/debian/ jessie main non-free contrib

deb http://security.debian.org/ jessie/updates main contrib non-free
deb-src http://security.debian.org/ jessie/updates main contrib non-free

jessie をstretch にする.

% grep -v ^# /etc/apt/sources.list|uniq

deb http://ftp.jp.debian.org/debian/ stretch main non-free contrib
deb-src http://ftp.jp.debian.org/debian/ stretch main non-free contrib

deb http://security.debian.org/ stretch/updates main contrib non-free
deb-src http://security.debian.org/ stretch/updates main contrib non-free

コンソール端末に移動する

X の端末だとX が不安定になることがあるのでコンソールの端末に移動.Ctrl + Alt + 1~6 とかで移動してログインする.
fbtermなどを使わないと日本語表示が出来ないので LANG=C にしておく.

% echo $LANG
ja_JP.UTF-8
% LANG=C

root 権限になる

% sudo -s
# echo $LANG
C

ログの取得開始

# script ~mk/jessie2stretch.log 
Script started, file is /home/mk/jessie2stretch.log

パッケージ情報を更新

# apt-get update

アップグレードに必要な容量を確認する

# apt-get -o APT::Get::Trivial-Only=true dist-upgrade
 :
 :
 :
1551 upgraded, 72 newly installed, 8 to remove and 0 not upgraded.
Need to get 79.4 MB/1645 MB of archives.
After this operation, 469 MB of additional disk space will be used.
E: Trivial Only specified but this is not a trivial operation.

最小アップグレード

# apt-get upgrade
 :
1212 upgraded, 0 newly installed, 0 to remove and 340 not upgraded.
Need to get 0 B/1180 MB of archives.
After this operation, 137 MB of additional disk space will be used.
Do you want to continue? [Y/n] Y
 :

dist-upgrade の影響を確認する

# apt-get -s dist-upgrade
  :

dist-upgrade する

# apt-get dist-upgrade
  :
The following packages will be REMOVED:
  iceweasel-l10n-csb iceweasel-l10n-ku iceweasel-l10n-zu librpmsign1 libsane:i386 tracker-utils xserver-xorg-video-modesetting
  xserver-xorg-video-siliconmotion
  :
339 upgraded, 72 newly installed, 8 to remove and 0 not upgraded.
Need to get 79.4 MB/465 MB of archives.
After this operation, 332 MB of additional disk space will be used.
Do you want to continue? [Y/n] Y
  :

不要になったパッケージを削除する

# apt-get autoremove
  :
0 upgraded, 0 newly installed, 32 to remove and 0 not upgraded.
After this operation, 28.6 MB disk space will be freed.
Do you want to continue? [Y/n]Y
  :
0 upgraded, 0 newly installed, 0 to remove and 0 not upgraded.

sudo 設定確認

# lv /etc/sudoers

以前 sudoers が書き換わっていた事があるので確認
念の為別端末( Alt + 1~6 )で確認も

% sudo -s
[sudo] password for mk: 
# whoami
root

ログ終了

# exit
Script done, file is /home/mk/jessie2stretch.log

再起動

% sudo shutdown -r now jessie2stretch dist-upgrade!

Version 確認

% cat /etc/debian_version 
stretch/sid
% uname -a
Linux x220 3.16.0-4-amd64 #1 SMP Debian 3.16.7-ckt11-1 (2015-05-24) x86_64 GNU/Linux
% screenfetch
         _,met$$$$$gg.           mk@x220
      ,g$$$$$$$$$$$$$$$P.        OS: Debian testing stretch
    ,g$$P""       """Y$$.".      Kernel: x86_64 Linux 3.16.0-4-amd64
   ,$$P'              `$$$.      Uptime: 2m
  ',$$P       ,ggs.     `$$b:    Packages: 5457
  `d$$'     ,$P"'   .    $$$     Shell: zsh 5.0.7
   $$P      d$'     ,    $$P     Resolution: 1440x900
   $$:      $$.   -    ,d$$'     WM: GNOME Shell
   $$\;      Y$b._   _,d$P'      WM Theme: Adwaita
   Y$$.    `.`"Y$$$$P"'          GTK Theme: Not Found [GTK2], Not Found [GTK3]
   `$$b      "-.__               Icon Theme: Not Found
    `Y$$                         Font: Not Found
     `Y$$.                       CPU: Intel Core i7 CPU L 620 @ 2GHz
       `$$b.                     RAM: 1413MB / 7801MB
         `Y$$b.                 
            `"Y$b._             
                `""""

サードパーティのsource list を復活させる

/etc/apt/sources.list.d/* をリストアしたり.

% ls -A /etc/apt/sources.list.d/
atlassian-hipchat.list  chrome-remote-desktop.list  google-chrome.list  google-chrome.list.save  owncloud-client.list  spideroak.com.sources.list  steam.list  wuala.list
% sudo apt update
% sudo apt list --upgradable
一覧表示... 完了
libowncloudsync0/不明 1.8.2-1 amd64 [1.8.1+dfsg-1 からアップグレード可]
owncloud-client/不明 1.8.2-1 amd64 [1.8.1+dfsg-1 からアップグレード可]
owncloud-client-l10n/不明 1.8.2-1 all [1.8.1+dfsg-1 からアップグレード可]
% sudo apt upgrade
% sudo apt dist-upgrade

未だjessie がリリースされてそう経ってないので差分が少なくディストリビューションアップグレードはあっさり終わりました.アップデート時に面倒な設定ファイルの書き換えも1つだけでした.

追記)
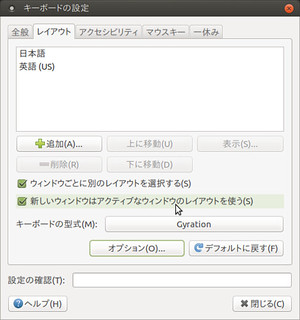
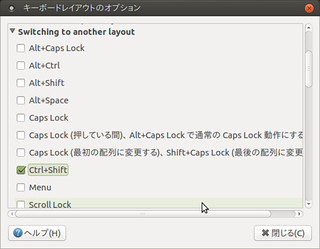
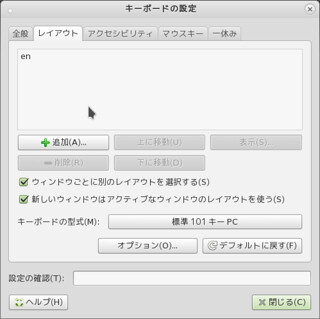
コンソールでのキーマップが[標準 105 キー (国際) PC] になっていたので,[標準 101 キー PC] に変更した.

% sudo dpkg-reconfigure keyboard-configuration

WordPress へのspam 投稿をしたことのあるIP を拒否するようにした

最近WordPress へのコメントとトラックバックスパムが酷くなってきました。URL が含まれている物は承認が必要なようにしているのですが面倒です。このときにスパムはスパムだと手動で振り分けをしているので振り分けたものからIP を抜き出してアクセス制限を掛けるとましにならないかと設定してみました。

データベースから該当IP を抜き出す

MySQL からスパムを指定したIP の一覧は以下のようにして取得出来そうです。

$ cat /etc/wordpress/spamcommentip.sql
SELECT comment_author_IP FROM wordpress.wp_comments WHERE comment_approved='spam'
$ /usr/bin/mysql -umy -p < /etc/wordpress/spamcommentip.sql | /usr/bin/sort -n | /usr/bin/uniq -c| sort -n|cut -c-7|uniq -c
     81       1
     31       2
     26       3
     12       4
      8       5
      9       6
      4       7
      9       8
      1       9
      1      10
      3      11
      2      12
      3      13
      1      14
      1      15
      1      18
      4      20
      1      22
      1      23
      1      24
      1      26
      1      43
      1      82
      1     119
      1     146
      1     394

自動化したいので、MySQL にアクセスする為のMySQL の設定ファイルと、IP を抜き出すsqlファイルを用意します。

  • MySQL アクセスの為の設定ファイル

    $ cd /etc/wordpress
    $ umask 077
    $ sudo touch .my.conf
    $ sudo chown www-data.root .my.conf
    $ vi .my.conf
    cat .my.conf 
    user=wp
    password=XXXXXXXXXXXXXX
    database=wordpress
    
  • IP を抜き出す為のsqlファイル

    $ sudo vi /etc/wordpress/spamcommentip.sql
    $ cat $ cat /etc/wordpress/spamcommentip.sql
    SELECT comment_author_IP FROM wordpress.wp_comments WHERE comment_approved='spam'
    

以下のようにしてIP の一覧が取得出来るようになりました。

$ /usr/bin/mysql --defaults-file=/etc/wordpress/.my.conf < /etc/wordpress/spamcommentip.sql

apache httpd の .htaccess で指定IPアドレスからの WordPress のコメント投稿とトラックバックを制限

Debian のパッケージで WordPress を導入しているので導入パスは /usr/share/wordpress/ です。
設定ファイルは /etc/wordpress 以下です。
/usr/share/wordpress/.htaccess/etc/wordpress/htaccess のシンボリックリンクになっています。

アクセス制限をするには .htaccessdeny from ip address な感じで行けます。
さっきのIPの一覧取得時に並べ替えて同一IPをまとめて頭にdeny from を付けるようにします。

$ /usr/bin/mysql --defaults-file=/etc/wordpress/.my.conf < /etc/wordpress/spamcommentip.sql | /usr/bin/sort -n | /usr/bin/uniq | /bin/grep -v 'comment_author_IP' | /bin/sed "s/^/  deny from /"

あまり無いと思いますが、正しいIP アドレスを登録してしまっても本文が読めるようにコメントやトラックバックだけ制限しようと思います。コメント、トラックバックは次のwp-comments-post.php / wp-trackback.php を利用するようなのでこのファイルへのアクセスを制限します。
.htaccess の Files ディレクティブを利用して以下ような感じでいけそうです。

<Files ~ wp-comments-post.php|wp-trackback.php>
  deny from ip address
</Files>

動作確認は自分のIPアドレスを一時的に登録して行いました。blog本文にはアクセス出来てコメントURL は拒否されています。

% w3m -dump_head https://matoken.org/blog/blog/2015/06/09/facebook-pgp/|head -1
HTTP/1.0 200 OK
% w3m -dump_head https://matoken.org/blog/wp-comments-post.php|head -1
HTTP/1.1 403 Forbidden

cron を使って自動的に更新するようにする

IP list は外部ファイルにして読み込むようにすると便利そうですが、Include ディレクティブは .htaccess からは利用出来無いようなので分割ファイルを作って連結することにします。

  • /etc/wordpress/htaccess_base
    • 元のhtaccess
  • /etc/wordpress/htaccess_spamhead
    • Files ディレクティブの先頭
  • /etc/wordpress/htaccess_spamiplist
    • データベースから抜き出して作成した拒否IPリスト
  • /etc/wordpress/htaccess_spamtail
    • Files ディレクティブの末尾
  • /etc/wordpress/htaccess
    • 最終的に結合されて.htaccess のリンク元になるファイル

htaccess_base / htaccess_spamhead / htaccess_spamtail を用意します。

$ sudo cp -p /etc/wordpress/htaccess /etc/wordpress/htaccess_base
$ sudo sh -c "echo '<Files ~ wp-trackback.php|wp-comments-post.php>' > /etc/wordpress/htaccess_spamhead"
$ sudo sh -c "echo '</Files>' > /etc/wordpress/htaccess_spamtail"

htaccess_spamiplist / htaccess はcron で1時間毎に作成するようにします。

$ sudo -u www-data crontab -e
$ sudo -u www-data crontab -l
14 * * * *      /usr/bin/mysql --defaults-file=/etc/wordpress/.my.conf < /etc/wordpress/spamcommentip.sql | /usr/bin/sort -n | /usr/bin/uniq | /bin/grep -v 'comment_author_IP' | /bin/sed "s/^/  deny from /" > /etc/wordpress/htaccess_spamiplist && /bin/cat /etc/wordpress/htaccess-base /etc/wordpress/htaccess_spamhead /etc/wordpress/htaccess_spamiplist /etc/wordpress/htaccess_spamtail > /etc/wordpress/htaccess

これで1時間毎にWordPress 上でspam と判定したコメント/トラックバックの送信元IP からコメント/トラックバックを拒否するようになりました。
うまくいくといいのですが……。

追記)
設定して数日経ちましたが,spam激減しました!

Debian Jessie のAdobe Flash Player をupdate-flashplugin-nonfreeで最新にする

IMGP9666_DNG

最近Debian Jessie でAdobe Flash が古いと怒られてるけどpkgでなかなか降りて来ないのでupdate-flashplugin-nonfree を手動で叩いて最新にしたメモです.
#え?GNU Gnashですか?ちょっとつらいですねARM とかでも動くのは良いんですが….

最近Iceweasel やFirefox でAdobe Flash のあるページを見ようとするとバージョンが古いのでAdobe Flash がブロックされます.とりあえず許可すると動作しますが面倒だし意図しないものも実行してしまいそうです.Jessie はtesting とはいえもう2週間位この状態が続いている気がするのでもしかしてFirefox がLinux以外のバージョンを元に古いと行ってる可能性があるのでは?と思って以下のページで確認すると最新は11.2.202.451 なのに対して11.2.202.425 と実際古かったです.

#しかしLinux版大分バージョン番号が離れてきましたね….今のところ見当たらないけどそろそろ対応できないsiteとか出てきたりして.

Debian Jessie ではAdobe Flash はflashplugin-nonfree パッケージを利用して導入しています.このパッケージはAdobe Flash Player のバージョンの確認を行い,最新版をダウンロードして導入してくれるものです.パッケージの中を見るとこんな感じでした.

% dpkg -L flashplugin-nonfree
/.
/var
/var/lib
/var/lib/flashplugin-nonfree
/var/cache
/var/cache/flashplugin-nonfree
/usr
/usr/sbin
/usr/sbin/update-flashplugin-nonfree
/usr/share
/usr/share/applications
/usr/share/man
/usr/share/man/man8
/usr/share/man/man8/update-flashplugin-nonfree.8.gz
/usr/share/icons
/usr/share/icons/hicolor
/usr/share/icons/hicolor/22x22
/usr/share/icons/hicolor/22x22/apps
/usr/share/icons/hicolor/48x48
/usr/share/icons/hicolor/48x48/apps
/usr/share/icons/hicolor/32x32
/usr/share/icons/hicolor/32x32/apps
/usr/share/icons/hicolor/24x24
/usr/share/icons/hicolor/24x24/apps
/usr/share/icons/hicolor/16x16
/usr/share/icons/hicolor/16x16/apps
/usr/share/pixmaps
/usr/share/bug
/usr/share/bug/flashplugin-nonfree
/usr/share/bug/flashplugin-nonfree/script
/usr/share/doc
/usr/share/doc/flashplugin-nonfree
/usr/share/doc/flashplugin-nonfree/copyright
/usr/share/doc/flashplugin-nonfree/changelog.gz
/usr/share/doc/flashplugin-nonfree/README
/usr/share/lintian
/usr/share/lintian/overrides
/usr/share/lintian/overrides/flashplugin-nonfree
/usr/lib
/usr/lib/flashplugin-nonfree
/usr/lib/flashplugin-nonfree/pubkey.asc
/usr/lib/mozilla
/usr/lib/mozilla/plugins
/usr/bin

README を確認するとWiki page 読んでねとのこと.

% cat /usr/share/doc/flashplugin-nonfree/README
Please read the information at:
http://wiki.debian.org/FlashPlayer

てことで--status で確認を行い,--installで最新に出来るようです.実際に叩いてみます.

% sudo /usr/sbin/update-flashplugin-nonfree
Usage:
  update-flashplugin-nonfree --install
  update-flashplugin-nonfree --uninstall
  update-flashplugin-nonfree --status
Additional options:
  --verbose
  --quiet
% sudo /usr/sbin/update-flashplugin-nonfree --status
Flash Player version installed on this system  : 11.2.202.425
Flash Player version available on upstream site: 11.2.202.451
flash-mozilla.so - auto mode
  link currently points to /usr/lib/flashplugin-nonfree/libflashplayer.so
/usr/lib/flashplugin-nonfree/libflashplayer.so - priority 50
/usr/lib/gnash/libgnashplugin.so - priority 10
Current 'best' version is '/usr/lib/flashplugin-nonfree/libflashplayer.so'.
% sudo /usr/sbin/update-flashplugin-nonfree --install
--2015-03-29 06:35:12--  https://fpdownload.macromedia.com/get/flashplayer/pdc/11.2.202.451/install_flash_player_11_linux.x86_64.tar.gz
 :
% sudo /usr/sbin/update-flashplugin-nonfree --status
Flash Player version installed on this system  : 11.2.202.451
Flash Player version available on upstream site: 11.2.202.451
flash-mozilla.so - auto mode
  link currently points to /usr/lib/flashplugin-nonfree/libflashplayer.so
/usr/lib/flashplugin-nonfree/libflashplayer.so - priority 50
/usr/lib/gnash/libgnashplugin.so - priority 10
Current 'best' version is '/usr/lib/flashplugin-nonfree/libflashplayer.so'.

ということで最新の11.2.202.451になりました.
なんで最近apt コマンドで最新になっていないのかは未確認です….

OpenSSH 6.8/6.8p1 で鍵指紋のアルゴリズムの規定値が変わったので試す

openssh

OpenSSH 6.8/6.8p1 のリリースノートを眺めていて気になる点が.
http://www.openssh.com/txt/release-6.8

* Add FingerprintHash option to ssh(1) and sshd(8), and equivalent
   command-line flags to the other tools to control algorithm used
   for key fingerprints. The default changes from MD5 to SHA256 and
   format from hex to base64.
 Fingerprints now have the hash algorithm prepended. An example of
   the new format: SHA256:mVPwvezndPv/ARoIadVY98vAC0g+P/5633yTC4d/wXE
   Please note that visual host keys will also be different.

鍵指紋の規定アルゴリズムがMD5 からSHA256 に変わり,表示形式もhex からbase64 になった,visual host key も変わる.ということで確認してみました.

従来のコマンドでの鍵指紋表示.MD5/hex が使われる

% ssh-keygen -l -v -f /etc/ssh/ssh_host_ecdsa_key
256 e8:d0:53:e7:34:59:e9:77:3a:e7:8d:8a:a9:f6:91:84 /etc/ssh/ssh_host_ecdsa_key.pub (ECDSA)
+---[ECDSA 256]---+
|            ..   |
|           o.    |
|        . =.     |
|     . o = .. . .|
|    . + E o  . o |
|     o . . .  o .|
|      .   o    =.|
|        .  +  . o|
|       ..o+ ..   |
+-----------------+

OpenSSH 6.8/6.8p1 のコマンドでの鍵指紋表示.SHA256/base64が使われて鍵指紋の頭にSHA256が付いたりvisual host key の見た目も変わる.

% /home/mk/usr/local/openssh-6.8p1/bin/ssh-keygen -l -v -f /etc/ssh/ssh_host_ecdsa_key
256 SHA256:pDZReijOXeDXAE0IgYb5E+DHgbyvClEllKCs499RI54 root@x220(ECDSA)
+---[ECDSA 256]---+
|+*+++oo=+        |
|*o*o...=.o       |
|.=o+. = = .      |
|.o+o o B         |
|+ ..o.=oS        |
|.o ...+..        |
|...  E           |
|... . .          |
|o  . .           |
+----[SHA256]-----+

しかし,-E option が提供されるようになってアルゴリズムを指定できるのでこれでMD5/hex で鍵指紋の確認が可能.
※ssh-keygen —help より

   ssh-keygen -l [-v] [-E fingerprint_hash] [-f input_keyfile]

※man より

 -E fingerprint_hash
         Specifies the hash algorithm used when displaying key fingerprints.  Valid options are: “md5” and “sha256”.  The default is “sha256”.

OpenSSH 6.8/6.8p1 のコマンドでMD5 を指定.MD5/hex で鍵指紋が表示される.ただ,アルゴリズムのMD5 が鍵指紋の頭につくし後ろにcomment も付くのでdiff とかを使うと差異が出る.visual host key も下に[MD5]がつくので同様.

% /home/mk/usr/local/openssh-6.8p1/bin/ssh-keygen -l -v -E md5 -f /etc/ssh/ssh_host_ecdsa_key
256 MD5:e8:d0:53:e7:34:59:e9:77:3a:e7:8d:8a:a9:f6:91:84 root@x220(ECDSA)
+---[ECDSA 256]---+
|            ..   |
|           o.    |
|        . =.     |
|     . o = .. . .|
|    . + E o  . o |
|     o . . .  o .|
|      .   o    =.|
|        .  +  . o|
|       ..o+ ..   |
+------[MD5]------+
% ssh-keygen -l -v -f /etc/ssh/ssh_host_ecdsa_key

てことで暫くはMD5/SHA256の2種類の鍵指紋を提供したほうが良さそうですね.

Xperia Pro(MK16a)をBootloader Unlock してみた

Xperia Pro(MK16a)を持っているのですが,OSが古いし標準アプリも多くてストレージもいっぱいで使いたいアプリもなかなか入れることが出来ません.
最近はこの端末にMVNOのSIMを刺してモバイルルータ and GPSロガー的に使っていますがbluetooth tethering も使えずWi-Fi tethering だとバッテリの減りも早いです.ということでカスタムROMやCyanogenMod11か12あたりに入れ替えたいのですがブートローダーにロックがかかっているのでまずはこれを解除しないといけません.Test Point を使ったりするのは面倒だなと思っていたのですが,現在は公式でアンロックコードを手に入れることができるのでこちらで行うことに.
※保証がきかなくなります.SEUSなどが利用できなくなります.公式アップデートも利用できなくなるそうです.(まあこれからOTAとか来ることはないと思いますが)

本体の他に以下のものが必要です.ここでは開発環境の説明はしません.

  • Android 開発環境の動作するPC(今回はDebian Jessie)
  • Android 開発環境の中のfastboot コマンド(sdk/platform-tools 以下)
  • USB A-microB ケーブル

アンロックコードの入手

アンロックコードは以下のページから入手できます.

機種を選択して,メールアドレスを入力すると確認メールが届くので,そのメールのURL をクリックするとIMEIの入力画面になって,そこでIMEI を入力することでCodeが入手できます.

アンロック

Xperia Pro の電源を切ります.
USBケーブルはPCのみに接続する
電源Off 状態からメニューボタンを押しながらUSBケーブルを接続する
右上側面のHDMIコネクタ横のLEDが青くなるとFastbootモードになっている

Fastboot モードの時のdmesgはこんな感じでした.

[78677.917985] usb 1-1.1: new high-speed USB device number 30 using ehci-pci
[78678.013776] usb 1-1.1: unable to get BOS descriptor
[78678.025756] usb 1-1.1: New USB device found, idVendor=0fce, idProduct=0dde
[78678.025764] usb 1-1.1: New USB device strings: Mfr=1, Product=2, SerialNumber=3
[78678.025769] usb 1-1.1: Product: S1Boot Fastboot
[78678.025774] usb 1-1.1: Manufacturer: Sony Ericsson Mobile Communications AB
[78678.025778] usb 1-1.1: SerialNumber: CB5A1G45XXXXXX

fastboot devices コマンドで接続を確認します.

% ./fastboot devices
CB5A1G45XXXXXX  fastboot
% ./fastboot -i 0x0fce getvar version
version: 0.3
finished. total time: 0.001s

もしここでno permissions fastboot というエラーが出る場合はadb serverを起動しなおしてみるとうまく行くようです.それでもうまく行かない場合root権限で起動し直す(sudo command)とうまく行ったことも.

% ./fastboot devices
no permissions  fastboot
% ./adb kill-server
% ./adb start-server
* daemon not running. starting it now on port 5037 *
* daemon started successfully *
% ./fastboot devices
CB5A1G45XXXXXX  fastboot

問題ないようなら以下のコマンドでアンロックコードを指定してアンロックします.

% ./fastboot -i 0x0fce oem unlock 0xC3BA1080A6XXXXXX
...
(bootloader) Unlock phone requested
(bootloader) Erasing block 0x00001300
(bootloader) Erasing block 0x00001400
(bootloader) Erasing block 0x00001500
(bootloader) Erasing block 0x00001600
(bootloader) Erasing block 0x00001700
(bootloader) Erasing block 0x00001800
(bootloader) Erasing block 0x00001900
(bootloader) Erasing block 0x00001a00
(bootloader) Erasing block 0x00001b00
(bootloader) Erasing block 0x00001c00
(bootloader) Erasing block 0x00001d00
(bootloader) Erasing block 0x00001e00
(bootloader) Erasing block 0x00001f00
OKAY [  4.587s]
finished. total time: 4.587s

これでアンロック完了です.
次はOSを入れ替えてみます.

ownCloud 7.0.4 導入でownCloud Client 接続で嵌まる

レンタルサーバのheteml にownCloud 7.0.4 を導入する簡単なお仕事.ssh も使えるし〜と思ってさくっと導入してWeb でのテストまでして引渡したのですがユーザからownCloud のクライアントで接続できないとのこと.

ログファイルを出力しつつ試してみると確かに繋がりません.

% owncloud —confdir ./ —logfile ./log —logflush —logwindow

  • —confdir 設定ファイルのディレクトリ指定
  • —logfile ログファイル指定
  • —logflush ログのリアルタイム出力
  • —logwindow ログ出力ウィンドウ表示

WebDav でもうまく行かない.

怪しそうな以下のエラーメッセージで検索するとそれらしいものを発見.

No basic authentication headers were found

コメントを参考に以下の2ファイルを修正.

  • .htaccess
  • lib/base.php
$ diff -u .htaccess.org .htaccess
--- .htaccess.org       2015-02-19 18:41:36.000000000 +0900
+++ .htaccess   2015-03-03 18:09:27.000000000 +0900
@@-17,6 +17,9 @@
 </IfModule>
 <IfModule mod_rewrite.c>
 RewriteEngine on
+RewriteCond %{HTTP:Authorization} ^Basic.*
+RewriteRule ^(.*) $1?Authorization=%{HTTP:Authorization} [QSA,C]
+RequestHeader unset Authorization
 RewriteRule .* - [env=HTTP_AUTHORIZATION:%{HTTP:Authorization}]
 RewriteRule ^\.well-known/host-meta /public.php?service=host-meta [QSA,L]
 RewriteRule ^\.well-known/host-meta\.json /public.php?service=host-meta-json [QSA,L]
@@-40,4 +43,4 @@
 </IfModule>
$ diff -u lib/base.php.org lib/base.php
--- lib/base.php.org    2014-12-09 03:34:15.000000000 +0900
+++ lib/base.php        2015-03-02 20:58:04.000000000 +0900
@@-805,6 +805,12 @@

        protected static function handleAuthHeaders() {
                //copy http auth headers for apache+php-fcgid work around
+               if(isset($_GET['Authorization']) && preg_match('/Basic\s+(.*)$/i', $_GET['Authorization'], $matches))
+               {
+                   list($name, $password) = explode(':', base64_decode($matches[1]));
+                   $_SERVER['PHP_AUTH_USER'] = strip_tags($name);
+                   $_SERVER['PHP_AUTH_PW'] = strip_tags($password);
+               }
                if (isset($_SERVER['HTTP_XAUTHORIZATION']) && !isset($_SERVER['HTTP_AUTHORIZATION'])) {
                        $_SERVER['HTTP_AUTHORIZATION'] = $_SERVER['HTTP_XAUTHORIZATION'];
                }
```language

これでどうにか繋がるようになりました.
同じような環境はそこそこありそうですけどね….

Android から USB-TTL 経由でRaspberry Pi にアクセス

ふと,手元のUSB-TTLアダプタ(Prolific PL2303)とmicroUSBのホストケーブルでAndroidに繋げば普通に使えるのではと思って試してみました.

Raspberry Pi 側の接続.
赤の5Vは接続しなくても動きますが,接続すると少し給電されます.
IMG_20150212_163124

こんな感じに.
IMG_20150212_204416.jpg

Android側のアプリは10種類ほど試しましたが今回利用したProlific PL2303では以下の3つでデバイスを認識しました.Playストアを見た感じではFTDI対応のものが一番多そうでした.

という感じで実際利用できているのはUSB Serial Terminal Liteだけでした.

設定はBitrateの変更と文字コードの変更を行いました.
Screenshot_2015-02-12-20-39-28

デバイスの認識状態はこんな感じ
Screenshot_2015-02-12-20-24-12Screenshot_2015-02-12-20-24-19

そしてこんな感じで使えています
Screenshot_2015-02-12-20-22-35

使い勝手はあまり良くないですが,出先とかでちょっとコマンドを打ちたいときに良さそうです.

オープンソースカンファレンス2015大分に参加

オープンソースカンファレンス2015大分に参加してきました.今回は鹿児島らぐとして展示とLTをしてきました.

IMGP0266IMGP0295
展示はKobo Debian/Android, Raspberry Pi でRasinbowstream, Raspberry Pi 2 model B デモなどでした.Raspberry Pi ブースのような感じですが鹿児島でLinuxに関する活動をしている鹿児島らぐの展示でした.(…鹿児島らぐの説明よりもずっとたくさんRaspberry Pi のはなししてましたが)

IMGP0287

ライトニングトークはトップバッターでした.スライド終わりだけど残り時間どのくらいかなと確認しようとしたところでちょうど時間で偶然時間ピッタリで終わりました.大体近県?のイベントでの宣伝は出来たかなと思いますが,広島や四国でもできればやりたいところです.以下がその時のスライドです.

鹿児島らぐはじめました(オープンソースカンファレンス2015大分LT) from Kenichiro MATOHARA


その後懇親会に参加してホテルへ帰りました.
IMGP0350

次回の鹿児島らぐの県外のイベントは未定です….鹿児島でのイベントは「鹿児島Linux勉強会」を2/21(土)に開催予定です.詳細はWeb/ML等で確認してください.

そして開けて今日はOSC大分翌日観光があったのですがこれはまた別エントリで.