色温度を自動的に変更して健康に気を使う(ブルーライトカット)

backspace.fmでドリキンさんがf.luxがいいと言っているのを聞いて以前Linux環境でブルーライトカット系のアプリを少し試したのを思い出しました.

その時はdebianでf.luxは自分でリポジトリを登録するのが面倒でパッケージの用意されているgnome-shell-extension-redshiftredshiftを試してみたのでした.f.luxインスパイアらしいし.
これらはf.luxと同じようにネットワーク情報から位置情報を取得し,端末の場所の太陽の位置により色温度を変化させるアプリケーションです.夜は色温度を低くしてブルーライトを軽減させます.これによりブルーライトを睡眠前に受ける量が減って寝つきやすくなったり睡眠の質が良くなるかもという効果を期待しています.
しかし,gnome-shell-extension-redshiftはうまく有効にならず,redshiftは位置情報の取得に失敗して手動で動作させていたのでした.

今回もdebian環境でredshift-gtkを試してみました.これは実体はredshiftでタスクトレイに常駐するものです.一時的にon/offすることも簡単に出来るので便利です.

実行するとタスクトレイに電球と月のアイコンが表示されます.クリックすると以下のようなメーニューが.
20160211_06:02:18-13459

画像編集などで一時的に機能を切りたい場合などサスペンドする機能もあります.
20160211_06:02:31-13554

インフォメーションの表示.朝6時頃なので色温度がだんだん高くなっていくところです.
20160211_06:02:28-4511

設定ファイルの作成

規定値で動作させてもだいたい問題ないのですが,カスタマイズしたかったり位置情報が誤った場所のものになっている場合など設定を変更したくなることがあります.
redshiftをコマンドで実行する場合はオプションが指定できますが,redshift-gtkの場合は設定ファイルで指定可能です.
場所は~/.config/redshift.confです.;以降はコメントとして扱われるようです.

メインとなる[redshift]セクションの説明です.

  • temp-day : 昼間の色温度,規定値は5500
  • temp-night : 夜間の色温度,規定値は3700
  • transition : スムーズな遷移の無効有効の設定(0 or 1)
  • brightness-day : 昼間のブライトネス設定(0.1~1.0)
  • brightness-night : 夜間のブライトネス設定(0.1~1.0)
  • gamma : ガンマ値の設定(0.1~10.0)
  • adjustment-method : 調整方法の選択
$ redshift -m list
Available adjustment methods:
  drm
  randr
  vidmode
  dummy
 
Specify colon-separated options with `-m METHOD:OPTIONS'.
Try `-m METHOD:help' for help.
  • location-provider : ロケーションプロバイダの指定.listオプションで確認できます.現在はgeoclue2とmanualが選べるようです.
$ redshift -l list
Available location providers:
  geoclue2
  manual
 
Specify colon-separated options with`-l PROVIDER:OPTIONS'.
Try `-l PROVIDER:help' for help.

adjustment-methodを指定した場合それぞれのセクションでオプションを指定可能です.
内容は$ redshift -m randr:helpのようにメソッド名:helpで確認できます.

[redshift]
 :
adjustment-method=randr
 :
[randr]
screen=1

location-providermanualにした場合[manual]セクションで緯度経度を指定します.度.分のみで秒まで指定するとエラーとなります.
以下は鹿児島県の場合です.

[manual]
lat=31.33
lon=130.33

ということで今こんな感じで使っています.

; Global settings for redshift
[redshift]
; Set the day and night screen temperatures
temp-day=5700
temp-night=3600
; Enable/Disable a smooth transition between day and night
; 0 will cause a direct change from day to night screen temperature.
; 1 will gradually increase or decrease the screen temperature
transition=1
; Set the screen brightness. Default is 1.0
;brightness=0.9
; It is also possible to use different settings for day and night since version 1.8.
brightness-day=0.9
brightness-night=0.7
; Set the screen gamma (for all colors, or each color channel individually)
gamma=0.8
;gamma=0.8:0.7:0.8
; Set the location-provider: 'geoclue2', 'manual'
; type 'redshift -l list' to see possible values
; The location provider settings are in a different section.
location-provider=manual
 
; Set the adjustment-method: 'drm', 'randr', 'vidmode', 'dummy'
; type 'redshift -m list' to see all possible values
; The adjustment method settings are in a different section.
adjustment-method=randr
 
; Configuration of the adjustment-method
; type 'redshift -m METHOD:help' to see the settings
; ex: 'redshift -m randr:help'
; In this example, randr is configured to adjust screen 0.
; Note that the numbering starts from 0, so this is actually the second screen.
[randr]
screen=0
 
; Configuration of the location-provider:
; type 'redshift -l PROVIDER:help' to see the settings
; e.g. 'redshift -l manual:help'
[manual]
; kagoshima, japan
lat=31.33
lon=130.33

問題点?

redshiftを動かしているとブライトネスもこれで管理されます.手動で設定してもすぐにredshiftの設定に戻ります.バッテリー駆動中でブライトネスを下げてバッテリーの持ちを良くしようというような場合は困ります.とりあえずredshiftもブライトネスも手動設定して回避しています.

redshift-gtkを終了した状態で手動設定

$ redshift -O 3500
$ xrandr --output LVDS1 --brightness 0.3

それと夜ふかしさんのためにブルーライトカットの時間をずらす機能はないかなと思ったのですが見当たりませんでした.これは位置情報をmanualで設定して時差のある場所を設定するようにしたら実現できそうです.

Linuxで一部のパーティションの自動マウントを無効にする

Linuxで外付けHDDやUSBストレージなどを接続した時に一部のパーティションの自動マウントを無効にする方法です.

Gnomeで全てのメディアの自動マウントの切り替えをしたい場合は以下を参照して下さい.

対象パーティションの確認

対象のメディアをマウントした状態でblkidコマンドや/etc/mtabなどを参考に対象のUUIDを調べる

$ cat /etc/mtab
    :
/dev/mmcblk0p1 /media/mk/boot vfat rw,nosuid,nodev,relatime,uid=1000,gid=1000,fmask=0022,dmask=0022,codepage=437,iocharset=utf8,shortname=mixed,showexec,utf8,flush,errors=remount-ro 0 0
/dev/mmcblk0p2 /media/mk/ec2aa3d2-eee7-454e-8260-d145df5ddcba ext4 rw,nosuid,nodev,relatime,data=ordered 0 0
$ sudo /sbin/blkid /dev/mmcblk0*
/dev/mmcblk0: PTUUID="ba2edfb9" PTTYPE="dos"
/dev/mmcblk0p1: SEC_TYPE="msdos" LABEL="boot" UUID="74BD-74CF" TYPE="vfat" PARTUUID="ba2edfb9-01"
/dev/mmcblk0p2: UUID="ec2aa3d2-eee7-454e-8260-d145df5ddcba" TYPE="ext4" PARTUUID="ba2edfb9-02"

ここでは

/dev/mmcblk0p1 -> 74BD-74CF
/dev/mmcblk0p2 -> ec2aa3d2-eee7-454e-8260-d145df5ddcba

GPartedなどを使うのもいいかもしれません.

20160211_05:02:10-12031

fatabの編集

/etc/fstabにnoautoオプション付きで記述します.対象パーティションをマウントした状態の/etc/mtabが参考になるでしょう.

UUID=74BD-74CF  /media/mk/pi-boot       vfat    noauto,rw,nosuid,nodev,relatime,uid=1000,gid=1000,fmask=0022,dmask=0022,codepage=437,iocharset=utf8,shortname=mixed,show
exec,utf8,flush,errors=remount-ro       0       0
UUID=ec2aa3d2-eee7-454e-8260-d145df5ddcba       /media/mk/pi-root       ext4    noauto,rw,nosuid,nodev,relatime,data=ordered   0       0

マウントしたい場合

手動でmountコマンドを実行したり,

$ sudo mount /media/mk/pi-root

Nautilus等で該当パーティションのアイコンをクリックしてマウントできます.

20160211_05:02:05-8216

ちょっと大げさですね.
root権の要らないもっとお手軽な方法がありそうな気がします.

Gnomeのメディア自動マウント切り替え

Gnome環境でUSBメモリなどのメディアを接続した際自動的にマウントしてほしくない場合の手順です.設定はdconfに書かれているので直接編集は出来ません.以下に説明するコマンドなどを利用して書き換えます.

書き換え対象は,
org.gnome.desktop.media-handlingの下のautomountです.
ここの値がtrueの場合自動マウントする, falseの場合自動マウントしないとなります.

dconfコマンド利用

現在の状況確認

$ dconf read /org/gnome/desktop/media-handling/automount
true

無効に設定する場合

$ dconf write /org/gnome/desktop/media-handling/automount false
$ dconf read /org/gnome/desktop/media-handling/automount
false

有効に設定する場合

$ dconf write /org/gnome/desktop/media-handling/automount true
$ dconf read /org/gnome/desktop/media-handling/automount
true

gsettingsコマンド利用

現在の状況確認(true->自動マウントする, false->自動マウントしない)

$ gsettings get org.gnome.desktop.media-handling automount
true

無効に設定する場合

$ gsettings set org.gnome.desktop.media-handling automount false
$ gsettings get org.gnome.desktop.media-handling automount
false

有効に設定する場合

$ gsettings set org.gnome.desktop.media-handling automount true
$ gsettings get org.gnome.desktop.media-handling automount
true

dconf-editor利用(GUI)

コマンドが面倒な場合はdconf-editorなどでGUIを使って変更も出来ます.

20160211_04:02:59-19728

コマンドで添付ファイル付きメールを送る2つの方法

Google+でmailコマンドで添付ファイル付きメールを送ろうとしている方の投稿のコメントにbase64でデコードして送るscriptを使ってますとか書いたのですが,これperl4でcgi全盛な大昔からやってる手法なので楽なものがあるのではと思い探してみました.

Debian stretch testingのs-nailを使う

Debian stretch testing/sid ではmailコマンドがbsd-mailxからs-nailに変わって添付ファイルオプションがあるようです.

 -a file     Attach the given file to the message.  The same filename conventions as described in the section COMMANDS apply: shell word expansion is
             restricted to the tilde ‘~’ and variables.  Shall file not be accessible but contain a ‘=’ character, then anything after the ‘=’ is assumed to
             specify the input character set and anything before ‘=’ the filename: this is the only option to specify the input character set (and don't per‐
             form any character set conversion) for text attachments from the command line, not using the ~@ tilde escape command.

こんな感じで使えました.

$ echo 'attach test(binary)' | mail -s "attach test mail" -a ./text.xz matoken@gmail.com

#はじめ.zipを送ろうとしてgmailサーバに弾かれました.そういえばそうだった……
##sendmail: 552 5.7.0 content and attachment content guidelines. xu1sm1469539pab.31 - gsmtp

普通にメール送るのに加えて-aオプションでファイルを指定する感じです.
オプションでSMTPサーバの指定も出来るようなのでMTAの設定をしていないような場合でも単体で使えそうです.

Debian jessieでbiabamを使う

s-nailはstretch testingからでjessieには入っていないようです.代わりに入っているのはbsd-mailxです.manをちょっと見た感じでは添付ファイルの扱いは載っていなさそう.でもきっと便利な何かがあるのでは?とapt-cache search mail attachとかして探してみるとbiabamというbash script製のものを発見.小さいし良さそうと試してみました.

biabam – bash attachment mailer

こんな感じで使えました.

$ sudo apt install biabam
$ echo 'attach test' | biabam ./test.xz -s "attach test from jessie" matoken@gmail.com

ちなみにmailコマンドで添付ファイルの方法を検索すると大抵mutt使う例が出てきますが,muttを既に設定済みの人でないと敷居が高いと思います.そういう場合に今回の方法はいいのではないかと思います.

しかし恐らく多国言語対応はして居なさそうなので日本語をSubjectやBODYに使う場合は素直にScriptを書いたほうがいいかもしれません…….
定形なら適当なMUAでメールのテンプレートファイルを作っておいて流し込んでmailコマンドに投げるようにしてもいいですね.


Tailsの導入にtails-installパッケージが便利

手元のUSBメモリに導入してあるTailsを最新にしようと思い立ちダウンロードしつつ導入ページを見てみると新しくなっていました.

これまではisoファイルを入手した後USBメモリその1に導入.その後USBメモリその1から起動したTailsから運用したいUSBメモリその2に導入する必要がありました.
(USBメモリその1はカスタマイズなどが出来なかったはず)

次のページがその方法の解説ページです.

しかし,DebianとUbuntu向けにインストーラが用意されていました.これを利用するとインストールのためのUSBメモリが必要なくisoファイルからUSBメモリに導入するだけでOKになっていました.

これは便利と早速試してみました.

Tailsの入手

次のページから入手出来ます.私はbittorrent経由で入手しました.ダウンロードの完了に1時間と少し掛かりました.

ダウンロードが済んだら署名確認をします.
公開鍵を持っていない場合はダウンロードページの下のTails signing keyという画像から入手してインポートします.

$ wget -qO - https://tails.boum.org/tails-signing.key | gpg --import /dev/stdin
gpg: 鍵58ACD84F: 公開鍵"Tails developers (offline long-term identity key) <tails@boum.org>"をインポートしました
gpg:           処理数の合計: 1
gpg:             インポート: 1  (RSA: 1)
gpg: 最小の「ある程度の信用」3、最小の「全面的信用」1、PGP信用モデル
gpg: 深さ: 0  有効性:  15  署名:  53  信用: 0-, 0q, 0n, 0m, 0f, 15u
gpg: 深さ: 1  有効性:  53  署名:  60  信用: 53-, 0q, 0n, 0m, 0f, 0u
gpg: 次回の信用データベース検査は、2016-02-19です

その後署名確認をします.

$ gpg --verify tails-i386-2.0.iso.sig
gpg: 署名されたデータが'tails-i386-2.0.iso'にあると想定します
gpg: 2016年01月26日 09時07分15秒 JSTにRSA鍵ID 752A3DB6で施された署名
gpg: "Tails developers (offline long-term identity key) <tails@boum.org>"からの正しい署名
gpg:                 別名"Tails developers <tails@boum.org>"
gpg: *警告*: この鍵は信用できる署名で証明されていません!
gpg:       この署名が所有者のものかどうかの検証手段がありません。
主鍵フィンガー・プリント: A490 D0F4 D311 A415 3E2B  B7CA DBB8 02B2 58AC D84F
副鍵フィンガー・プリント: BA2C 222F 44AC 00ED 9899  3893 98FE C6BC 752A 3DB6

tails-installerの導入

tails-installerパッケージを導入します.tails-installerパッケージはDebianではjessie-backports以降に用意されています.

jessieでbackportsを設定していない人は次のページを参考に設定して下さい.

今回はstretch(testing)なのでパッケージの導入だけです.

$ sudo apt install tails-installer

tails-installertails-installerを使ったTailsの導入

メニューからやコマンドラインからtails-installer-launcherを実行します.ちなみにawesome wm環境だと認証がうまく動かないようです.

<脱線>

以下のコマンドの実行に問題がありました: `/usr/bin/pkexec /usr/bin/syslinux  -d syslinux /dev/sdb1`。
詳細なエラーログは  '/tmp/tails-installer-ddjZmh' に書かれています。
Tails installation failed!
以下のコマンドの実行に問題がありました: `/usr/bin/pkexec /usr/bin/syslinux  -d syslinux /dev/sdb1`。
詳細なエラーログは  '/tmp/tails-installer-ddjZmh' に書かれています。

このログを見ると以下のようなエラーが記録されていました.syslinux実行時に/dev/ttyが見つからないと言っているようです.

/usr/bin/pkexec /usr/bin/syslinux  -d syslinux /dev/sdb1
Error creating textual authentication agent: Error opening current controlling terminal for the process (`/dev/tty'): No such device or address

端末から実行すると認証が走りました.多分上のエラーはこの認証を呼ぼうとしてどこに呼べばいいのか解らなかったんでしょうね.

$ LANG=C tails-installer-launcher
    :
==== AUTHENTICATING FOR org.freedesktop.policykit.exec ===
Authentication is needed to run `/usr/bin/syslinux' as the super user
Authenticating as: KenichiroMATOHARA,,, (mk)
Password:
==== AUTHENTICATION FAILED ===

しかし3回ほど試しましたがここの認証も正しいパスワードを入力しても失敗してしまうよう…….

</脱線>

とりあえずpolicykitのちゃんと動いているGnomeなどの環境では問題ない&policykitが動かない場合は`gksudo`経由で実行すればOKです.

$ gksudo tails-installer-launcher

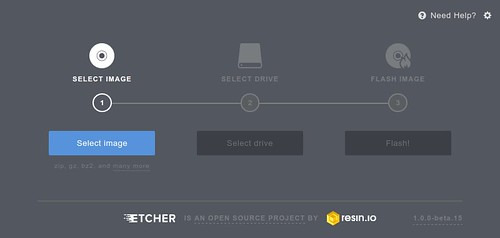
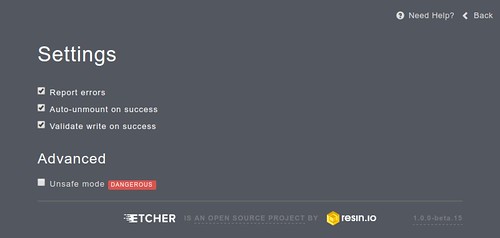
InstallとUpgradeが選択できます.Installを選択した場合は新規インストールで既存のデータは消されるので注意が必要です.Upgradeを選択すると既に持っているTailsのメディアのアップグレードが出来ます.

20160209_05:02:03-18344

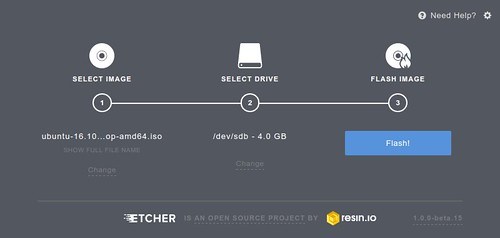
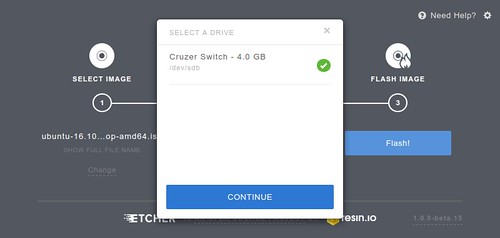
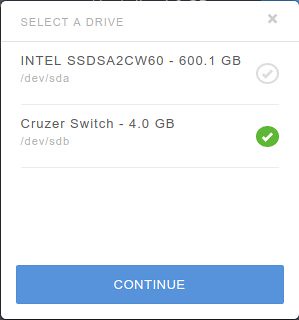
署名確認をしたisoファイルと導入先のデバイス(USBメモリ等)を指定してInstall Tailsを選択します.

20160209_05:02:22-18509

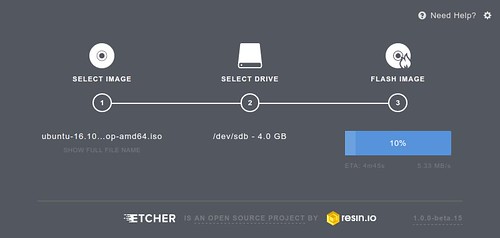
確認画面が出て,OKボタンを押すと初期化や展開が始まります.しばらく待ちましょう.

20160209_05:02:28-18561

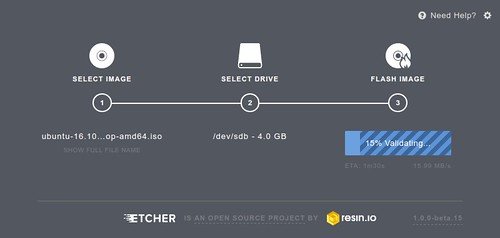
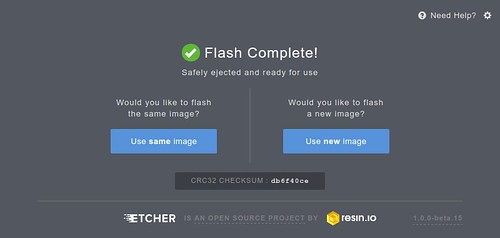
以下の画面が表示されたら完了です.

20160209_06:02:51-24618

UNetbootin並にお手軽です.Debian/UbuntuとTailsを利用している方におすすめです :)
#そういえばUNetbootinはjessie以降から居なくなってる. > Debian Package Tracking System – unetbootin


EncFSに似た暗号化ファイルシステムのCryFSを試す

EncFSのMLで見かけたのですが,EncFSに似た暗号化FSのCryFSというものがあるようです.

EncFSは平文のファイルと暗号化ファイルが一対一で対応づいているしタイムスタンプやパーミッションも引き継いでいるので推測されやすいという問題があります.CryFSはその辺りも隠蔽できるようです.
面白そうなので少し試してみました.

初めDebian stretchに導入しようと思ったのですが,jessieのapt-lineは用意されているのですが,これをstretchに導入しようとするとバージョンチェックで対応してないと言われ,sourceから導入しようと思ったらbiiという恐らくstretchのpkgに存在しないコマンドを要求されるので手っ取り早くUbuntu 14.04 LTSで試しました.

$ linuxlogo -L ubuntu$ linuxlogo -L ubuntu
 
              .-.
        .-'``(|||)
     ,`\ \    `-`.                 88                         88
    /   \ '``-.   `                88                         88
  .-.  ,       `___:      88   88  88,888,  88   88  ,88888, 88888  88   88
 (:::) :        ___       88   88  88   88  88   88  88   88  88    88   88
  `-`  `       ,   :      88   88  88   88  88   88  88   88  88    88   88
    \   / ,..-`   ,       88   88  88   88  88   88  88   88  88    88   88
     `./ /    .-.`        '88888'  '88888'  '88888'  88   88  '8888 '88888'
        `-..-(   )
              `-`
 
 
Linux Version 3.13.0-77-generic, Compiled #121-Ubuntu SMP Wed Jan 20 10:50:42 UTC 2016
      Two 800MHz AMD Athlon Processors, 7.9GB RAM, 5191.48 Bogomips Total
                                     micro

#screenfetchがpkgに無いな

導入

このscriptで鍵やapt-lineの設定とCryFSの導入が行われます.

$ wget -O - https://www.cryfs.org/install.sh | sudo bash
$ cryfs -h
CryFS Version 0.8.5
WARNING! This version is not considered stable. Please backup your data frequently!
 
Usage: cryfs [options] rootDir mountPoint [-- [FUSE Mount Options]]
 
Allowed options:
  -h [ --help ]          show help message
  -c [ --config ] arg    Configuration file
  -f [ --foreground ]    Run CryFS in foreground.
  --cipher arg           Cipher to use for encryption. See possible values by
                         calling cryfs with --show-ciphers
  --show-ciphers         Show list of supported ciphers.
  --unmount-idle arg     Automatically unmount after specified number of idle
                         minutes.
  --extpass arg          External program to use for password input
  --logfile arg          Specify the file to write log messages to. If this is
                         not specified, log messages will go to stdout, or
                         syslog if CryFS is running in the background.
 

利用例

基本的な使い方はEncFSと同じ感じです.初回起動時は簡単な設定が必要.

$ mkdir encdir
$ mkdir mnt
$ cryfs encdir mnt
CryFS Version 0.8.5
WARNING! This version is not considered stable. Please backup your data frequently!
 
Use default settings?
Your choice [y/n]: y
 
Generating secure encryption key...done
Password:
Confirm Password:
Creating config file...done
 
Mounting filesystem. To unmount, call:

アンマウントはfuseなのでfusermount -uで

$ fusermount -u "/tmp/mnt"
$ ls -lA encdir mnt
encdir:
合計 40
-rw-rw-r-- 1 mk mk 32816  2月  7 04:08 0C2B03AEBC6D01C0AAB861907CE361A6
-rw-rw-r-- 1 mk mk  1134  2月  7 04:08 cryfs.config
 
mnt:
合計 0

cryfs.configという設定ファイルが作成されます

$ file encdir/cryfs.config
encdir/cryfs.config: data
$ od -xc encdir/cryfs.config|head
0000000    7263    6679    2e73    6f63    666e    6769    303b    733b
          c   r   y   f   s   .   c   o   n   f   i   g   ;   0   ;   s
0000020    7263    7079    0074    0000    0008    0000    0000    0001
          c   r   y   p   t  \0  \0  \0  \b  \0  \0  \0  \0  \0 001  \0
0000040    0000    0001    0000    0020    0000    0000    0000    a86f
         \0  \0 001  \0  \0  \0      \0  \0  \0  \0  \0  \0  \0   o 250
0000060    eac9    f71c    a592    8034    2f04    a2cb    c19e    78db
        311 352 034 367 222 245   4 200 004   / 313 242 236 301 333   x
0000100    e526    e951    1548    6c59    8a1e    beaf    db19    c7ff
          & 345   Q 351   H 025   Y   l 036 212 257 276 031 333 377 307

タイムスタンプは残らないようです.これはちょっと困る.

$ cryfs encdir mnt
$ cd mnt
$ touch a b c d e f
touch: `a' のタイムスタンプを設定中です: サポートされていない操作です
touch: `b' のタイムスタンプを設定中です: サポートされていない操作です
touch: `c' のタイムスタンプを設定中です: サポートされていない操作です
touch: `d' のタイムスタンプを設定中です: サポートされていない操作です
touch: `e' のタイムスタンプを設定中です: サポートされていない操作です
touch: `f' のタイムスタンプを設定中です: サポートされていない操作です
$ ls -lA
合計 0
-rw-rw-r-- 1 mk mk 0  1月  1  1970 a
-rw-rw-r-- 1 mk mk 0  1月  1  1970 b
-rw-rw-r-- 1 mk mk 0  1月  1  1970 c
-rw-rw-r-- 1 mk mk 0  1月  1  1970 d
-rw-rw-r-- 1 mk mk 0  1月  1  1970 e
-rw-rw-r-- 1 mk mk 0  1月  1  1970 f

10MBのファイルを作ってみると32kくらいで分割されたファイル群になっているようです.

$ dd if=/dev/zero of=mnt/10M.dd bs=1M count=10
$ ls -lA encdir mnt
 
encdir:
合計 11848
-rw-rw-r-- 1 mk mk 32816  2月  7 04:12 0015B9E50D707A660AC59BF6ABA4588B
-rw-rw-r-- 1 mk mk 32816  2月  7 04:12 00AB6551CD86FE4A5129ED330C86B7ED
-rw-rw-r-- 1 mk mk 32816  2月  7 04:12 00BBCEFD0A4150AD15842F356E184F94
-rw-rw-r-- 1 mk mk 32816  2月  7 04:12 00F8B1CCE5770E2D3DC4C47FA0583B80
-rw-rw-r-- 1 mk mk 32816  2月  7 04:12 048860D118BFD0F43A86B8F858456965
-rw-rw-r-- 1 mk mk 32816  2月  7 04:12 049D06A30EF07D80988B6D948E72250A
-rw-rw-r-- 1 mk mk 32816  2月  7 04:12 04FF722DB4ADFBD7F567966EC1244BD1
-rw-rw-r-- 1 mk mk 32816  2月  7 04:12 0599D02B12B1C9EAB554525482531D5F
-rw-rw-r-- 1 mk mk 32816  2月  7 04:12 05D56C792B76894E7194FB28A02F0FAB
-rw-rw-r-- 1 mk mk 32816  2月  7 04:12 06048941FF5F7E185BE3372400580A2C
-rw-rw-r-- 1 mk mk 32816  2月  7 04:12 077FE2E17E29826C6AB407578C5312CB
〜中略〜
-rw-rw-r-- 1 mk mk 32816  2月  7 04:12 FE5879AFA516A816008C9ED4AEB847B5
-rw-rw-r-- 1 mk mk 32816  2月  7 04:12 FE6BB5A582CF60F7329645CF3FAB365B
-rw-rw-r-- 1 mk mk 32816  2月  7 04:12 FFD97AF585CD8DEE23C722076FF8CB94
-rw-rw-r-- 1 mk mk 32816  2月  7 04:12 FFFA9CCA10C0F7A455DA18B109024AA7
-rw-rw-r-- 1 mk mk  1134  2月  7 04:08 cryfs.config
 
mnt:
合計 10240
-rw-rw-r-- 1 mk mk 10485760  1月  1  1970 10M.dd
-rw-rw-r-- 1 mk mk        0  1月  1  1970 a
-rw-rw-r-- 1 mk mk        0  1月  1  1970 b
-rw-rw-r-- 1 mk mk        0  1月  1  1970 c
-rw-rw-r-- 1 mk mk        0  1月  1  1970 d
-rw-rw-r-- 1 mk mk        0  1月  1  1970 e
-rw-rw-r-- 1 mk mk        0  1月  1  1970 f
$ rm mnt/10M.dd

ディレクトリを掘ってもファイルとして保存されるので覗かれてもわかりません.

$ mkdir mnt/dir
$ echo hoge > mnt/dir/hoge
$ ls -lA  encdir/
合計 328
-rw-rw-r-- 1 mk mk 32816  2月  7 04:11 0A332D1A5E0B5C36C9FBCEAB81E6320A
-rw-rw-r-- 1 mk mk 32816  2月  7 04:38 0C2B03AEBC6D01C0AAB861907CE361A6
-rw-rw-r-- 1 mk mk 32816  2月  7 04:11 40C765A5F1D681FFAEC781502836F444
-rw-rw-r-- 1 mk mk 32816  2月  7 04:11 64CF16B73827485463657F2A6928346D
-rw-rw-r-- 1 mk mk 32816  2月  7 04:11 78AA36DEE59FE330861A6D9B1218B16E
-rw-rw-r-- 1 mk mk 32816  2月  7 04:40 A9A48DEB85E2619C2ECBF7490BF3F8C9
-rw-rw-r-- 1 mk mk 32816  2月  7 04:11 DB99D4AAAAA21302B400DA1F9E370EA4
-rw-rw-r-- 1 mk mk 32816  2月  7 04:40 E5FA0435A166231035B54AC0E4723D83
-rw-rw-r-- 1 mk mk 32816  2月  7 04:11 F9589623B409B2142141F79614A865BF
-rw-rw-r-- 1 mk mk  1134  2月  7 04:08 cryfs.config
$ rm mnt/*
rm: `mnt/dir' を削除できません: ディレクトリです
$ ls -lA  encdir
合計 112
-rw-rw-r-- 1 mk mk 32816  2月  7 04:41 0C2B03AEBC6D01C0AAB861907CE361A6
-rw-rw-r-- 1 mk mk 32816  2月  7 04:40 A9A48DEB85E2619C2ECBF7490BF3F8C9
-rw-rw-r-- 1 mk mk 32816  2月  7 04:40 E5FA0435A166231035B54AC0E4723D83
-rw-rw-r-- 1 mk mk  1134  2月  7 04:08 cryfs.config

EncFSはファイル名自体にファイル名のメタデータを含むので利用できるファイル名長が短くなりますが,CryFSだとファイル中にメタデータを含むので元ファイルシステムの最大長のファイル名が利用できるようです.

$ touch mnt/012345678890123456788901234567889012345678890123456788901234567889012345678890123456788901234567889012345678890123456788901234567889012345678890123456788901234567889012345678890123456788901234567889012345678890123456788901234567889012345678890123456789012
$ ls -lA encdir
合計 40
-rw-rw-r-- 1 mk mk 32816  2月  7 04:51 0C2B03AEBC6D01C0AAB861907CE361A6
-rw-rw-r-- 1 mk mk  1134  2月  7 04:08 cryfs.config

パーミッションの変更やオーナーやグループを変更してもメタデータ内に吸収されるようです.

$ chmod 777 mnt/012345678890123456788901234567889012345678890123456788901234567889012345678890123456788901234567889012345678890123456788901234567889012345678890123456788901234567889012345678890123456788901234567889012345678890123456788901234567889012345678890123456789012
$ sudo chown www-data.www-data mnt/012345678890123456788901234567889012345678890123456788901234567889012345678890123456788901234567889012345678890123456788901234567889012345678890123456788901234567889012345678890123456788901234567889012345678890123456788901234567889012345678890123456789012
$ ls -lA encdir mnt
encdir:
合計 40
-rw-rw-r-- 1 mk mk 32816  2月  7 04:51 0C2B03AEBC6D01C0AAB861907CE361A6
-rw-rw-r-- 1 mk mk  1134  2月  7 04:08 cryfs.config
 
mnt:
合計 0
-rwxrwxrwx 1 www-data www-data 0  2月  7 04:53 012345678890123456788901234567889012345678890123456788901234567889012345678890123456788901234567889012345678890123456788901234567889012345678890123456788901234567889012345678890123456788901234567889012345678890123456788901234567889012345678890123456789012

オプションを少し見てみます.
--show-ciphersで利用できる暗号が確認できます.規定値ではaes-256-gcmのようです.

$ fusermount -u mnt
$ ls -lA mnt
合計 0
$ cryfs --show-ciphers
CryFS Version 0.8.5
WARNING! This version is not considered stable. Please backup your data frequently!
 
aes-256-gcm
aes-256-cfb
aes-128-gcm
aes-128-cfb
twofish-256-gcm
twofish-256-cfb
twofish-128-gcm
twofish-128-cfb
serpent-256-gcm
serpent-256-cfb
serpent-128-gcm
serpent-128-cfb
cast-256-gcm
cast-256-cfb
mars-448-gcm
mars-448-cfb
mars-256-gcm
mars-256-cfb
mars-128-gcm
mars-128-cfb

--extpassオプションで外部のプログラムからパスワードが受け取れます.

$ cat << __EOF__ > pass
#!/bin/bash
echo 'passwd'
__EOF__
$ chmod +x pass
$ ./pass
passwd
$ cryfs --extpass ./pass encdir mnt
CryFS Version 0.8.5
WARNING! This version is not considered stable. Please backup your data frequently!
 
Loading config file...done
 
Mounting filesystem. To unmount, call:
$ fusermount -u "/tmp/mnt"
 

--unmount-idleで一定時間利用されていない時に自動アンマウントされます.

$ cryfs --extpass ./pass --unmount-idle 1 encdir mnt

1分後

$ ls -l mnt
合計 0

今のところベータで未実装の昨日もありますし,こういう怖いメッセージも出力される状態です.

WARNING! This version is not considered stable. Please backup your data frequently!

#そういえば数年前nilfs2もmount時に似たような警告出してましたね

mount.nilfs2: WARNING! - The NILFS on-disk format may change at any time.
mount.nilfs2: WARNING! - Do not place critical data on a NILFS filesystem.

今はもう何も言われない :)

[1109102.058384] NILFS version 2 loaded
[1109102.077659] segctord starting. Construction interval = 5 seconds, CP frequency < 30 seconds

実装が済んで安定すればEncFSの競合として便利に使えそうな感じです.
興味のある方はCryFSのページのフォームでメールアドレスを登録しておくといいかもしれません.

Let us notify you when CryFS is stable!


configs moduleで/proc/config.gzを呼び出す

kernel buildしようと現在のconfigをコピーしようとしたところ/boot以下にも/proc/config.gzも見当たらない.こういう場合configsというモジュールを読み込むと/proc/config.gzが出来るらしい.

$ ls -l /proc/config.gz
ls: cannot access /proc/config.gz: No such file or directory
$ ls -la /boot/config-*
ls: cannot access /boot/config-*: No such file or directory
$ sudo modprobe configs
$ lsmod|grep configs
configs                30516  0
$ ls -l /proc/config.gz
-r--r--r-- 1 root root 29305 Feb  4 18:34 /proc/config.gz
$ zcat /proc/config.gz > /usr/src/linux/.config
$ sudo rmmod configs
$ ls -l /proc/config.gz
ls: cannot access /proc/config.gz: No such file or directory

これはRasbina jessieで遭遇しました.
Debian stretch amd64でも試してみたところmoduleがありませんでした.でも普通に/boot/config-x.x.xがあるので困らないです.

$ sudo modprobe configs
modprobe: FATAL: Module configs not found in directory /lib/modules/4.3.0-1-amd64

menuconfigではこの辺みたいです.

General setup
  [*] Kernel .config support
    [*]   Enable access to .config through /proc/config.gz[*]   Enable access to .config through /proc/config.gz

雑なPadcastサーバを少しましにする

先日作ったPodcastサーバですがあれからずっと動かしていますが安定して動いているようです.雑さをましにするために少し修正しました.

プレイヤー部分はこんな感じで少し変わりました.

@reboot while true; do cvlc --ignore-config --extraintf=http --http-port=8081 --http-password='raspberry' ~/podcasts/todayspodcast.m3u --play-and-exit --norm-max-level=2.0 --sout='#transcode{acodec=mp3,ab=64,channels=1}:standard{access=http,mux=ts,dst=:8080}' ; done
40 * * * *      podracer ; cd ~/podcasts ; find . -mmin -1440 -type f -print0 | xargs -0n1 file | grep -i audio | cut -f1 -d: | xargs ls -1tr > ~/podcasts/todayspodcast.m3u
10 0 * * *  rm -rf ~/podcasts/`date --date '1 weeks ago' +\%F`
  • killせずに1周毎にVLCを呼ぶようにしてプレイリスト更新
  • Podcast取得を1時間に1度に変更
  • ボリュームのノーマライズ
  • ビットレートを64kにリアルタイムエンコーディング
  • プレイリストの作成も1時間に一度
  • プレイリストの順序を時間順にソート
  • プレイリストの内容はプレイリスト作成時から過去1日分(1440分)
  • 音泉の番組に対応(RSS化してpodracerに登録.簡単だけど公開すると怒られそうな気がする)

VLCのオプション

  • --ignore-config
    設定を読み込みません
  • --extraintf=http
    ウェブコントローラーを有効に
  • --http-port=8081
    ウェブコントローラーの待ち受けポートを8081番に
  • --http-password='raspberry'
    ウェブコントローラーの認証パスワードをraspberry
  • ~/podcasts/todayspodcast.m3u
    再生ファイル(プレイリストを指定)
  • --play-and-exit
    再生後終了する.これがないとプレイリストを再生後も起動しっぱなしになって次の周に入らない.(vlc://quitでも大丈夫だが,vlc://quitだとプレイリストにも表示される)
  • --norm-max-level=2.0
    ボリュームのノーマライズ.この値はもう少しいじったほうがいいかも?
  • --sout='#transcode{acodec=mp3,ab=64,channels=1}
    モノラル64kのmp3に変換している.Podcastを調べると殆どの番組が64kで一部40,96,128,160が混じっている.1日試したが32kでも大丈夫そう.
  • standard{access=http,mux=ts,dst=:8080}
    8080番ポートでHTTPライブストリーミング配信

VLCのオプションはmanにはあまり載ってなくて困っていたのですが,vlc -Hに大量のオプションが載っているのに気づいてからはかどりました.

$ vlc -h| tail -1
網羅的なヘルプを表示するためには、'-H'オプションを指定してください。
$ vlc -h | wc -l
372
$ vlc -H | wc -l
5674

その他細かいところで

  • 設置場所の変更
  • DNSに名前を登録して固定IPに(Androidでも名前でアクセス可能に)
  • 合わせてプレイリスト等のurlを名前に
  • hostnameの変更
  • sshd設定
  • iptable設定
  • OSの自動更新設定
  • watch dogの設定

といった辺りも設定しましたがこの辺は何時もの設定なので今回は省略.

と,こんな感じでだいたいやりたいことは出来たかなーという感じですが,VLCでなくMPD辺りで曲管理して再生,配信はまた別アプリでやったほうがいいような気もしてきました.VLCは1つで何でもできるしウェブコントローラーもあっていいのですが,MPDの方がリモート管理がしやすそうなので気が向いたらそっちも組むかもです.

今100円ショップのイヤホンを使って聞いているのでその部分が一番ストレスな感じです.

Raspberry Piの小さな液晶のPiTFTを仮想画面スクロールで広く使いたかったけど挫折

IMGP2681

Raspberry Pi用でAdaruit製のGPIO経由(SPI)で接続する320×240 2.8"のタッチスクリーン付きのディスプレイ.動作には専用のドライバが必要.ドライバはsourceの他にAdaruitがRasbianに組み込み済みのものと,ビルド済みのリポジトリが用意されている.

Afafruit謹製のOSイメージ入手

通常のRasbianにAdafruitのリポジトリを追加する方法と,それを反映済みのOSイメージを使う方法(と自分でbuildする方法)がある.ここでは手順の少ないAfafruit謹製のOSイメージを利用する.こちらからwheesy/jessieのものが入手可能.

今回はjessie(2015-09-24-raspbian-jessie-pitft28r.zip)を利用.hashや署名は見当たらず.手元ではこんな感じだった.

$ md5sum 2015-09-24-raspbian-jessie-pitft28r.zip
e78c764abbd3426d63d9ae7180fcdfa8  2015-09-24-raspbian-jessie-pitft28r.zip
$ sha512sum 2015-09-24-raspbian-jessie-pitft28r.zip
a6be01345be6030aaf0bc85293a946be4db54e80a42dbbab0034ddff3c21e842fc10f7f066acd605ffd9d16b6d43e14631e7d5a969a7f2a0869d7d00f013d8fd  2015-09-24-raspbian-jessie-pitft28r.zip

SD Cardデバイス確認

$ dmesg | tail -3
[793679.349596] mmc0: new high speed SDHC card at address 59b4
[793679.350315] mmcblk0: mmc0:59b4 USDU1 14.9 GiB
[793679.351411]  mmcblk0: p1 p2 p3
$ sudo fdisk -l /dev/mmcblk0
Disk /dev/mmcblk0: 15 GiB, 16088301568 bytes, 31422464 sectors
Units: sectors of 1 * 512 = 512 bytes
Sector size (logical/physical): 512 bytes / 512 bytes
I/O size (minimum/optimal): 512 bytes / 512 bytes
Disklabel type: dos
Disk identifier: 0xb3c5e39a
 
Device         Boot    Start      End  Sectors  Size Id Type
/dev/mmcblk0p1          8192   131071   122880   60M  c W95 FAT32 (LBA)
/dev/mmcblk0p2        131072 27228158 27097087 12.9G 83 Linux
/dev/mmcblk0p3      27228159 31422463  4194305    2G 83 Linux
$ mount|grep /dev/mmcblk0

パーティション情報の確認と消去

$ sudo wipefs /dev/mmcblk0
offset               type
----------------------------------------------------------------
0x1fe                dos   [partition table]
 
$ sudo wipefs -a /dev/mmcblk0
/dev/mmcblk0: 2 bytes were erased at offset 0x000001fe (dos): 55 aa
/dev/mmcblk0: calling ioctl to re-read partition table: 成功です
$ sudo wipefs /dev/mmcblk0

※Mac/Windowsではこの辺を使うといいと思う.

イメージ書き込み

$ unzip -p 2015-09-24-raspbian-jessie-pitft28r.zip | pv | sudo ionice -c2 dd of=/dev/mmcblk0 bs=4M
4.03GiB 0:05:58 [11.5MiB/s] [                                                                                                              <=>                         ]
0+36176 レコード入力
0+36176 レコード出力
4325376000 バイト (4.3 GB) コピーされました、 452.676 秒、 9.6 MB/秒
$ sync
$ sync
$ mount|grep /dev/mmcblk0

コマンドの意味などはこちらを

書き込んだSD CardをPiTFTの繋がったRaspberry Piに挿入して起動するとXが自動起動してLXDEにpiユーザで自動ログインした状態になる.

リモート接続(ssh)

Rasbian jessieは初期状態でavahi&sshが起動しているのでIPアドレスを調べなくても接続できて便利.

$ ssh pi@raspberrypi.local -CY

リモート接続(vnc)

x11vncを使ってvinoみたいに既に起動しているX画面(DISPLAY=:0)を転送

$ sudo apt install x11vnc
$ x11vnc -display :0 &

リポジトリサーバの日本への切り替えとパッケージのアップデート

$ sudo apt edit-sources
$ cat /etc/apt/sources.list
deb http://ftp.tsukuba.wide.ad.jp/Linux/raspbian/raspbian/  jessie main contrib non-free rpi
deb-src http://ftp.tsukuba.wide.ad.jp/Linux/raspbian/raspbian/  jessie main contrib non-free rpi
deb http://apt.adafruit.com/raspbian/ jessie main
$ sudo apt update && sudo apt upgrade

Xの確認

$ ps -ef|grep X
root       557   550  0 05:50 tty7     00:00:01 /usr/bin/X :0 -seat seat0 -auth /var/run/lightdm/root/:0 -nolisten tcp vt7 -novtswitch
pi         733   698  0 05:50 ?        00:00:00 /usr/bin/lxsession -s LXDE-pi -e LXDE
pi         837   733  1 05:51 ?        00:00:02 lxpanel --profile LXDE-pi
pi         838   733  0 05:51 ?        00:00:01 pcmanfm --desktop --profile LXDE-pi
pi         968   942  0 05:55 pts/0    00:00:00 grep --color=auto X
$ DISPLAY=:0 xrandr --verbose
xrandr: Failed to get size of gamma for output default
Screen 0: minimum 320 x 240, current 320 x 240, maximum 320 x 240
default connected 320x240+0+0 (0x4f) normal (normal) 0mm x 0mm
        Identifier: 0x4e
        Timestamp:  35831
        Subpixel:   unknown
        Clones:
        CRTC:       0
        CRTCs:      0
        Transform:  1.000000 0.000000 0.000000
                    0.000000 1.000000 0.000000
                    0.000000 0.000000 1.000000
                   filter:
  320x240 (0x4f)  0.000MHz *current
        h: width   320 start    0 end    0 total  320 skew    0 clock   0.00KHz
        v: height  240 start    0 end    0 total  240           clock   0.00Hz
$ ls -l /dev/fb*
crw-rw---- 1 root video 29, 0 Sep 24 17:32 /dev/fb0
crw-rw---- 1 root video 29, 1 Feb  3 05:52 /dev/fb1

PiTFT分のXだけが起動していて,ディスプレイ番号は:0のよう.解像度は320x240だけ.モニタ名はdefault?

XRandRのpanningを使って画面をスクロールして広く使う(失敗)

やっと本題.
xrandrのmanを見るとpanningというそれらしい設定が.

       Per-output options
 
       --panning widthxheight[+x+y[/track_widthxtrack_height+track_x+track_y[/border_left/border_top/border_right/border_bottom]]]
              This option sets the panning parameters.  As soon as panning is enabled, the CRTC position can change with every pointer move.  The first four param‐
              eters specify the total panning area, the next four the pointer tracking area (which defaults to the same area). The last four parameters specify the
              border and default to 0. A width or height set to zero disables panning on the according axis. You typically have to set the screen  size  with  --fb
              simultaneously.
 
       --transform a,b,c,d,e,f,g,h,i
              Specifies a transformation matrix to apply on the output. Automatically a bilinear filter is selected.  The mathematical form corresponds to:
                     a b c
                     d e f
                     g h i
              The transformation is based on homogeneous coordinates. The matrix multiplied by the coordinate vector of a pixel of the output gives the transformed
              coordinate vector of a pixel in the graphic buffer.  More precisely, the vector (x y) of the output pixel is extended to 3 values (x y w), with 1  as
              the  w coordinate and multiplied against the matrix. The final device coordinates of the pixel are then calculated with the so-called homogenic divi‐
              sion by the transformed w coordinate.  In other words, the device coordinates (x' y') of the transformed pixel are:
                     x' = (ax + by + c) / w'   and
                     y' = (dx + ey + f) / w'   ,
                     with  w' = (gx + hy + i)  .
              Typically, a and e corresponds to the scaling on the X and Y axes, c and f corresponds to the translation on those axes, and g, h, and i are  respec‐
              tively  0,  0 and 1. The matrix can also be used to express more complex transformations such as keystone correction, or rotation.  For a rotation of
              an angle T, this formula can be used:
                     cos T  -sin T   0
                     sin T   cos T   0
                      0       0      1
              As a special argument, instead of passing a matrix, one can pass the string none, in which case the default values are used (a  unit  matrix  without
              filter).
 
       --scale xxy
              Changes  the  dimensions  of the output picture. Values superior to 1 will lead to a compressed screen (screen dimension bigger than the dimension of
              the output mode), and values below 1 leads to a zoom in on the output. This option is actually a shortcut version of the --transform option.
 
       --scale-from wxh
              Specifies the size in pixels of the area of the framebuffer to be displayed on this output.  This option  is  actually  a  shortcut  version  of  the
              --transform option.
 
       --primary
              Set the output as primary.  It will be sorted first in Xinerama and RANDR geometry requests.

ちょっと複雑そう.xrandrのGUIの皮のarandr/lxrandrで設定できると便利なんだろうけど実装された機能が少なくてこの当たりの設定は使えない感じで残念.
#arandrは外部モニタの設定や解像度の変更にはよく使ってます.

XRandRを手動で設定してmodeの登録を試みる

cvtコマンドで取得した値をxrandrに渡すといいはずだけどうまく行かない.

$ cvt 800 600
# 800x600 59.86 Hz (CVT 0.48M3) hsync: 37.35 kHz; pclk: 38.25 MHz
Modeline "800x600_60.00"   38.25  800 832 912 1024  600 603 607 624 -hsync +vsync
$ xrandr --newmode "800x600_60.00"   38.25  800 832 912 1024  600 603 607 624 -hsync +vsync
$ xrandr --addmode default 800x600_60.00
xrandr: cannot find output "default"
$ DISPLAY=:0 xrandr --addmode default 800x600_60.00
xrandr: Failed to get size of gamma for output default
xrandr: cannot find mode "800x600_60.00"
$ DISPLAY=:0 xrandr --addmode default 800x600_60.00
xrandr: Failed to get size of gamma for output default
xrandr: cannot find mode "800x600_60.00"

PC(i915なDebian stretch amd64)では想定した動作になった.
この例では存在するモードよりも広い1904×720のモードを追加した後,画面のモードを640×480にして仮想スクリーンを1904×720にしている.マウスカーソルを端に持って行くと自動スクロールする.

$ xrandr | grep LVDS1 -A5
LVDS1 connected 1366x768+0+0 (normal left inverted right x axis y axis) 277mm x 156mm panning 1366x768+0+0
   1366x768      60.00*+
   1360x768      59.80    59.96  
   1024x768      60.00  
   800x600       60.32    56.25  
   640x480       59.94  
$ cvt 1904 720
# 1904x720 59.97 Hz (CVT) hsync: 44.86 kHz; pclk: 111.25 MHz
Modeline "1904x720_60.00"  111.25  1904 2000 2192 2480  720 723 733 748 -hsync +vsync
$ cvt 1904 720
# 1904x720 59.97 Hz (CVT) hsync: 44.86 kHz; pclk: 111.25 MHz
Modeline "1904x720_60.00"  111.25  1904 2000 2192 2480  720 723 733 748 -hsync +vsync
$ xrandr --newmode "1904x720_60.00"  111.25  1904 2000 2192 2480  720 723 733 748 -hsync +vsync
$ xrandr --addmode VGA1 1904x720_60.00
$ xrandr --output LVDS1 --mode 640x480 --panning 1904x720

そもそもpanningはmodeを追加しなくても使えるようだ.

$ xrandr --output LVDS1 --mode 1366x768 --panning 2000x768
$ xrandr --output LVDS1 --mode 1366x768 --panning 2732x1536 --scale 2x2

ということはこれだけでいいはずだけどモニタ名がうまく行けてない.モニタ名をドライバでちゃんと設定してない?

$ DISPLAY=:0 xrandr default --mode 320x240 --panning 800x600
xrandr: unrecognized option 'default'
Try 'xrandr --help' for more information.$ DISPLAY=:0 xrandr default --mode 320x240 --panning 800x600
xrandr: unrecognized option 'default'
Try 'xrandr --help' for more information.

Adafruitのフォーラムに同じ質問があったけど動いて無さそう.

もう少し叩いてみたらモニタ名はdefaultでOKのよう.320×240より小さなmodeを作ってみてもダメ.
xrandrコマンドを引数無しで実行した時のmaximum 320 x 240がいけないのかも.PCではmaximum 32767 x 32767と恐らくビデオカードの最大解像度であろう値が表示される.VRAMを増やしたりすると行けるけるのかもしれない.

$ DISPLAY=:0 xrandr
xrandr: Failed to get size of gamma for output default
Screen 0: minimum 320 x 240, current 320 x 240, maximum 320 x 240
default connected 320x240+0+0 0mm x 0mm
   320x240        0.00*
$ DISPLAY=:0 xrandr --output default --auto --mode 320x240 --panning 800x600
xrandr: Failed to get size of gamma for output default
xrandr: screen cannot be larger than 320x240 (desired size 800x600)
$ DISPLAY=:0 xrandr --output default --auto --mode 160x120 --panning 320x240
xrandr: cannot find mode 160x120
$ cvt 160 120
# 160x120 50.08 Hz (CVT 0.02M3) hsync: 6.51 kHz; pclk: 1.25 MHz
Modeline "160x120_60.00"    1.25  160 168 176 192  120 123 127 130 -hsync +vsync
$ xrandr --newmode "160x120_60.00"    1.25  160 168 176 192  120 123 127 130 -hsync +vsync
$ DISPLAY=:0 xrandr --newmode "160x120_60.00"    1.25  160 168 176 192  120 123 127 130 -hsync +vsync
xrandr: Failed to get size of gamma for output default
$ DISPLAY=:0 xrandr --addmode default 160x120_60.00
xrandr: Failed to get size of gamma for output default
$ DISPLAY=:0 xrandr
xrandr: Failed to get size of gamma for output default
Screen 0: minimum 320 x 240, current 320 x 240, maximum 320 x 240
default connected 320x240+0+0 0mm x 0mm
   320x240        0.00*
   160x120_60.00  50.08  
pi@raspberrypi ~ $ DISPLAY=:0 xrandr --output default --auto --mode 160x120_60.00 --panning 320x240
xrandr: Failed to get size of gamma for output default
xrandr: Configure crtc 0 failed

恐らくこれ以上はsourceを修正しないとダメだと思う.

fbcpを利用してRaspberry Pi標準のディスプレイをコピーして利用

フレームバッファをコピーするfbcpを利用する方法.便利だけどタッチパネル機能が使えない.

内蔵が/dev/fb0でPiTFTが/dev/fb1になっているので通常のRaspberry Piで行った設定をそのままPiTFTの画面に映すことが出来る.
フレームバッファのコピーなのでXだけでなくコンソール利用時にも使える.

fbcpのbuild

$ sudo apt install cmake
$ git clone https://github.com/tasanakorn/rpi-fbcp.git
$ cd rpi-fbcp
$ mkdir build
$ cd build
$ cmake ..
$ make

fbcpコマンドを適当な場所に置く.

$ sudo cp fbcp /usr/local/bin/

/dev/fb1を指定しているファイルを退避して,起動時にfbcpを起動するよう設定して再起動.

$ sudo mv /etc/X11/xorg.conf.d/99-fbdev.conf ~pi/99-fbdev.conf
$ sudo sed -i 's/exit/\/usr\/local\/bin\/fbcp \&\n\nexit/g' /etc/rc.local
$ sudo reboot

コンソールの途中からfbcpが動作してXも表示される.解像度は656×416になっている.もっと高解像度にもできるが使いやすさを考えるとこのくらいでいいと思う.

$ DISPLAY=:0 xrandr --verbose
xrandr: Failed to get size of gamma for output default
Screen 0: minimum 656 x 416, current 656 x 416, maximum 656 x 416
default connected 656x416+0+0 (0x4f) normal (normal) 0mm x 0mm
        Identifier: 0x4e
        Timestamp:  19289
        Subpixel:   unknown
        Clones:    
        CRTC:       0
        CRTCs:      0
        Transform:  1.000000 0.000000 0.000000
                    0.000000 1.000000 0.000000
                    0.000000 0.000000 1.000000
                   filter:
  656x416 (0x4f)  0.000MHz *current
        h: width   656 start    0 end    0 total  656 skew    0 clock   0.00KHz
        v: height  416 start    0 end    0 total  416           clock   0.00Hz

過去の試み

Debian stretch環境でSilverlight動画を視聴

確か1話はニコニコ動画で見たと思うハルチカですが,2話からは有料のよう.どこかで見られないかなーとON AIR情報を調べてみると「Rakuten SHOWTIME」というところで最新話が1週無料のようです.

Rakuten SHOWTIME
(最新各話、配信後1週間無料) http://video.rakuten.co.jp/

早速見に行くと,

非対応デバイスのため、動画を再生できません。

ブラウザのUser-Agentを変更してアクセスしてみると,Silverlightでした.

動画を再生するためには、Silverlightのインストールが必要です。こちらから最新版のインストールをお願いいたします。

Silverlightでの動画視聴は以前Pipelightを使って試したことがありました.

このときは動画と音声がどんどんずれていって動画視聴は辛かったです.今なら改善されているかもと再度試してみました.

以前はPipelightはDebian pkgにあったのですが今はなくなっているようです.

$ w3m -dump 'https://packages.debian.org/search?keywords=pipelight&searchon=all&exact=1&suite=all&section=all'|grep 'で検索しました' -A5
すべてのアーキテクチャで検索しました。
 
残念ながら、検索結果はありませんでした
 
━━━━━━━━━━━━━━━━━━━━━━━━━━━━━━━━━━━━━━━━━━━━━━━━━━━━━━━━━━━━━━━━━━━━━━━━━━━━━━━

公式ページを見ると導入手順が書かれていました.

今回はDebian stretchなのでこちらのページを参考に導入しました.

i386パッケージを有効にします.

$ sudo dpkg --add-architecture i386

リポジトリの鍵を入手して登録します.

wget http://repos.fds-team.de/Release.key
sudo apt-key add Release.key

pipelightのsource listを追加します.

$ sudo apt edit-sources pipelight
$ sudo cat /etc/apt/sources.list.d/pipelight.list
deb http://repos.fds-team.de/stable/debian/ stretch main

<追記>
apt-cache searchなどが一般ユーザでできなくなるので読み込み権を追加.

$ sudo chmod o+r /etc/apt/sources.list.d/pipelight.list

</追記>

パッケージ情報を更新してPipelightを導入します.

$ sudo apt update && sudo apt upgrade
$ sudo apt install pipelight-multi

プラグインデータベースを最新にします.

$ sudo pipelight-plugin --update

とりあえずPipelightの導入は完了です.続いてプラグインの有効化を行います.
ここからは以下のページを参考にします.
Pipelight | Installation

pipelight-pluginコマンドで利用できるプラグインの種類が確認できます.

$ pipelight-plugin
 
Usage: pipelight-plugin [OPTIONS ...] COMMAND
 
Environment variables:
  MOZ_PLUGIN_PATH             overwrite plugin path
 
Options:
  --accept                    accept all licenses
 
User commands:
  --enable  PLUGIN            enable plugin
  --disable PLUGIN            disable plugin
  --disable-all               disable all plugins
  --list-enabled              list enabled plugins for the current user
  --list-enabled-all          list all enabled plugins
  --show-license              print license for plugin
  --system-check              do a system check
  --help                      shows this help
  --version                   shows the current version of Pipelight
 
Global commands (require root rights):
  --create-mozilla-plugins    create copies of libpipelight.so
  --remove-mozilla-plugins    remove copies of libpipelight.so
  --unlock PLUGIN             unlocks an additional plugin
  --lock   PLUGIN             locks an additional plugin
  --update                    update the dependency-installer script
 
 
Supported standard plugins:
  silverlight5.1
  silverlight5.0
  silverlight4
  flash
  unity3d
  widevine
 
Additional plugins (experimental):
  shockwave
  foxitpdf
  grandstream
  adobereader
  hikvision
  npactivex
  roblox
  vizzedrgr
  viewright-caiway
  x64-unity3d
  x64-flash
 

今回はSilverlightを使いたいのでsilverlight5.1を有効にします.

$ sudo pipelight-plugin --enable silverlight5.1

ブラウザ(Iceweasel)で利用できるようにします,

$ sudo pipelight-plugin --create-mozilla-plugins

ブラウザ(Iceweasel)を起動して,about:pluginsにアクセスしてプラグインが読み込まれているか確認します.

20160202_16:02:32-30774

うまくいったようなので動画視聴を試してみます.2番組試してみましたが以前と違いズレも発生せず快適に視聴できました.機能も一通り試してみましたが,最大化も含め全て問題なく動いているようです.

20160202_15:02:03-9643

ということでハルチカが見られるようになりました :)