不正なUSBデバイスからPCを守るUSBGuardを試す

BadUSBなどの不正なUSBデバイスからPCが守れないかなちょっと設定すればできそう?そもそも作っている人がいるんじゃ?ということで探したらUSBGuardというソフトウェアを見つけました.

このソフトウェアを導入しておくと,設定したルールに合致しないUSBデバイスはblockされます. デスクトップ利用の場合はGUIのアプレットを利用してUSB接続時にウィンドウがポップアップして接続するか選べたりもします. 便利.
#USB KILLERは……USB配線を外したりUSBコネクタを塞ぐしかないですよね多分.

導入

Debian/Ubuntuにはパッケージがあるのでそちらから導入します.

$ sudo apt install usbguard usbguard-applet-qt

設定

一般ユーザから利用する場合は設定ファイルを編集してユーザかグループを追加してデーモンの再起動を行います. 設定ファイルは/etc/usbguard/usbguard-daemon.confです.

diff --git a/usbguard/usbguard-daemon.conf b/usbguard/usbguard-daemon.conf
index 4a54ca0..7b3a165 100644
--- a/usbguard/usbguard-daemon.conf
+++ b/usbguard/usbguard-daemon.conf
@@ -65,7 +65,7 @@ PresentControllerPolicy=keep
#
# IPCAllowedUsers=username1 username2 ...
#
-IPCAllowedUsers=root
+IPCAllowedUsers=root user1 user2

#
# Groups allowed to use the IPC interface.
@@ -75,7 +75,7 @@ IPCAllowedUsers=root
#
# IPCAllowedGroups=groupname1 groupname2 ...
#
-IPCAllowedGroups=root
+IPCAllowedGroups=root users

#
# Generate device specific rules including the "via-port"

ユーザの場合はIPCAllowedUsers,グループの場合はIPCAllowedGroupsにスペース区切りで書いていきます.

デーモンの再起動

設定を反映するためにデーモンを再起動します.

$ sudo service usbguard restart

CUIでの利用例

usbguardが起動した後に接続されたデバイスはblockされています.

$ usbguard list-devices| tail -2
9: allow id 8087:0024 serial "" name "" hash "Zx7v0FMQEjScKSAFENAiobEs1OGPPB0YWR+yXDCVE04=" parent-hash "WwvSEwd+7257rAqUGLMQjffF7zyqygmmLeQTYnR9QzQ=" via-port "4-1" with-interface 09:00:00
11: block id 1004:631c serial "03a809c94b4befd4" name "LGE Android Phone" hash "P5dSK5xxK4R5QTRzd7KlD8Agf/+28pztL077j1oWqPI=" parent-hash "Zx7v0FMQEjScKSAFENAiobEs1OGPPB0YWR+yXDCVE04=" via-port "4-1.1" with-interface ff:ff:00

blockされている11番目のデバイスを許可してみます.(これは一時的です)

$ usbguard allow-device 11
$ usbguard list-devices| tail -1
11: allow id 1004:631c serial "03a809c94b4befd4" name "LGE Android Phone" hash "P5dSK5xxK4R5QTRzd7KlD8Agf/+28pztL077j1oWqPI=" parent-hash "Zx7v0FMQEjScKSAFENAiobEs1OGPPB0YWR+yXDCVE04=" via-port "4-1.1" with-interface ff:ff:00

状況の確認

USBデバイスの認識状況を監視します.

$ usbguard watch
[IPC] Connected
[device] Inserted: id=12 hash=vi38heJ4vKEdayxiqrQFylpwa3xkVYYUkZi2zbu3sWs= name=Mass Storage Device product_id=1336 serial=00000000000006 vendor_id=048d interface={ 08:06:50} rule_match=0 rule_id=4294967295
[device] Blocked: id=12 name=Mass Storage Device product_id=1336 vendor_id=048d rule_match=0 rule_id=4294967295
[device] Allowed: id=12 name=Mass Storage Device product_id=1336 vendor_id=048d rule_match=0 rule_id=4294967295

GUI(usbguard-applet-qt)の利用例

CUIだとちょっと面倒ですが,デスクトップ利用の場合はusbguard-applet-qtが便利です.

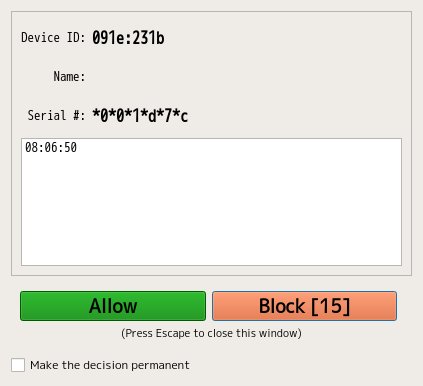
usbguard-applet-qtが起動した状態でUSBデバイスを接続すると以下のようなダイヤログが表示されます.Allowボタンを押すことで利用できるようになります. このとき,Make the decision permanentにチェックを入れておくと,設定が永続化されます.この設定は/etc/usbguard/rules.confに記録されます.

20161007_02:10:22-9078

ダイヤログはタイムアウトすると消えてしまいますが,アプレットのウィンドウから設定画面を呼び出すことができます.ここから設定変更ができます.

20161007_16:10:49-4107

とりあえずはこれくらいで良さそうですが,ルールを書くといろいろ応用が効きそうです.

とりあえずはどうもデーモン起動までに接続されていたデバイスは許可されるようなので内臓デバイスを明示的に許可してその他をblockしようと思います.

mind mappingアプリのFreeplaneを試す

FreeMindをDebian jessieに導入しようとしたらパッケージが見当たりません. 探してみるとメンテナンスされてないからjessie/sidから消されたようです.

We have Freeplane which is actively maintained and roughly equivalent in features.

でもFreeplaneというメンテされている似たものがあるよということでこれを試してみることにしました.

#ちなみにFreeMindのsiteを見るとstableのリリースが2013年で1.0.1.その後1.1.0-Beta1が2015年1.1.0-Beta2が2016年に出ていて,Debianでは0.9.0だったようです.

FreeplaneはどうもFreeMindのフォークのようです.見た目も使い勝手も似ています.JAVA製でマルチプラットホームなのも同じです.

導入はパッケージがあるのでそれを利用しました.

$ sudo apt install freeplane

起動ロゴ……何だろうこの虫?は.

20161005_01:10:30-30616

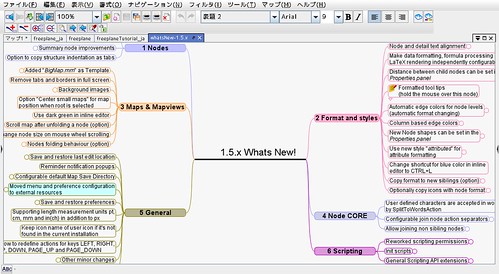
初回起動時にはWhats Newが表示されました.

20161005_01:10:09-30241

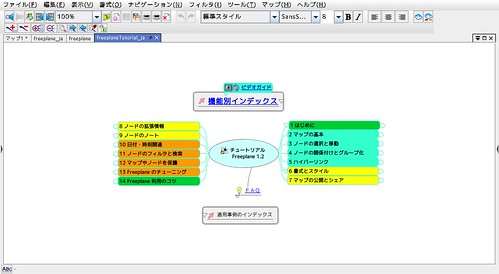
少し日本語が豆腐になってしまっている場所がありましたがフォントを日本語フォントに変更することで解決しました. 後はチュートリアルとかに目を通しておくと良さそうです.

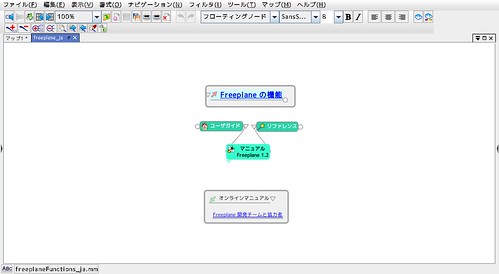
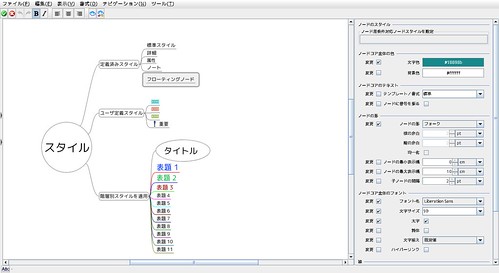
チュートリアルなどのドキュメントは/usr/share/freeplane/doc/辺りにありました.

$ ls -1 /usr/share/freeplane/doc/*_ja.mm
/usr/share/freeplane/doc/freeplaneFunctions_ja.mm
/usr/share/freeplane/doc/freeplaneTutorial_ja.mm
/usr/share/freeplane/doc/freeplane_ja.mm

20161005_01:10:53-29876

20161005_01:10:09-28858

20161005_01:10:32-27112

未だそんなに使っていませんが,FreeMindと同じような操作性だし以前書いた.mmも読めるようなのでそのまま移行できそうです.

<追記>

Ubuntu 16.10 amd64(今は未だリリース前)にも入れてみましたが起動しませんでした.とりあえず本家から.zipを貰ってきて動かしています.一応報告はしてみました.

</追記>

Android端末をLinuxのタッチパッド替わりにしたい(Bluetooth利用のBlink)

最近またポインティングデバイスにApple Wireless Trackpadを利用するようになりましたが持ち運びには少し嵩張ります.マウスを持ち運ぶのもかさばります.
Ubuntu TouchでHDMI接続時にタッチデバイスになるというのを見てAndroid端末をタッチデバイスにすることが出来るのでは?それなら荷物増え無いしいいかもと思って少し調べてみました.

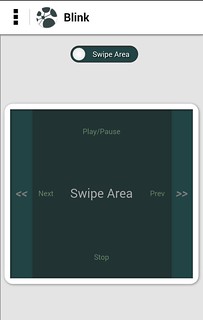
BlinkはBluetooth接続かつPC側でデーモンを動かす必要があります.
先ずBluetoothペアリングをしておき,PC側でデーモンを導入します.

  • 必要パッケージの導入

$ sudo apt install bluez python-bluez xdotoolsudo apt-get install bluez python-bluez xdotool
  • デーモンの導入

$ git clone https://github.com/drpain/blink-server.git ~/.blink

以下のようにしてデーモンを起動するのですが,この記事を書いている時点でのDebian stretch testing amd64では以下のようなエラーとなります.

$ sudo ~/.blink/bluetooth_server.py
Traceback (most recent call last):
  File "/home/mk/.blink/bluetooth_server.py", line 25, in <module>
    profiles         = [ SERIAL_PORT_PROFILE ]
  File "/usr/lib/python2.7/dist-packages/bluetooth/bluez.py", line 176, in advertise_service
    raise BluetoothError (str (e))
bluetooth.btcommon.BluetoothError: (2, 'No such file or directory')

GuihubのHELPを参考に*/etc/bluetooth/main.conf*を以下のように修正します.

diff --git a/bluetooth/main.conf b/bluetooth/main.conf
index 372fd8c..2f7cc4a 100644
--- a/bluetooth/main.conf
+++ b/bluetooth/main.conf
@@ -64,6 +64,9 @@
 # 'false'.
 #FastConnectable = false

+# "drpain/blink-server: This is the server you would need to be able to run the Blink Android Application." https://github.com/drpain/blink-server
+DisablePlugins = pnat
+
 #[Policy]
 #
 # The ReconnectUUIDs defines the set of remote services that should try

設定を反映するためにbluetoothdを再起動してサーバを再起動します.

$ sudo service bluetooth restart

サーバは要rootのようです.
この状態でAndroid側からクライアントPCを選択して接続すればok.

$ sudo ~/.blink/bluetooth_server.py
READY FOR CONNECTIONS, RFCOMM channel 1
('INBOUND CONNECTION ', ('68:76:4F:3B:D1:E0', 1))
COMMAND RECEIVED [{"action":"mouse-move","x":null,"y":null}]
['xdotool', 'mousemove_relative', '--', 'None', 'None']
COMMAND RECEIVED [{"action":"mouse-move","x":-1,"y":0}]
['xdotool', 'mousemove_relative', '--', '-1', '0']
COMMAND RECEIVED [{"action":"mouse-move","x":0,"y":0}]
['xdotool', 'mousemove_relative', '0', '0']
COMMAND RECEIVED [{"action":"mouse-move","x":-1,"y":0}]
['xdotool', 'mousemove_relative', '--', '-1', '0']

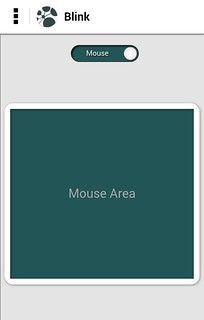
上の方のモード切替スイッチをタップして規定の「Swipe Area」から「Mouse」にします.「Mouse Area」で操作するとxdotoolのログが大量に出つつ操作できます.

27629912281 e0ba729509 n
27094267013 3fb8577a76 n

操作は少し解りづらくてこんな感じです.

  • タップ→左クリック

  • タップ, ホールド, リリース → 右クリック

中クリックやドラッグは多分未実装で使えません.
カーソル移動はちらつきますがとりあえず使える感じです.

でも導入に要設定変更&要rootなのが面倒ですね.

awesomeとかでApple Wireless Trackpadを設定する

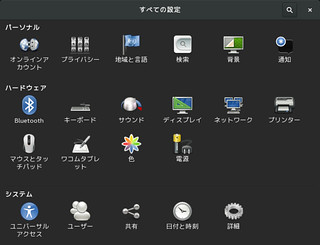
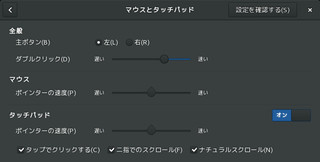
Bluetooth接続のApple Wireless Trackpadですが,GnomeとかだとBluetoothでペアリングした後こんな感じでGUIで設定できるのですが,

27082898093 594ed9ea4e n
27082898303 067a324e77 n
27414891970 2128414b0d n

awesomeだと効かないようです.ペアリングした後カーソル移動,2本指スクロール,右クリックはなどは動作するのですが,一番利用する左クリックが動作しません.

こいつはDynaptics driver用のコマンドのsynclientを使って設定内容の確認とアドホックな動作確認をします.
コマンドが存在しない場合 xserver-xorg-input-synaptics pkgを導入してください.
-l optionで設定項目の確認が出来ます.

$ synclient -l
Parameter settings:
    LeftEdge                = -2393
    RightEdge               = 2651
    TopEdge                 = -2030
    BottomEdge              = 2139
    FingerLow               = 70
    FingerHigh              = 75
    MaxTapTime              = 180
    MaxTapMove              = 346
    MaxDoubleTapTime        = 100
    SingleTapTimeout        = 180
    ClickTime               = 100
    EmulateMidButtonTime    = 0
    EmulateTwoFingerMinZ    = 100
    EmulateTwoFingerMinW    = 50
    VertScrollDelta         = 157
    HorizScrollDelta        = 157
    VertEdgeScroll          = 0
    HorizEdgeScroll         = 0
    CornerCoasting          = 0
    VertTwoFingerScroll     = 1
    HorizTwoFingerScroll    = 1
    MinSpeed                = 1
    MaxSpeed                = 1.75
    AccelFactor             = 0.0253743
    TouchpadOff             = 0
    LockedDrags             = 0
    LockedDragTimeout       = 5000
    RTCornerButton          = 0
    RBCornerButton          = 0
    LTCornerButton          = 0
    LBCornerButton          = 0
    TapButton1              = 0
    TapButton2              = 2
    TapButton3              = 3
    ClickFinger1            = 1
    ClickFinger2            = 3
    ClickFinger3            = 2
    CircularScrolling       = 1
    CircScrollDelta         = 0.1
    CircScrollTrigger       = 0
    CircularPad             = 0
    PalmDetect              = 1
    PalmMinWidth            = 10
    PalmMinZ                = 200
    CoastingSpeed           = 50
    CoastingFriction        = 50
    PressureMotionMinZ      = 30
    PressureMotionMaxZ      = 160
    PressureMotionMinFactor = 1
    PressureMotionMaxFactor = 1
    GrabEventDevice         = 0
    TapAndDragGesture       = 1
    AreaLeftEdge            = 0
    AreaRightEdge           = 0
    AreaTopEdge             = 0
    AreaBottomEdge          = 0
    HorizHysteresis         = 4
    VertHysteresis          = 4
    ClickPad                = 0
    RightButtonAreaLeft     = 0
    RightButtonAreaRight    = 0
    RightButtonAreaTop      = 0
    RightButtonAreaBottom   = 0
    MiddleButtonAreaLeft    = 0
    MiddleButtonAreaRight   = 0
    MiddleButtonAreaTop     = 0
    MiddleButtonAreaBottom  = 0

とりあえずタップの設定をしてみます.これでタップが出来るようになったら設定項目は当たりです.

$ synclient TapButton1=1
$ synclient -l|grep TapButton1
    TapButton1              = 1

設定項目が判ったら設定ファイルに書いておきます.
今回は /etc/X11/xorg.conf.d/21-apple-touchpad.conf にしました.
とりあえずタップの設定だけ以下のように設定しました.
ファイルの用意ができたらXの再起動を行います.awesomeの場合 Mod4 + Shift + q とかで一旦Xを終了してログインし直します.

Section "InputClass"
    Identifier "touchpad"
    Driver "synaptics"
    MatchIsTouchpad "on"
        Option "TapButton1" "1" # 1本指タップを左クリックに
EndSection

他の設定項目も同様に設定していきます.
現在こんな感じにしています.

Section "InputClass"
    Identifier "touchpad"
    Driver "synaptics"
    MatchIsTouchpad "on"
        Option "TapButton1" "1" # 1本指タップを左クリックに
        Option "TapButton2" "3" # 2本指タップを右クリックに
        Option "TapButton3" "2" # 3本指タップを中クリックに
        Option "VertTwoFingerScroll" "on"       # 縦スクロールを有効
        Option "HorizTwoFingerScroll" "on"      # 横スクロールを有効
        Option "PalmDetect" "1" # 手のひら検出
EndSection

今回Debian stretch testing amd64ですが他の環境でも同様に行けると思います.

$ screenfetch
         _,met$$$$$gg.           mk@x220
      ,g$$$$$$$$$$$$$$$P.        OS: Debian testing stretch
    ,g$$P""       """Y$$.".      Kernel: x86_64 Linux 4.5.0-2-amd64
   ,$$P'              `$$$.      Uptime: 1d 12h 8m
  ',$$P       ,ggs.     `$$b:    Packages: 4379
  `d$$'     ,$P"'   .    $$$     Shell: bash 4.3.42
   $$P      d$'     ,    $$P     Resolution: 1366x768
   $$:      $$.   -    ,d$$'     WM: Awesome
   $$\;      Y$b._   _,d$P'      WM Theme: awesome
   Y$$.    `.`"Y$$$$P"'          CPU: Intel Core i5-2540M CPU @ 3.3GHz
   `$$b      "-.__               GPU: Mesa DRI Intel(R) Sandybridge Mobile
    `Y$$                         RAM: 4288MiB / 15934MiB
     `Y$$.
       `$$b.
         `Y$$b.
            `"Y$b._
                `""""

画像や動画をtextに変換するhiptextを試す

類似のものでlibcacaとかがありますが,

Turn images into text better than caca/aalib

とのことでもっといいものらしいです.
Texttop[1]で使われているので興味を持ったのですが,そのままではBuild出来なかったのでメモです.

build

READMEではこの辺が必要とのことです.

sudo apt-get install build-essential libpng12-dev libjpeg-dev \
    libfreetype6-dev libgif-dev ragel libavformat-dev libavcodec-dev \
    libswscale-dev libgflags-dev libgoogle-glog-dev

Debian stretch testingではこんな感じ?

$ sudo apt-get install build-essential libpng-dev libjpeg-dev \
      libfreetype6-dev libgif-dev ragel libavformat-dev libavcodec-dev \
      libswscale-dev libgflags-dev libgoogle-glog-dev

後はmakeするだけなんですが,こんなエラーが.新しいlibavに追従できてない感じ?

g++ -g -O3 -std=c++11 -Wall -Wextra -fno-exceptions -fno-rtti -MD  -march=native -c -o movie.o movie.cc
movie.cc: In member function ‘void Movie::PrepareRGB(int, int)’:
movie.cc:56:42: error: ‘PIX_FMT_RGB24’ was not declared in this scope
                       width_, height_, PIX_FMT_RGB24, SWS_FAST_BILINEAR,
                                          ^
In file included from graphic.h:10:0,
                 from movie.h:9,
                 from movie.cc:4:
movie.cc:64:38: error: ‘avcodec_alloc_frame’ was not declared in this scope
 CHECK(frame_ = avcodec_alloc_frame());
                                      ^
movie.cc:66:19: warning: ‘int avpicture_get_size(AVPixelFormat, int, int)’ is deprecated [-Wdeprecated-declarations]
   int rgb_bytes = avpicture_get_size(PIX_FMT_RGB24, width_, height_);
                   ^
In file included from /usr/include/x86_64-linux-gnu/libavformat/avformat.h:318:0,
                 from movie.cc:10:
/usr/include/x86_64-linux-gnu/libavcodec/avcodec.h:4898:5: note: declared here
 int avpicture_get_size(enum AVPixelFormat pix_fmt, int width, int height);
     ^
movie.cc:69:14: warning: ‘int avpicture_fill(AVPicture*, const uint8_t*, AVPixelFormat, int, int)’ is deprecated [-Wdeprecated-declarations]
   int prep = avpicture_fill(reinterpret_cast<AVPicture*>(frame_rgb_),
              ^
In file included from /usr/include/x86_64-linux-gnu/libavformat/avformat.h:318:0,
                 from movie.cc:10:
/usr/include/x86_64-linux-gnu/libavcodec/avcodec.h:4883:5: note: declared here
 int avpicture_fill(AVPicture *picture, const uint8_t *ptr,
     ^
movie.cc: In member function ‘Graphic Movie::Next()’:
movie.cc:94:5: warning: ‘void av_free_packet(AVPacket*)’ is deprecated [-Wdeprecated-declarations]
     av_free_packet(&packet);
     ^
In file included from /usr/include/x86_64-linux-gnu/libavformat/avformat.h:318:0,
                 from movie.cc:10:
/usr/include/x86_64-linux-gnu/libavcodec/avcodec.h:4040:6: note: declared here
 void av_free_packet(AVPacket *pkt);
      ^
movie.cc:94:27: warning: ‘void av_free_packet(AVPacket*)’ is deprecated [-Wdeprecated-declarations]
     av_free_packet(&packet);
                           ^
In file included from /usr/include/x86_64-linux-gnu/libavformat/avformat.h:318:0,
                 from movie.cc:10:
/usr/include/x86_64-linux-gnu/libavcodec/avcodec.h:4040:6: note: declared here
 void av_free_packet(AVPacket *pkt);
      ^
<ビルトイン>: ターゲット 'movie.o' のレシピで失敗しました
make: *** [movie.o] エラー 1

でも以下のPRを反映したら通りました :)

試してみる

サンプルとして,balls.jpg, obama.jpg があるのでこれを試してみます.
うまく動いていそうです.

47418

でも.pngはうまく動かない?

$ ./hiptext ~/Downloads/Tux.png
F0601 11:01:16.713266 30721 png.cc:35] Check failed: type == PNG_COLOR_TYPE_RGB || type == PNG_COLOR_TYPE_RGBA png bad type: /home/mk/Downloads/Tux.png
*** Check failure stack trace: ***
    @     0x7fa48d3c013d  google::LogMessage::Fail()
    @     0x7fa48d3c1fa3  google::LogMessage::SendToLog()
    @     0x7fa48d3bfccb  google::LogMessage::Flush()
    @     0x7fa48d3c298e  google::LogMessageFatal::~LogMessageFatal()
    @           0x41859f  LoadPNG()
    @           0x403fa8  main
    @     0x7fa489e59610  __libc_start_main
    @           0x40a229  _start
    @              (nil)  (unknown)
中止
$ convert ~/Downloads/Tux.png ./Tux.jpg
$ ./hiptext Tux.jpg

`.jpg`に変換したらいけてる感じですがなんか欠けてます.

26780171563 8d301b27a4

動画再生もいけます.再生のみで一時定位などの操作は出来ない感じ?

今のところlibcacaや動画ではvlcやmplayerなんかのほうがパッケージで導入できるのでお手軽そう.

とりあえず動くようになったので次はTexttopを試してみようと思います.

書き込み専用ぽいsamba共有を作る

書き込み専用の共有

sambaでデータの提出専用みたいな共有が作れないかと試してみました.

sambaサーバ の /etc/samba/smb.conf を編集して write-only という共有を作成.

[write-only]
  # 共有ファイルの保存先
  path = /export/data/write-only
  # 共有が見えるように
  browseable = yes
  # ゲストアクセス許可
  guest ok = yes
  guest only = yes
  # 書き込み可能
  writable = Yes
  # ゲストで書き込むと nobody アカウントで保存される
  guest account = nobody
  # umaskを 0333 に
  create mask = 0333
  directory mask = 0333
  # 読み込み権のないファイルを見えなくする
  hide unreadable = Yes

samba の設定を反映する

$ sudo service samba reload

クライアントPCから共有に接続して動作確認する

gvfs-mount で mount して,マウントポイントを確認.

$ gvfs-mount smb://192.168.1.102/write-only
$ mount|grep gvfs
gvfsd-fuse on /run/user/1000/gvfs type fuse.gvfsd-fuse (rw,nosuid,nodev,relatime,user_id=1000,group_id=1000)
client$ $ ls -la /run/user/1000/gvfs/smb-share\:server\=192.168.1.102\,share\=write-only/
合計 0
drwx------ 1 mk mk 0  5月 25 19:13 .
dr-x------ 3 mk mk 0  5月 21 05:54 ..

書き込んでみる

$ echo hoge > /run/user/1000/gvfs/smb-share\:server\=192.168.1.102\,share\=write-only/hoge

書き込んだファイルは見えない

$ ls -la /run/user/1000/gvfs/smb-share\:server\=192.168.1.102\,share\=write-only/
合計 0
drwx------ 1 mk mk 0  5月 25 19:24 .
dr-x------ 3 mk mk 0  5月 21 05:54 ..
$ cat /run/user/1000/gvfs/smb-share\:server\=192.168.1.102\,share\=write-only/hoge
$ cat: '/run/user/1000/gvfs/smb-share:server=192.168.1.102,share=write-only/hoge': 許可がありません

serverではこんな感じで見える

$ ls -lA /export/data/write-only
合計 4
--wx-w---- 1 nobody nogroup 5  5月 25 19:24 hoge
$ sudo cat /export/data/write-only/hoge
hoge

クライアントから同名のファイル名で上書きするとエラーもなく書き込める

$ echo fuga > /run/user/1000/gvfs/smb-share\:server\=192.168.1.102\,share\=write-only/hoge

サーバで書き換わっているのを確認

$ sudo cat /export/data/write-only/hoge
fuga


PulseAudioでライン入力を使う

PCの熱が辛い

最近暖かくなってきました.NotePCにあまり仕事をさせていなくてもCPU温度は65~75度くらい.

$ acpi -ti
Thermal 0: ok, 71.0 degrees C
Thermal 0: trip point 0 switches to mode critical at temperature 99.0 degrees C

Flash動画をブラウザ経由で再生すると初めのうちはそうでもないけどすぐに130%くらいCPUを使ってPCの動作重く&CPU熱くなります(特にニコ生TS).そして最近は100度を超えてシャットダウンしてしまうように.

  • 再生初め

$ top -bn1 | grep -A 3 PID
  PID USER      PR  NI    VIRT    RES    SHR S  %CPU %MEM     TIME+ COMMAND
21114 mk        20   0 1114852 214732 103616 S  43.8  1.3   0:13.54 plugin-containe
22343 mk         9 -11  588044  12992   9416 S  12.5  0.1   1:30.03 pulseaudio
 3816 mk        20   0  561012 172172 147924 S   6.2  1.1   1:51.02 Xorg
  • 暫く経ったら

$ top -bn1 | grep -A 3 PID
  PID USER      PR  NI    VIRT    RES    SHR S  %CPU %MEM     TIME+ COMMAND
21114 mk        20   0 1168452 241256 125892 S 147.1  1.5   2:12.09 plugin-containe
25291 mk        20   0   43820   3936   3176 R  17.6  0.0   0:00.03 top
 3816 mk        20   0  574540 171532 146696 S  11.8  1.1   2:08.95 Xorg

※plugin-containeがpepperflashのプロセス.

pepperflashをAdobe Flash Playerに変更するとましになったような気もしましたがよくクラッシュする&スクリーンセーバ自動抑制機能などもないようなのでちょっと使いづらいです.

$ sudo update-alternatives --config flash-mozilla.so
alternative flash-mozilla.so (/usr/lib/mozilla/plugins/flash-mozilla.so を提供) には 2 個の選択肢があります。

  選択肢    パス                                                                          優先度  状態
------------------------------------------------------------
* 0            /usr/lib/browser-plugin-freshplayer-pepperflash/libfreshwrapper-flashplayer.so   70        自動モード
  1            /usr/lib/browser-plugin-freshplayer-pepperflash/libfreshwrapper-flashplayer.so   70        手動モード
  2            /usr/lib/flashplugin-nonfree/libflashplayer.so                                   50        手動モード

現在の選択 [*] を保持するには <Enter>、さもなければ選択肢の番号のキーを押してください:

スマホやChromeCastで動画再生を試みる&PC経由でBluetoothヘッドセットで音声を聞きたい

スマホやChromeCastで再生して外部ディスプレイに映すようにしたらどうだろうと試してみるとニコニコ動画/生放送は画質が悪くなってしまうけど他のサービスでは良さそうです.しかし音声をBluetoothヘッドセットで聞きたいです.それもPCと一緒に.
ということで,以下のような接続を試してみました.PC(Debian)でのBluetoothはblueman-appletを,音声デバイスの切り替えなどはpavucontrolを,Bluetooth音声のプロファイルはA2DPを利用しています.

  • ○ Android → Bluetooth → PC(Debian) → Bluetooth HeadSet

  • ○ iOS → Bluetooth → PC(Debian) → Bluetooth HeadSet

  • ✘ Android → 3.5mmライン → PC(Debian) → Bluetooth HeadSet

  • ✘ iOS → 3.5mmライン → PC(Debian) → Bluetooth HeadSet

  • ✘ ChromeCast → HDMI → HDMIモニタ → 3.5mmライン → PC(Debian) → Bluetooth HeadSet

Bluetooth ではうまく行くのですが,3.5mmライン入力がうまく行きません.ChromeCastはBluetoothが使えないのでちょっと困ります.
ライン入力の波形は出ているしレコーダアプリでラインからの音の録音は出来るのでPCに音は流れてきているようです.

以下のFAQページによると`module-loopback`モジュールを読み込むと良いようです.

以下のようにすると反映されてライン入力からの音が出るようになりました.

$ pactl load-module module-loopback

ログアウトすると設定は消えるので以下の辺りの設定ファイルに書いておくと良さそうです.

$ man default.pa|grep -A5 'SYNOPSIS'
SYNOPSIS
       ~/.config/pulse/default.pa

       /etc/pulse/default.pa

       /etc/pulse/system.pa

/etc/pulse/default.pa~/.config/pulse/default.pa にコピーして編集してPulseAudioを再起動して反映出来ました.

$ mkdir -p ~/.config/pulse
$ cp /etc/pulse/default.pa ~/.config/pulse/default.pa
$ vi ~/.config/pulse/default.pa
$ diff /etc/pulse/default.pa ~/.config/pulse/default.pa
167a168,170
>
> # 3.5mm Juck In
> load-module module-loopback
$ /usr/bin/pulseaudio -k
$ /usr/bin/pulseaudio --start --log-target=syslog

再起動しても問題無さそうです.
とりあえずこの状態でライン入力からの音声とPCの音声が同時にBluetoothヘッドセットで聞ける状態になりました.

しかし問題点がひとつ.ライン入力とBluetooth(A2DP)入力を同時に行おうとするとライン入力の音が聞こえなくなってしまいます.これは要調査ですね…….

<追記>

~/.config/pulse/default.pa の以下をコメントアウトで行けてるよう.これ出力側だけかと思ってたんですが入力も効くんですかね.

> #load-module module-switch-on-connect

てことでライン入力とBluetooth入力とPCの音声が全部同時に出力できるようになりました :)

</追記>

環境

コンポジットマネージャーのXcompmgrでウィンドウ透過設定

久々にMATE環境を使ってみています.
awesomeだとショートカットキーでウィンドウの配置を設定できるので簡単にウィンドウを並べ変えて動画を見ながら別のことをするといったことが簡単に出来ました.しかしMATEで同じことをしようとすると面倒.以前はGnome端末で背景を透過させていましたがこの機能はなくなっていました.

Gnome端末から無くなった後もMATE端末には透過機能が残っていましたがこちらからもいつの間にかなくなっていました.もう復活することは無さそうなので他の端末アプリを幾つか試してみましたが擬似透過しか見当たりません.

ということで今回はXcompmgrを試してみました.

前提

xorgでComposite, RENDER が有効になっている必要がああります.以下OKの例.

$ xdpyinfo | grep -i "render\|composite"
    Composite
    RENDER

必要パッケージの導入

コンポジットマネージャーのxcompmgrと,透過の設定をするtranssetの含まれたx11-appsを導入します.

$ sudo apt install xcompmgr x11-apps

コンポジットマネージャの起動

$ xcompmgr -c &

とか

$ xcompmgr -cf &

とか

$ xcompmgr -c -C -t-5 -l-5 -r4.2 -o.55 &

とかお好みで.

transsetでの透過

xcompmgrが起動した状態でtranssetを使うとウィドウを透過させることが出来ます.
引数には0~1の値を設定します.0が完全に透明.1が不透明です.

$ transset 0.6

として実行するとマウスカーソルが+マークになり,クリックしたウィンドウが透過されます.
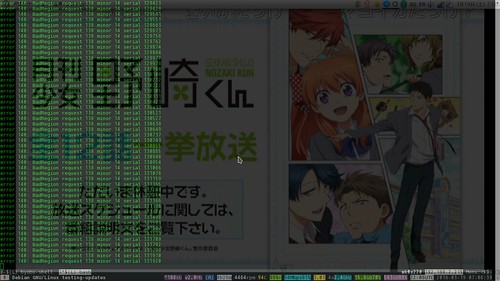
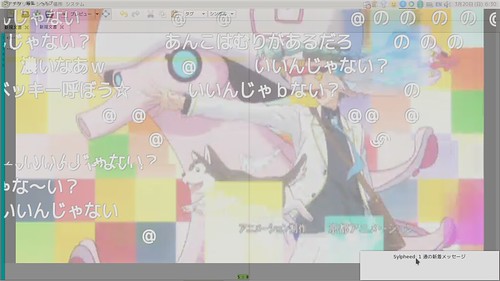
以下はブラウザフルスクリーンでニコ生を再生した上に透過設定したMATE端末を表示しています.

Screenshot at 2016-03-19 07:06:39

自動起動設定

毎回手動で起動&設定するのは面倒なのでこんな感じで自動起動設定をします.
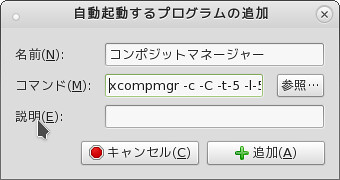
コンポジットマネージャーは「システム」->「設定」>「ユーザ向け」->「自動起動するアプリ」から.

Screenshot at 2016-03-20 06:27:22

MATE端末の透過設定は~/.bashrcに以下のように書いてbash起動時にMATE端末だったらtranssetを起動するようにしてみました.sleepを付けないとうまく動きませんでした.sleepの値は環境によって変わると思います.

$ tail -4 ~/.bashrc
case "$COLORTERM" in
    mate-terminal) sleep 0.3 && transset -a 0.6 > /dev/null;;
esac
 

ショートカット設定

MATE端末だけを透過設定する場合はここまでの設定で大丈夫ですが,他のウィンドウや透過度を変更するのにショートカット設定をしておくと便利そうです.

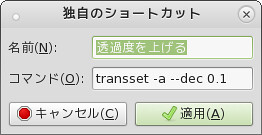
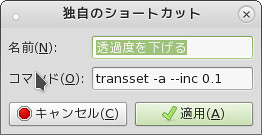
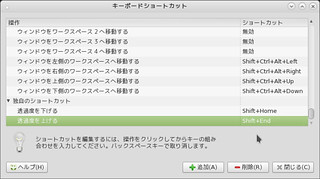
「システム」->「設定」->「ハードウェア」->「キーボードショートカット」でtranssetを登録してショートカットを設定します.

ここで設定したtranssetのオプションは-aはアクティブウィンドウの指定,--inc/--decはインクリメント,デクリメントのオプションです.

Screenshot at 2016-03-20 07:48:08Screenshot at 2016-03-20 07:48:03

Screenshot at 2016-03-20 06:25:27

これで未設定のアプリで透過させたり,ちょっと透過度を調整したいと行った時にショートカットですぐ設定できるようになりました :)

Screenshot at 2016-03-20 06:30:06


Dragonboard 410c eMMC領域のOS入れ替え方法2種類

以下のガイドのとおりなんですが一応メモを.

microSD Card経由と,Fastboot経由の2種類があります.
microSD Card経由の場合はDIP switchの変更が必要でディスプレイとマウスが必要です.
Fastboot経由の場合はHostPCとmicroUSB Cableが必要です.USB-LANアダプタを使えばヘッドレスで全て設定できます.

#こういうのを使ったほうがいいけど.

microSD Card経由での書き込み

USBキーボード,マウス,HDMIモニタと4GB以上のmicroSDが必要です.

イメージの入手とmicroSD Cardへの書き込み

このファイル名は現在の最新です.以下のページを見て最新を入手してください.

$ wget http://builds.96boards.org/releases/dragonboard410c/linaro/debian/latest/dragonboard410c_sdcard_install_debian-66.zip http://builds.96boards.org/releases/dragonboard410c/linaro/debian/latest/MD5SUMS.txt
$ md5sum -c MD5SUMS.txt 2>&1 | egrep -v 'FAILED|ありません'
dragonboard410c_sdcard_install_debian-66.zip: 完了
md5sum: 警告: 一覧にある 15 個のファイルが読み込めませんでした
$ unzip -l dragonboard410c_sdcard_install_debian-66.zip
Archive:  dragonboard410c_sdcard_install_debian-66.zip
  Length      Date    Time    Name
---------  ---------- -----   ----
    14022  2016-02-27 14:36   license.txt
2621440000  2016-02-27 14:36   db410c_sd_install_debian.img
---------                     -------
2621454022                     2 files
$ unzip dragonboard410c_sdcard_install_debian-66.zip
$ cat ./db410c_sd_install_debian.img | pv | sudo dd of=/dev/sdz bs=4M

microSDからの起動とセットアップ

microSD CardをDragonboard 410cに差し込んで,基盤の裏面のDIP switch(s6)を操作してSD boot(2)だけをOnにします.シルクがあるので解りやすいです.
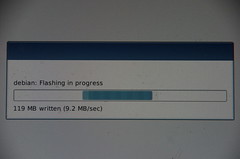
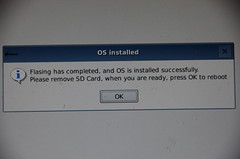
Dragonboard 410cにUSBキーボード,マウス,HDMIモニタを接続して起動するとシンプルなインストーラが起動するのでポチポチと押していくと完了です.

IMGP2730IMGP2731IMGP2732IMGP2733

一旦電源を切ってDIP swatchを元に戻し,microSD Cardを取り外して起動するとLXDEが起動してきます.

ちなみにDIP switchにUSB bootもあるので試してみましたが未実装化手順が違うのかうまく行きませんでした.

Fastboot経由での書き込み

microSD経由より手順が多いですが必要なものが少ない&DIP swatchの操作が必要ないのでケースに入れている場合などもいいかもしれません.
microUSB Cableは必要なので用意してください.

fastbootの導入

HostPCにfastbootを導入します.Android開発環境が既にある人は入っていそうですね.

$ sudo apt install android-tools-fastboot

bootloaderイメージの入手

次のsiteからbootloaderイメージを入手します.最新版を入手してください.
96Boards Builds for: latest

ディレクトリを掘って展開しておきます.

$ unzip -l dragonboard410c_bootloader_emmc_linux-46.zip 
Archive:  dragonboard410c_bootloader_emmc_linux-46.zip
  Length      Date    Time    Name
---------  ---------- -----   ----
57344  2016-02-10 10:00   hyp.mbn
   744042  2016-02-10 10:00   emmc_appsboot.mbn
14022  2016-02-10 10:00   license.txt
   154980  2016-02-10 10:00   rpm.mbn
   483468  2016-02-10 10:00   tz.mbn
 23102976  2016-02-10 10:00   NON-HLOS.bin
   80  2016-02-10 10:00   sec.dat
   252868  2016-02-10 10:00   sbl1.mbn
34304  2016-02-10 10:00   gpt_both0.bin
  324  2016-02-10 10:00   flashall
---------                     -------
 24844408                     10 files
$ mkdir dragonboard410c_bootloader_emmc_linux-46
$ unzip dragonboard410c_bootloader_emmc_linux-46.zip

fastboot modeに入るために基板上の(-)ボタン(s4)を押しながら電源を投入します.すぐにfastboot modeになるのでfastboot devicesコマンドで確認します.何も出てない場合は失敗しているので電源投入をやり直します.

$ sudo fastboot devices
b5d12d18        fastboot

デバイスが認識できているのが確認できたらflashall scriptで書き込みを開始します.書き込みを開始した後は(-)ボタン(s4)を離しても大丈夫そうです.

$ sudo ./flashall
target reported max download size of 268435456 bytes
sending 'partition' (33 KB)...
OKAY [  0.005s]
writing 'partition'...
OKAY [  1.451s]
finished. total time: 1.457s
target reported max download size of 268435456 bytes
sending 'hyp' (56 KB)...
OKAY [  0.005s]
writing 'hyp'...
OKAY [  0.011s]
finished. total time: 0.016s
target reported max download size of 268435456 bytes
sending 'modem' (22561 KB)...
OKAY [  0.732s]
writing 'modem'...
OKAY [  0.756s]
finished. total time: 1.488s
target reported max download size of 268435456 bytes
sending 'rpm' (151 KB)...
OKAY [  0.008s]
writing 'rpm'...
OKAY [  0.010s]
finished. total time: 0.018s
target reported max download size of 268435456 bytes
sending 'sbl1' (246 KB)...
OKAY [  0.011s]
writing 'sbl1'...
OKAY [  0.010s]
finished. total time: 0.021s
target reported max download size of 268435456 bytes
sending 'sec' (0 KB)...
OKAY [  0.004s]
writing 'sec'...
OKAY [  0.006s]
finished. total time: 0.010s
target reported max download size of 268435456 bytes
sending 'tz' (472 KB)...
OKAY [  0.017s]
writing 'tz'...
OKAY [  0.015s]
finished. total time: 0.033s
target reported max download size of 268435456 bytes
sending 'aboot' (726 KB)...
OKAY [  0.026s]
writing 'aboot'...
OKAY [  0.025s]
finished. total time: 0.052s
erasing 'boot'...
OKAY [  0.036s]
finished. total time: 0.037s
erasing 'rootfs'...
OKAY [  0.267s]
finished. total time: 0.267s
erasing 'devinfo'...
OKAY [  0.034s]
finished. total time: 0.034s

boot/root領域の書き込み

OSイメージのboot/root領域のデータを入手して書き込みます.
書き込みはfastboot modeにしてから行ってください.

$ wget http://builds.96boards.org/releases/dragonboard410c/linaro/debian/latest/linaro-jessie-alip-qcom-snapdragon-arm64-20160227-66.img.gz http://builds.96boards.org/releases/dragonboard410c/linaro/debian/latest/boot-linaro-jessie-qcom-snapdragon-arm64-20160227-66.img.gz http://builds.96boards.org/releases/dragonboard410c/linaro/debian/latest/MD5SUMS.txt
$ md5sum -c MD5SUMS.txt 2&>1 |grep 完了
boot-linaro-jessie-qcom-snapdragon-arm64-20160227-66.img.gz: 完了
linaro-jessie-alip-qcom-snapdragon-arm64-20160227-66.img.gz: 完了
$ sudo fastboot flash boot ./boot-linaro-jessie-qcom-snapdragon-arm64-20160227-66.img 
target reported max download size of 268435456 bytes
sending 'boot' (17480 KB)...
OKAY [  0.562s]
writing 'boot'...
OKAY [  0.329s]
finished. total time: 0.891s
$ sudo fastboot flash rootfs ./linaro-jessie-alip-qcom-snapdragon-arm64-20160227-66.img 
target reported max download size of 268435456 bytes
sending sparse 'rootfs' (262140 KB)...
OKAY [  9.309s]
writing 'rootfs'...
OKAY [ 18.304s]
sending sparse 'rootfs' (262140 KB)...
OKAY [  9.236s]
writing 'rootfs'...
OKAY [ 19.888s]
sending sparse 'rootfs' (262140 KB)...
OKAY [  9.255s]
writing 'rootfs'...
OKAY [ 19.759s]
sending sparse 'rootfs' (262140 KB)...
OKAY [  9.295s]
writing 'rootfs'...
OKAY [ 19.834s]
sending sparse 'rootfs' (262140 KB)...
OKAY [  9.317s]
writing 'rootfs'...
OKAY [ 19.828s]
sending sparse 'rootfs' (262140 KB)...
OKAY [  9.290s]
writing 'rootfs'...
OKAY [ 19.765s]
sending sparse 'rootfs' (59016 KB)...
OKAY [  2.118s]
writing 'rootfs'...
OKAY [  4.450s]
finished. total time: 179.649s

起動するとlxdeが起動してきます.sshdも起動してくるのでdhcpdの動いている環境でUSB-LANアダプタを接続すればヘッドレス環境で設定が可能です.avahiは動いてないのでipはポートスキャンなりarpなりで探してください.

$ sudo nmap -sP 192.168.2.200-255 --spoof-mac 00:90:cc:e8:0b:db

Starting Nmap 7.01 ( https://nmap.org ) at 2016-03-11 01:39 JST
Spoofing MAC address 00:90:CC:E8:0B:DB (Planex Communications)
Nmap scan report for 192.168.2.203
Host is up.
Nmap done: 56 IP addresses (1 host up) scanned in 19.15 seconds
$ sudo arp|grep 00:90:cc
192.168.2.214            ether   00:90:cc:e8:0b:db   C                     wlp3s0

ユーザ名はlinaroパスワードも同じです.

$ ssh linaro@192.168.2.202
$ uname -a
Linux linaro-alip 4.4.0-linaro-lt-qcom #1 SMP PREEMPT Sat Feb 27 04:55:16 UTC 2016 aarch64 GNU/Linux
$ lsb_release -a
No LSB modules are available.
Distributor ID: Debian
Description:    Debian GNU/Linux 8.3 (jessie)
Release:        8.3
Codename:       jessie

ちなみに,セットアップ終了後のeMMCの容量はこのくらいです.

$ df /
Filesystem      1K-blocks    Used Available Use% Mounted on
/dev/mmcblk0p10   7260748 1814312   5120404  27% /

後は普通のDebianなのでsource listを日本に向けてUpdateしてほげりましょう.

/etc/apt/sources.list.d/の下はこんな感じ.後ろ2つは/etc/apt/sources.listと重複しているような?

$ find /etc/apt/sources.list.d/ -type f | xargs -n1 -I{} sh -c "echo \#-- {} ; cat {}"
#-- /etc/apt/sources.list.d/hwpack.qcom.list
deb http://repo.linaro.org/ubuntu/qcom-overlay jessie main
#-- /etc/apt/sources.list.d/linaro-overlay-repo.list
deb http://repo.linaro.org/ubuntu/linaro-overlay jessie main
deb-src http://repo.linaro.org/ubuntu/linaro-overlay jessie main
#-- /etc/apt/sources.list.d/hwpack.debian.list
deb http://ftp.debian.org/debian/ jessie main contrib non-free
#-- /etc/apt/sources.list.d/hwpack.backports.list
deb http://ftp.debian.org/debian/ jessie-backports main
Radikoを自動的に録音してPodcast化してくれるradicastを試す

Radikoを自動的に録音してPodcast化してくれるradicastというものを見つけました.

昔はこんな感じで録音したりしていましたが仕様が変わって録音できなくなって対応というのが面倒で最近は録音していませんでした.たまに聞くときはAndroidのRazikoを使っています.でもradicastならお手軽に動かせてPodcastとして扱えるので便利そうということで試してみました.

試した環境はUbuntu 14.04 amd64/Debian stretch testing amd64/Rasbian jessieですが,Ubuntu環境では録音開始時に以下のようにコアダンプしてしまうようでうまく行っていません :-(

2016/03/09 05:20:00 [radiko] start record
2016/03/09 05:20:00 [radiko] GET http://radiko.jp/player/swf/player_3.0.0.01.swf
2016/03/09 05:20:04 [radiko] POST https://radiko.jp/v2/api/auth1_fms
Segmentation fault (コアダンプ)

dockerでも動きますが,今回は実機で動かしています.

必要なpkgの導入

$ sudo apt install libav-tools swftools rtmpdump golang-go

※Debian stretchの場合はlibav-toolsの代わりにffmpegを導入.

go getで導入

$ GOPATH=~/usr/local/go go get github.com/soh335/radicast

オプションはこんな感じでした.

$ ~/usr/local/go/bin/radicast -h
Usage of /home/mk/usr/local/go/bin/radicast:
  -bitrate string
        bitrate (default "64k")
  -buffer int
        buffer for recording (default 60)
  -config string
        path of config.json (default "config.json")
  -converter string
        ffmpeg or avconv. If not set this option, radicast search its automatically.
  -host string
        host (default "0.0.0.0")
  -output string
        output (default "output")
  -port string
        port (default "3355")
  -setup
        initialize json configuration
  -title string
        title (default "radicast")

設定ファイル作成

--setupオプションでスケルトンを作成して,

$ ~/usr/local/go/bin/radicast --setup > ~/usr/local/go/etc/radicast.json
$ cat ~/usr/local/go/etc/radicast.json
{
  "HOUSOU-DAIGAKU": [],
  "MBC": [],
  "RN1": [],
  "RN2": []
}

次のページを参考にcron形式で設定します.crontabと違い秒単位まで指定できるようです.

例えば"0 0 7 * * MON-FRI" だと月曜から金曜の07:00:00の番組を録音となります.
録音停止は自動的にされるようです.

$ cat ~/usr/local/go/etc/radicast.json
{
  "HOUSOU-DAIGAKU": [],
  "MBC": [
    "0 0 5 * * MON-FRI",
    "0 10 5 * * MON-FRI",
    "0 0 7 * * MON-FRI"
  ],
  "RN1": [],
  "RN2": []
}

実行

設定ファイルを指定して実行します.

$ ~/usr/local/go/bin/radicast -config=$HOME/usr/local/go/etc/radicast.json
2016/03/09 05:00:12 [radicast] station:MBC spec:0 0 5 * * MON-FRI
2016/03/09 05:00:12 [radicast] station:MBC spec:0 10 5 * * MON-FRI
2016/03/09 05:00:12 [radicast] station:MBC spec:0 0 7 * * MON-FRI
2016/03/09 05:00:12 [radicast] start new cron
2016/03/09 05:00:12 [server] start 0.0.0.0:3355

指定時刻になると,番組情報を取得して録音が始まり,番組終了時に録音が終了して次のジョブまで待機します.

2016/03/09 06:30:00 [radiko] start record
2016/03/09 06:30:00 [radiko] GET http://radiko.jp/player/swf/player_3.0.0.01.swf
2016/03/09 06:30:04 [radiko] POST https://radiko.jp/v2/api/auth1_fms
2016/03/09 06:30:05 [radiko] POST https://radiko.jp/v2/api/auth2_fms
2016/03/09 06:30:06 [radiko] GET http://radiko.jp/v2/api/program/today?area_id=JP46
2016/03/09 06:30:07 [radiko] start recording モーニング・スマイル
2016/03/09 06:30:07 [radiko] rtmpdump command: /usr/bin/rtmpdump --live --quiet -r rtmpe://f-radiko.smartstream.ne.jp --playpath simul-stream.stream --app MBC/_definst_ -W http://radiko.jp/player/swf/player_3.0.0.01.swf -C S:"" -C S:"" -C S:"" -C S:J_Rb9kLWN2Cb5XlcGqQjfw --stop 1853 -o -
2016/03/09 06:30:07 [radiko] converter command: /usr/bin/ffmpeg -y -i - -vn -acodec libmp3lame -ar 44100 -ab 64k -ac 2 /tmp/radiko240330221/radiko_0.mp3

データは以下のようにoutput以下に保存されています.

$ find output -ls
  6724248      0 drwxr-xr-x   1 mk       mk             36  3月  9 05:55 output
  6724778      0 drwxr-xr-x   1 mk       mk             44  3月  9 05:55 output/20160309053000_MBC
  6724327  10168 -rw-r--r--   1 mk       mk       10409132  3月  9 05:55 output/20160309053000_MBC/podcast.mp3
  6724779      4 -rw-r--r--   1 mk       mk            650  3月  9 05:55 output/20160309053000_MBC/podcast.xml

録音中のテンポラリファイルは/tmp以下に作られます.

$ ls -lA /tmp/radiko077215706/
合計 5184
-rw-r--r-- 1 mk mk 5223512  3月  9 07:10 radiko_0.mp3

録音したデータはPodcastとして配信されます.このURLは規定値ではlocalhostからしかアクセスできません.このURLをPodcast Aggregatorに指定してあげると普通にPodcastとして扱えます :)

$ xmllint http://localhost:3355/rss
<?xml version="1.0" encoding="UTF-8"?>
<rss xmlns:itunes="http://www.itunes.com/dtds/podcast-1.0.dtd" version="2.0">
    <channel>
        <title>radicast</title>
        <itunes:owner/>
        <itunes:image/>
        <itunes:category/>
        <item>
            <title>生島ヒロシのおはよう一直線 (2016-03-09 05:30:00 +0900 JST)</title>
            <itunes:author>生島ヒロシ</itunes:author>
            <itunes:summary> &lt;br /&gt;&lt;A href="http://www.mbc.co.jp/radio/" target="_blank"&gt;&lt;img src="http://www.mbc.co.jp/radio/radiko/bn/mbcradio_pr1410.png" alt="MBCradio" /&gt;&lt;/A&gt;&lt;br /&gt;&lt;br /&gt;twitterハッシュタグは「&lt;a href="http://twitter.com/#!/search/%23mbc1107"&gt;#mbc1107&lt;/a&gt;」</itunes:summary>
            <itunes:image/>
            <enclosure url="http://localhost:3355/podcast/20160309053000_MBC.mp3" length="10409132" type="audio/mpeg"/>
            <pubDate>Wed, 9 Mar 2016 05:55:45 +0900</pubDate>
        </item>
    </channel>
</rss>

Podcast Aggregatorとこのサーバが別の場合以下のように-hostオプションを指定してインターフェイスに割り当てたipを指定するとそのネットワークからアクセスできるようになります.

$ ~/usr/local/go/bin/radicast -config=$HOME/usr/local/go/etc/radicast.json -host 192.168.2.203
  :
2016/03/09 07:42:34 [server] start 192.168.2.203:3355

proxy

は使えない感じかな?

$ w3m -dump http://radiko.jp/area
document.write('<span class="JP46">KAGOSHIMA JAPAN</span>');
$ tsocks w3m -dump http://radiko.jp/area
document.write('<span class="JP13">TOKYO JAPAN</span>');
$ ALL_PROXY=socks5h://localhost:8080 ~/usr/local/go/bin/radicast -setup
2016/03/09 07:56:00 [radiko] GET http://radiko.jp/player/swf/player_3.0.0.01.swf
2016/03/09 07:56:01 [radiko] POST https://radiko.jp/v2/api/auth1_fms
2016/03/09 07:56:02 [radiko] POST https://radiko.jp/v2/api/auth2_fms
2016/03/09 07:56:02 [radiko] GET http://radiko.jp/v2/api/program/today?area_id=JP46
{
  "HOUSOU-DAIGAKU": [],
  "MBC": [],
  "RN1": [],
  "RN2": []
}
$ tsocks ~/usr/local/go/bin/radicast -setup
   :
  "MBC": [],
   :
$ tsocks ~/usr/local/go/bin/radicast -setup
   :
  "MBC": [],
   :
$ ALL_PROXY=http://localhost:8080 ~/usr/local/go/bin/radicast -setup
   :
  "MBC": [],
   :