Nextcloud を 15 にアップグレードしようとしてコケる

20181212_05:12:42-18746

Nextcloud 15 がリリースされました.

14.0.4 からアップグレードしようとしましたが失敗しました.そのメモです.

$ sudo -u www-data php7.0 ./occ upgrade
Nextcloud or one of the apps require upgrade - only a limited number of commands are available
You may use your browser or the occ upgrade command to do the upgrade
Set log level to debug
Updating database schema
Updated database
UnexpectedValueException: The files of the app "user_external" were not correctly replaced before running the update
Update failed
Maintenance mode is kept active
Reset log level

整合性が保たれていないようなので手動でアーカイブを入手して比較すると同じに見える

$ wget https://download.nextcloud.com/server/releases/nextcloud-15.0.0.tar.bz2 https://download.nextcloud.com/server/releases/nextcloud-15.0.0.tar.bz2.asc
$ gpg --verify ./nextcloud-15.0.0.tar.bz2.asc
gpg: 署名されたデータが'./nextcloud-15.0.0.tar.bz2'にあると想定します 
gpg: 2018年12月10日 19時27分11秒 JSTにRSA鍵ID A724937Aで施された署名
gpg: "Nextcloud Security <security@nextcloud.com>"からの正しい署名
gpg: *警告*: この鍵は信用できる署名で証明されていません!
gpg:          この署名が所有者のものかどうかの検証手段がありません。 
主鍵フィンガー・プリント: 2880 6A87 8AE4 23A2 8372  792E D758 99B9 A724 937A
$ tar tvf ./nextcloud-15.0.0.tar.bz2 | lv
$ tar xf ./nextcloud-15.0.0.tar.bz2
$ sudo -u www-data rsync -acvvn ./nextcloud/apps/user_external /var/www/home.matoken.org/nextcloud/apps/
sending incremental file list
delta-transmission disabled for local transfer or --whole-file
user_external/
user_external/appinfo/app.php is uptodate
user_external/appinfo/database.xml is uptodate
user_external/appinfo/info.xml is uptodate
user_external/appinfo/signature.json is uptodate
user_external/img/app.svg is uptodate
user_external/lib/base.php is uptodate
user_external/lib/ftp.php is uptodate
user_external/lib/imap.php is uptodate
user_external/lib/smb.php is uptodate
user_external/lib/webdavauth.php is uptodate
total: matches=0  hash_hits=0  false_alarms=0 data=0

sent 515 bytes  received 587 bytes  2,204.00 bytes/sec
total size is 19,690  speedup is 17.87 (DRY RUN)

このあたりのバグぽい

ちなみに user_external はFTP, IMAP, SMB の認証周りのよう.

Authenticate user login against FTP, IMAP or SMB.

とりあえず該当の user_external を無効にしてアップグレードは通った

$ sudo -u www-data php7.0 ./occ app:disable user_external
$ sudo -u www-data php7.0 ./occ upgrade

通ったけど無効にしていても怒られる

Some files have not passed the integrity check. Further information on how to resolve this issue can be found in the documentation. (List of invalid files… / Rescan…)

Technical information
=====================
The following list covers which files have failed the integrity check. Please read
the previous linked documentation to learn more about the errors and how to fix
them.

Results
=======
- user_external
    - EXTRA_FILE
        - user_external/appinfo/signature.json

Raw output
==========
Array
(
    [user_external] => Array
        (
            [EXTRA_FILE] => Array
                (
                    [user_external/appinfo/signature.json] => Array
                        (
                            [expected] => 
                            [current] => 37efcee67605ab01a595df9b8e37a63f0260a8d795cb4af9b1b40e137ace928193747445954b22455fcbfd1758ea9b663153afc73438f5370725682e344c8723
                        )

                )

        )

)

まだ非対応アプリも多いしメイン環境は暫く待ったほうが良さそうな感じです.

環境

$ sudo -u www-data php7.0 ./occ status -v
  - installed: true
  - version: 15.0.0.10
  - versionstring: 15.0.0
  - edition: 
$ lsb_release -d
Description:    Ubuntu 16.04.5 LTS
$ uname -m
x86_64
Nextcloud 14 の Telegram を使った2要素認証

先日ファイル共有ソフトの Nextcloud 14がリリースされました.

新機能のうちSignal/Telegram/SMS による2要素認証のサポートが気になります.

Signal/Telegram/SMS 2FA support
A new 2-factor authentication provider named ‘gateway’ was introduced which allows users to use the secure messaging apps Signal and Telegram as well as various SMS gateways as second factor to secure their authentication.

SMSはplaySMS, websms.deを利用するようです.SignalもTelegramもセキュアなメッセージングサービスなのでこういう用途に向いていそうです.どちらも公式でLinux x86_64のデスクトップアプリが提供されています.アプリの出来は今の所Telegramのほうが上だと思います.Arm Linuxだと公式のものはないのですが,TelegramについてはCLIのアプリがあり,Raspberry Pi の Raspbian stretch でも要patchで動作しました.(Webアプリもあるのでそちらでも動作すると思うが未確認)

SMSはやったことがあるし,Telegram が使いやすい.てことでTelegramの設定をしてみました.まだ未実装な機能が多くちょっと面倒なのでメモしておきます.

Two-Factor Gateway の導入

Nextcloud 14に Two-Factor Gateway アプリを導入します.管理者アカウントで「アプリ」の「セキュリティ」から導入するのが楽でしょう.

導入するとNextcloudの「設定」の「セキュリティ」の中に「Message gateway second-factor auth」という項目が現れますが,設定が出来ません.

GitHubのドキュメントをみると未だ未実装の機能が多いようです.

Telegram Bot の作成

TOTPコードの送信する Telegram Bot を作成します.作成はTelegram のドキュメントを参照して作成します.

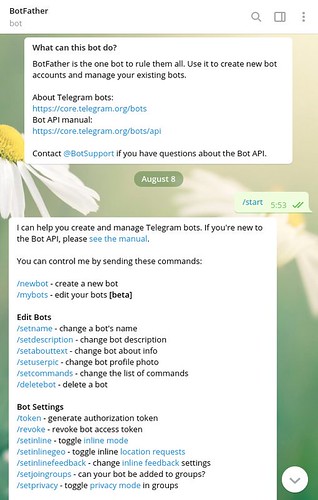
BotFather と会話してbot作成

BotFather という bot 管理用の bot が居るので,会話してbot を作成します.

アイコンちょっと怖い

44062365934 5aabe8f64d m

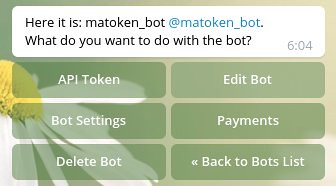
/newbot コマンドで新しい bot の作成が始まります.botの名前を効かれるので答えます.続いて bot の username を求められます.この username は最後に bot とつける必要があります.
成功するとアクセストークンが表示されるのでメモして次の手旬に移ります.以下の例では 640093430:AAFTa_pSAcKCZWeFoVDt-l7h7ewqzNe0Luo がトークンです.

Done! Congratulations on your new bot. You will find it at t.me/matoken_bot. You can now add a description, about section and profile picture for your bot, see /help for a list of commands. By the way, when you've finished creating your cool bot, ping our Bot Support if you want a better username for it. Just make sure the bot is fully operational before you do this.

Use this token to access the HTTP API:
640093430:AAFTa_pSAcKCZWeFoVDt-l7h7ewqzNe0Luo

For a description of the Bot API, see this page: https://core.telegram.org/bots/api

30910879338 4609b7a707
44781979421 aac86c72de

occ コマンドで Telegram bot のトークン設定

Nextcloud のインストールされている場所に Nextcloud 管理用の occ コマンドがあります.このコマンドで Telegram bot のトークンを設定します.
トークンの 640093430: 部分は省いてその後ろだけを入力します.

$ sudo -u www-data php ./occ twofactorauth:gateway:configure telegram
Please enter your Telegram bot token: AAFTa_pSAcKCZWeFoVDt-l7h7ewqzNe0Luo
Using AAFTa_pSAcKCZWeFoVDt-l7h7ewqzNe0Luo.
$ sudo -u www-data php ./occ twofactorauth:gateway:status
Signal gateway: not configured
SMS gateway: not configured
Telegram gateway: configured

ひとまずこれで管理者側の設定は終了です.

Telegram bot の chat_id を調べて登録する

ここからはNextcloud の利用アカウントでの操作になります.

Telegram
In order to receive authentication codes via Telegram, you first have to start a new chat with the bot set up by your admin.
Secondly, you have to obtain your Telegram ID via the ID Bot. Enter this ID to receive your verification code below.

You are not using Telegram for two-factor authentication at the moment. Enable

Telegram アプリを利用して,Telegram の bot から TOTPコードを受け取りたい Telegram アカウントに適当なメッセージを投げます.

@matoken hello

その後,Telegram API を利用してメッセージを取得して chat_id を調べます.
以下の例では 475721977 です.

$ curl https://api.telegram.org/bot640093430:AAHu9u_c12KC2PY8g22QZoA94u4tAJvxsvY/getUpdates | jq
  % Total    % Received % Xferd  Average Speed   Time    Time     Time  Current
                                 Dload  Upload   Total   Spent    Left  Speed
100   358  100   358    0     0    315      0  0:00:01  0:00:01 --:--:--   315
{
  "ok": true,
  "result": [
    {
      "update_id": 612249686,
      "message": {
        "message_id": 9,
        "from": {
          "id": 475721977,
          "is_bot": false,
          "first_name": "matoken",
          "username": "matoken",
          "language_code": "En"
        },
        "chat": {
          "id": 475721977,
          "first_name": "matoken",
          "username": "matoken",
          "type": "private"
        },
        "date": 1537282406,
        "text": "@matoken hello",
        "entities": [
          {
            "offset": 0,
            "length": 8,
            "type": "mention"
          }
        ]
      }
    }
  ]
}

試しに送信してみて Telegram アプリに bot からメッセージが飛んできたら chat id が正しいはず.

$ curl -X POST "https://api.telegram.org/bot640093430:AAHu9u_c12KC2PY8g22QZoA94u4tAJvxsvY" -d "chat_id=475721977&text=hello" | jq
  % Total    % Received % Xferd  Average Speed   Time    Time     Time  Current
                                 Dload  Upload   Total   Spent    Left  Speed
100   274  100   246  100    28    179     20  0:00:01  0:00:01 --:--:--   200
{
  "ok": true,
  "result": {
    "message_id": 15,
    "from": {
      "id": 640093430,
      "is_bot": true,
      "first_name": "matoken_bot",
      "username": "matoken_bot"
    },
    "chat": {
      "id": 475721977,
      "first_name": "matoken",
      "username": "matoken",
      "type": "private"
    },
    "date": 1537312183,
    "text": "hello"
  }
}

Nextcloud にログインして,「設定」→「セキュリティ」の下部に「Message gateway second-factor auth」という項目が出来ているので「Enable」を押す.

Telegram
In order to receive authentication codes via Telegram, you first have to start a new chat with the bot set up by your admin.
Secondly, you have to obtain your Telegram ID via the ID Bot. Enter this ID to receive your verification code below.

You are not using Telegram for two-factor authentication at the moment. Enable

以下のメッセージが表示されたら chat_id を入力して Verify します.

Enter your identification (e.g. phone number to start the verification):
 Verify

Telegram で TOTPコードが飛んで来るのでそれを入力したらOKです.
一旦ログアウトして試してみましょう.

Telegram 認証を試す

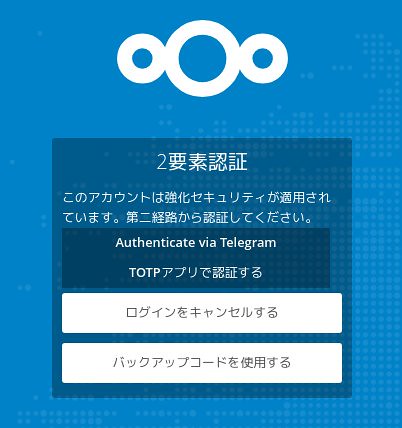
いつものようにユーザ名,パスワードで認証すると以下のような画面に遷移します.
「Authenticate via Telegram」を押します.

44781965201 94bd9ca33e

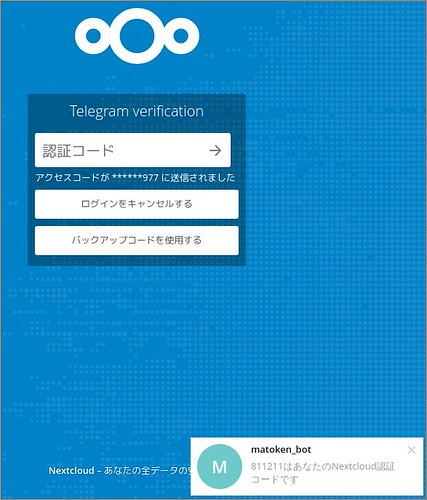
Telegram から認証コードが飛んでくるのでそれを入力して認証完了です.

30910872108 2d5e8c21eb

めんどくさい……

未だ手順が面倒で一般ユーザに試してくれと言える状態ではないですね.でも次のリリースあたりでは簡単になるんじゃないでしょうか.

環境

$ sudo -u www-data php ./occ app:list|grep twofactor_|grep :
  - twofactor_backupcodes: 1.3.1
  - twofactor_gateway: 0.9.0
  - twofactor_totp: 1.5.0
$ sudo -u www-data php ./occ -V
Nextcloud 14.0.0
$ lsb_release -d
Description:    Ubuntu 16.04.5 LTS
$ uname -m
x86_64

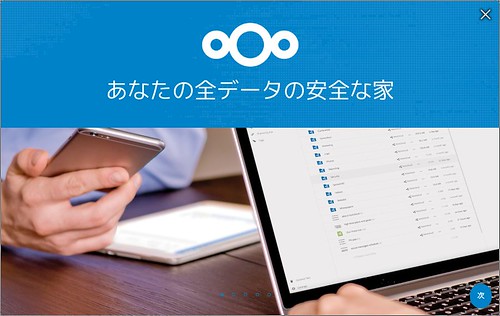
NextcloudのWeb Installer

最近13が出たNextcloudですが,先日自宅サーバのownCloudもNextcloudに移行しました.
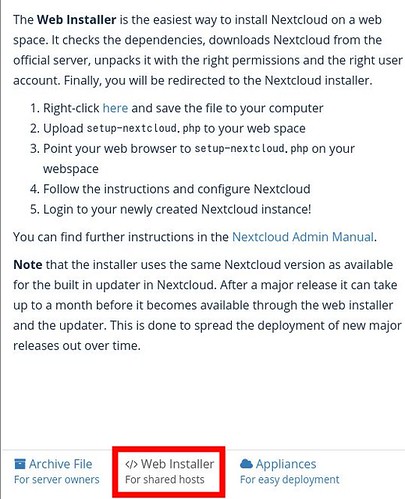
その時気づいたのですが,インストールページにWeb Installerというものが増えていました.

20180214_22:02:05-30568

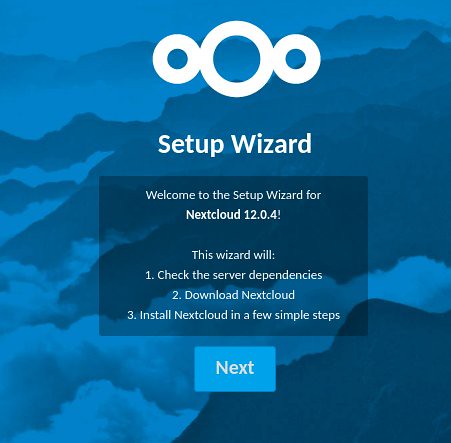
いつもはArchiveをダウンロードしてverifyして展開してセットアップという流れでしたが,これだとWeb Installer ScriptをダウンロードしてWebPublicに置いてアクセスすると以下のようなSetup Wizardがはじまり,Nextcloud本体をダウンロードして展開してくれます.

$ wget https://download.nextcloud.com/server/installer/setup-nextcloud.php
$ sudo -u www-data mv setup-nextcloud.php /var/www/

https://example.com/setup-nextcloud.php

20180131_08:01:38-11248

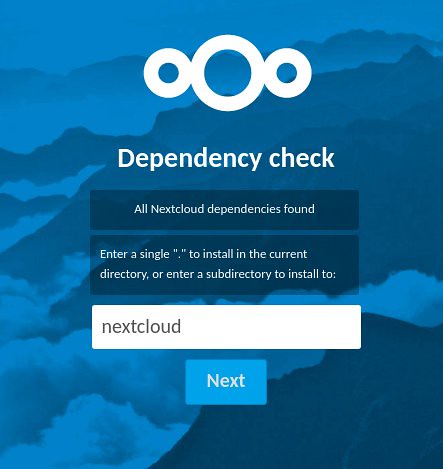
次の画面で導入ディレクトリを指定すると後はいつものセットアップウィザードが走ります.

20180131_08:01:54-11374

shellの使えないサーバなんかでは便利そうです.

ちなみにこのときownCloudから以下のような感じでデータ移行したのですが,数ユーザ,データ量50GB程度でしたが復号化暗号化ですごい時間かかりました.

  • ユーザの確認
    occ user:list
  • ownCloudで暗号化解除
    occ encryption:decrypt-all
  • rsync とかで owncloud/data/${USER}/files を nextcloud/data/${USER}/files にコピー
  • Nextcloudでファイルスキャン
    occ files:scan -p /${USER}/files ${USER}
  • Nextcloudで暗号化
    occ encryption:encrypt-all

この辺を見るとデータはそのまま移行できたようです…….

追記)

やっぱり簡単に移行できそう.