DevuanというDebianからのフォークディストリビューションがあります.
これは脱SystemdなLinuxディストリビューションで,Raspberry Pi等のarmhfにも対応しています.そしてDebianからDevuanに移行することが出来ます.(Debian jessie -> Devuan jessie)
DebianベースのRaspbianからも同様に移行できるというmailを見かけたので試してみます.
SD cardでやったほうが手順は少ないのですが,遅いし寿命も縮むだろうしってことでイメージサイズを拡大したRaspbianを元にchroot + QEMU User EmulatorでArm以外のhostででやってみました.
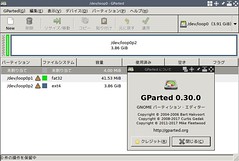
サイズを拡大したRaspbianイメージをマウント
以下の手順で用意したイメージを元にします.
raspbian-stretch-lite_latest.imgが元のイメージで,今回devuan_ascii.imgとしてコピーしたものを使います.
$ cp ./raspbian-stretch-lite_latest.img ./devuan_ascii.img
$ sudo kpartx -av ./devuan_ascii.img
add map loop0p1 (253:4): 0 85045 linear 7:0 8192
add map loop0p2 (253:5): 0 8129 linear 7:0 63
$ sudo mount /dev/mapper/loop0p2 /mnt
$ sudo mount /dev/mapper/loop0p1 /mnt/boot
QEMU User Emulatorが使えるようにqemu-user-staticをcp
これでQEMU User Emulatorが透過的に利用できます.
$ sudo cp -p /usr/bin/qemu-arm-static /mnt/usr/bin/
chroot用に/devと/procをbind mountしてchroot
$ sudo mount --bind /dev /mnt/dev
$ sudo mount --bind /dev/pts /mnt/dev/pts
$ sudo mount --bind /proc /mnt/proc
$ sudo chroot /mnt /bin/bash
Raspbian stretchを最新の状態にする
# apt update
# apt upgrade -y
Devuanリポジトリの鍵をインポート
Devuanリポジトリの鍵をインポートする.そのために必要なdirmngrpkgも導入.
# apt install dirmngr
# apt-key adv --recv-keys 94532124541922FB
Executing: /tmp/apt-key-gpghome.zqL0gcSbes/gpg.1.sh --recv-keys 94532124541922FB
gpg: key 94532124541922FB: public key "Devuan Repository (Primary Devuan signing key) <repository@devuan.org>" imported
gpg: Total number processed: 1
gpg:               imported: 1
source.listをDevuanのものに書き換え
Devuanのstableはjessieですが,元のRaspbianがstretchなのでそれに対応するAsciiを指定しています.
Devuan jessieを使いたい場合は,Raspbian jessieを元にするといいと思います.
| Devuan | Debian |
|---|---|
| Jessie(stable) | Jessie(oldstable) |
| Ascii(development) | Stretch(stable) |
| Beowulf(-) | Buster(testing) |
| Ceres(unstable) | Sid(unstable) |
- Index of /raspbian/images/raspbian-2017-07-05 ※多分Raspbian jessie latest.
# vi /etc/apt/sources.list
# cat /etc/apt/sources.list|grep -v ^#
deb http://mirrordirector.raspbian.org/raspbian/ stretch rpi
deb http://auto.mirror.devuan.org/merged ascii main contrib non-free
deb http://auto.mirror.devuan.org/merged ascii-updates  main contrib non-free
deb http://auto.mirror.devuan.org/merged ascii-security main contrib non-free
Devuanのパッケージにupgrade
# apt update && apt upgrade
  :
274 upgraded, 7 newly installed, 0 to remove and 3 not upgraded.
Need to get 115 MB of archives.
After this operation, 25.0 MB disk space will be freed.
Do you want to continue? [Y/n] Y
  :
# apt dist-upgrade
Reading package lists... Done
Building dependency tree
Reading state information... Done
Calculating upgrade... Done
The following packages were automatically installed and are no longer required:
  bluez bluez-firmware cgmanager libcgmanager0 systemd-shim
Use 'sudo apt autoremove' to remove them.
The following packages will be REMOVED:
  libpam-systemd mountall pi-bluetooth plymouth raspberrypi-sys-mods systemd systemd-sysv
The following NEW packages will be installed:
  eudev libeudev1 sysvinit-core
The following packages will be upgraded:
  init libudev1 udev
3 upgraded, 3 newly installed, 7 to remove and 0 not upgraded.
Need to get 1162 kB of archives.
After this operation, 9431 kB disk space will be freed.
Do you want to continue? [Y/n] Y
  :
chrootから抜けてイメージアンマウント
#念の為kpartx -dの前にfsckしておくといいかも?
# exit
$ sudo umount /mnt/proc
$ sudo umount /mnt/dev/pts
$ sudo umount /mnt/dev
$ sudo umount /mnt/boot
$ sudo umount /mnt
$ sudo kpartx -d /dev/mapper/loop0p1
$ sudo kpartx -d /dev/mapper/loop0p2
$ sync
SD cardにイメージを書き込んでRaspberry Piで起動
普通にddとかEtcherとかでSD cardに書き込みます.
$ time sudo dcfldd if=./devuan_ascii.img of=/dev/sdd;sync;sync
128000 blocks (4000Mb) written.
128000+0 records in
128000+0 records out

real    7m13.207s
user    0m0.823s
sys     0m9.211s
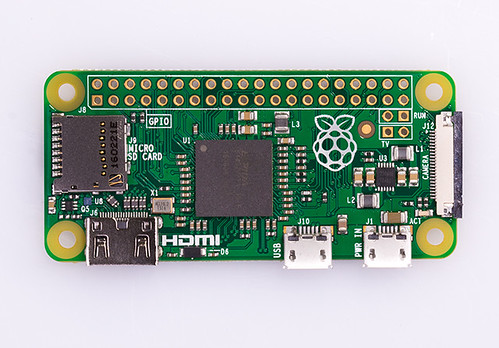
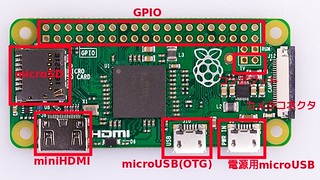
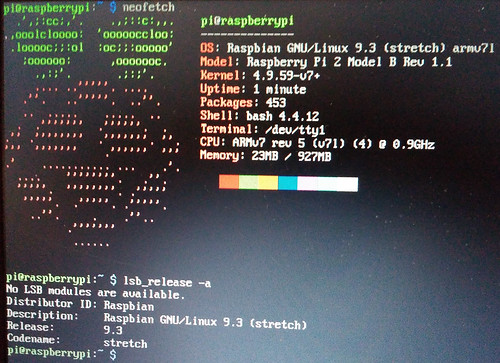
後はRaspberry Piで起動すればOK.今回はRaspberry Pi 2 Bで試しました.
Systemdとか居ません.
RAMの利用状況はこんな感じ
$ free
              total        used        free      shared  buff/cache   available
Mem:         949584       21916      879120         188       48548      879976
Swap:        102396           0      102396
しかしneofetchとかではRaspbianのままですね.該当pkgのreinstallとかで更新できそうな気がしますが未検証.
イメージ操作めんどくさいのでdebootstrapの方が楽かもしれない?
- Devuan GNU+Linux Free Operating System
- RaspberryPi – Debian Wiki
- RaspberryPi3 – Debian Wiki
- Raspberry Pi 2 Model B に Debian Jessie /armhf をインストールする
- Raspberry Pi3 / arm64 Debian/Ubuntu ミートアップ in 札幌 #DevuanはArm64は未サポート
いやそれなら公式イメージのほうがいいか