以下のガイドのとおりなんですが一応メモを.
microSD Card経由と,Fastboot経由の2種類があります.
microSD Card経由の場合はDIP switchの変更が必要でディスプレイとマウスが必要です.
Fastboot経由の場合はHostPCとmicroUSB Cableが必要です.USB-LANアダプタを使えばヘッドレスで全て設定できます.
#こういうのを使ったほうがいいけど.
microSD Card経由での書き込み
USBキーボード,マウス,HDMIモニタと4GB以上のmicroSDが必要です.
イメージの入手とmicroSD Cardへの書き込み
このファイル名は現在の最新です.以下のページを見て最新を入手してください.
- Dragonboard 410c Installation Guide for Linux and Android · 96boards/documentation Wiki
- 96Boards Builds for: latest
$ wget http://builds.96boards.org/releases/dragonboard410c/linaro/debian/latest/dragonboard410c_sdcard_install_debian-66.zip http://builds.96boards.org/releases/dragonboard410c/linaro/debian/latest/MD5SUMS.txt
$ md5sum -c MD5SUMS.txt 2>&1 | egrep -v 'FAILED|ありません'
dragonboard410c_sdcard_install_debian-66.zip: 完了
md5sum: 警告: 一覧にある 15 個のファイルが読み込めませんでした
$ unzip -l dragonboard410c_sdcard_install_debian-66.zip
Archive:  dragonboard410c_sdcard_install_debian-66.zip
  Length      Date    Time    Name
---------  ---------- -----   ----
    14022  2016-02-27 14:36   license.txt
2621440000  2016-02-27 14:36   db410c_sd_install_debian.img
---------                     -------
2621454022                     2 files
$ unzip dragonboard410c_sdcard_install_debian-66.zip
$ cat ./db410c_sd_install_debian.img | pv | sudo dd of=/dev/sdz bs=4M
microSDからの起動とセットアップ
microSD CardをDragonboard 410cに差し込んで,基盤の裏面のDIP switch(s6)を操作してSD boot(2)だけをOnにします.シルクがあるので解りやすいです.
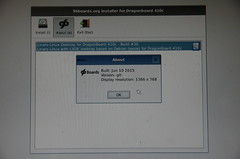
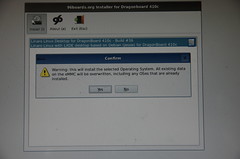
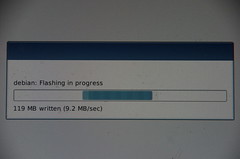
Dragonboard 410cにUSBキーボード,マウス,HDMIモニタを接続して起動するとシンプルなインストーラが起動するのでポチポチと押していくと完了です.
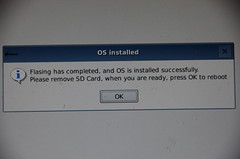
一旦電源を切ってDIP swatchを元に戻し,microSD Cardを取り外して起動するとLXDEが起動してきます.
ちなみにDIP switchにUSB bootもあるので試してみましたが未実装化手順が違うのかうまく行きませんでした.
Fastboot経由での書き込み
microSD経由より手順が多いですが必要なものが少ない&DIP swatchの操作が必要ないのでケースに入れている場合などもいいかもしれません.
microUSB Cableは必要なので用意してください.
fastbootの導入
HostPCにfastbootを導入します.Android開発環境が既にある人は入っていそうですね.
$ sudo apt install android-tools-fastboot
bootloaderイメージの入手
次のsiteからbootloaderイメージを入手します.最新版を入手してください.
– 96Boards Builds for: latest
ディレクトリを掘って展開しておきます.
$ unzip -l dragonboard410c_bootloader_emmc_linux-46.zip
Archive:  dragonboard410c_bootloader_emmc_linux-46.zip
  Length      Date    Time    Name
---------  ---------- -----   ----
57344  2016-02-10 10:00   hyp.mbn
   744042  2016-02-10 10:00   emmc_appsboot.mbn
14022  2016-02-10 10:00   license.txt
   154980  2016-02-10 10:00   rpm.mbn
   483468  2016-02-10 10:00   tz.mbn
 23102976  2016-02-10 10:00   NON-HLOS.bin
   80  2016-02-10 10:00   sec.dat
   252868  2016-02-10 10:00   sbl1.mbn
34304  2016-02-10 10:00   gpt_both0.bin
  324  2016-02-10 10:00   flashall
---------                     -------
 24844408                     10 files
$ mkdir dragonboard410c_bootloader_emmc_linux-46
$ unzip dragonboard410c_bootloader_emmc_linux-46.zip
fastboot modeに入るために基板上の(-)ボタン(s4)を押しながら電源を投入します.すぐにfastboot modeになるのでfastboot devicesコマンドで確認します.何も出てない場合は失敗しているので電源投入をやり直します.
$ sudo fastboot devices
b5d12d18        fastboot
デバイスが認識できているのが確認できたらflashall scriptで書き込みを開始します.書き込みを開始した後は(-)ボタン(s4)を離しても大丈夫そうです.
$ sudo ./flashall
target reported max download size of 268435456 bytes
sending 'partition' (33 KB)...
OKAY [  0.005s]
writing 'partition'...
OKAY [  1.451s]
finished. total time: 1.457s
target reported max download size of 268435456 bytes
sending 'hyp' (56 KB)...
OKAY [  0.005s]
writing 'hyp'...
OKAY [  0.011s]
finished. total time: 0.016s
target reported max download size of 268435456 bytes
sending 'modem' (22561 KB)...
OKAY [  0.732s]
writing 'modem'...
OKAY [  0.756s]
finished. total time: 1.488s
target reported max download size of 268435456 bytes
sending 'rpm' (151 KB)...
OKAY [  0.008s]
writing 'rpm'...
OKAY [  0.010s]
finished. total time: 0.018s
target reported max download size of 268435456 bytes
sending 'sbl1' (246 KB)...
OKAY [  0.011s]
writing 'sbl1'...
OKAY [  0.010s]
finished. total time: 0.021s
target reported max download size of 268435456 bytes
sending 'sec' (0 KB)...
OKAY [  0.004s]
writing 'sec'...
OKAY [  0.006s]
finished. total time: 0.010s
target reported max download size of 268435456 bytes
sending 'tz' (472 KB)...
OKAY [  0.017s]
writing 'tz'...
OKAY [  0.015s]
finished. total time: 0.033s
target reported max download size of 268435456 bytes
sending 'aboot' (726 KB)...
OKAY [  0.026s]
writing 'aboot'...
OKAY [  0.025s]
finished. total time: 0.052s
erasing 'boot'...
OKAY [  0.036s]
finished. total time: 0.037s
erasing 'rootfs'...
OKAY [  0.267s]
finished. total time: 0.267s
erasing 'devinfo'...
OKAY [  0.034s]
finished. total time: 0.034s
boot/root領域の書き込み
OSイメージのboot/root領域のデータを入手して書き込みます.
書き込みはfastboot modeにしてから行ってください.
$ wget http://builds.96boards.org/releases/dragonboard410c/linaro/debian/latest/linaro-jessie-alip-qcom-snapdragon-arm64-20160227-66.img.gz http://builds.96boards.org/releases/dragonboard410c/linaro/debian/latest/boot-linaro-jessie-qcom-snapdragon-arm64-20160227-66.img.gz http://builds.96boards.org/releases/dragonboard410c/linaro/debian/latest/MD5SUMS.txt
$ md5sum -c MD5SUMS.txt 2&>1 |grep 完了
boot-linaro-jessie-qcom-snapdragon-arm64-20160227-66.img.gz: 完了
linaro-jessie-alip-qcom-snapdragon-arm64-20160227-66.img.gz: 完了
$ sudo fastboot flash boot ./boot-linaro-jessie-qcom-snapdragon-arm64-20160227-66.img
target reported max download size of 268435456 bytes
sending 'boot' (17480 KB)...
OKAY [  0.562s]
writing 'boot'...
OKAY [  0.329s]
finished. total time: 0.891s
$ sudo fastboot flash rootfs ./linaro-jessie-alip-qcom-snapdragon-arm64-20160227-66.img
target reported max download size of 268435456 bytes
sending sparse 'rootfs' (262140 KB)...
OKAY [  9.309s]
writing 'rootfs'...
OKAY [ 18.304s]
sending sparse 'rootfs' (262140 KB)...
OKAY [  9.236s]
writing 'rootfs'...
OKAY [ 19.888s]
sending sparse 'rootfs' (262140 KB)...
OKAY [  9.255s]
writing 'rootfs'...
OKAY [ 19.759s]
sending sparse 'rootfs' (262140 KB)...
OKAY [  9.295s]
writing 'rootfs'...
OKAY [ 19.834s]
sending sparse 'rootfs' (262140 KB)...
OKAY [  9.317s]
writing 'rootfs'...
OKAY [ 19.828s]
sending sparse 'rootfs' (262140 KB)...
OKAY [  9.290s]
writing 'rootfs'...
OKAY [ 19.765s]
sending sparse 'rootfs' (59016 KB)...
OKAY [  2.118s]
writing 'rootfs'...
OKAY [  4.450s]
finished. total time: 179.649s
起動するとlxdeが起動してきます.sshdも起動してくるのでdhcpdの動いている環境でUSB-LANアダプタを接続すればヘッドレス環境で設定が可能です.avahiは動いてないのでipはポートスキャンなりarpなりで探してください.
$ sudo nmap -sP 192.168.2.200-255 --spoof-mac 00:90:cc:e8:0b:db

Starting Nmap 7.01 ( https://nmap.org ) at 2016-03-11 01:39 JST
Spoofing MAC address 00:90:CC:E8:0B:DB (Planex Communications)
Nmap scan report for 192.168.2.203
Host is up.
Nmap done: 56 IP addresses (1 host up) scanned in 19.15 seconds
$ sudo arp|grep 00:90:cc
192.168.2.214            ether   00:90:cc:e8:0b:db   C                     wlp3s0
ユーザ名はlinaroパスワードも同じです.
$ ssh linaro@192.168.2.202
$ uname -a
Linux linaro-alip 4.4.0-linaro-lt-qcom #1 SMP PREEMPT Sat Feb 27 04:55:16 UTC 2016 aarch64 GNU/Linux
$ lsb_release -a
No LSB modules are available.
Distributor ID: Debian
Description:    Debian GNU/Linux 8.3 (jessie)
Release:        8.3
Codename:       jessie
ちなみに,セットアップ終了後のeMMCの容量はこのくらいです.
$ df /
Filesystem      1K-blocks    Used Available Use% Mounted on
/dev/mmcblk0p10   7260748 1814312   5120404  27% /
後は普通のDebianなのでsource listを日本に向けてUpdateしてほげりましょう.
/etc/apt/sources.list.d/の下はこんな感じ.後ろ2つは/etc/apt/sources.listと重複しているような?
$ find /etc/apt/sources.list.d/ -type f | xargs -n1 -I{} sh -c "echo \#-- {} ; cat {}"
#-- /etc/apt/sources.list.d/hwpack.qcom.list
deb http://repo.linaro.org/ubuntu/qcom-overlay jessie main
#-- /etc/apt/sources.list.d/linaro-overlay-repo.list
deb http://repo.linaro.org/ubuntu/linaro-overlay jessie main
deb-src http://repo.linaro.org/ubuntu/linaro-overlay jessie main
#-- /etc/apt/sources.list.d/hwpack.debian.list
deb http://ftp.debian.org/debian/ jessie main contrib non-free
#-- /etc/apt/sources.list.d/hwpack.backports.list
deb http://ftp.debian.org/debian/ jessie-backports main