回線の調子が悪いので,久々に少しゲームを遊んでみようかと思いLinux版Steamを起動して「Life is Strange 2」の冒頭を遊んでみましたが,「Life is Strange – Episode 1」も無料のようなのでこれを先に遊んだほうがいいかな?と起動すると2で使えていた日本語が選べないようです.
Winows版の言語パックはあるようなのでどうにかならないかなと試してみました.
カテゴリー: testing
Discordの画面共有をなるべく低画質にして帯域を節約する(2021-06-21)
Discord Linux版での画面共有時の設定メモです.
※この設定は今の所ウェブアプリ版では出てこないので使えないと思います.
スライドの共有などのあまり画質やフレームレートの必要ないものの画面共有時には規定値の設定より低くしても問題なさそうです.
現時点(2021-06-21)での最低解像度,最低フレームレートの設定メモです.
Barrierで装飾キーがロックされるのを解除する
Barrierというマルチプラットホームのキーボードマウス共有ソフトを常用しています.1台の端末のキーボードマウスで複数のマシンを操れます.Synergyのフォークです.
最近1台の端末をDebian Bullseye + i3wm にしてみたのですが,どうもキーボードがおかしくなります.CtrlやSuperが押しっぱなしになります.
以前から別のマシンでこの症状は出ていましたが今回は頻度がとても多くまともに動くことのほうが少ないです.これまでXorgを再起動して解決していましたが面倒すぎます.
ISSUEを探すと出てきました.未解決のようです(◞‸◟)
でもワークアラウンドがあったので試してみました.
vnStatでネットワークトラフィックを集計する
以下のエントリでipコマンドでネットワーク通信量が確認できました.
端末を起動してからの通信量は確認できますが,再起動したりするとデータ量はクリアされてしまいます.MRTGやZabbixなどを使うのは大げさな感じがします.
もう少しお手軽なものがないかなと少し探してvnStatというものを見つけたので今回試してみました.
Debian 10 Buster testing をリリース後に apt update するとエラーになる
2019-07-06 に Debian Buster 10 がリリースされました.
Debian 10 Buster testing 環境でリリース後に apt update をするとエラーになってしまいます.
$ sudo apt update
Get:1 http://security.debian.org/debian-security buster/updates InRelease [39.1 kB]
Get:2 http://deb.debian.org/debian buster InRelease [118 kB]
N: Repository 'http://security.debian.org/debian-security buster/updates InRelease' changed its 'Version' value from '' to '10'
E: Repository 'http://security.debian.org/debian-security buster/updates InRelease' changed its 'Suite' value from 'testing' to 'stable'
N: This must be accepted explicitly before updates for this repository can be applied. See apt-secure(8) manpage for details.
Do you want to accept these changes and continue updating from this repository? [y/N]
N: Repository 'http://deb.debian.org/debian buster InRelease' changed its 'Version' value from '' to '10.0'
E: Repository 'http://deb.debian.org/debian buster InRelease' changed its 'Suite' value from 'testing' to 'stable'
N: This must be accepted explicitly before updates for this repository can be applied. See apt-secure(8) manpage for details.
Do you want to accept these changes and continue updating from this repository? [y/N]
Reading package lists... Done
E: Failed to fetch http://deb.debian.org/debian/dists/buster/InRelease
E: Failed to fetch http://security.debian.org/debian-security/dists/buster/updates/InRelease
E: Some index files failed to download. They have been ignored, or old ones used instead.
--allow-releaseinfo-change を指定してAPT にリリースを情報を確認したことを教えます.
$ sudo apt --allow-releaseinfo-change update
次からはオプション無しで実行してもエラーが出なくなります.
$ sudo apt update
Hit:1 http://deb.debian.org/debian buster InRelease
Hit:2 http://security.debian.org/debian-security buster/updates InRelease
Reading package lists... Done
Building dependency tree
Reading state information... Done
3 packages can be upgraded. Run 'apt list --upgradable' to see them.
ちなみに stable でなく testing 環境を使い続けたい場合は /etc/apt/sources.list を現在の Debian testing の bullseye に修正すればいいはず.
環境
$ dpkg-query -W apt
apt     1.8.2
$ hostnamectl | egrep 'Operating System|Architecture'
  Operating System: Debian GNU/Linux 10 (buster)
      Architecture: x86-64
Debian, Ubuntu で 上流のパッケージを借りてくる
以前以下のような記事を書きました.
今でもこのblogの中ではアクセスが多く,最近もトラックバックをもらいました.
この当時は arm64 の mozcパッケージがなくて自分でbuild したという話なのですが,現在はDebian では buster(testing), Ubuntu ではartful(17.10) 以降でパッケージが存在します.
なのでこの野良パッケージを使うよりも公式の上流パッケージを借りるほうが大抵の場合いいと思います.
ということで手順を書いておきます.
パッケージファイルだけが必要な場合はパッケージのページからダウンロード可能です.
野良パッケージは近日中に削除します.
Debian stretch arm64 に Debian buster arm64 の mozc を借りてくる
Debian stretch arm64 では mozc-data しかない
$ apt-cache search mozc
mozc-data - Mozc input method - data files
buster(testing) のmozc を借りてくることにする.
/etc/apt/preferences で buster の優先度を下げる
/etc/apt/preferences
Package: *
Pin: release n=buster
Pin-Priority: 100
/etc/apt/sources.list に
buster(testing) を 追加 設定deb http://deb.debian.org/debian buster main
※sources.list の編集には apt edit-sources を使うと文法チェックをしてくれるのでおすすめ
パッケージ情報の更新
$ sudo apt update
mozcパッケージの確認
$ apt-cache search mozc
mozc-data - Mozc input method - data files
fcitx-dbus-status - Addon for Fcitx to set/get/monitor IM statuses via D-Bus
emacs-mozc - Mozc for Emacs
emacs-mozc-bin - Helper module for emacs-mozc
fcitx-mozc - Mozc engine for fcitx - Client of the Mozc input method
ibus-mozc - Mozc engine for IBus - Client of the Mozc input method
mozc-server - Server of the Mozc input method
mozc-utils-gui - GUI utilities of the Mozc input method
uim-mozc - Mozc engine for uim - Client of the Mozc input method
パッケージの導入
$ apt install fcitx-mozc -t buster
後は通常の apt update && apt upgrade で stretch で導入したパッケージは stretch で,buster で導入したパッケージはbuster で更新されるはず.
Ubuntu 16.04 LTS xenial arm64 に Ubuntu 18.04 LTS bionic arm64 の mozc を借りてくる
Debianの手順と同じでもokだと思うけど念の為以下の手順を真似してみる.
mozc は Ubuntu 17.10 artful から対応しているが,もうサポートされないのでUbuntu 18.04 bionic を使う.
標準のリリースを xenial に設定
/etc/apt/apt.conf.d/01ubuntu
APT::Default-Release "xenial";
mozc をpinningする
/etc/apt/preferences
Package: *mozc*
Pin: release n=xenial
Pin-Priority: -10

Package: *mozc*
Pin: release n=bionic
Pin-Priority: 900
/etc/apt/sources.list に buster(testing) を 追加 設定
/etc/apt/sources.list
deb http://ports.ubuntu.com/ bionic main universe
※sources.list の編集には apt edit-sources を使うと文法チェックをしてくれるのでおすすめ
※mirrorにより arm64 が置かれていないので注意
パッケージ情報の更新
$ sudo apt update
検索結果にmozcが出てくる
$ apt-cache search mozc
mozc-data - Mozc input method - data files
ibus-mozc - Mozc engine for IBus - Client of the Mozc input method
mozc-server - Server of the Mozc input method
mozc-utils-gui - GUI utilities of the Mozc input method
emacs-mozc - Mozc for Emacs
emacs-mozc-bin - Helper module for emacs-mozc
fcitx-mozc - Mozc engine for fcitx - Client of the Mozc input method
uim-mozc - Mozc engine for uim - Client of the Mozc input method
パッケージの導入
$ sudo apt install fcitx-mozc -t bionic
Debianでもarm64でmozc build
EDIT: 現在は次の記事の手順のほうが良いと思います -> Debian, Ubuntu で 上流のパッケージを借りてくる – matoken’s meme
先日Ubuntu 16.04 arm64環境でmozc pkgを作りました.
今回はDebian stretch arm64でも作ってみました.
環境はQualcomの96BoardのDragonBoard 410cにDebian stretch aarch64のイメージ(dragonboard410c_sdcard_install_debian-233.zip)を使いました.
OSイメージの入手や導入方法などは以下のあたりにあります.
- DragonBoard™ 410 Getting Started Guide (README.md)
- DragonBoard™ 410 Getting Started Guide (Debian.md)
- DragonBoard™ 410 Getting Started Guide (LinuxSD.md)
手元では以下のような感じでsd cardに書き込んだ後dipスイッチでsd起動にして起動してeMMCに導入しました.
$ md5sum dragonboard410c_sdcard_install_debian-233.zip
ef17a1602cf0ef300e123a3224e0699d  dragonboard410c_sdcard_install_debian-233.zip
$ unzip -l dragonboard410c_sdcard_install_debian-233.zip
Archive:  dragonboard410c_sdcard_install_debian-233.zip
  Length      Date    Time    Name
---------  ---------- -----   ----
4055891968  2017-05-11 05:25   db410c_sd_install_debian.img
    13953  2017-05-04 21:45   LICENSE
---------                     -------
4055905921                     2 files
$ unzip -p dragonboard410c_sdcard_install_debian-233.zip LICENSE | lv
$ unzip -p dragonboard410c_sdcard_install_debian-233.zip db410c_sd_install_debian.img | pv | sudo dd of=/dev/mmcblk0 bs=4M
$ sync
$ sync
$ sync
後の手順はほぼ前回のUbuntuと同じですが,
dpkg-buildpackage: error: fakeroot not found, either install the fakeroot
package, specify a command with the -r option, or run this as root
とfakerootが無いと起こられたので導入パッケージにfakerootを追加したのと,
virtual memory exhausted: Cannot allocate memory
という感じでコケたので以下のような感じでスワップファイルを追加して回避しました.前回のUbuntuを入れてる方の機械はRAM2GBなのでRAM1GB+SWAP1GBでも行けると思いますが念の為2GB追加しました.
$ dd if=/dev/zero of=/var/tmp/swap bs=1M count=2048
$ sudo chmod 600 /var/tmp/swap
$ sudo chown 0.0 /var/tmp/swap
$ sudo mkswap /var/tmp/swap
$ sudo swapon /var/tmp/swap
$ free
              total        used        free      shared  buff/cache   available
Mem:         945868      225736      444948       40784      275184      608980
Swap:       2097148           0     2097148
で,パッケージングと導入の手順はこんな感じでした.
$ sudo apt update
$ sudo apt upgrade
$ sudo apt install build-essential devscripts fakeroot
$ sudo apt build-dep mozc
$ apt source mozc
$ wget https://gist.githubusercontent.com/matoken/afce66ce67392c11d3ed20d7bbab5833/raw/2bb0163f30291caa6ba7b41b3d4352c7e6c0b6a7/patch
$ patch -p0 < patch
$ cd mozc-2.19.2623.102+dfsg
$ time dpkg-buildpackage -us -uc -j4
   :
real    111m31.882s
user    88m2.352s
sys     10m59.828s
$ dch -i
$ head debian/changelog
mozc (2.19.2623.102+dfsg-1.1) unstable; urgency=medium

  * Non-maintainer upload.
  * Update debian/control.
    - Add arm64 to Architecture list.

 -- K.I.Matohara <matoken@gmail.com>  Sat, 03 Jun 2017 22:15:19 +0000

mozc (2.19.2623.102+dfsg-1) unstable; urgency=medium

$ dpkg-buildpackage -j4
$ ls -la ../*dfsg-1.1_*
-rw-r--r-- 1 linaro linaro  2130510 Jun  4 01:10 ../emacs-mozc-bin-dbgsym_2.19.2623.102+dfsg-1.1_arm64.deb
-rw-r--r-- 1 linaro linaro   157710 Jun  4 01:10 ../emacs-mozc-bin_2.19.2623.102+dfsg-1.1_arm64.deb
-rw-r--r-- 1 linaro linaro    28118 Jun  4 01:10 ../emacs-mozc_2.19.2623.102+dfsg-1.1_arm64.deb
-rw-r--r-- 1 linaro linaro  2765446 Jun  4 01:10 ../fcitx-mozc-dbgsym_2.19.2623.102+dfsg-1.1_arm64.deb
-rw-r--r-- 1 linaro linaro   224574 Jun  4 01:10 ../fcitx-mozc_2.19.2623.102+dfsg-1.1_arm64.deb
-rw-r--r-- 1 linaro linaro  3088148 Jun  4 01:10 ../ibus-mozc-dbgsym_2.19.2623.102+dfsg-1.1_arm64.deb
-rw-r--r-- 1 linaro linaro   189886 Jun  4 01:10 ../ibus-mozc_2.19.2623.102+dfsg-1.1_arm64.deb
-rw-r--r-- 1 linaro linaro    14134 Jun  4 01:10 ../mozc-data_2.19.2623.102+dfsg-1.1_all.deb
-rw-r--r-- 1 linaro linaro 24825020 Jun  4 01:11 ../mozc-server-dbgsym_2.19.2623.102+dfsg-1.1_arm64.deb
-rw-r--r-- 1 linaro linaro 12310852 Jun  4 01:11 ../mozc-server_2.19.2623.102+dfsg-1.1_arm64.deb
-rw-r--r-- 1 linaro linaro  9823936 Jun  4 01:11 ../mozc-utils-gui-dbgsym_2.19.2623.102+dfsg-1.1_arm64.deb
-rw-r--r-- 1 linaro linaro   755758 Jun  4 01:11 ../mozc-utils-gui_2.19.2623.102+dfsg-1.1_arm64.deb
-rw-r--r-- 1 linaro linaro    18228 Jun  4 04:00 ../mozc_2.19.2623.102+dfsg-1.1_arm64.buildinfo
-rw-r--r-- 1 linaro linaro     6898 Jun  4 04:00 ../mozc_2.19.2623.102+dfsg-1.1_arm64.changes
-rw-r--r-- 1 linaro linaro  1921396 Jun  4 01:10 ../uim-mozc-dbgsym_2.19.2623.102+dfsg-1.1_arm64.deb
-rw-r--r-- 1 linaro linaro   192712 Jun  4 01:10 ../uim-mozc_2.19.2623.102+dfsg-1.1_arm64.deb
$ sudo apt install ../mozc-server_2.19.2623.102+dfsg-1.1_arm64.deb ../fcitx-mozc_2.19.2623.102+dfsg-1.1_arm64.deb ../mozc-data_2.19.2623.102+dfsg-1.1_all.deb ../mozc-utils-gui_2.19.2623.102+dfsg-1.1_arm64.deb
$ sudo apt install fcitx-ui-classic
これも一応この辺に置いておきました.多分そのうち消します.(Versionが上がった頃?)
これでとりあえず手元のUbuntu/Debianで利用できるようになりましたが,mozcのバージョンアップ毎にbuildが必要です.なのでBTS予定.あとクロスで試すのとMultiarchも試してみたいです.
参考URL
Raspberry PiのFreedomBoxで/var/lib/dpkg/statusが壊れたのを復旧
Raspberry PiでFreedomBoxを試しているのですが,ストレージがmicroSDのせいか修正していたパッケージの依存関係か何かがおかしくなったせいか/var/lib/dpkg/statusが壊れてしまいました.
$ sudo apt update
Hit:1 http://cdn-fastly.deb.debian.org/debian testing InRelease
Reading package lists... Error!
E: Unable to parse package file /var/lib/dpkg/status (1)
W: You may want to run apt-get update to correct these problems
E: The package cache file is corrupted
E: パッケージファイル /var/lib/dpkg/status を解釈することができません (1)
W: これらの問題を解決するためには apt-get update を実行する必要があるかもしれません
E: パッケージキャッシュファイルが壊れています
apt-get updateで治るのかなと思って叩いてみましたが駄目でした.
Debian リファレンスの第2章 Debian パッケージ管理によると,
2.6.5. パッケージセレクションの復元
もし何らかの理由で “/var/lib/dpkg/status” の内容が腐った場合には、Debian システムはパッケージ選択データーが失われ大きな打撃を被ります。古い “/var/lib/dpkg/status” ファイルは、”/var/lib/dpkg/status-old” や “/var/backups/dpkg.status.*” としてあるので探します。
“/var/backups/” は多くの重要な情報を保持しているので、これを別のパーティション上に置くのも良い考えです。
とのことなので,/var/lib/dpkg/status-oldから復旧をと思いましたがこれも既に壊れているバージョン./var/backups/dpkg.status.0はまだ壊れていなかったのでこれで上書きして復旧したようです.
$ sudo cp /var/backups/dpkg.status.0 /var/lib/dpkg/status
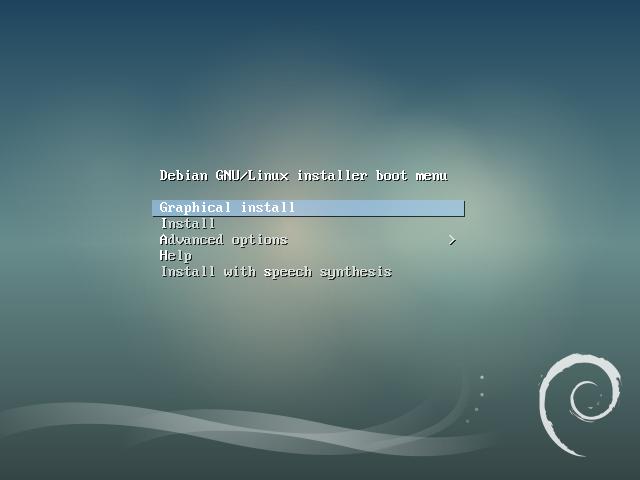
DebianのisoイメージをUSBメモリに書き込み
gistに貼ってたものだけどせっかくなのでこちらにも.
ファイルダウンロード
今回はDebian stretch Debian Installer rc2のi386版のnetinst.
- debian-stretch-DI-rc2-i386-netinst.iso : イメージ本体
- SHA512SUMS : isoファイルのチェックサムファイル
- SHA512SUMS.sign : SHA512SUMSの署名ファイル
$ wget http://cdimage.debian.org/cdimage/stretch_di_rc2/i386/iso-cd/debian-stretch-DI-rc2-i386-netinst.iso http://cdimage.debian.org/cdimage/stretch_di_rc2/i386/iso-cd/SHA512SUMS.sign http://cdimage.debian.org/cdimage/stretch_di_rc2/i386/iso-cd/SHA512SUMS
※i386/amd64をよく使う場合は
multi-archを使うと1つのUSBメモリでi386/amd64が利用できて便利
チェックサムファイルの署名確認
チェックサムファイルのSHA512SUMSが正常なものか確認
$ gpg --verify SHA512SUMS.sign
gpg: 署名されたデータが'SHA512SUMS'にあると想定します
gpg: 2017年02月02日 07時45分30秒 JSTに施された署名
gpg:                RSA鍵DA87E80D6294BE9Bを使用
gpg: "Debian CD signing key <debian-cd@lists.debian.org>"からの正しい署名 [不明の]
gpg: *警告*: この鍵は信用できる署名で証明されていません!
gpg:       この署名が所有者のものかどうかの検証手段がありません。
 主鍵フィンガープリント: DF9B 9C49 EAA9 2984 3258  9D76 DA87 E80D 6294 BE9B
※公開鍵が見つかりません(public key not found)というエラーの場合はgpg --keyserver keyring.debian.org --recv-keys DA87E80D6294BE9Bで鍵をインポートして再度確認.鍵のIDやフィンガープリントは以下のページでも確認できる
ハッシュ確認
isoファイルが正しくダウンロードされているか確認
以下の例はdebian-stretch-DI-rc2-i386-netinst.isoしかダウンロードしていないのでそれ以外のエラーや警告は無視する
$ sha512sum -c SHA512SUMS
sha512sum: debian-mac-stretch-DI-rc2-i386-netinst.iso: そのようなファイルやディレクトリはありません
debian-mac-stretch-DI-rc2-i386-netinst.iso: FAILED open or read
debian-stretch-DI-rc2-i386-netinst.iso: 完了
sha512sum: debian-stretch-DI-rc2-i386-xfce-CD-1.iso: そのようなファイルやディレクトリはありません
debian-stretch-DI-rc2-i386-xfce-CD-1.iso: FAILED open or read
sha512sum: 警告: 一覧にある 2 個のファイルが読み込めませんでした
usbメモリへの書き込み
USBメモリの確認
書き込み先のデバイスが正しいか確認する
USBメモリ接続直後にdmesgを確認したりfdiskコマンドやマウントして中を確認したり……
$ dmesg
  :
[414356.444121] usb 1-1.2: New USB device found, idVendor=13fe, idProduct=1a00
[414356.444128] usb 1-1.2: New USB device strings: Mfr=0, Product=11, SerialNumber=0
[414356.444131] usb 1-1.2: Product: USB 2.0 HUB
[414362.925178] usb-storage 1-1.2.1:1.0: USB Mass Storage device detected
[414362.925967] scsi host6: usb-storage 1-1.2.1:1.0
[414364.184209] sd 6:0:0:1: [sdb] 980480 512-byte logical blocks: (502 MB/479 MiB)
[414364.187102] sd 6:0:0:1: [sdb] Write Protect is off
[414364.187106] sd 6:0:0:1: [sdb] Mode Sense: 23 00 00 00
[414364.190339] sd 6:0:0:1: [sdb] No Caching mode page found
[414364.190345] sd 6:0:0:1: [sdb] Assuming drive cache: write through
[414364.201730]  sdb: sdb1
[414364.201734] sdb: p1 size 982496 extends beyond EOD, enabling native capacity
[414364.214471]  sdb: sdb1
[414364.214475] sdb: p1 size 982496 extends beyond EOD, truncated
[414364.228961] sd 6:0:0:1: [sdb] Attached SCSI removable disk
$ sudo fdisk -l /dev/sdb
Disk /dev/sdb: 478.8 MiB, 502005760 bytes, 980480 sectors
Units: sectors of 1 * 512 = 512 bytes
Sector size (logical/physical): 512 bytes / 512 bytes
I/O size (minimum/optimal): 512 bytes / 512 bytes
Disklabel type: dos
Disk identifier: 0x00000000

Device     Boot Start    End Sectors   Size Id Type
/dev/sdb1  *       32 982527  982496 479.8M  6 FAT16
USBメモリのアンマウント
USBメモリをマウントしている場合はアンマウントしておく
$ sudo umount /dev/sdb1
$ mount | grep /dev/sdb
パーテイション情報の削除
念の為パーテイション情報を削除しておく
$ sudo wipefs /dev/sdb
offset               type
----------------------------------------------------------------
0x1fe                dos   [partition table]

$ sudo wipefs -a /dev/sdb ; sync
/dev/sdb: 2 bytes were erased at offset 0x000001fe (dos): 55 aa
/dev/sdb: calling ioctl to re-read partition table: 成功です
書き込み
進捗状態を確認したい場合はpvコマンドを間に挟んだり,ddrescue / ddrescueなどが利用できる
$ sudo dd if=./debian-stretch-DI-rc2-i386-netinst.iso of=/dev/sdb bs=4M ; sync
95+1 レコード入力
95+1 レコード出力
401604608 bytes (402 MB, 383 MiB) copied, 176.874 s, 2.3 MB/s
書き込みが終わったらUSBメモリを取り外してターゲットマシンで利用する
VirtualBoxで起動確認(余録)
手軽に試せるマシンがなかったのでVirtualBoxからUSBメモリを起動して確認した
USBメモリのディスクイメージ作成
直にUSBメモリを指定できないのでUSBメモリへアクセスするためのvmdkイメージを作成
$ sudo VBoxManage internalcommands createrawvmdk -rawdisk /dev/sdb -filename sdb.vmdk
RAW host disk access VMDK file sdb.vmdk created successfully.
$ sudo cat sdb.vmdk
# Disk DescriptorFile
version=1
CID=1722e641
parentCID=ffffffff
createType="fullDevice"

# Extent description
RW 980480 FLAT "/dev/sdb" 0

# The disk Data Base
#DDB

ddb.virtualHWVersion = "4"
ddb.adapterType="ide"
ddb.geometry.cylinders="972"
ddb.geometry.heads="16"
ddb.geometry.sectors="63"
ddb.uuid.image="c2c9d560-049f-4c44-bf8a-0b85e820ba12"
ddb.uuid.parent="00000000-0000-0000-0000-000000000000"
ddb.uuid.modification="00000000-0000-0000-0000-000000000000"
ddb.uuid.parentmodification="00000000-0000-0000-0000-000000000000"
USBメモリにアクセス権のあるユーザでVirtualBoxを起動してUSBメモリのイメージを指定して起動
(ここいまいち……)
$ gksudo virtualbox
mikutterからGooglePhotosにアップロードするやつを試す
というわけで、mikutterのプラグインできた。 https://t.co/6hP23pBziO
— スラマイマラス (@slimymars) 2017年2月25日
Google Photosってことは容量気にせず画像投げられる & Google+との連携もできそう?ってことで試してみました.
#mikutterについてはこちらを.
関連パッケージ導入
$ sudo apt install ruby-oauth2
mikutter-google-photos-uploader plugin導入
$ cd ~/.mikutter/plugin
$ git clone https://github.com/slimymars/mikutter-google-photos-uploader
$ cd mikutter-google-photos-uploader
$ bundle install
mikutter起動
……認識されない.mikutterが古い所為のようです.
$ grep mikutter: ~/.mikutter/plugin/mikutter-google-photos-uploader/.mikutter.yml
  mikutter: 3.5.2
$ dpkg-query -W mikutter
mikutter        3.5.0+dfsg-1
Debianではjessie-backportsからsidまで3.5.0+dfsg-1でexperimentalだけ3.5.2+dfsg-1でした.
てことで,experimentalから借りてきます.
sources.listにexperimentalがある状態で
$ grep experimental /etc/apt/sources.list
deb http://dennou-q.gfd-dennou.org/debian/ experimental main non-free contrib
deb-src http://dennou-q.gfd-dennou.org/debian/ experimental main non-free contrib
/etc/apt/preferences.d/mikutterを以下のような感じで用意して,
$ cat /etc/apt/preferences.d/mikutter
Package: mikutter
Pin: release a=experimental
Pin-Priority: 800
パッケージを更新して導入.
$ sudo apt upgrade
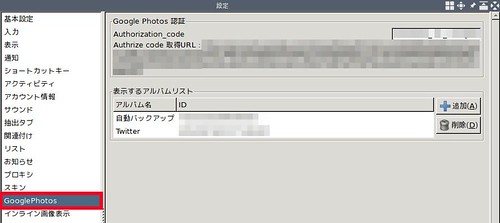
mikutterでの設定
mikutterが3.5.2になったので認識しました.設定画面を見ると,GooglePhotosというタブが増えているのでそのタブのAuthrise code 取得URLをブラウザで開いて認証し,出てきたコードをAuthrization_codeに貼り付けます.
更にmikutterからアップロードする保存先のアルバムを追加しておきます.GooglePhotosに存在しないアルバムは前もって
から登録しておきましょう.アルバムは複数登録できるので例えば
- ミク
- フレンズ
のようにアルバムを登録しておくと画像整理がはかどります?
実際の画像保存方法は,mikutterの保存したい画像の上で右クリックしてGoogle Photosに画像をアップロードを選び,
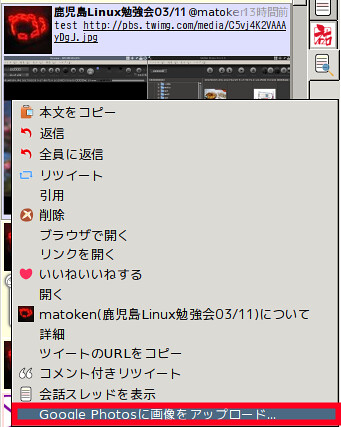
その後表示されるアルバムを選択するだけです.
![]()
Google Photosに見に行くとアップロードされているのが確認できます.
Google+へのクロスポストにも使えるかなと思ったのですが,Google+の投稿画面はタイムラグがあるようで少し待たないと表示されませんでした.これはGoogle側の問題ですね.Google Photosから投稿するようにすれば良さそうです.
関連?Tweet
てことで,mikutter-google-photos-uploader動きました.Debianではruby-oauth2とexperimentalのmikutterが必要な感じです. pic.twitter.com/qt5vhPnhjN
— 鹿児島Linux勉強会03/11 (@matoken) 2017年2月28日
これマジ!?
— キシワダイト (11カラット) (@toshi_a) 2017年2月28日
おもろいプラグイン出てきたんとちゃうか
— キシワダイト (11カラット) (@toshi_a) 2017年2月28日
みくったー・グーグル・フォトズ・うpろーだ、575では
— はいこん (@OBSOLETE_STD) 2017年2月28日
ておくれだ……!
— スラマイマラス (@slimymars) 2017年2月28日
わかりやすい pic.twitter.com/Q6iEzgvx3e
— 鹿児島Linux勉強会03/11 (@matoken) 2017年2月28日
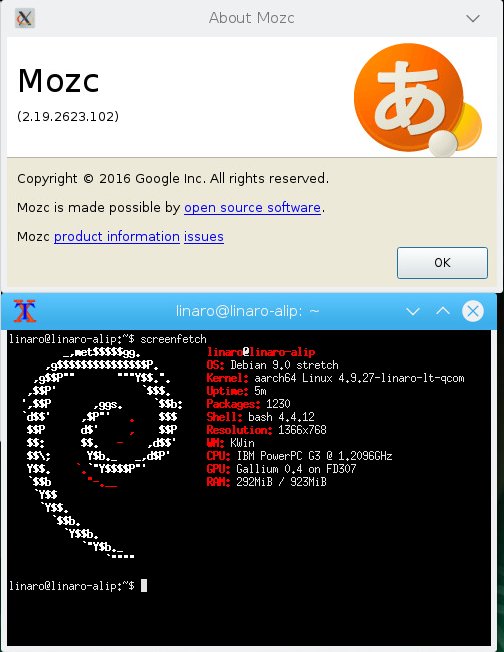
環境
$ screenfetch
         _,met$$$$$gg.           mk@x220
      ,g$$$$$$$$$$$$$$$P.        OS: Debian 9.0 stretch
    ,g$$P""       """Y$$.".      Kernel: x86_64 Linux 4.9.0-2-amd64
   ,$$P'              `$$$.      Uptime: 4d 18h 51m
  ',$$P       ,ggs.     `$$b:    Packages: 5147
  `d$$'     ,$P"'   .    $$$     Shell: bash 4.4.11
   $$P      d$'     ,    $$P     Resolution: 1366x768
   $$:      $$.   -    ,d$$'     WM: Awesome
   $$\;      Y$b._   _,d$P'      WM Theme: default
   Y$$.    `.`"Y$$$$P"'          CPU: Intel Core i5-2540M CPU @ 3.3GHz
   `$$b      "-.__               GPU: Mesa DRI Intel(R) Sandybridge Mobile
    `Y$$                         RAM: 13040MiB / 15934MiB
     `Y$$.
       `$$b.
         `Y$$b.
            `"Y$b._
                `""""