etckeeperのmanに載っているREADMEを読もうと思ったら無い

Debian sid amd64のetckeeperのmanに載っているREADMEを読もうと思ったらそんなファイルは無い.

$ man etckeeper | grep -B1 README
SEE ALSO
       /usr/share/doc/etckeeper/README.md.gz
$ lv /usr/share/doc/etckeeper/README.md.gz
/usr/share/doc/etckeeper/README.md.gz: No such file or directory
$ ls -lA /usr/share/doc/etckeeper/
合計 40
-rw-r--r-- 1 root root  4679  7月 18  2016 README.mdwn.gz
-rw-r--r-- 1 root root 11645  8月  2  2016 changelog.Debian.gz
-rw-r--r-- 1 root root  1785  7月 18  2016 copyright
-rw-r--r-- 1 root root   948  7月 18  2016 index.mdwn
-rw-r--r-- 1 root root   483  7月 18  2016 install.mdwn
-rw-r--r-- 1 root root    55  7月 18  2016 news.mdwn
-rw-r--r-- 1 root root   309  7月 18  2016 todo.mdwn
$ dpkg -L etckeeper | grep README
/etc/etckeeper/commit.d/README
/etc/etckeeper/init.d/README
/etc/etckeeper/post-install.d/README
/etc/etckeeper/pre-commit.d/README
/etc/etckeeper/pre-install.d/README
/etc/etckeeper/unclean.d/README
/etc/etckeeper/uninit.d/README
/etc/etckeeper/update-ignore.d/README
/usr/share/doc/etckeeper/README.mdwn.gz
$ dpkg-query -W etckeeper
etckeeper       1.18.5-1

/usr/share/doc/etckeeper/README.mdwn.gzが内容からしてそれぽい.
バグぽいので報告しようかと思って既存のバグを眺めると既に報告されて上流で修正済みのようでした.

バックライト制御コマンドのybacklight

awesome wmでバックライトの制御にxbacklightコマンドを使っていたのですが,手元のDebian sid amd64環境ではNo outputs have backlight propertyというエラーで現在利用できなくなっています.

$ xbacklight -get
No outputs have backlight property
$ xbacklight = 100
No outputs have backlight property
$ xbacklight + 10
No outputs have backlight property
$ xbacklight - 10
No outputs have backlight property

workaroundとしてこんな感じで手で叩いていてちょっとあれです.持ち出さないPCなのであまり操作しないのでどうにかなってるけど不便です.

$ sudo sh -c "echo 1000 > /sys/class/backlight/intel_backlight/brightness"

しかし,gdm3のログイン画面ではFn+Home/Fm+Endでバックライトの変更が出来ることに気づきました.
なんか進展あったのかな?とバグレポを眺めているとそれらしいものは見つからないけれど,

ybacklightというものが紹介されているのに気づきました.

利用方法はxbacklightと同じです.

$ ybacklight -h
Usage: /home/mk/bin/ybacklight [options]
  Options:
  -d <driver> or -driver <driver>: Use driver <driver> (NB: -display is
                                   also supported for compatibility)
  -help: Print this help
  -set <percentage> or = <percentage>: Set backlight to <percentage>
  -inc <percentage> or + <percentage>: Increase backlight by <percentage>
  -dec <percentage> or - <percentage>: Decrease backlight by <percentage>
  -get: Get backlight percentage
  -time <ignored> or -steps <ignored>: Unsupported, ignored
  -v: Verbose output

読むのはいけますが,変更は出来ません.

$ ybacklight -get
30
$ ybacklight +10
Permissions conflict.  Can't write to: ( /sys/class/backlight/intel_backlight/brightness )

/sys/class/backlight/intel_backlight/brightnessに書き込み権をつけると行けます.

$ ls -l /sys/class/backlight/intel_backlight/brightness
-rw-r--r-- 1 root root 4096  4月  5 06:48 /sys/class/backlight/intel_backlight/brightness
$ sudo chmod o+w /sys/class/backlight/intel_backlight/brightness
$ ls -l /sys/class/backlight/intel_backlight/brightness
-rw-r--rw- 1 root root 4096  4月  5 06:48 /sys/class/backlight/intel_backlight/brightness
$ ybacklight +10
40
$ ybacklight -10
30

ちょっと微妙.

gdm3でユーザーリストの非表示が無効になっていたのを調べる

Debian sid amd64のgdm3の画面でユーザーリストを表示しないようにしていたのですが,表示されるようになっていました.

これまでは,
/etc/gdm3/greeter.dconfファイルの以下の設定を有効にしていました.

disable-user-list=true

$ apt-get changelog gdm3( /usr/share/doc/gdm3/changelog.Debian.gz)を見るとこんな記述が,

  * greeter.dconf-defaults: this is a new file to remove the old 
    greeter.gsettings
  * Convert greeter.gsettings to greeter.dconf-defaults at postinst time 
    and use ucf to update the file.
  * Make a direct symlink to the new greeter.dconf-defaults file in the 
    dconf defaults directory.

gdm3 (3.12.1-1)からgreeter.dconf-defaultsに変わったようです.

$ ls /etc/gdm3/
Init  PostLogin  PostSession  PreSession  Xsession  daemon.conf  daemon.conf.dpkg-dist  greeter.dconf  greeter.dconf-defaults  greeter.dconf-defaults.ucf-old

内容はほとんど同じなようです.

$ diff  /etc/gdm3/greeter.dconf /etc/gdm3/greeter.dconf-defaults
26,27d25
< #logo='/usr/share/icons/gnome/48x48/places/debian-swirl.png'
< #fallback-logo='/usr/share/icons/gnome/48x48/places/debian-swirl.png'
31d28
< 
33c30
< disable-user-list=true
---
> # disable-user-list=true
37,38c34,35
< #banner-message-enable=true
< #banner-message-text='Welcome!!!!!!!!!!!!!!!!!!!!!!'
---
> # banner-message-enable=true
> # banner-message-text='Welcome'

ということで/etc/gdm3/greeter.dconf-defaultsdisable-user-list=trueを有効にしたらOKでした.

diff --git a/gdm3/greeter.dconf-defaults b/gdm3/greeter.dconf-defaults
index c5b0786..b0ee10c 100644
--- a/gdm3/greeter.dconf-defaults
+++ b/gdm3/greeter.dconf-defaults
@@ -27,7 +27,7 @@ logo='/usr/share/icons/hicolor/48x48/emblems/emblem-debian-white.png'
 fallback-logo='/usr/share/icons/hicolor/48x48/emblems/emblem-debian-white.png'

 # - Disable user list
-# disable-user-list=true
+disable-user-list=true
 # - Disable restart buttons
 # disable-restart-buttons=true
 # - Show a login welcome message

#ちなみにこのとき$ sudo service gdm3 restartとしたらなんかおかしくなってしまいました…….OSごと再起動したら治りました.

次から気づきやすいように

$ sudo dpkg-reconfigure apt-listchanges

で「APTで表示すべき変更内容の種類を選択してください。」を「両方 – ニュースと changelog の両方」にしておきました.testing/unstable辺りはちゃんと読まないとですね…….

※apt-listchangesが入っていない場合は$ sudo apt install apt-listchanges

ext4の暗号化fsを試してみる

Linux 4.1でext4の暗号化ファイルシステムが取り込まれているのに気づいたので少し試してみました.
cCryptFSやEncFSなどと同じようにファイル単位での暗号化です.前もって暗号化フラグを設定してあれば一般ユーザが勝手に暗号領域を作ることも可能でした.eCryptFSやEncFSのような使い方も可能そうです.恐らく速度はこちらのほうが速いでしょう(未確認).ただ,パスフレーズがわかってしまうと別のユーザからもマウント可能だしパーミッションがあれば読み書きも出来るので通常のファイルシステムと同様パーミッションの設定は必須ですね.
パーティション内全てを暗号化することは出来ないようなのでLUKS(dm-crypt)とは単純に空きかえることはできなさそうです.

そんなこんなでもともとAndroid向けということもあってPC/Serverではあまり使いみちが思いつかない感じです.(何かいい使い方ありそうだけど…….)

必要条件確認

  • Linux 4.1以上
$ uname -r
4.9.0-2-amd64
  • CONFIG_EXT4_ENCRYPTIONが有効
$ grep CONFIG_EXT4_ENCRYPTION /boot/config-`uname -r`
CONFIG_EXT4_ENCRYPTION=y
  • e2fsprogs 1.43以上
$ dpkg-query -W e2fsprogs
e2fsprogs       1.43.4-2
  • ブロックサイズが4k
$ sudo dumpe2fs /dev/loop0 | grep -i 'block size'
dumpe2fs 1.43.4 (31-Jan-2017)
Block size:               4096

必要なパッケージの導入

$ sudo apt install e2fsprogs keyutils util-linux coreutils mount

ファイルシステムの用意

今回は既存のファイルシステム内にディスクイメージを作成してそれを利用

  • 1GBのディスクイメージの作成
$ dd if=/dev/zero of=ext4-crypt.img seek=1073741824 bs=1 count=1
1+0 レコード入力
1+0 レコード出力
1 byte copied, 0.000118528 s, 8.4 kB/s
  • パーティションの作成
    primaryを1つ作成
$ /sbin/fdisk ext4-crypt.img

Welcome to fdisk (util-linux 2.29.2).
Changes will remain in memory only, until you decide to write them.
Be careful before using the write command.

Device does not contain a recognized partition table.
Created a new DOS disklabel with disk identifier 0xa25a3988.

Command (m for help): n
Partition type
   p   primary (0 primary, 0 extended, 4 free)
   e   extended (container for logical partitions)
Select (default p): p
Partition number (1-4, default 1): 
First sector (2048-2097151, default 2048): 
Last sector, +sectors or +size{K,M,G,T,P} (2048-2097151, default 2097151): 

Created a new partition 1 of type 'Linux' and of size 1023 MiB.

Command (m for help): w
The partition table has been altered.
Syncing disks.
  • ext4でフォーマット
$ /sbin/mkfs.ext4 ./ext4-crypt.img 
mke2fs 1.43.4 (31-Jan-2017)
Found a dos partition table in ./ext4-crypt.img
Proceed anyway? (y,N) y
Discarding device blocks: done                            
Creating filesystem with 262144 4k blocks and 65536 inodes
Filesystem UUID: dc44fd43-7d7a-4dfc-87f1-dc52410e2dd1
Superblock backups stored on blocks: 
        32768, 98304, 163840, 229376

Allocating group tables: done                            
Writing inode tables: done                            
Creating journal (8192 blocks): done
Writing superblocks and filesystem accounting information: done
  • マウント
$ sudo mount -o loop ./ext4-crypt.img /mnt
$ grep /mnt /etc/mtab 
/dev/loop0 /mnt ext4 rw,relatime,data=ordered 0 0
  • オーナー,グループの変更
$ sudo chown `id -u`.`id -g` /mnt
$ ls -la /mnt
合計 36
drwxr-xr-x 3 mk   mk    4096  4月  2 04:58 .
drwxr-xr-x 1 root root   248  3月 28 02:19 ..
drwx------ 2 root root 16384  4月  2 04:58 lost+found

ext4暗号化ファイルシステムの利用

  • ext4の暗号化フラグを設定
$ sudo tune2fs -O encrypt /dev/loop0
$ sudo dumpe2fs /dev/loop0 | grep -io encrypt
dumpe2fs 1.43.4 (31-Jan-2017)
encrypt
  • 鍵の生成とキーリングへの追加
$ /usr/sbin/e4crypt add_key
Enter passphrase (echo disabled): 
Added key with descriptor [07a3ce5a6ebf0396]
$ keyctl show
Session Keyring
1048296028 --alswrv   1000  1000  keyring: _ses
 615559430 --alsw-v   1000  1000   \_ logon: ext4:07a3ce5a6ebf0396

※パスフレーズの入力は1回だけで確認されないので初回は特に注意.利用しはじめる前にキーリングをクリアして登録し直してパスフレーズが正しいか確認しておく.

  • 暗号化ポリシーの設定

このとき対象ディレクトリが空ではない場合エラーとなる( Error [Directory not empty] setting policy. )ので注意.

マウントポイントにはlost+foundが存在するので必ずサブディレクトリ以下である必要がある.

$ mkdir /mnt/encryption
$ /usr/sbin/e4crypt set_policy 07a3ce5a6ebf0396 /mnt/encryption
Key with descriptor [07a3ce5a6ebf0396] applied to /mnt/encryption.

※鍵の生成とキーリングへの追加と暗号化ポリシーの設定は次のようにすることで一度に設定可能

$ /usr/sbin/e4crypt add_key /mnt/encryption
  • 暗号化ファイルシステム領域にファイルを作成
$ echo 'hello' > /mnt/encryption/test.txt
$ ls -la /mnt/encryption
合計 12
drwxr-xr-x 2 mk mk 4096  4月  2 05:07 .
drwxr-xr-x 4 mk mk 4096  4月  2 05:06 ..
-rw-r--r-- 1 mk mk    6  4月  2 05:07 test.txt
  • キーリングのクリア
$ sudo keyctl clear @s
$ sudo keyctl show
Session Keyring
1048296028 --alswrv   1000  1000  keyring: _ses

キーリングをクリアしただけではアクセスできる

$ ls -lA /mnt/encryption
合計 12
-rw-r--r-- 1 mk mk    6  4月  2 05:07 test.txt
  • アンマウントとマウントし直し

キーリングをクリアした状態でアンマウントすると暗号化された状態に戻る

$ sudo umount /mnt
$ sudo mount -o loop ./ext4-crypt.img /mnt
$ ls -la /mnt/encryption
合計 12
drwxr-xr-x 2 mk mk 4096  4月  2 05:42 .
drwxr-xr-x 4 mk mk 4096  4月  2 05:06 ..
-rw-r--r-- 1 mk mk    6  4月  2 05:42 uzUlJZQfaxMx,7cC63,53A
$ cat /mnt/encryption/uzUlJZQfaxMx,7cC63,53A 
cat: /mnt/encryption/uzUlJZQfaxMx,7cC63,53A: 要求されたキーが利用できません

ユーザ,グループ,パーミッションなどは見える.内容にはアクセスできない.

  • 再度暗号化領域を利用出来るようにする

鍵の生成とキーリングへの追加と暗号化ポリシーの設定をし直すとアクセスできるようになる

$ /usr/sbin/e4crypt add_key /mnt/encryption
Enter passphrase (echo disabled): 
Added key with descriptor [07a3ce5a6ebf0396]
$ ls -la /mnt/encryption
合計 12
drwxr-xr-x 2 mk mk 4096  4月  2 05:42 .
drwxr-xr-x 4 mk mk 4096  4月  2 05:06 ..
-rw-r--r-- 1 mk mk    6  4月  2 05:42 test.txt

ファイル名長の確認

EncFSなどはファイル名のメタデータがファイル名内にあるので利用できるファイル名長が短くなってしまう.ext4ではどうか試す.

  • 通常のext4領域では256文字
$ touch /mnt/1234567890123456789012345678901234567890123456789012345678901234567890123456789012345678901234567890123456789012345678901234567890123456789012345678901234567890123456789012345678901234567890123456789012345678901234567890123456789012345678901234567890123456
touch: '/mnt/1234567890123456789012345678901234567890123456789012345678901234567890123456789012345678901234567890123456789012345678901234567890123456789012345678901234567890123456789012345678901234567890123456789012345678901234567890123456789012345678901234567890123456' に touch できません: ファイル名が長すぎます
$ touch /mnt/123456789012345678901234567890123456789012345678901234567890123456789012345678901234567890123456789012345678901234567890123456789012345678901234567890123456789012345678901234567890123456789012345678901234567890123456789012345678901234567890123456789012345
  • 暗号化領域も同様だった
$ touch /mnt/encryption/123456789012345678901234567890123456789012345678901234567890123456789012345678901234567890123456789012345678901234567890123456789012345678901234567890123456789012345678901234567890123456789012345678901234567890123456789012345678901234567890123456789012345
$ ls -lA /mnt/encryption/
合計 4
-rw-r--r-- 1 mk mk 0  4月  2 07:14 123456789012345678901234567890123456789012345678901234567890123456789012345678901234567890123456789012345678901234567890123456789012345678901234567890123456789012345678901234567890123456789012345678901234567890123456789012345678901234567890123456789012345
-rw-r--r-- 1 mk mk 6  4月  2 05:42 test.txt
  • 非暗号化状態ではこんな状態
-rw-r--r-- 1 mk mk    0  4月  2 07:14 _OsoePJvc3qPQCPHbUMtjSynszcHig3BL
-rw-r--r-- 1 mk mk    6  4月  2 05:42 uzUlJZQfaxMx,7cC63,53A

復号状態のファイル名は別の場所に記録されているよう.

複数の暗号化領域を作ってみる

  • 新しい暗号化領域のためのディレクトリを作成
$ mkdir /mnt/encryption2
$ ls -la /mnt/encryption2
合計 8
drwxr-xr-x 2 mk mk 4096  4月  2 06:49 .
drwxr-xr-x 5 mk mk 4096  4月  2 06:49 ..
  • 暗号化設定
$ sudo e4crypt add_key /mnt/encryption2
Enter passphrase (echo disabled):
Key with descriptor [9640dd016062b432] already exists
Key with descriptor [9640dd016062b432] applied to /mnt/encryption2.
$ keyctl show
Session Keyring   
1048296028 --alswrv   1000  1000  keyring: _ses
  94779002 --alsw-v      0     0   \_ logon: ext4:69ca01e214957173
 219437542 --alsw-v      0     0   \_ logon: ext4:07a3ce5a6ebf0396
1025344233 --alsw-v      0     0   \_ logon: ext4:9640dd016062b432
$ touch /mnt/encryption2/hoge
  • 一回暗号化を解除してマウントし直す
$ keyctl clear @s
$ keyctl show
Session Keyring   
1048296028 --alswrv   1000  1000  keyring: _ses
$ sudo umount /mnt
$ sudo mount -o loop ./ext4-crypt.img /mnt
  • 片方だけ鍵を登録して暗号化領域を利用
$ sudo e4crypt add_key /mnt/encryption2
Enter passphrase (echo disabled):
Added key with descriptor [9640dd016062b432]
Key with descriptor [9640dd016062b432] applied to /mnt/encryption2.
$ ls -la /mnt/encryption*
/mnt/encryption:  
合計 12
drwxr-xr-x 2 mk mk 4096  4月  2 06:11 .
drwxr-xr-x 5 mk mk 4096  4月  2 06:49 ..
-rw-r--r-- 1 mk mk    0  4月  2 06:11 _OsoePJvc3qPQCPHbUMtjSynszcHig3BL
-rw-r--r-- 1 mk mk    6  4月  2 05:42 uzUlJZQfaxMx,7cC63,53A

/mnt/encryption2: 
合計 8
drwxr-xr-x 2 mk mk 4096  4月  2 06:51 .
drwxr-xr-x 5 mk mk 4096  4月  2 06:49 ..
-rw-r--r-- 1 mk mk    0  4月  2 06:51 hoge

暗号化領域に鍵が登録されてない状態でファイルを作ってみる

暗号化領域に鍵が登録されてない状態でファイルを作るとどうなるかを確認.

$ ls -lA /mnt/encryption
合計 4
-rw-r--r-- 1 mk mk 0  4月  2 07:14 _OsoePJvc3qPQCPHbUMtjSynszcHig3BL
-rw-r--r-- 1 mk mk 6  4月  2 05:42 uzUlJZQfaxMx,7cC63,53A
mk@x220:~ (1180)$ touch /mnt/encryption/test
touch: '/mnt/encryption/test' のタイムスタンプを設定中です: そのようなファイルやディレクトリはありません
mk@x220:~ (1181)$ ls -lA /mnt/encryption
合計 4
-rw-r--r-- 1 mk mk 0  4月  2 07:14 _OsoePJvc3qPQCPHbUMtjSynszcHig3BL
-rw-r--r-- 1 mk mk 6  4月  2 05:42 uzUlJZQfaxMx,7cC63,53A

エラーとなって作れない.

別のユーザで利用

  • 別のユーザで中が見えるか確認
$ id
uid=1001(gm) gid=1001(gm) groups=1001(gm),20(dialout),24(cdrom),25(floppy),29(audio),30(dip),44(video),46(plugdev),107(netdev)
$ ls -la /mnt/encryption
合計 12
drwxr-xr-x 2 mk mk 4096  4月  2 06:11 .
drwxr-xr-x 7 mk mk 4096  4月  2 07:48 ..
-rw-r--r-- 1 mk mk    0  4月  2 07:14 _OsoePJvc3qPQCPHbUMtjSynszcHig3BL
-rw-r--r-- 1 mk mk    6  4月  2 05:42 uzUlJZQfaxMx,7cC63,53A
$ ls -la /mnt/encryption
合計 12
drwxrwxrwx 2 mk mk 4096  4月  2 06:11 .
drwxr-xr-x 7 mk mk 4096  4月  2 07:48 ..
-rw-r--r-- 1 mk mk    0  4月  2 07:14 123456789012345678901234567890123456789012345678901234567890123456789012345678901234567890123456789012345678901234567890123456789012345678901234567890123456789012345678901234567890123456789012345678901234567890123456789012345678901234567890123456789012345
-rw-r--r-- 1 mk mk    6  4月  2 05:42 test.txt
  • 権限があればファイル作成もできる
$ touch /mnt/encryption/other_user
$ ls -lA /mnt/encryption
合計 4
-rw-r--r-- 1 mk mk 0  4月  2 07:14 123456789012345678901234567890123456789012345678901234567890123456789012345678901234567890123456789012345678901234567890123456789012345678901234567890123456789012345678901234567890123456789012345678901234567890123456789012345678901234567890123456789012345
-rw-r--r-- 1 gm gm 0  4月  2 07:55 other_user
-rw-r--r-- 1 mk mk 6  4月  2 05:42 test.txt
  • 暗号化解除は出来ないと思ったが,
$ /usr/sbin/e4crypt add_key /mnt/encryption
/mnt/encryption: Permission denied
  • パーミッションをゆるくしてやると出来てしまう.
$ ls -la /mnt/encryption
合計 12
drwxrwxrwx 2 mk mk 4096  4月  2 07:55 .
drwxr-xr-x 7 mk mk 4096  4月  2 07:48 ..
-rw-r--r-- 1 gm gm    0  4月  2 07:55 97NmIBETx,1q9US96etRsA
-rw-r--r-- 1 mk mk    0  4月  2 07:14 _OsoePJvc3qPQCPHbUMtjSynszcHig3BL
-rw-r--r-- 1 mk mk    6  4月  2 05:42 uzUlJZQfaxMx,7cC63,53A
$ /usr/sbin/e4crypt add_key /mnt/encryption
Enter passphrase (echo disabled): 
Added key with descriptor [07a3ce5a6ebf0396]
Error [Permission denied] setting policy.
The key descriptor [07a3ce5a6ebf0396] may not match the existing encryption context for directory [/mnt/encryption].
$ ls -lA /mnt/encryption
合計 4
-rw-r--r-- 1 mk mk 0  4月  2 07:14 123456789012345678901234567890123456789012345678901234567890123456789012345678901234567890123456789012345678901234567890123456789012345678901234567890123456789012345678901234567890123456789012345678901234567890123456789012345678901234567890123456789012345
-rw-r--r-- 1 gm gm 0  4月  2 07:55 other_user
-rw-r--r-- 1 mk mk 6  4月  2 05:42 test.txt
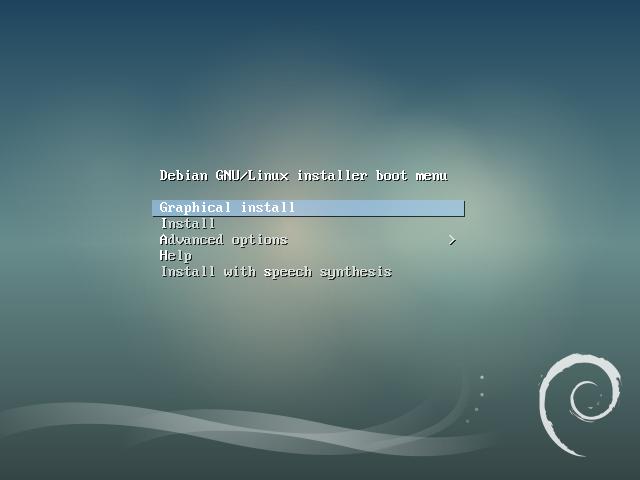
DebianのisoイメージをUSBメモリに書き込み

gistに貼ってたものだけどせっかくなのでこちらにも.

ファイルダウンロード

今回はDebian stretch Debian Installer rc2のi386版のnetinst.

  • debian-stretch-DI-rc2-i386-netinst.iso : イメージ本体
  • SHA512SUMS : isoファイルのチェックサムファイル
  • SHA512SUMS.sign : SHA512SUMSの署名ファイル
$ wget http://cdimage.debian.org/cdimage/stretch_di_rc2/i386/iso-cd/debian-stretch-DI-rc2-i386-netinst.iso http://cdimage.debian.org/cdimage/stretch_di_rc2/i386/iso-cd/SHA512SUMS.sign http://cdimage.debian.org/cdimage/stretch_di_rc2/i386/iso-cd/SHA512SUMS

※i386/amd64をよく使う場合はmulti-archを使うと1つのUSBメモリでi386/amd64が利用できて便利

チェックサムファイルの署名確認

チェックサムファイルのSHA512SUMSが正常なものか確認

$ gpg --verify SHA512SUMS.sign
gpg: 署名されたデータが'SHA512SUMS'にあると想定します
gpg: 2017年02月02日 07時45分30秒 JSTに施された署名
gpg:                RSA鍵DA87E80D6294BE9Bを使用
gpg: "Debian CD signing key <debian-cd@lists.debian.org>"からの正しい署名 [不明の]
gpg: *警告*: この鍵は信用できる署名で証明されていません!
gpg:       この署名が所有者のものかどうかの検証手段がありません。
 主鍵フィンガープリント: DF9B 9C49 EAA9 2984 3258  9D76 DA87 E80D 6294 BE9B

公開鍵が見つかりません(public key not found)というエラーの場合はgpg --keyserver keyring.debian.org --recv-keys DA87E80D6294BE9Bで鍵をインポートして再度確認.鍵のIDやフィンガープリントは以下のページでも確認できる

ハッシュ確認

isoファイルが正しくダウンロードされているか確認
以下の例はdebian-stretch-DI-rc2-i386-netinst.isoしかダウンロードしていないのでそれ以外のエラーや警告は無視する

$ sha512sum -c SHA512SUMS
sha512sum: debian-mac-stretch-DI-rc2-i386-netinst.iso: そのようなファイルやディレクトリはありません
debian-mac-stretch-DI-rc2-i386-netinst.iso: FAILED open or read
debian-stretch-DI-rc2-i386-netinst.iso: 完了
sha512sum: debian-stretch-DI-rc2-i386-xfce-CD-1.iso: そのようなファイルやディレクトリはありません
debian-stretch-DI-rc2-i386-xfce-CD-1.iso: FAILED open or read
sha512sum: 警告: 一覧にある 2 個のファイルが読み込めませんでした

usbメモリへの書き込み

USBメモリの確認

書き込み先のデバイスが正しいか確認する
USBメモリ接続直後にdmesgを確認したりfdiskコマンドやマウントして中を確認したり……

$ dmesg
  :
[414356.444121] usb 1-1.2: New USB device found, idVendor=13fe, idProduct=1a00
[414356.444128] usb 1-1.2: New USB device strings: Mfr=0, Product=11, SerialNumber=0
[414356.444131] usb 1-1.2: Product: USB 2.0 HUB
[414362.925178] usb-storage 1-1.2.1:1.0: USB Mass Storage device detected
[414362.925967] scsi host6: usb-storage 1-1.2.1:1.0
[414364.184209] sd 6:0:0:1: [sdb] 980480 512-byte logical blocks: (502 MB/479 MiB)
[414364.187102] sd 6:0:0:1: [sdb] Write Protect is off
[414364.187106] sd 6:0:0:1: [sdb] Mode Sense: 23 00 00 00
[414364.190339] sd 6:0:0:1: [sdb] No Caching mode page found
[414364.190345] sd 6:0:0:1: [sdb] Assuming drive cache: write through
[414364.201730]  sdb: sdb1
[414364.201734] sdb: p1 size 982496 extends beyond EOD, enabling native capacity
[414364.214471]  sdb: sdb1
[414364.214475] sdb: p1 size 982496 extends beyond EOD, truncated
[414364.228961] sd 6:0:0:1: [sdb] Attached SCSI removable disk
$ sudo fdisk -l /dev/sdb
Disk /dev/sdb: 478.8 MiB, 502005760 bytes, 980480 sectors
Units: sectors of 1 * 512 = 512 bytes
Sector size (logical/physical): 512 bytes / 512 bytes
I/O size (minimum/optimal): 512 bytes / 512 bytes
Disklabel type: dos
Disk identifier: 0x00000000

Device     Boot Start    End Sectors   Size Id Type
/dev/sdb1  *       32 982527  982496 479.8M  6 FAT16

USBメモリのアンマウント

USBメモリをマウントしている場合はアンマウントしておく

$ sudo umount /dev/sdb1
$ mount | grep /dev/sdb

パーテイション情報の削除

念の為パーテイション情報を削除しておく

$ sudo wipefs /dev/sdb
offset               type
----------------------------------------------------------------
0x1fe                dos   [partition table]

$ sudo wipefs -a /dev/sdb ; sync
/dev/sdb: 2 bytes were erased at offset 0x000001fe (dos): 55 aa
/dev/sdb: calling ioctl to re-read partition table: 成功です

書き込み

進捗状態を確認したい場合はpvコマンドを間に挟んだり,ddrescue / ddrescueなどが利用できる

$ sudo dd if=./debian-stretch-DI-rc2-i386-netinst.iso of=/dev/sdb bs=4M ; sync
95+1 レコード入力
95+1 レコード出力
401604608 bytes (402 MB, 383 MiB) copied, 176.874 s, 2.3 MB/s

書き込みが終わったらUSBメモリを取り外してターゲットマシンで利用する

VirtualBoxで起動確認(余録)

手軽に試せるマシンがなかったのでVirtualBoxからUSBメモリを起動して確認した

USBメモリのディスクイメージ作成

直にUSBメモリを指定できないのでUSBメモリへアクセスするためのvmdkイメージを作成

$ sudo VBoxManage internalcommands createrawvmdk -rawdisk /dev/sdb -filename sdb.vmdk 
RAW host disk access VMDK file sdb.vmdk created successfully.
$ sudo cat sdb.vmdk
# Disk DescriptorFile
version=1
CID=1722e641
parentCID=ffffffff
createType="fullDevice"

# Extent description
RW 980480 FLAT "/dev/sdb" 0

# The disk Data Base 
#DDB

ddb.virtualHWVersion = "4"
ddb.adapterType="ide"
ddb.geometry.cylinders="972"
ddb.geometry.heads="16"
ddb.geometry.sectors="63"
ddb.uuid.image="c2c9d560-049f-4c44-bf8a-0b85e820ba12"
ddb.uuid.parent="00000000-0000-0000-0000-000000000000"
ddb.uuid.modification="00000000-0000-0000-0000-000000000000"
ddb.uuid.parentmodification="00000000-0000-0000-0000-000000000000"

USBメモリにアクセス権のあるユーザでVirtualBoxを起動してUSBメモリのイメージを指定して起動

(ここいまいち……)

$ gksudo virtualbox

mikutterからGooglePhotosにアップロードするやつを試す

Google Photosってことは容量気にせず画像投げられる & Google+との連携もできそう?ってことで試してみました.

#mikutterについてはこちらを.

関連パッケージ導入

$ sudo apt install ruby-oauth2

mikutter-google-photos-uploader plugin導入

$ cd ~/.mikutter/plugin
$ git clone https://github.com/slimymars/mikutter-google-photos-uploader
$ cd mikutter-google-photos-uploader
$ bundle install

mikutter起動

……認識されない.mikutterが古い所為のようです.

$ grep mikutter: ~/.mikutter/plugin/mikutter-google-photos-uploader/.mikutter.yml 
  mikutter: 3.5.2
$ dpkg-query -W mikutter
mikutter        3.5.0+dfsg-1

Debianではjessie-backportsからsidまで3.5.0+dfsg-1experimentalだけ3.5.2+dfsg-1でした.

てことで,experimentalから借りてきます.

sources.listexperimentalがある状態で

$ grep experimental /etc/apt/sources.list
deb http://dennou-q.gfd-dennou.org/debian/ experimental main non-free contrib
deb-src http://dennou-q.gfd-dennou.org/debian/ experimental main non-free contrib

/etc/apt/preferences.d/mikutterを以下のような感じで用意して,

$ cat /etc/apt/preferences.d/mikutter
Package: mikutter
Pin: release a=experimental
Pin-Priority: 800

パッケージを更新して導入.

$ sudo apt upgrade

mikutterでの設定

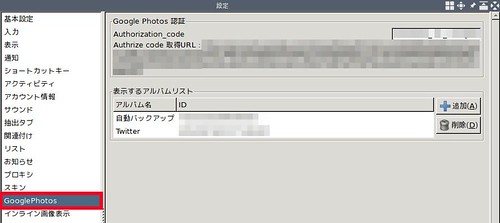
mikutterが3.5.2になったので認識しました.設定画面を見ると,GooglePhotosというタブが増えているのでそのタブのAuthrise code 取得URLをブラウザで開いて認証し,出てきたコードをAuthrization_codeに貼り付けます.
更にmikutterからアップロードする保存先のアルバムを追加しておきます.GooglePhotosに存在しないアルバムは前もって

から登録しておきましょう.アルバムは複数登録できるので例えば

  • ミク
  • フレンズ

のようにアルバムを登録しておくと画像整理がはかどります?

20170228_19:02:23-16584

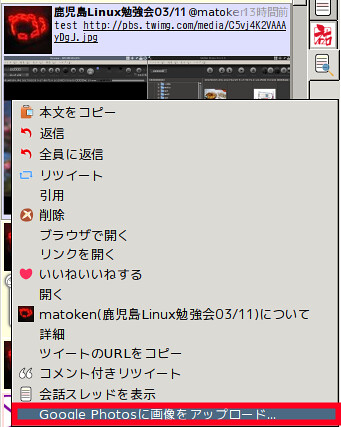
実際の画像保存方法は,mikutterの保存したい画像の上で右クリックしてGoogle Photosに画像をアップロードを選び,

shutter_17-03-01_08:33:12_001

その後表示されるアルバムを選択するだけです.

menu_018

Google Photosに見に行くとアップロードされているのが確認できます.

Google+へのクロスポストにも使えるかなと思ったのですが,Google+の投稿画面はタイムラグがあるようで少し待たないと表示されませんでした.これはGoogle側の問題ですね.Google Photosから投稿するようにすれば良さそうです.

関連?Tweet

環境

$ screenfetch
         _,met$$$$$gg.           mk@x220
      ,g$$$$$$$$$$$$$$$P.        OS: Debian 9.0 stretch
    ,g$$P""       """Y$$.".      Kernel: x86_64 Linux 4.9.0-2-amd64
   ,$$P'              `$$$.      Uptime: 4d 18h 51m
  ',$$P       ,ggs.     `$$b:    Packages: 5147
  `d$$'     ,$P"'   .    $$$     Shell: bash 4.4.11
   $$P      d$'     ,    $$P     Resolution: 1366x768
   $$:      $$.   -    ,d$$'     WM: Awesome
   $$\;      Y$b._   _,d$P'      WM Theme: default
   Y$$.    `.`"Y$$$$P"'          CPU: Intel Core i5-2540M CPU @ 3.3GHz
   `$$b      "-.__               GPU: Mesa DRI Intel(R) Sandybridge Mobile 
    `Y$$                         RAM: 13040MiB / 15934MiB
     `Y$$.                      
       `$$b.                    
         `Y$$b.                 
            `"Y$b._             
                `""""           

Mumble server設定メモ

鹿児島Linux勉強会 2017.01の遠隔で利用した設定メモです.

  • サーバのOSはDebian jessie amd64
  • 自動起動せず利用時に手動で起動する
  • fwも都度手動
  • サブチャンネルはなし
  • ssl証明書は既存のstartsslを利用

pkgの導入

$ sudo apt install mumble-server

自動起動を無効にする

$ sudo dpkg-reconfigure mumble-server

で設定画面に入り,

Mumble-server (murmurd) can start automatically when the server is booted.

Autostart mumble-server on server boot?

を選択する.
(/etc/default/mumble-serverMURMUR_DAEMON_START=0でも)

設定ファイルを編集

diff --git a/mumble-server.ini b/mumble-server.ini
index b445d4e..46f1dfd 100644
--- a/mumble-server.ini
+++ b/mumble-server.ini
@@ -12,7 +12,7 @@
 #        NOT regex = \w* BUT regex = \\w*

 # Path to database. If blank, will search for
-# murmur.sqlite in default locations or create it if not found.
+A
 database=/var/lib/mumble-server/mumble-server.sqlite

 # If you wish to use something other than SQLite, you'll need to set the name
@@ -86,7 +86,7 @@ pidfile=/var/run/mumble-server/mumble-server.pid
 # configure it here ehan ehrough D-Bus or Ice.
 #
 # Welcome message sent to clients when they connect.
-welcometext="<br />Welcome to this server running <b>Murmur</b>.<br />Enjoy your stay!<br />"
+welcometext="<br />Welcome to KagoLUG server running <b>Murmur</b>.<br />Enjoy your stay!<br />"

 # Port to bind TCP and UDP sockets to.
 port=64738
@@ -144,26 +144,28 @@ users=100
 # addresses.
 # Only uncomment the 'registerName' parameter if you wish to give your "Root" channel a custom name.
 #
-#registerName=Mumble Server
+registerName=KagoLUG Mumble Server
 #registerPassword=secret
 #registerUrl=http://mumble.sourceforge.net/
-#registerHostname=
+registerHostname=kagolug.org

 # If this option is enabled, the server will announce its presence via the 
 # bonjour service discovery protocol. To change the name announced by bonjour
 # adjust the registerName variable.
 # See http://developer.apple.com/networking/bonjour/index.html for more information
 # about bonjour.
-#bonjour=True
+bonjour=False

 # If you have a proper SSL certificate, you can provide the filenames here.
 # Otherwise, Murmur will create it's own certificate automatically.
-#sslCert=
-#sslKey=
+#sslCert=/etc/letsencrypt/live/kagolug.org/cert.pem
+sslCert=/etc/letsencrypt/live/kagolug.org/fullchain.pem
+sslKey=/etc/letsencrypt/live/kagolug.org/privkey.pem
+#sslCA=/etc/letsencrypt/live/kagolug.org/fullchain.pem

 # If Murmur is started as root, which user should it switch to?
 # This option is ignored if Murmur isn't started with root privileges.
-uname=mumble-server
+uname=root

 # If this options is enabled, only clients which have a certificate are allowed
 # to connect.

ssl証明書をクリア

$ sudo murmurd -wipessl
$ sudo killall murmurd

利用時

デーモンの起動とポート開放を行う

$ sudo service mumble-server start
$ sudo iptables -A INPUT -p udp -m udp --dport 64738 -j ACCEPT
$ sudo iptables -A INPUT -p tcp -m tcp --dport 64738 -j ACCEPT

利用者にはサーバとポートを伝える
– server : kagolug.org
– port : 64738

mumble://kagolug.org?title=KagoLUG%20Mumble%20Server&version=1.2.0

利用環境

  • PC : ThinkPad X200(Ubuntu 16.10 amd64)
  • マイク : elecom製の数百円のもの
  • スピーカー : Elecom LBT-SPTR01ECBK

はじめLBT-SPTR01ECBKでマイクとスピーカー両方の役割をと思っていたが,うまく音を拾えない&HSP/HFPでは音が悪く聞き取りづらかったので役割を分けた.
マイクはPC直付だったので音を拾いづらい&キー入力の音などを拾っていたはず.

利用完了時

デーモンの終了

$ sudo service mumble-server start

iptablesのmumbleルールを閉じる

$ sudo iptables -L --line-numbers | grep 64738
23   ACCEPT     udp  --  anywhere             anywhere             udp dpt:64738
24   ACCEPT     tcp  --  anywhere             anywhere             tcp dpt:64738
$ sudo iptables -D INPUT 23
$ sudo iptables -D INPUT 24
$ sudo iptables -L --line-numbers | grep 64738

課題

ssl証明書ファイルを読み込むためにdaemonをrootで動かしているのをmumble-serverユーザに戻したい.

-uname=mumble-server
+uname=root
$ sudo ls -l /etc/letsencrypt/live/kagolug.org/fullchain.pem /etc/letsencrypt/live/kagolug.org/privkey.pem
lrwxrwxrwx 1 root ssl-cert 40 Dec 26 10:30 /etc/letsencrypt/live/kagolug.org/fullchain.pem -> ../../archive/kagolug.org/fullchain9.pem
lrwxrwxrwx 1 root ssl-cert 38 Dec 26 10:30 /etc/letsencrypt/live/kagolug.org/privkey.pem -> ../../archive/kagolug.org/privkey9.pem

ssl-certグループにmumble-serverを登録で行けそう?

マイク

会議向けの全方位のマイクが欲しい

Screenfetch的な情報表示コマンドのNeofetch

Screenfetch的な情報表示コマンドのNeofetch

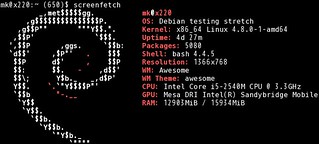
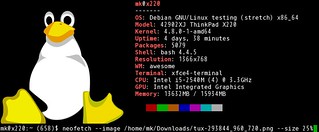
よくデスクトップのキャプチャを取得するときに表示されているScreenfetchコマンドというものがあります.システムの情報とアスキーアートを素敵に表示してくれます. これににたものでNetfetchというものを見かけたので試してみました.こちらは画像も扱えるようです.

導入

以下のページに各種環境への導入方法が書かれています.

Debian sid/stretchにはパッケージがあるようなことが書かれていますが,

Neofetch is in Debian Unstable/Stretch's official repositories.

今はsidのみのようです.

ということでひとまずstretchではこんな感じで導入しました.

$ #-- /etc/apt/sources.list.d/neofetch を作る
$ sudo apt edit-sources neofetch
$ cat /etc/apt/sources.list.d/neofetch.list
deb http://dl.bintray.com/dawidd6/neofetch jessie main
$ #-- 鍵のインポート
$ wget "https://bintray.com/user/downloadSubjectPublicKey?username=bintray" -O Release-neofetch.key
$ gpg Release-neofetch.key
pub   rsa4096 2015-02-17 [SC]
      8756C4F765C9AC3CB6B85D62379CE192D401AB61
uid           Bintray (by JFrog) <bintray@bintray.com>
sub   rsa4096 2015-02-17 [E]
$ sudo apt-key add Release-neofetch.key
$ rm Release-neofetch.key
$ #-- pkg情報更新&pkg導入
$ sudo apt update
$ sudo apt install neofetch

早速実行

$ neofetch --help

    NEOFETCH

    USAGE: neofetch --option "value" --option "value"

    NOTE: There's also a config option for each flag below.

    Info:
    --disable infoname          Allows you to disable an info line from appearing
                                in the output.
                                NOTE: You can supply multiple args. eg.
                                'neofetch --disable cpu gpu disk shell'
                                NOTE: The arguments must all be lowercase.
    --os_arch on/off            Hide/Show OS architecture.
    --speed_type type           Change the type of cpu speed to display.
                                Possible values: current, min, max, bios,
                                scaling_current, scaling_min, scaling_max
                                NOTE: This only support Linux with cpufreq.
    --cpu_shorthand type        Shorten the output of CPU
                                Possible values: name, speed, tiny, on, off
    --cpu_cores type            Whether or not to display the number of CPU cores
                                Takes: logical, physical, off
                                NOTE: 'physical' doesn't work on BSD.
    --cpu_speed on/off          Hide/Show cpu speed.
    --cpu_temp on/off           Hide/Show cpu temperature.
                                NOTE: This only works on Linux and BSD.
                                NOTE: For FreeBSD-based systems, you need to enable coretemp
                                      kernel module.
    --distro_shorthand on/off   Shorten the output of distro (tiny, on, off)
                                NOTE: This option won't work in Windows (Cygwin)
    --kernel_shorthand on/off   Shorten the output of kernel
                                NOTE: This option won't work in BSDs (except PacBSD and PC-BSD)
    --uptime_shorthand on/off   Shorten the output of uptime (tiny, on, off)
    --refresh_rate on/off       Whether to display the refresh rate of each monitor
                                Unsupported on Windows
    --gpu_brand on/off          Enable/Disable GPU brand in output. (AMD/NVIDIA/Intel)
    --gtk_shorthand on/off      Shorten output of gtk theme/icons
    --gtk2 on/off               Enable/Disable gtk2 theme/icons output
    --gtk3 on/off               Enable/Disable gtk3 theme/icons output
    --shell_path on/off         Enable/Disable showing $SHELL path
    --shell_version on/off      Enable/Disable showing $SHELL version
    --ip_host url               Url to query for public IP
    --song_shorthand on/off     Print the Artist/Title on seperate lines
    --birthday_shorthand on/off Shorten the output of birthday
    --birthday_time on/off      Enable/Disable showing the time in birthday output
    --birthday_format format    Format the birthday output. (Uses 'date' cmd format)

    Text Formatting:
    --colors x x x x x x        Changes the text colors in this order:
                                title, @, underline, subtitle, colon, info
    --underline on/off          Enable/Disable the underline.
    --underline_char char       Character to use when underlining title
    --bold on/off               Enable/Disable bold text

    Color Blocks:
    --color_blocks on/off       Enable/Disable the color blocks
    --block_width num           Width of color blocks in spaces
    --block_height num          Height of color blocks in lines
    --block_range start end     Range of colors to print as blocks

    Bars:
    --bar_char 'elapsed char' 'total char'
                                Characters to use when drawing bars.
    --bar_border on/off         Whether or not to surround the bar with '[]'
    --bar_length num            Length in spaces to make the bars.
    --bar_colors num num        Colors to make the bar.
                                Set in this order: elapsed, total
    --cpu_display mode          Bar mode.
                                Takes: bar, infobar, barinfo, off
    --memory_display mode       Bar mode.
                                Takes: bar, infobar, barinfo, off
    --battery_display mode      Bar mode.
                                Takes: bar, infobar, barinfo, off
    --disk_display mode         Bar mode.
                                Takes: bar, infobar, barinfo, off

    Image:
    --image type                Image source. Where and what image we display.
                                Possible values: wall, ascii,
                                /path/to/img, /path/to/dir/, off
    --size 00px | --size 00%    How to size the image.
                                Possible values: auto, 00px, 00%, none
    --crop_mode mode            Which crop mode to use
                                Takes the values: normal, fit, fill
    --crop_offset value         Change the crop offset for normal mode.
                                Possible values: northwest, north, northeast,
                                west, center, east, southwest, south, southeast

    --xoffset px                How close the image will be to the left edge of the
                                window. This only works with w3m.
    --yoffset px                How close the image will be to the top edge of the
                                window. This only works with w3m.
    --bg_color color            Background color to display behind transparent image.
                                This only works with w3m.
    --gap num                   Gap between image and text.
                                NOTE: --gap can take a negative value which will
                                move the text closer to the left side.
    --clean                     Delete cached files and thumbnails.

    Ascii:
    --ascii value               Where to get the ascii from, Possible values:
                                distro, /path/to/ascii
    --ascii_colors x x x x x x  Colors to print the ascii art
    --ascii_distro distro       Which Distro's ascii art to print
                                NOTE: Arch and Ubuntu have 'old' logo varients.
                                NOTE: Use 'arch_old' or 'ubuntu_old' to use the old logos.
                                NOTE: Ubuntu has flavor varients.
                                NOTE: Change this to 'Lubuntu', 'Xubuntu', 'Ubuntu-GNOME'
                                or 'Ubuntu-Budgie' to use the flavors.
    --ascii_logo_size           Size of ascii logo.
                                Supported distros: Arch, Gentoo, Crux, OpenBSD.
    --ascii_bold on/off         Whether or not to bold the ascii logo.
    --logo | -L                 Hide the info text and only show the ascii logo.

    Screenshot:
    --scrot | -s /path/to/img   Take a screenshot, if path is left empty the screen-
                                shot function will use $scrot_dir and $scrot_name.
    --upload | -su /pth/t/img   Same as --scrot but uploads the scrot to a website.
    --image_host                Website to upload scrots to. Takes: imgur, teknik
    --scrot_cmd cmd             Screenshot program to launch

    Other:
    --config /path/to/config    Specify a path to a custom config file
    --config none               Launch the script without a config file
    --help                      Print this text and exit
    --version                   Show neofetch version
    -v                          Display error messages.
    -vv                         Display a verbose log for error reporting.

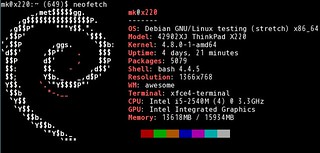
オプション結構多いです. とりあえず素で実行.

20161207_05:12:12-5188

情報もScreenfetchより増えています.

20161207_05:12:20-9093

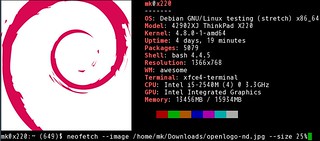
次は画像を指定してみます.画像サイズが大きかったので25%に縮小もしています. 楽しい :)

20161207_05:12:35-3963

20161207_06:12:30-16979

画像の表示については環境によってうまく行く行かないがあるようです.うまく表示されない場合は以下のWikiを参照すると良さそうです.

Mumbleでリモート会議

先週ですが,FSIJ 月例会に参加していました. といっても東京に出て行ったわけではなくネットワーク開催だったので家からの参加です.

ということでMumbleというソフトウェアで音声チャット + Etherpad(ウェブブラウザベース)でテキスト交換という環境でした. Mumbleを前もって試していればよかったのだけど直前に入れてなかなか参加できず途中からの参加になりましたorz~

MumbleはDebian stretch amd64環境ではパッケージが存在する( mumble )のでこれを導入するだけでした.マルチプラットホームで各種環境向けにも存在して,Androidなどでも利用できるようです. – Mumble, the open source VoIP solutionPlumble – Mumble VOIP (Free) – Google Play の Android アプリPlumble – Mumble VOIP – Google Play の Android アプリ

今回使用機器は以下のような感じ.でしたが,スピーカーは試行錯誤している時に繋いだもので後で試すと本体のスピーカーで大丈夫でした.

  • PC : Thinkpad X220(Debian stretch amd64)
  • マイク : 3.5mmジャックに直接挿せるもの(型番不明)
  • スピーカー : ELECOM LBT-SPTR01AV(Bluetooth)

このときMumble利用時に嵌ったところをメモしておきます. – ヘッドホンとマイクが1つの端子の端末でマイクを繋ぐとヘッドホンもそちらを向いてしまって音が出なかった – Bluetothヘッドセットを繋ぐとそちらから音が出るようになったがマイクがうまく働かない – PulseAudio Volume Control (pavucontrol)で見るとマイクがミュートになっていたので解除してMumbleに割り当て – 伝送方式を"push to talk"にしたがpushがわからなかった -> ショートカットで適当なキーに割り当て(Mumble非アクティブ時も有効)

  • その他
    • Awesome WM環境ではMumbleが最小化してしまうと窓を復帰させる方法が今のところわからない.タスクトレイのアイコンをクリックしても出てこない.(Xfce4はアイコンクリックで出てくるよう)
    • 一回設定できればフォーカスがなくてもショートカットが効いて話せるのでとりあえず使えるけどチャットと誰が話しているかのアイコンの確認(唇アイコンが赤くなる)が出来ない(オーバーレイの設定でどうにかなりそう?)
    • アイコンを右クリックしてそのまま離すと丁度終了になってしまう…….
    • Mumbleの音声品質は16kbps/40kbps/72kbpsから選択可能(規定値は40k)
    • push to talkを使うとその時しか音声が飛ばないので周りの環境に左右されにくくて良い(キー入力の音や環境音が入りにくい)

最近はUstream.tv/Youtube Liveなどの動画配信やBBB(BigBlueButton)などの動画を使ったオンライン会議システムなどで中継ということが多いですが,手弁当の勉強会なんかだと回線などの問題でうまく行かなかったりすることが多いですが割り切って音声のみの中継にしてしまうのもありだなと感じました.

最近リモート参加した勉強会

不正なUSBデバイスからPCを守るUSBGuardを試す

BadUSBなどの不正なUSBデバイスからPCが守れないかなちょっと設定すればできそう?そもそも作っている人がいるんじゃ?ということで探したらUSBGuardというソフトウェアを見つけました.

このソフトウェアを導入しておくと,設定したルールに合致しないUSBデバイスはblockされます. デスクトップ利用の場合はGUIのアプレットを利用してUSB接続時にウィンドウがポップアップして接続するか選べたりもします. 便利.
#USB KILLERは……USB配線を外したりUSBコネクタを塞ぐしかないですよね多分.

導入

Debian/Ubuntuにはパッケージがあるのでそちらから導入します.

$ sudo apt install usbguard usbguard-applet-qt

設定

一般ユーザから利用する場合は設定ファイルを編集してユーザかグループを追加してデーモンの再起動を行います. 設定ファイルは/etc/usbguard/usbguard-daemon.confです.

diff --git a/usbguard/usbguard-daemon.conf b/usbguard/usbguard-daemon.conf
index 4a54ca0..7b3a165 100644
--- a/usbguard/usbguard-daemon.conf
+++ b/usbguard/usbguard-daemon.conf
@@ -65,7 +65,7 @@ PresentControllerPolicy=keep
#
# IPCAllowedUsers=username1 username2 ...
#
-IPCAllowedUsers=root
+IPCAllowedUsers=root user1 user2

#
# Groups allowed to use the IPC interface.
@@ -75,7 +75,7 @@ IPCAllowedUsers=root
#
# IPCAllowedGroups=groupname1 groupname2 ...
#
-IPCAllowedGroups=root
+IPCAllowedGroups=root users

#
# Generate device specific rules including the "via-port"

ユーザの場合はIPCAllowedUsers,グループの場合はIPCAllowedGroupsにスペース区切りで書いていきます.

デーモンの再起動

設定を反映するためにデーモンを再起動します.

$ sudo service usbguard restart

CUIでの利用例

usbguardが起動した後に接続されたデバイスはblockされています.

$ usbguard list-devices| tail -2
9: allow id 8087:0024 serial "" name "" hash "Zx7v0FMQEjScKSAFENAiobEs1OGPPB0YWR+yXDCVE04=" parent-hash "WwvSEwd+7257rAqUGLMQjffF7zyqygmmLeQTYnR9QzQ=" via-port "4-1" with-interface 09:00:00
11: block id 1004:631c serial "03a809c94b4befd4" name "LGE Android Phone" hash "P5dSK5xxK4R5QTRzd7KlD8Agf/+28pztL077j1oWqPI=" parent-hash "Zx7v0FMQEjScKSAFENAiobEs1OGPPB0YWR+yXDCVE04=" via-port "4-1.1" with-interface ff:ff:00

blockされている11番目のデバイスを許可してみます.(これは一時的です)

$ usbguard allow-device 11
$ usbguard list-devices| tail -1
11: allow id 1004:631c serial "03a809c94b4befd4" name "LGE Android Phone" hash "P5dSK5xxK4R5QTRzd7KlD8Agf/+28pztL077j1oWqPI=" parent-hash "Zx7v0FMQEjScKSAFENAiobEs1OGPPB0YWR+yXDCVE04=" via-port "4-1.1" with-interface ff:ff:00

状況の確認

USBデバイスの認識状況を監視します.

$ usbguard watch
[IPC] Connected
[device] Inserted: id=12 hash=vi38heJ4vKEdayxiqrQFylpwa3xkVYYUkZi2zbu3sWs= name=Mass Storage Device product_id=1336 serial=00000000000006 vendor_id=048d interface={ 08:06:50} rule_match=0 rule_id=4294967295
[device] Blocked: id=12 name=Mass Storage Device product_id=1336 vendor_id=048d rule_match=0 rule_id=4294967295
[device] Allowed: id=12 name=Mass Storage Device product_id=1336 vendor_id=048d rule_match=0 rule_id=4294967295

GUI(usbguard-applet-qt)の利用例

CUIだとちょっと面倒ですが,デスクトップ利用の場合はusbguard-applet-qtが便利です.

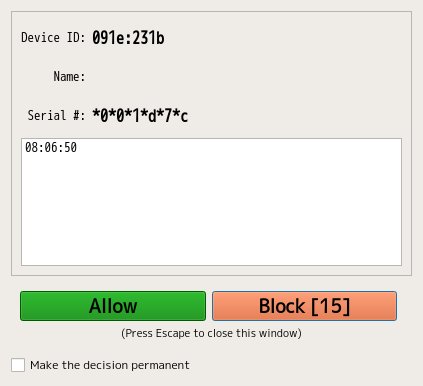
usbguard-applet-qtが起動した状態でUSBデバイスを接続すると以下のようなダイヤログが表示されます.Allowボタンを押すことで利用できるようになります. このとき,Make the decision permanentにチェックを入れておくと,設定が永続化されます.この設定は/etc/usbguard/rules.confに記録されます.

20161007_02:10:22-9078

ダイヤログはタイムアウトすると消えてしまいますが,アプレットのウィンドウから設定画面を呼び出すことができます.ここから設定変更ができます.

20161007_16:10:49-4107

とりあえずはこれくらいで良さそうですが,ルールを書くといろいろ応用が効きそうです.

とりあえずはどうもデーモン起動までに接続されていたデバイスは許可されるようなので内臓デバイスを明示的に許可してその他をblockしようと思います.