Googleドライブにコマンドラインでアクセスするskickaを試す

Googleドライブにコマンドラインでアクセスできる skicka を少し試してみました.

GOPATHを設定していない場合設定
$ GOPATH=~/go
$ PATH=${PATH}:~/go/bin
skickaの導入
$ go get github.com/google/skicka

skickaの設定を行います.
init コマンドで設定ファイルを生成します.
設定ファイルは ~/.skicka.config として作れれます.
次にlsコマンドを発行します.初回実行時にはウェブブラウザが起動して認証処理が走ります.許可すると自動的に認証が完了してls処理が走ります.
認証情報は`~/.skicka.tokencache.json` に保存されます.
ls実行時に次回以降のためにメタデータを作成します.ファイルが多いと時間がかかります.プログレスが表示されるのでしばらく待ちましょう.
メタデータは ~/.skicka.metadata.cache に保存されます.

skickaの初期設定
$ skicka init
$ skicka ls

サーバなどでウェブブラウザを起動するのが難しい場合は -no-browser-authls コマンドの に付けて起動すると認証URLが表示されるのでそれを操作PCなどで開いて認証を行い,表示された認証コードをコマンドラインに貼り付けます.

$ skicka -no-browser-auth ls
Go to the following link in your browser:
https://accounts.google.com/o/oauth2/auth?client_id=952283912845-sjotrejbktpinel08hrnspl33d8gho1e.apps.googleusercontent.com&redirect_uri=urn%3Aietf%3Awg%3Aoauth%3A2.0%3Aoob&response_type=code&scope=https%3A%2F%2Fwww.googleapis.com%2Fauth%2Fdrive&state=st1541320926479298710
Enter verification code: 4/iwBrjQFEvm2p0nQGXJuRQgTZFZZ6BmXkT7Up7Wl3UYS7NWEyiltTc6E
Usage
$ ~/go/bin/skicka
usage: skicka [skicka options] <command> [command options]

Supported commands are:
  cat       Print the contents of the given file
  download  Download a file or folder hierarchy from Drive to the local disk
  df        Display free space on Drive
  du        Report disk usage for a folder hierarchy on Drive
  fsck      Check consistency of files in Drive and local metadata cache
  genkey    Generate a new encryption key
  init      Create an initial skicka configuration file
  ls        List the contents of a folder on Google Drive
  mkdir     Create a new folder or folder hierarchy on Drive
  rm        Remove a file or folder on Google Drive
  upload    Upload a local file or directory hierarchy to Drive

'skicka help' prints more detailed documentation.
help
$ ~/go/bin/skicka help                                                                                                             [45/2151]
skicka is a tool for working with files and folders on Google Drive.
See http://github.com/google/skicka/README.md for information about getting started.

usage: skicka [common options] <command> [command options]

Commands and their options are:
  cat        Print the contents of the Google Drive file to standard output.
             Arguments: drive_path ...

  download   Recursively download either a single file, or all files from a
             Google Drive folder to a local directory. If the corresponding
             local file already exists and has the same contents as the its
             Google Drive file, the download is skipped.
             Arguments: [-ignore-times] [-download-google-apps-files]
                        drive_path local_path

  df         Prints the total space used and amount of available space on
             Google Drive.

  du         Print the space used by the Google Drive folder and its children.
             Arguments: [drive_path ...]

  fsck       [EXPERIMENTAL/NEW] Use at your own risk.
             Perform a number of consistency checks on files stored in Google
             Drive, including verifying metadata and removing duplicate files
             with the same name.
             Arguments: [--trash-duplicates] [drive_path]

  help       Print this help text.

  genkey     Generate a new key for encrypting files.

  init       Create an initial ~/.skicka.config configuration file. (You
             will need to edit it before using skicka; see comments in the
             configuration file for details.)

  ls         List the files and directories in the given Google Drive folder.                                                                          [8/2151]
             Arguments: [-d, -l, -ll, -r] [drive_path ...],
             where -l and -ll specify long (including sizes and update
             times) and really long output (also including MD5 checksums),
             respectively.  The -r argument causes ls to recursively list
             all files in the hierarchy rooted at the base directory, and
             -d causes directories specified on the command line to be
             listed as files (i.e., their contents aren't listed.)

  mkdir      Create a new directory (folder) at the given Google Drive path.
             Arguments: [-p] drive_path ...,
             where intermediate directories in the path are created if -p is
             specified.

  rm         Remove a file or directory at the given Google Drive path.
             Arguments: [-r, -s] drive_path ...,
             where files and directories are recursively removed if -r is
             specified and the google drive trash is skipped if -s is
             specified. The default behavior is to fail if the drive path
             specified is a directory and -r is not specified, and to send
             files to the trash instead of permanently deleting them.

  upload     Uploads all files in the local directory and its children to the
             given Google Drive path. Skips files that have already been
             uploaded.
             Arguments: [-ignore-times] [-encrypt] [-follow-symlinks <maxdepth>]
                        local_path drive_path

Options valid for both "upload" and "download":
  -dry-run         Don't actually upload or download, but print the paths of
                   all files that would be transferred.
  -ignore-times    Normally, skicka assumes that if the timestamp of a local
                   file matches the timestamp of the file on Drive and the
                   files have the same size, then it isn't necessary to
                   confirm that the file contents match. The -ignore-times
                   flag can be used to force checking file contents in this
                   case.

General options valid for all commands:
  -config <filename>     General skicka configuration file. Default: ~/.skicka.config.
  -debug                 Enable debugging output.
  -dump-http             Dump http traffic.
  -metadata-cache-file <filename>
                         File to store metadata about Google Drive contents.
                         Default: ~/.skicka.metadata.cache
  -no-browser-auth       Disables attempting to open the authorization URL in a web
                         browser when initially authorizing skicka to access Google Drive.
  -quiet                 Suppress non-error messages.
  -tokencache <filename> OAuth2 token cache file. Default: ~/.skicka.tokencache.json.
  -verbose               Enable verbose output.
ファイルのアップロード
$ skicka upload ~/Pictures/$(ls -tr1 ~/Pictures/|tail -1) /
Files:  14.41 KiB / 14.41 KiB [====================================================================================================================] 100.00% 3s
2018/11/04 17:45:32 Preparation time 1s, sync time 3s
2018/11/04 17:45:32 Updated 1 Drive files, 0 local files
2018/11/04 17:45:32 14.41 kiB read from disk, 0 B written to disk
2018/11/04 17:45:32 14.41 kiB uploaded (3.98 kiB/s), 0 B downloaded (0 B/s)
2018/11/04 17:45:32 52.08 MiB peak memory used
ファイルを確認
$ skicka ls|grep jpg
20180307_23:03:21-10889.jpg
20181104_17:11:45-30082.jpg
ファイルのダウンロード
$ skicka rm 20181104_17:11:45-30082.jpg
$ diff ~/Pictures/20181104_17:11:45-30082.jpg /tmp/20181104_17:11:45-30082.jpg
$ ls -l ~/Pictures/20181104_17:11:45-30082.jpg /tmp/20181104_17:11:45-30082.jpg
-rw-r--r-- 1 matoken matoken 14760 11月  4 17:41 /home/matoken/Pictures/20181104_17:11:45-30082.jpg
-rw-r--r-- 1 matoken matoken 14760 11月  4 17:41 /tmp/20181104_17:11:45-30082.jpg
ファイルの削除
$ skicka rm /20181104_17:11:45-30082.jpg

skickaには暗号化機能があります.upload時に -encrypt オプションを付与することによりファイルを暗号化してGoogleドライブに保存できます.そのためには準備が必要です.
SKICKA_PASSPHRASE という環境変数にパスフレーズを設定した状態で,skicka genkey を実行して生成された情報を設定ファイルの ~/.skicka.config に書き込みます.

暗号化のためのkey等を生成する(環境変数はexportしないと認識しなかった)
$ read -sp "skicka pass: " SKICKA_PASSPHRASE && export SKICKA_PASSPHRASE && skicka genkey
skicka pass: ; Add the following lines to the [encryption] section
; of your ~/.skicka.config file.
        salt=62cd4c08693c935f35c45be5261907127ef14055f197bb19bae36616fedecb54
        passphrase-hash=23f702efce4fe7bf775d3bc80f07e2a765589016b537bf322ed5e0c8f2f6ce90
        encrypted-key=463c9c75b3aa98e5401bb5fde6d681f8053d39d3e5ce49ef22bcc58977736162
        encrypted-key-iv=d2533e58f6c9bb976a66d499280ce8c2
設定ファイルに暗号化情報を書き込む(コメントを外すのを忘れずに)
$ vi ~/.skicka.config
$ grep -A5 encryption ~/.skicka.config
[encryption]
        ; Run 'skicka genkey' to generate an encyption key.
        salt=62cd4c08693c935f35c45be5261907127ef14055f197bb19bae36616fedecb54
        passphrase-hash=23f702efce4fe7bf775d3bc80f07e2a765589016b537bf322ed5e0c8f2f6ce90
        encrypted-key=463c9c75b3aa98e5401bb5fde6d681f8053d39d3e5ce49ef22bcc58977736162
        encrypted-key-iv=d2533e58f6c9bb976a66d499280ce8c2

upload時に -encrypt を指定すると暗号化され,.aes256 という拡張子付きで保存されます.

暗号化しながら保存する
$ skicka mkdir encryption
$ skicka upload -encrypt ~/Pictures/20181105_19\:11\:18-8911.jpg /encryption/
$ skicka ls /encryption/
20181105_19:11:18-8911.jpg.aes256

元のファイル名ではダウンロードできず,.aes256 拡張子付きのファイル名ではダウンロードできた.このファイルは .aes256 の拡張子付きのままだが,復号されている.

ダウンロード
$ skicka download /encryption/20181105_19:11:18-8911.jpg ./
skicka: /encryption/20181105_19:11:18-8911.jpg: not found on Drive
$ skicka download /encryption/20181105_19:11:18-8911.jpg.aes256 ./
$ file ./20181105_19\:11\:18-8911.jpg.aes256
./20181105_19:11:18-8911.jpg.aes256: JPEG image data, JFIF standard 1.01, aspect ratio, density 1x1, segment length 16, baseline, precision 8, 933x600, frames
3
$ identify ./20181105_19\:11\:18-8911.jpg.aes256
./20181105_19:11:18-8911.jpg.aes256 JPEG 933x600 933x600+0+0 8-bit sRGB 92988B 0.000u 0:00.000
$ display ./20181105_19\:11\:18-8911.jpg.aes256

ウェブブラウザからダウンロードしたファイルは暗号化されている.データ量は少し増えている.

$ file 20181105_19_11_18-8911.jpg.aes256.jpg.aes256
20181105_19_11_18-8911.jpg.aes256.jpg.aes256: data
$ ls -la 201811*
-rw-r--r-- 1 matoken matoken 92988 11月  5 19:30 20181105_19:11:18-8911.jpg.aes256
-rw-r--r-- 1 matoken matoken 93004 11月  5 21:46 20181105_19_11_18-8911.jpg.aes256.jpg.aes256
環境
$ dpkg-query -W golang git bash
bash    4.4.18-3.1
git     1:2.19.1-1
golang  2:1.10~5
$ lsb_release -d
Description:    Debian GNU/Linux unstable (sid)
$ uname -m
x86_64
Debian, Ubuntu で 上流のパッケージを借りてくる

以前以下のような記事を書きました.

今でもこのblogの中ではアクセスが多く,最近もトラックバックをもらいました.

この当時は arm64 の mozcパッケージがなくて自分でbuild したという話なのですが,現在はDebian では buster(testing), Ubuntu ではartful(17.10) 以降でパッケージが存在します.
なのでこの野良パッケージを使うよりも公式の上流パッケージを借りるほうが大抵の場合いいと思います.
ということで手順を書いておきます.

パッケージファイルだけが必要な場合はパッケージのページからダウンロード可能です.

野良パッケージは近日中に削除します.

Debian stretch arm64 に Debian buster arm64 の mozc を借りてくる

Debian stretch arm64 では mozc-data しかない
$ apt-cache search mozc
mozc-data - Mozc input method - data files

buster(testing) のmozc を借りてくることにする.

/etc/apt/preferences で buster の優先度を下げる

/etc/apt/preferences
Package: *
Pin: release n=buster
Pin-Priority: 100
/etc/apt/sources.list に buster(testing)追加 設定
deb http://deb.debian.org/debian buster main

sources.list の編集には apt edit-sources を使うと文法チェックをしてくれるのでおすすめ

パッケージ情報の更新
$ sudo apt update
mozcパッケージの確認
$ apt-cache search mozc
mozc-data - Mozc input method - data files
fcitx-dbus-status - Addon for Fcitx to set/get/monitor IM statuses via D-Bus
emacs-mozc - Mozc for Emacs
emacs-mozc-bin - Helper module for emacs-mozc
fcitx-mozc - Mozc engine for fcitx - Client of the Mozc input method
ibus-mozc - Mozc engine for IBus - Client of the Mozc input method
mozc-server - Server of the Mozc input method
mozc-utils-gui - GUI utilities of the Mozc input method
uim-mozc - Mozc engine for uim - Client of the Mozc input method
パッケージの導入
$ apt install fcitx-mozc -t buster

後は通常の apt update && apt upgrade で stretch で導入したパッケージは stretch で,buster で導入したパッケージはbuster で更新されるはず.

Ubuntu 16.04 LTS xenial arm64 に Ubuntu 18.04 LTS bionic arm64 の mozc を借りてくる

Debianの手順と同じでもokだと思うけど念の為以下の手順を真似してみる.

mozc は Ubuntu 17.10 artful から対応しているが,もうサポートされないのでUbuntu 18.04 bionic を使う.

標準のリリースを xenial に設定

/etc/apt/apt.conf.d/01ubuntu
APT::Default-Release "xenial";

mozc をpinningする

/etc/apt/preferences
Package: *mozc*
Pin: release n=xenial
Pin-Priority: -10

Package: *mozc*
Pin: release n=bionic
Pin-Priority: 900

/etc/apt/sources.list に buster(testing) を 追加 設定

/etc/apt/sources.list
deb http://ports.ubuntu.com/ bionic main universe

※sources.list の編集には apt edit-sources を使うと文法チェックをしてくれるのでおすすめ
※mirrorにより arm64 が置かれていないので注意

パッケージ情報の更新
$ sudo apt update
検索結果にmozcが出てくる
$ apt-cache search mozc
mozc-data - Mozc input method - data files
ibus-mozc - Mozc engine for IBus - Client of the Mozc input method
mozc-server - Server of the Mozc input method
mozc-utils-gui - GUI utilities of the Mozc input method
emacs-mozc - Mozc for Emacs
emacs-mozc-bin - Helper module for emacs-mozc
fcitx-mozc - Mozc engine for fcitx - Client of the Mozc input method
uim-mozc - Mozc engine for uim - Client of the Mozc input method
パッケージの導入
$ sudo apt install fcitx-mozc -t bionic

Redshift-gtk が位置情報を取得出来なくて困る

太陽の動きに合わせてモニタの色や明るさの調整をしてくれる f.LuxインスパイアなRedshiftというプログラムがあるのですが,新しい環境に導入しても動作しません.位置情報が取得できないようです.

44624259834 09ae5f8845

$ redshift
位置プロバイダ `geoclue2' を試行しています...
プロバイダ `geoclue2' を使用します。
方式 `randr' を使用します。
初期位置が取得可能になるのを待機しています...
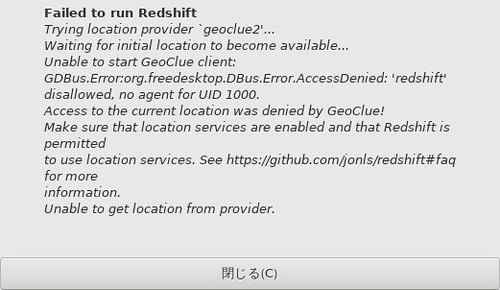
Unable to start GeoClue client: GDBus.Error:org.freedesktop.DBus.Error.AccessDenied: 'redshift' disallowed, no agent for UID 1000.
Access to the current location was denied by GeoClue!
Make sure that location services are enabled and that Redshift is permitted
to use location services. See https://github.com/jonls/redshift#faq for more
information.
プロバイダから位置を取得できません。

geoclue2のdemoを試してみますがやはり動きません.agentを実行した状態だと動きます.

demoも動かない
$ sudo apt install geoclue-2-demo
$ /usr/lib/geoclue-2.0/demos/where-am-i

** (where-am-i:16681): CRITICAL **: 07:00:13.576: Failed to connect to GeoClue2 service: GDBus.Error:org.freedesktop.DBus.Error.AccessDenied: 'geoclue-where-am-i' disallowed, no agent for UID 1000
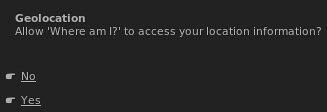
agentを実行してから試すと取得できるが確認メッセージが表示される
$ /usr/lib/geoclue-2.0/demos/agent &
$ /usr/lib/geoclue-2.0/demos/where-am-i
Geolocation service not in use
Geolocation service in use
Client object: /org/freedesktop/GeoClue2/Client/1

New location:
Latitude:    34.700000°
Longitude:   137.733300°
Accuracy:    25000.000000 meters
Timestamp:   2018年10月16日 07時01分35秒 (1539640895 seconds since the Epoch)
$ redshift
位置プロバイダ `geoclue2' を試行しています...
プロバイダ `geoclue2' を使用します。
方式 `randr' を使用します。
初期位置が取得可能になるのを待機しています...
Geolocation service not in use
Geolocation service in use
位置: 北緯 34.70°, 東経 137.73°

44434687985 2bbe2c44ec
44434688165 c1b5632101

GeoClueの設定で確認メッセージを表示しないように設定しておきます.

/etc/geoclue/geoclue.conf にredshiftの設定を追記
$ echo '[redshift]
allowed=true
system=false
users=' | sudo tee -a
/etc/geoclue/geoclue.conf
[redshift]
allowed=true
system=false
users=
agentを再起動して試す
$ kill %1
[1]+  Terminated              /usr/lib/geoclue-2.0/demos/agent
$ /usr/lib/geoclue-2.0/demos/agent &
[1] 32138
$ redshift
位置プロバイダ `geoclue2' を試行しています...
プロバイダ `geoclue2' を使用します。
方式 `randr' を使用します。
初期位置が取得可能になるのを待機しています...
Geolocation service not in use
Geolocation service in use
位置: 北緯 34.70°, 東経 137.73°
^CGeolocation service not in use

てことで,agentを実行しておけば動くようになりました.しかし,位置がかなりずれています.浜松あたりの座標が帰って来ていますが,実際は鹿児島です.
半時間はずれてそうです.

Redshift のhelpを確認すると手動で座標を指定できるようです.

redshift help
$ gtk-redshift --help
ヘルプを出力するには `redshift -h` を実行してください。
$ redshift -h
使い方: redshift -l 緯度:経度 -t 昼の色温度:夜の色温度 [オプション...]

時刻に従ってディスプレイの色温度を設定します。

  -h            このヘルプ メッセージを表示
  -v            詳細な出力
  -V            プログラムのバージョンを表示

  -b DAY:NIGHT  画面に適用する明るさ (0.1 から 1.0 の間)
  -c FILE       指定した設定ファイルから設定を読み込む
  -g R:G:B      追加で適用するガンマ補正
  -l LAT:LON    あなたの現在位置
  -l PROVIDER   自動で位置情報を更新するプロバイダを選択
                (`list' を指定すると利用可能なプロバイダの一覧が見られます)
  -m METHOD     色温度の設定方式
                (`list' を指定すると利用可能な方式の一覧が見られます)
  -o            ワン ショット モード (色温度の変更は継続して行いません)
  -O TEMP       ワン ショット 手動モード (色温度を設定します)
  -p            表示モード (パラメータの出力のみを行って終了します)
  -P            新しい色効果の適用前に既存のガンマ ランプをリセット
  -x            リセット モード (画面の調整を解除します)
  -r            色温度の緩やかな変更を無効にする
  -t DAY:NIGHT  昼間/夜間に設定する色温度

ニュートラルな温度は 6500K です。この値を用いると
ディスプレイの色温度は変更されません。これよりも高い値を設定すると
青い光が増え、低い値を設定すると赤い光が増えます。

既定値:

  昼間の温度: 6500K
  夜間の温度: 4500K

バグは <https://github.com/jonls/redshift/issues> に報告してください
$ redshift -l list
利用可能な位置プロバイダ:
  geoclue2
  manual

`-l プロバイダ名:オプション' でコロン区切りのオプションを指定します。
`-l プロバイダ名:help' でヘルプが参照できます。

OpenStreetMapなどで設定したい場所のURLで時計度の座標が確認出来ます.

座標を指定して実行してみます.小数点以下2桁しか見ないようです.

redshiftに手動で座標指定
$ redshift -l 35.69935:139.76957
方式 `randr' を使用します。
初期位置が取得可能になるのを待機しています...
位置: 北緯 35.70°, 東経 139.77°
^C
$ gtk-redshift -l 35.70:139.77 &

設定ファイルに位置情報設定しておきます.これでオプション無しでokになります.(秋葉原周辺の設定)

$ mkdir -p ~/.config/redshift
$ vi ~/.config/redshift/redshift.conf
~/.config/redshift/redshift.conf
[redshift]

location-provider=manual

[manual]
;秋葉原付近の差表
lat=35.70
lon=139.77
ADD 2020-12-28)

Debian sid amd64の redshift 1.12 ではPATHが ~/.config/redshift.conf に変わっていました.

$ redshift -V
redshift 1.12
$ dpkg-query -W redshift
redshift        1.12-4
$ man redshift | grep redshift.conf
       A  configuration  file  with  the name redshift.conf can optionally be placed in ~/.config/. The file has standard INI format. General

手動でとりあえず設定できましたが,移動するたびに設定するのは面倒なので別の位置情報取得データベースを試してみます.

GeoIPの導入とアップデート
$ sudo apt install geoip-bin geoip-database geoip-database-extra geoipupdate
$ sudo geoipupdate
$ geoiplookup $(curl -s ifconfig.me/ip)
GeoIP Country Edition: JP, Japan
GeoIP City Edition, Rev 1: JP, 13, Hyogo, Nishinomiya, 662-0934, 34.716702, 135.333298, 0, 0
GeoIP ASNum Edition: AS10013 FreeBit Co.,Ltd.

GeoIPは兵庫になりました.少し近づいたけどやはりかなりずれています.
これでうまく行ったらこんな感じで設定できるのですが.

GeoIPを使ったredshift利用例
$ gtk-redshift -l $( geoiplookup $(curl -s ifconfig.me/ip)|grep City | cut -f7-8 -d, | sed -e 's/,/:/' -e 's/\ //g' )

てことでagentを起動するのは面倒だし旅行の予定もないのでとりあえずマニュアル設定にしておきます.

環境
$ dpkg-query -W redshift redshift-gtk geoclue-2.0 geoclue-2-demo geoip-bin geoip-database geoip-database-extra geoipupdate
geoclue-2-demo  2.4.12-2
geoclue-2.0     2.4.12-2
geoip-bin       1.6.12-1
geoip-database  20180315-1
geoip-database-extra    20180315-1
geoipupdate     2.5.0-1
redshift        1.12-2
redshift-gtk    1.12-2
$ lsb_release -d
Description:    Debian GNU/Linux unstable (sid)
$ uname -m
x86_64

Firefox で DNS-over-HTTPS を試す

最近の Firefox はTrusted Recursive Resolver(TRR)を利用して DNS-over-HTTPS が利用できるようです.試してみました.

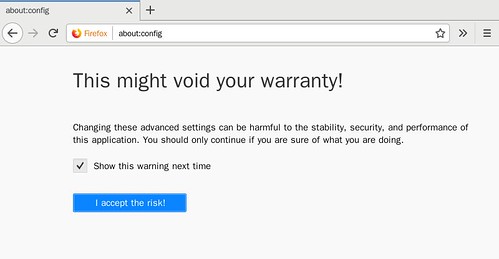
アドレスバーに about:config 入力して移動.

44211559615 6a29ddb6d5

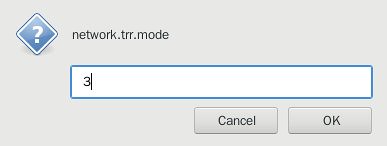
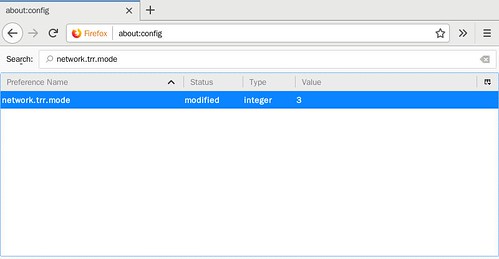
network.trr.mode を設定.今回は`3`のTRRのみ利用を指定した.

44402653684 e26c646cb0
43309711340 4b5d902ae2

  • network.trr.mode

    • 0 : TRR無効(既定値).

    • 1 : 通常のDNSとTRRを並行実行して最初に帰ってきた結果を利用する.

    • 2 : TRRを優先利用.

    • 3 : TRRのみを利用.

    • 4 : 通常のDNSを利用する.TRRは情報収集のためだけに動く.

    • 5 : TRRを明示的に無効にする

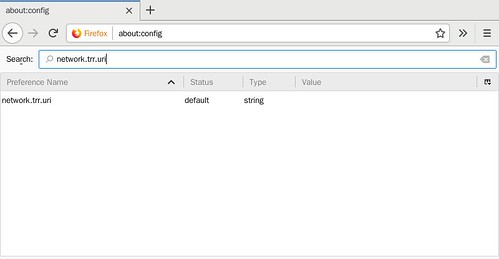
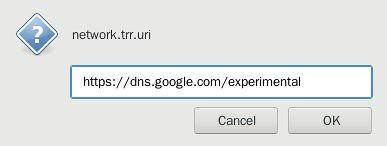
次に network.trr.uri を指定.好みのDNS-over-HTTPS のリゾルバを指定.

43309712480 d417a108b5
44402653984 c8538ce5fe

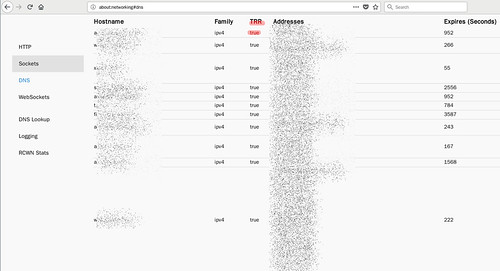
about:networking#dns にアクセスしてTRRが true になっていれば TRR を利用しているはず.

44402654944 daac2b37e3

環境
$ dpkg-query -W firefox
firefox 62.0.3-1
$ lsb_release -d
Description:    Debian GNU/Linux unstable (sid)
$ uname -m
x86_64

44402653394 9392330ef0

Linux で DNS-over-HTTPS を利用する

Android で DNS-over-HTTPS が簡単に出来るようになりました.

Linuxだどうなんだろうと以下の`dns-over-https` を試してみました.ここでは Debian sid amd64 で試していますが,公式の手順には Ubuntu 18.04 LTS, macOS の手順が載っています.

導入例
$ sudo apt install git golang
$ git clone https://github.com/m13253/dns-over-https.git
$ cd dns-over-https
$ make
$ sudo checkinstall
規定値のサーバは Google Public DNS になっている.変更したい場合は設定ファイル( /etc/dns-over-https/doh-client.conf )を編集
$ sudo edit /etc/dns-over-https/doh-client.conf
CleanBrowsingのセキュリティフィルターを利用する場合の設定例
diff --git a/dns-over-https/doh-client.conf b/dns-over-https/doh-client.conf
index 3b5de14..1791397 100644
--- a/dns-over-https/doh-client.conf
+++ b/dns-over-https/doh-client.conf
@@ -11,7 +11,7 @@ listen = [
 upstream_google = [

     # Google's productive resolver, good ECS, bad DNSSEC
-    "https://dns.google.com/resolve",
+    #"https://dns.google.com/resolve",

     # CloudFlare's resolver, bad ECS, good DNSSEC
     #"https://cloudflare-dns.com/dns-query",
@@ -39,6 +39,9 @@ upstream_ietf = [
     # Blog: https://blog.cloudflare.com/welcome-hidden-resolver/
     #"https://dns4torpnlfs2ifuz2s2yf3fc7rdmsbhm6rw75euj35pac6ap25zgqad.onion/dns-query",

+    # CleanBrowsing https://cleanbrowsing.org/dnsoverhttps
+    "https://doh.cleanbrowsing.org/doh/security-filter/"
+
 ]

 # Bootstrap DNS server to resolve the address of the upstream resolver
起動
$ sudo systemctl restart doh-client
名前が引けるのを確認
$ dig @127.0.0.1 | grep SERVER
;; SERVER: 127.0.0.1#53(127.0.0.1)
trace
$ dig +trace matoken.org @127.0.0.1

; <<>> DiG 9.11.4-P2-3-Debian <<>> +trace matoken.org @127.0.0.1
;; global options: +cmd
.                       24820   IN      NS      m.root-servers.net.
.                       24820   IN      NS      b.root-servers.net.
.                       24820   IN      NS      c.root-servers.net.
.                       24820   IN      NS      d.root-servers.net.
.                       24820   IN      NS      e.root-servers.net.
.                       24820   IN      NS      f.root-servers.net.
.                       24820   IN      NS      g.root-servers.net.
.                       24820   IN      NS      h.root-servers.net.
.                       24820   IN      NS      i.root-servers.net.
.                       24820   IN      NS      j.root-servers.net.
.                       24820   IN      NS      a.root-servers.net.
.                       24820   IN      NS      k.root-servers.net.
.                       24820   IN      NS      l.root-servers.net.
;; Received 239 bytes from 127.0.0.1#53(127.0.0.1) in 1334 ms

org.                    172800  IN      NS      a0.org.afilias-nst.info.
org.                    172800  IN      NS      a2.org.afilias-nst.info.
org.                    172800  IN      NS      b0.org.afilias-nst.org.
org.                    172800  IN      NS      b2.org.afilias-nst.org.
org.                    172800  IN      NS      c0.org.afilias-nst.info.
org.                    172800  IN      NS      d0.org.afilias-nst.org.
org.                    86400   IN      DS      9795 7 1 364DFAB3DAF254CAB477B5675B10766DDAA24982
org.                    86400   IN      DS      9795 7 2 3922B31B6F3A4EA92B19EB7B52120F031FD8E05FF0B03BAFCF9F891B FE7FF8E5
org.                    86400   IN      RRSIG   DS 8 1 86400 20181018050000 20181005040000 2134 . bYogBWKVV1SnjoHjS5LnLBE1mWC6UwkYT6muOjcHnuMNzJM1DY3YhSCT d9QOYlvvprUyD37xYIQ10BUZQ8hcNpnQ2TPUTNzd621lsqth6QK8zDN6 eP5AvZXlPy+9wni71rJIHy1wzepn9yrh3jp70zZhnEVxxgItWaYzsayY Jf+UfFQPmOKX0gn0GqcQ09CSZHdZhwbUT2AT1Rs0atkj6VaOy2TT1aQ1 gAtGF+5uA4uqLJegiEe/zneTeyuNE5QDQWKUNaeWEDE9kxylhv6m/3vE tQ8EHFpzOL9x+ed25LNcnRXH8K/xCW43R1FyaVNaA6xcsvGHCysqLneI v/RYMQ==
;; Received 813 bytes from 193.0.14.129#53(k.root-servers.net) in 210 ms

matoken.org.            86400   IN      NS      ns-cloud-d2.googledomains.com.
matoken.org.            86400   IN      NS      ns-cloud-d4.googledomains.com.
matoken.org.            86400   IN      NS      ns-cloud-d1.googledomains.com.
matoken.org.            86400   IN      NS      ns-cloud-d3.googledomains.com.
h9p7u7tr2u91d0v0ljs9l1gidnp90u3h.org. 86400 IN NSEC3 1 1 1 D399EAAB H9PARR669T6U8O1GSG9E1LMITK4DEM0T NS SOA RRSIG DNSKEY NSEC3PARAM
h9p7u7tr2u91d0v0ljs9l1gidnp90u3h.org. 86400 IN RRSIG NSEC3 7 2 86400 20181026101800 20181005091800 1862 org. edCrqcIYiHlMMzuacuX0DlobcQkymqClpK5C4QLzsNWtvp942bFRjbb2 WDX/6TsHO0noBNoKH2i+TU70WqpW7sVsXbjV9nkeLMZjxz/VLyAJOXWk 2ITvZwhjbe96lCSAIafm824pBx94ruieKZ2Yj8pYTBIrhDBoffjPhuem 44k=
a85qqkk8n39d1c6m55g8ucjhm6u3jjcs.org. 86400 IN NSEC3 1 1 1 D399EAAB A86TS1MQ34BR2A3D3CT8D5SCHKAPPBPJ NS DS RRSIG
a85qqkk8n39d1c6m55g8ucjhm6u3jjcs.org. 86400 IN RRSIG NSEC3 7 2 86400 20181022152743 20181001142743 1862 org. G15dhaW+53QBX9nTtsIUCnSRrMO0FCkQJE3jydb6hmRQEA328trp9OqK 6fuvl+RZBhBFeMeJV1Tz0Uezp9YvymfRWwdHiiFFLy3KBt5cTZJUXxTZ jXnMT9PoHZcIVJzN65vqQHDI2MzWYoQYr1WoKmJxOC5FQzFctZElyzEq fNQ=
;; Received 654 bytes from 199.19.56.1#53(a0.org.afilias-nst.info) in 217 ms

matoken.org.            120     IN      A       153.121.44.87
;; Received 56 bytes from 216.239.38.109#53(ns-cloud-d4.googledomains.com) in 388 ms

パケットキャプチャしてみる

  • 通常のDNS

dig 2quepghecPeuj.matoken.org
$ sudo tcpdump -n -nn -t -l -A -s0 2>/dev/null | grep 2quepghecPeuj.matoken.org
IP 192.168.2.203.49026 > 192.168.2.211.53: 49901+ [1au] A? 2quepghecPeuj.matoken.org. (66)
E..^.,..@.0t...........5.J..... .........2quepghecPeuj.matoken.org.......).........
E...z.@.@.8f.........5...w............. .2quepghecPeuj.matoken.org..............x...y,W........2....ns-cloud-d2.googledomains.com.........2....ns-cloud-d4.S........2....ns-cloud-d1.S........2....ns-cloud-d3.S.........d.... m.G.......+...."m.........D....$m.r......#P....&m............ .H`H..2.......m.G......+W.. .H`H..4.......m............ .H`H..6.......m.r......Ov.. .H`H..8.......m..)........
^C
  • DNS over HTTPS

名前は見当たらない

dig 2quepghecPeuj.matoken.org @127.0.0.1
$ sudo tcpdump -n -nn -t -l -A -s0 2>/dev/null | grep 2quepghecPeuj.matoken.org
^C

loopback 部分はHTTPSになる前の部分は見える

dig 2quepghecPeuj.matoken.org @127.0.0.1
$ sudo tcpdump -i lo -n -nn -t -l -A -s0 2>/dev/null | grep 2quepghecPeuj.matoken.org
IP 127.0.0.1.52265 > 127.0.0.1.53: 25766+ [1au] A? 2quepghecPeuj.matoken.org. (66)
E..^C...@.8..........).5.J.]d.. .........2quepghecPeuj.matoken.org.......).........
E..bD(@.@..`.........5.).N.ad............2quepghecPeuj.matoken.org..............w...y,W..)........
^C
永続化
$ sudo systemctl enable doh-client

後は /etc/network/interfaces や NetworkManager で DNS server に 127.0.0.1 を指定する.

環境
$ dpkg-query -W git golang dnsutils
dnsutils        1:9.11.4.P2+dfsg-3
git     1:2.19.0-1
golang  2:1.10~5
$ lsb_release -d
Description:    Debian GNU/Linux unstable (sid)
$ uname -m
x86_64
Dropbox を FUSE mount する dbxfs のアクセストークンを gpg で暗号化する

昨日dbxfs を試したのですが,アクセストークンのgpg での暗号化が出来ませんでした.

するとTwitterで情報をもらい,手動でDropbox app を作成してアクセストークンを入手する必要があるそうです.早速試してみたところうまく行きました!

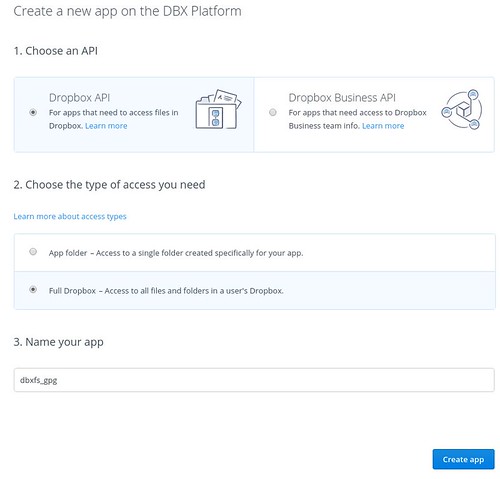
Dropbox の App Console にアクセスして,Create app で新しいアプリを作成します.
情報を入力してアプリを生成.

44379184824 11e5e5faf4

生成したアプリで Generated access token を押してアクセストークンを生成

43285861640 b2abfddc92 m

dbxfs設定ファイルの場所確認
$ ~/.local/bin/dbxfs --print-default-config-file
/home/matoken/.config/dbxfs/config.json
生成したアクセストークンを gpg で暗号化してファイルに格納.
$ echo -n 'ItBeOfobAlbofEicHefvemsajKicsEjcekDomBaHee-shwijreijKimyatIfnebir' | gpg -r EAA13B982D937827 -e -o /home/matoken/.config/dbxfs/token.gpg
暗号化したアクセストークンファイルを設定ファイルで指定する
$ jq . /home/matoken/.config/dbxfs/config.json
{
  "access_token_command": [
	"gpg",
	"--decrypt",
	"/home/matoken/.config/dbxfs/token.gpg"
  ],
  "send_error_reports": true,
  "asked_send_error_reports": true
}
mount 時に gpg で decrypt されて mount される
$ ~/.local/bin/dbxfs ~/fuse/dbxfs
Running 'gpg --decrypt /home/matoken/.config/dbxfs/token.gpg' for access token
gpg: 4096-ビットRSA鍵, ID EAA13B982D937827, 日付2015-06-11に暗号化されました
	  "K.I.Matohara <matoken@gmail.com>"
$ mount|grep dbxfs
dbxfs on /home/matoken/fuse/dbxfs type fuse (rw,nosuid,nodev,relatime,user_id=1000,group_id=1000,default_permissions)
$ ls /home/matoken/fuse/dbxfs
   :
$ fusermount -u ~/fuse/dbxfs

うまくいきました :)

環境
$ grep ^Version: ~/.local/lib/python3.6/site-packages/dbxfs-1.0.4.dist-info/METADATA
Version: 1.0.4
$ dpkg-query -W gpg libfuse2 python3-pip
gpg     2.2.10-2
libfuse2:amd64  2.9.8-2
python3-pip     9.0.1-2.3
$ lsb_release -d
Description:    Debian GNU/Linux unstable (sid)
$ uname -m
x86_64

macOS, Linux で Dropbox を fuse mount する dbxfs を少し試す

Dropbox を FUSE mount 出来る dbxfs というものを見つけたので試してみました.

Doropbox の Linux client はファイルシステムがext4のみと制限されます.dbxfs であればおそらくこの制限も問題ないのではないかと思います.(未確認)

The Dropbox folder will need to be on an ext4-formatted hard drive or partition
Note: ecryptfs is not supported, but Dropbox will continue to sync with supported file systems that are encrypted via full disk encryption (e.g. LUKS)

導入
$ sudo apt install libfuse2 python3-pip
help
$ ~/.local/bin/dbxfs -h
usage: dbxfs [-h] [-f] [-v] [-s] [-n] [-l SMB_LISTEN_ADDRESS] [-c CONFIG_FILE]
			 [-e ENCRYPTED_FOLDERS] [--print-default-config-file]
			 [mount_point]

positional arguments:
  mount_point

optional arguments:
  -h, --help            show this help message and exit
  -f, --foreground      keep filesystem server in foreground
  -v, --verbose         show log messages, use twice for maximum verbosity
  -s, --smb             force mounting via SMB
  -n, --smb-no-mount    export filesystem via SMB but don't mount it
  -l SMB_LISTEN_ADDRESS, --smb-listen-address SMB_LISTEN_ADDRESS
						address that SMB service should listen on, append
						colon to specify port
  -c CONFIG_FILE, --config-file CONFIG_FILE
						config file path
  -e ENCRYPTED_FOLDERS, --encrypted-folder ENCRYPTED_FOLDERS
						relative paths of encrypted folders, can be used
						multiple times. requires safefs
  --print-default-config-file
						print default config file path to standard out and
						quit
初回mount
$ ~/.local/bin/dbxfs ~/fuse/dbxfs
We need an access token. Perform the following steps:
1. Go to https://www.dropbox.com/oauth2/authorize?response_type=code&client_id=vinkudorurc8kno
2. Click "Allow" (you may have to log in first)
3. Copy the authorization code.
Enter authoritization code (Ctrl-C to quit): NodigIOndefkiwitshOrackazEuweavirtyedCibEdI
We're all connected. Do you want to save your credentials for future runs? [Y/n] Y
Would you like to help us improve dbxfs by providing anonymous error reports? [Y/n] Y
Mount point "/home/matoken/fuse/dbxfs" doesn't exist, do you want to create it? [Y/n] Y
  1. のurl をブラウザで開いて認証を行う
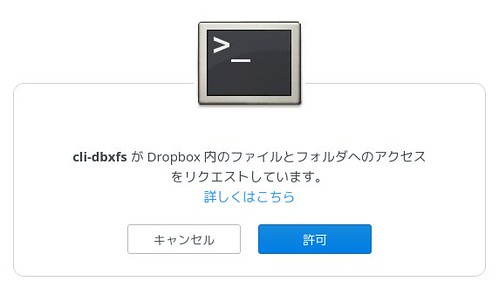
    認証後の画面で cli-dbxfs のアクセスを許可する.

45084023501 7cfd7c4058

許可後に表示されるトークンを 3. の後ろにコピー&ペーストする.

  • We’re all connected. Do you want to save your credentials for future runs?
    次回以降のために資格情報を保存するか?
  • Would you like to help us improve dbxfs by providing anonymous error reports?
    匿名のエラー報告を行いdbxfsに改善の支援を行うか?
  • Mount point “/home/matoken/fuse/dbxfs” doesn’t exist, do you want to create it?
    マウントポイントが存在しないので作成するか?
マウント確認
$ ls ~/fuse/dbxfs/
アンマウントする
$ fusermount -u ~/fuse/dbxfs
資格情報を保存していた場合2回目以降のマウントは何も聞かれない
$ ~/.local/bin/dbxfs ~/fuse/dbxfs

.

アクセストークンをpgpファイルに格納することも出来るようだが手元の環境では未だうまく行っていない(多分何か勘違いをしている)

EDIT: やはり使い方が間違っていた.次の記事に書いた -> Dropbox を FUSE mount する dbxfs のアクセストークンを gpg で暗号化する – matoken’s meme

設定ファイルの場所確認
$ ~/.local/bin/dbxfs --print-default-config-file
/home/matoken/.config/dbxfs/config.json
アクセストークンをpgpファイルにする
$ jq . /home/matoken/.config/dbxfs/config.json
{
  "keyring_user": "yigwulbaf6shnutugaivkilj",
  "send_error_reports": true,
  "asked_send_error_reports": true
}
$ gpg -r EAA13B982D937827 -e /home/matoken/.config/dbxfs/config.json
$ ls -l /home/matoken/.config/dbxfs/config.json*
-rw-r--r-- 1 matoken matoken 115 10月  4 07:19 /home/matoken/.config/dbxfs/config.json
-rw-r--r-- 1 matoken matoken 685 10月  4 07:22 /home/matoken/.config/dbxfs/config.json.gpg
$ shred /home/matoken/.config/dbxfs/config.json
$ echo '"access_token_command": ["gpg", "--decrypt", "/home/matoken/.config/dbxfs/config.json.gpg"]' > /home/matoken/.config/dbxfs/config.json
マウント
$ ~/.local/bin/dbxfs ~/fuse/dbxfs
Running 'gpg --decrypt /home/matoken/.config/dbxfs/config.json.gpg' for access token
gpg: 4096-ビットRSA鍵, ID EAA13B982D937827, 日付2015-06-11に暗号化されました
      "K.I.Matohara <matoken@gmail.com>"
Traceback (most recent call last):
  File "/home/matoken/.local/bin/dbxfs", line 11, in <module>
    sys.exit(main())
  File "/home/matoken/.local/lib/python3.6/site-packages/dbxfs/main.py", line 212, in main
    dropbox.Dropbox(access_token).users_get_current_account()
  File "/home/matoken/.local/lib/python3.6/site-packages/dropbox/base.py", line 4245, in users_get_current_account
    None,
  File "/home/matoken/.local/lib/python3.6/site-packages/dropbox/dropbox.py", line 274, in request
    timeout=timeout)
  File "/home/matoken/.local/lib/python3.6/site-packages/dropbox/dropbox.py", line 365, in request_json_string_with_retry
    timeout=timeout)
  File "/home/matoken/.local/lib/python3.6/site-packages/dropbox/dropbox.py", line 449, in request_json_string
    timeout=timeout,
  File "/home/matoken/.local/lib/python3.6/site-packages/requests/sessions.py", line 559, in post
    return self.request('POST', url, data=data, json=json, **kwargs)
  File "/home/matoken/.local/lib/python3.6/site-packages/requests/sessions.py", line 498, in request
    prep = self.prepare_request(req)
  File "/home/matoken/.local/lib/python3.6/site-packages/requests/sessions.py", line 441, in prepare_request
    hooks=merge_hooks(request.hooks, self.hooks),
  File "/home/matoken/.local/lib/python3.6/site-packages/requests/models.py", line 310, in prepare
    self.prepare_headers(headers)
  File "/home/matoken/.local/lib/python3.6/site-packages/requests/models.py", line 444, in prepare_headers
    check_header_validity(header)
  File "/home/matoken/.local/lib/python3.6/site-packages/requests/utils.py", line 941, in check_header_validity
    raise InvalidHeader("Invalid return character or leading space in header: %s" % name)
requests.exceptions.InvalidHeader: Invalid return character or leading space in header: Authorization

持ち運びモバイルPCだと辛いでしょうが,据え置きデスクトップ環境などのオンラインのマシンでは便利そうです.

環境
$ grep ^Version: ~/.local/lib/python3.6/site-packages/dbxfs-1.0.4.dist-info/METADATA
Version: 1.0.4
$ dpkg-query -W libfuse2 python3-pip
libfuse2:amd64  2.9.8-2
python3-pip     9.0.1-2.3
$ lsb_release -d
Description:    Debian GNU/Linux unstable (sid)
$ uname -m
x86_64
Nautilus が起動しなくなって困る

Nautilus が起動しなくなりました.nemo は起動するんだけど……
$ nautilus

(nautilus:16178): Tracker-ERROR **: 19:36:23.259: Unable to find default domain ontology rule /usr/share/tracker/domain-ontologies/default.rule
Trace/breakpoint trap
このファイルはなんだろうと中を覗こうとしたら存在しない
$ lv /usr/share/tracker/domain-ontologies/default.rule
/usr/share/tracker/domain-ontologies/default.rule: No such file or directory
tracker pkg に含まれるらしい
$ apt-file search /usr/share/tracker/domain-ontologies/default.rule
tracker: /usr/share/tracker/domain-ontologies/default.rule
インデックスや検索関連
$ apt show tracker
Package: tracker
Version: 2.1.4-1
Priority: optional
Section: utils
Maintainer: Debian GNOME Maintainers <pkg-gnome-maintainers@lists.alioth.debian.org>
Installed-Size: 3,453 kB
Depends: libc6 (>= 2.4), libglib2.0-0 (>= 2.45.3), libtracker-control-2.0-0 (= 2.1.4-1), libtracker-sparql-2.0-0 (= 2.1.4-1), dconf-gsettings-backend | gsettings-backend, shared-mime-info, libglib2.0-bin, default-dbus-session-bus | dbus-session-bus
Recommends: tracker-miner-fs
Homepage: https://wiki.gnome.org/Projects/Tracker
Tag: implemented-in::c, interface::commandline, interface::daemon,
 network::client, network::server, role::program, scope::utility,
 use::organizing, use::searching, works-with::db, works-with::file,
 works-with::pim
Download-Size: 1,009 kB
APT-Manual-Installed: yes
APT-Sources: http://ftp.jp.debian.org/debian sid/main amd64 Packages
Description: メタデータデータベース、索引付けおよび検索ツール
 Tracker は、メタデータとタグに関連付けられた第一クラスオブジェクト用の
 先進的なフレームワークです。全てのメタデータ、タグ、共有オブジェクト
 データベース、検索ツールと索引に対する統一されたソリューションを提供します。

N: 追加レコードが 1 件あります。表示するには '-a' スイッチを付けてください。
導入したら起動するようになりました
$ sudo apt install tracker
環境
$ dpkg-query -W $(dpkg -l nautilus* | grep ^ii | awk {'print $2'} ) tracker nemo
nautilus        3.30.0-4
nautilus-actions        3.2.3-1+b2
nautilus-compare        0.0.4+po1-1
nautilus-data   3.30.0-4
nautilus-filename-repairer      0.2.0-1
nautilus-gtkhash        1.1.1-3.1
nautilus-hide   0.2.3-4
nautilus-image-converter        0.3.1~git20110416-2
nautilus-image-manipulator      1.3-2
nautilus-scripts-manager        2.0-1
nautilus-share  0.7.3-2
nautilus-wipe   0.3-1
nemo    3.8.5-1
tracker 2.1.4-1
$ lsb_release -d
Description:    Debian GNU/Linux unstable (sid)
$ uname -m
x86_64
ssh環境での誤ったシステム停止を防ぐmolly-guard

最近 shutdown の man を見比べたりしてたのですが,そのときに systemd, sysvinit 以外に molly-guard という見知らぬものが.

$ apt-file search /sbin/shutdown
molly-guard: /sbin/shutdown
systemd-sysv: /sbin/shutdown
sysvinit-core: /sbin/shutdown

パッケージ情報をみると shutdown コマンドなどを置き換えて ssh 接続時には確認のためにホスト名を聞くようになるようです.
これにより手元のPCの再起動をしたつもりがリモートのサーバを再起動してしまうなどといったことが防げるようになります.

$ apt show molly-guard
Package: molly-guard
Version: 0.6.4
Priority: extra
Section: admin
Maintainer: Francois Marier <francois@debian.org>
Installed-Size: 57.3 kB
Depends: procps
Enhances: init, kexec-tools, mosh, openssh-server, pm-utils, systemd, sysvinit, upstart
Tag: implemented-in::shell, interface::commandline, network::server,
 protocol::ssh, role::program, scope::utility
Download-Size: 13.8 kB
APT-Manual-Installed: yes
APT-Sources: http://ftp.jp.debian.org/debian stretch/main amd64 Packages
Description: protects machines from accidental shutdowns/reboots
 The package installs a shell script that overrides the existing
 shutdown/reboot/halt/poweroff/coldreboot/pm-hibernate/pm-suspend* commands
 and first runs a set of scripts, which all have to exit successfully,
 before molly-guard invokes the real command.
 .
 One of the scripts checks for existing SSH sessions. If any of the four
 commands are called interactively over an SSH session, the shell script
 prompts you to enter the name of the host you wish to shut down. This should
 adequately prevent you from accidental shutdowns and reboots.
 .
 molly-guard diverts the real binaries to /lib/molly-guard/.  You can bypass
 molly-guard by running those binaries directly.

早速試してみます.

$ sudo apt install molly-guard
    :
package diverts others to: /lib/molly-guard/coldreboot
/sbin/halt
package diverts others to: /lib/molly-guard/halt
/sbin/pm-hibernate
/sbin/pm-suspend
/sbin/pm-suspend-hybrid
/sbin/poweroff
package diverts others to: /lib/molly-guard/poweroff
/sbin/reboot
package diverts others to: /lib/molly-guard/reboot
/sbin/shutdown
package diverts others to: /lib/molly-guard/shutdown

このあたりのコマンドが置き換わっています.

$ ls -l /sbin | grep molly
lrwxrwxrwx 1 root root        28 Aug 16  2016 coldreboot -> /lib/molly-guard/molly-guard
lrwxrwxrwx 1 root root        28 Aug 16  2016 halt -> /lib/molly-guard/molly-guard
lrwxrwxrwx 1 root root        28 Aug 16  2016 pm-hibernate -> /lib/molly-guard/molly-guard
lrwxrwxrwx 1 root root        28 Aug 16  2016 pm-suspend -> /lib/molly-guard/molly-guard
lrwxrwxrwx 1 root root        28 Aug 16  2016 pm-suspend-hybrid -> /lib/molly-guard/molly-guard
lrwxrwxrwx 1 root root        28 Aug 16  2016 poweroff -> /lib/molly-guard/molly-guard
lrwxrwxrwx 1 root root        28 Aug 16  2016 reboot -> /lib/molly-guard/molly-guard
lrwxrwxrwx 1 root root        28 Aug 16  2016 shutdown -> /lib/molly-guard/molly-guard

コマンド類は /lib/molly-guard 以下に退避されるようです.

sysvinit
$ ls -lA /lib/molly-guard
total 48
-rwxr-xr-x 1 root root 18952 Feb 13  2017 halt
-rwxr-xr-x 1 root root  2767 Aug 16  2016 molly-guard
lrwxrwxrwx 1 root root     4 Feb 13  2017 poweroff -> halt
lrwxrwxrwx 1 root root     4 Feb 13  2017 reboot -> halt
-rwxr-xr-x 1 root root 23368 Feb 13  2017 shutdown
systemd
$ ls -lA /lib/molly-guard
total 4
lrwxrwxrwx 1 root root   14 Jun 14 05:20 halt -> /bin/systemctl
-rwxr-xr-x 1 root root 2767 Aug 16  2016 molly-guard
lrwxrwxrwx 1 root root   14 Jun 14 05:20 poweroff -> /bin/systemctl
lrwxrwxrwx 1 root root   14 Jun 14 05:20 reboot -> /bin/systemctl
lrwxrwxrwx 1 root root   14 Jun 14 05:20 shutdown -> /bin/systemctl

ssh 経由で shutdown(sysvinit) を試みるとこのように hostname を求められます.ここで誤った hostname を書くと shutdown がキャンセルされました.

$ sudo shutdown -f -P -h +10 "kernel update (`uname -r`)"
W: molly-guard: SSH session detected!
Please type in hostname of the machine to shutdown: desktop
Good thing I asked; I won't shutdown debian ...
W: aborting shutdown due to 30-query-hostname exiting with code 1.

正しい hostname を指定すると shutdown が呼ばれます.

$ sudo shutdown -f -P -h +10 "kernel update (`uname -r`)"
W: molly-guard: SSH session detected!
Please type in hostname of the machine to shutdown: debian

Broadcast message from root@debian (pts/0) (Thu Sep 27 06:15:28 2018):

kernel update (4.9.0-3-amd64)
The system is going DOWN for system halt in 10 minutes!
^C
Shutdown cancelled.

ssh経由でない場合は molly-guard はすぐに shutdown を呼びます.

$ sudo shutdown -f -P -h +10 'poweroff'
^C
Shutdown cancelled.

環境

$ dpkg-query -W systemd-sysv molly-guard
molly-guard     0.6.4
systemd-sysv    232-25+deb9u4
$ dpkg-query -W sysvinit-core
sysvinit-core   2.88dsf-59.9
$ cat /etc/os-release
PRETTY_NAME="Debian GNU/Linux 9 (stretch)"
NAME="Debian GNU/Linux"
VERSION_ID="9"
VERSION="9 (stretch)"
ID=debian
HOME_URL="https://www.debian.org/"
SUPPORT_URL="https://www.debian.org/support"
BUG_REPORT_URL="https://bugs.debian.org/"
$ cat /etc/debian_version
9.5
$ uname -m
x86_64

qcow2 イメージをマウント

qemuやKVMでよく使われるqcow2イメージのマウントを行いました.

イメージの確認
$ sudo qemu-img info /var/lib/libvirt/images/Debian.qcow2
image: /var/lib/libvirt/images/Debian.qcow2
file format: qcow2
virtual size: 20G (21474836480 bytes)
disk size: 20G
cluster_size: 65536
Format specific information:
	compat: 1.1
	lazy refcounts: true
	refcount bits: 16
	corrupt: false
nbd モジュールの読み込み
$ sudo modprobe nbd
qcow2 イメージのバインド
$ sudo qemu-nbd -c /dev/nbd0 /var/lib/libvirt/images/Debian.qcow2
$ sudo fdisk -l /dev/nbd0
ディスク /dev/nbd0: 20 GiB, 21474836480 バイト, 41943040 セクタ
単位: セクタ (1 * 512 = 512 バイト)
セクタサイズ (論理 / 物理): 512 バイト / 512 バイト
I/O サイズ (最小 / 推奨): 512 バイト / 512 バイト
ディスクラベルのタイプ: dos
ディスク識別子: 0x3c0808c8

デバイス    起動 開始位置 終了位置   セクタ サイズ Id タイプ
/dev/nbd0p1 *        2048   499711   497664   243M 83 Linux
/dev/nbd0p2        501758 41940991 41439234  19.8G  5 拡張領域
/dev/nbd0p5        501760 41940991 41439232  19.8G 83 Linux
kpartx でデバイスマッピング
$ sudo kpartx /dev/nbd0
nbd0p1 : 0 497664 /dev/nbd0 2048
nbd0p2 : 0 2 /dev/nbd0 501758
nbd0p5 : 0 41439232 /dev/dm-1 2
dm-crypt で暗号化されているのでデバイスをオープン
$ sudo cryptsetup open /dev/nbd0p5 crypt
Enter passphrase for /dev/nbd0p5:
lvm領域なのでスキャンする
$ sudo lvmdiskscan
    :
  /dev/mapper/crypt                                     [     <19.76 GiB] LVM physical volume
  /dev/nbd0p5                                           [     <19.76 GiB]
  /dev/debian-vg/root                                   [      18.75 GiB]
  /dev/debian-vg/swap_1                                 [       1.00 GiB]
    :
マウントして内容確認
$ sudo mount -o ro /dev/debian-vg/root /mnt
$ ls /mnt/
bin   dev  home        initrd.img.old  lib64       media  opt   root  sbin  sys  usr  vmlinuz
boot  etc  initrd.img  lib             lost+found  mnt    proc  run   srv   tmp  var  vmlinuz.old
Table of Contents

環境

$ dpkg-query -W kpartx qemu-utils fdisk cryptsetup lvm2 mount linux-image-`uname -r`
cryptsetup      2:2.0.4-2
fdisk   2.32.1-0.1
kpartx  0.7.7-1
linux-image-4.18.0-1-amd64      4.18.8-1
lvm2    2.02.176-4.1
mount   2.32.1-0.1
qemu-utils      1:2.12+dfsg-3
$ lsb_release -d
Description:    Debian GNU/Linux unstable (sid)
$ uname -m
x86_64